Table of Contents
Advertisement
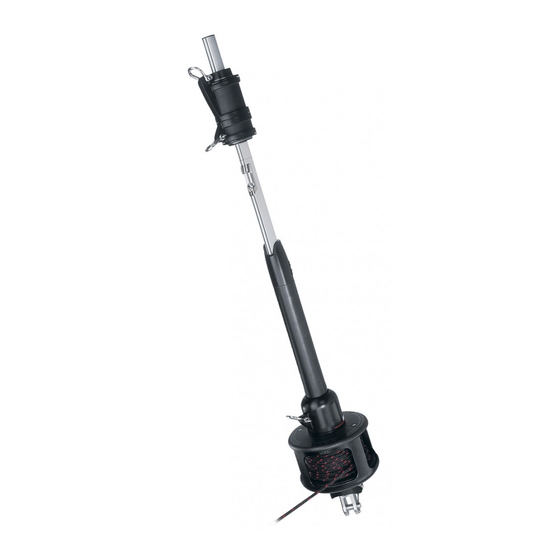
MKIV OCEAN - JIB REEFING & FURLING
Installation Manual - Intended for specialized personnel or expert users
Please read these instructions carefully before installing, servicing, or operating the equipment.
This manual may be modified without notice. See: www.harken.com/en/support/manuals/ for updated versions.
Unit 1
Preassembly
Commissioning
Operation
PLEASE SAVE THESE INSTRUCTIONS
5390 03/21
2
3
4
5
6
7
8
9
10
11-14
15
16
17-18
19-20
21
22
23
24
25
26
26-27
27
28
28
28
29
30-31
32
Advertisement
Table of Contents

Subscribe to Our Youtube Channel
Related Manuals for Harken MKIV Unit 1


Summary of Contents for Harken MKIV Unit 1
-
Page 1: Table Of Contents
Maintenance Clean/Inspect Replace Line Storage/Remove Furler Troubleshooting/Warranty Parts Lists 30-31 Contact Harken Please read these instructions carefully before installing, servicing, or operating the equipment. This manual may be modified without notice. See: www.harken.com/en/support/manuals/ for updated versions. PLEASE SAVE THESE INSTRUCTIONS... -
Page 2: Safety Precautions/Parts Description
The user must have appropriate training in order to use this product. Harken accepts no responsibility for damage or harm caused by not observing the safety requirements and instructions in this manual. See limited warranty, general warnings, and instructions in www.harken.com/en/general-warnings-instructions/... -
Page 3: Sizing Check
WARNING! Do not drill boat's chainplate or toggle. This may result in rig failure. Use the correct size toggle and clevis pin. 2. Harken does not recommend drilling boat’s chainplate or toggle. In some cases bushings are available to fit boats with smaller clevis pin sizes. -
Page 4: Parts
Preassembly Parts 2' (610 mm) 7' (2.13 m) Bottom Foil Connectors Foils Halyard Swivel Connector Bushings Foil Screws Feeder and Screws Trim Cap Screws Trim Cap Line Red Loctite ® Blue Loctite Hex Keys ® Foil Assembly Components Part No. Quantity Description 7511.31F... -
Page 5: Rigging Parts Check/Tools
4. Rod rigging requires Harken rod adapter stud. 5. Order Harken 7404 Lead Block Kit and one additional 7403 if necessary. Fits 1" (25 mm) stanchions. ALL UNITS ROD RIGGING... -
Page 6: Dimensions/Sailmaker's Instructions
Preassembly Dimensions/Sailmaker's Instructions Luff Length Note offsets above and below sail. A shorter luff may be required if a halyard restrainer is necessary (page 24) or a toggle or long toggle assembly is used to raise drum. If luff of sail is not long enough to put halyard swivel near top of headstay foil, a pendant must be added (see page 24). -
Page 7: Toggle Deductions/Stay Into Foil Options
Preassembly Toggle Deductions/Stay Into Foil Options Use dimensions of Harken toggle below to build stay to correct length. Tip: Turnbuckles should be 1/2 to 2/3rds open to allow shortening for new wire stretch and for fine-tuning mast rake. Thread "... -
Page 8: Top Foil Length
Preassembly Top Foil Length Measure A and add to this chart and “length chart” below Make sure upper Alternate measurement points Inches Measurement of A and pin-to-pin Point are the same. 24.0 16.4 Total A+B+E+F+G Pin-to-Pin Length Subtract ABEFG – *Add 1"... -
Page 9: Short Top Foil
Preassembly Short Top Foil Use one of the following special techniques for foils under 5 1/2" (140 mm) to ensure sufficient bearing surface for foil in area of halyard swivel. 5 1/2" (140 mm) Upper holes In this method only the upper holes Cut-Offs are used thus there is limited up/ Do Not Use... -
Page 10: Confirm Foil Length
Confirm Foil Length Confirm foil length by laying foils alongside stay with turnbuckle components. Pull stay out so it is straight. Attach Harken toggle to bottom of stay. Make sure toggle straps are straight. Adjust turnbuckle so that length of stay with Harken toggle will fit boat. - Page 11 Assembly Top Foil Cut foil to length using hacksaw. Deburr inside edge using rat-tail file. Mark the location of the trim cap screws at the cut end of the top foil. Location: 1/2" (12.7 mm)down from top of foil and 3/8" (9.8 mm) from center of the sail groove.
- Page 12 Assembly Top Foil The following instructions cover installing foils on stay starting from the bottom. Foils slide over a swage stud fitting or wire end where a Norseman-/Sta-Lok -type stud is used after foil ® assembly. Tip: In some cases foils can slide over a marine eye. This allows other assembly options: •...
- Page 13 Assembly Top Foil Assemble Halyard Deflector if used. Halyard Deflector Red Loctite ® Put a drop of red Loctite in screw holes. ® Place connector on wire with hooked side Red Loctite in screw holes ® Hooked side of connector Use a hex key wrench to securely tighten screws.
-
Page 14: Assembly Foils/Connectors
Assembly Foil/Connectors Sandwich bushings on wire, mating hook of plastic bushing with connector and mating with four recesses in bottom part of bushing. into screw holes. Put a drop of red Loctite ® Red Loctite in screw holes ® Slide foil completely over bushings and connector. -
Page 15: Halyard Swivel And Drum Assembly
Assembly Halyard Swivel/Drum Assembly Slide halyard swivel onto foil. IMPORTANT! Make sure up-arrow is up. Slide drum assembly onto foil. MKIV Ocean Unit 1... -
Page 16: Rod Rigging
Assembly Rod Rigging: Rod Adapter Stud Apply a few drops of red Loctite to threads of nosepiece. ® Screw main threaded stud portion onto bronze nosepiece until flats align with two cotter pin holes in terminal body. Tip: Turn nosepiece completely into threaded stud portion. -
Page 17: Turnbuckle/Toggle
Assembly Attach Turnbuckle/Toggle Assemble turnbuckle and attach Harken toggle. Note: If using Sta-Lok or Norseman ® stud, you must use a washer above stud as shown below. Washer Turnbuckle Clevis Pin Toggle Crosspin Norseman or Sta-Lok ® Clevis Pin Make sure shallow jaw is up. - Page 18 Assembly Attach Toggle/Long Link Plate Determine height of link plates to provide anchor clearance and cut to length. Cut at scribe mark. Deburr edges. Connect eye to toggle jaw using special clevis pin. Secure using cotter pin. Toggle For Long Link Plates Apply Isolator.
-
Page 19: Final/Feeder
Assembly Final If stay length is set, use side cutters or needle-nose pliers to bend cotter pin to secure turnbuckle. Slide lower drum assembly over turnbuckle and attach using long crosspin. Use plastic washers provided. WARNING! Crosspin must be 90 degrees to clevis pin that attaches unit to boat. - Page 20 Assembly Feeder/Final Secure using hex key. Use Tef-Gel on screws. NOTE: You will likely adjust foil height again once system is up on the mast and turnbuckle adjusted. Tip: To find hole position, line up the top of the lower unit with the halfway point of Line up top of unit with the the screw holes above.
-
Page 21: Turnbuckle
WARNING! Stay turnbuckle must attach to toggle. Do not attach stay to crosspin at drum assembly because crosspin and plates may fatigue and break causing an accident, damage to your vessel, personal injury, or death. See www.harken.com/ en/general-warnings-instructions/ for additional safety information. Stay turnbuckle Adjust turnbuckle. -
Page 22: Lead Line To Cockpit
Commissioning Lead Line to Cockpit Run line through enclosed window in guard and into hole in bottom plate of spool. Tie a small overhand knot and pull it up under drum assembly. WARNING! Lead line through enclosed window. If line is led through opening between two enclosed windows it can ride above lineguard and jam furler which can cause loss of control of boat. -
Page 23: Halyard Wrap/Prevent Halyard Wrap
Commissioning Prevent Halyard Wrap Halyard Wrap The most serious problem with furling systems occurs when the jib halyard wraps around the headstay foil. Halyard wraps will keep you from furling or unfurling and may cause serious damage to the unit and the halyard. WARNING! In severe cases, a halyard wrap can cause loss of control of boat and/or headstay can break suddenly. -
Page 24: Pendant/Halyard Restrainer/ Halyard Tension
If your boat needs a Halyard Deflector, use Part No. 7302 or a Halyard Restrainer, use Harken Part No. 944. Restrainer should be mounted as high as possible on face of mast. Position restrainer so that foils will not hit it when under load. -
Page 25: Spinnaker Halyards/Headstay And Backstay Tension
They permit a very tight headstay to be eased when boat is not in use. For best performance, consider adding a backstay adjuster; either a block and tackle, a mechanical adjuster like those offered by Harken, or a hydraulic adjuster. Remember to keep headstay tight for best performance when furling or reefing. -
Page 26: Raise Sails
WARNING! Sail can become uncontrollable when raising in windy conditions, resulting in loss of footing. Choose wind conditions to match your experience and ability. If changing sails underway, take all safety precautions when working on the foredeck. See www.harken.com/en/general-warnings-instructions/. Raise Sail Head Choose conditions with little or no wind when raising sail at the dock. -
Page 27: Secure Sail
Operation Reef/Secure Sail Reef A sail may be partially furled before you resume sailing. This is known as reefing. Many sailors find it helpful to place marks on foot of sail so that they can reef to a variety of predetermined jib sizes. -
Page 28: Maintenance
Replace Line Use Harken supplied line or source a good quality line with good wear characteristics. Use 9/32" (7 mm) line with break strength exceeding 2500 lbs (1130 kg). Smaller boats or smaller sails may allow 5/16" (8 mm) line. If a larger diameter line is desired, consult with a rigger about using tapered line with a high strength core and cover removed in forward part of line. -
Page 29: Troubleshooting/Warranty
Line is not led through windows. Pull line through enclosed window. Line jams between guard and plastic spool plate. Warranty https://www.harken.com/en/worldwide-limited-professional-customer-warranty/ or call, write, email or fax Harken, Inc., Pewaukee, WI USA MKIV Ocean Unit 1... -
Page 30: Parts Lists
MKIV Ocean Unit 1 Parts List Description Order Part No. Hub Assembly HFG990 Clamp Screw (M8 x 16 mm custom dogpoint SS HFS1337 Cover with threaded insert H-83150 Flange half with threaded insert H-35600C Screws for flange and cover HFS980 M4 x 10mm FH SHCS Guard half H-35199E.GREY... - Page 31 Halyard Restrainer (sold separately) Troubleshoot Warranty Appendix Please read these instructions carefully before installing, servicing, or operating the equipment. This manual may be modified without notice. See: www.harken.com/manuals for updated versions. PLEASE SAVE THESE INSTRUCTIONS Sheave/SS Inner Race Only 944ASSY 7404 Clevis Pin ( "...
-
Page 32: Contact Harken
Main Office and Harken Brandstore: Västmannagatan 81B SE-113 26 Stockholm Sweden Telephone: (46) 0303 61875 • Fax: (46) 0303 61876 Mailing address: Harken Sweden AB, Box 64, SE -440 30 Marstrand Web: harken.se • Email: harken@harken.se Harken UK, Ltd. Bearing House, Ampress Lane, Lymington, Hampshire S041 8LW, England Telephone: (44) 01590-689122 •...
Need help?
Do you have a question about the MKIV Unit 1 and is the answer not in the manual?
Questions and answers