Table of Contents
Advertisement
Quick Links
Thank you very much for purchasing this product.
• To ensure correct and safe usage with a full understanding of this product's performance, please be sure to read through this manual com-
pletely and store it in a safe location.
• Unauthorized copying or transferal, in whole or in part, of this manual is prohibited.
• The specifications of this product and the contents of this operation manual are subject to change without notice.
• The operation manual and the product have been prepared and tested as much as possible. If you find any misprints or errors, please
inform us.
• Roland DG Corporation assumes no responsibility for any direct or indirect loss or damage that may occur through use of this product,
regardless of any failure to perform on the part of this product.
• Roland DG Corporation assumes no responsibility for any direct or indirect loss or damage that may occur with respect to any article made
using this product.
FA03476
R1-230118
Copyright © 2023 Roland DG Corporation
https://www.rolanddg.com/
Advertisement
Table of Contents

Related Manuals for Roland VersaSTUDIO


Summary of Contents for Roland VersaSTUDIO
- Page 1 • Roland DG Corporation assumes no responsibility for any direct or indirect loss or damage that may occur through use of this product, regardless of any failure to perform on the part of this product. • Roland DG Corporation assumes no responsibility for any direct or indirect loss or damage that may occur with respect to any article made using this product.
-
Page 2: Table Of Contents
Contents The Basics ....................5 Basic Information ...................... 6 Introduction ......................... 7 Part Names ........................7 System Configuration of This Machine ..................9 Opening the Utility Window/Exiting Utility..................10 Opening the Utility Window ....................10 Exiting Utility ........................11 Starting VersaWorks .......................12 How to Open the VersaWorks Help ....................13 About the Media Used......................14 Types of Media .......................14 Usable Media .........................14... - Page 3 Contents Important Notes on Handling and Use ..................58 Automatic Maintenance Function: Points to Note ..............58 Keep Performing Maintenance.....................58 When Not in Use for a Prolonged Period .................58 Checking Ink Levels and Replacing ....................60 Checking for Remaining Ink ....................60 How to Replace the Ink Cartridge..................61 Regular Maintenance ....................
- Page 4 Contents Is the media loaded and set up straight and securely? ..............95 Was loaded media allowed to stand for some time? ..............95 Was the media loaded while the heater was hot? ..............95 Is the temperature of room too low? ..................95 Is the humidity of the room too high? ..................95 Is the using media deflected? .....................95 Media Feed Is Not Straight .......................96...
- Page 5 Contents [Ink has run out.] ......................112 [Pinch lever was returned.] .................... 112 [No sheet is present.]....................112 [Printing cannot continue because the end of the sheet was detected. Printing will be canceled.] ... 112 [ServiceCall No**] ......................112 [Ink Cartridge error : *** ink cartridge ] ................112 [BN-20D Utility is already running.] ..................
-
Page 6: The Basics
The Basics... -
Page 7: Basic Information
Basic Information Introduction ....................7 Part Names ..................7 System Configuration of This Machine ............9 Opening the Utility Window/Exiting Utility ............10 Opening the Utility Window ..............10 Exiting Utility ..................11 Starting VersaWorks ..................12 How to Open the VersaWorks Help..............13 About the Media Used .................14 Types of Media ..................14 Usable Media..................14 Four Different Output Methods...............15... -
Page 8: Introduction
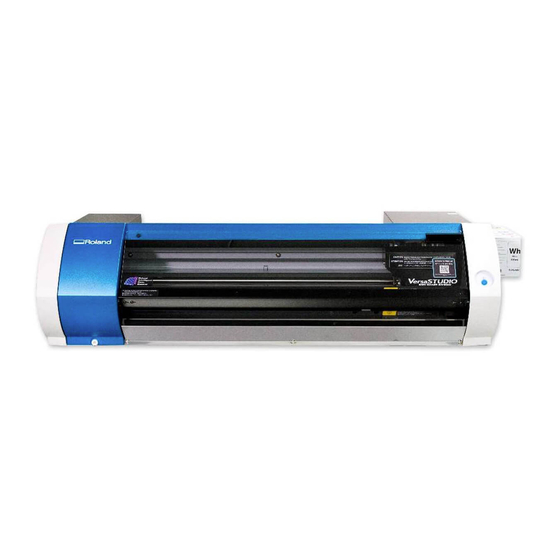
Introduction Part Names Front Name Function overview Remove when performing manual cleaning. Maintenance cover P. 72Manual Cleaning Keep this cover closed except when necessary, such as when Front cover loading media. Print-head carriage The print heads and blade are inside this carriage. [POWER]Key Switches the printer on and off. - Page 9 Introduction Rear Name Function overview Loading lever Operate this when you load media. USB connector Main power switch Power-cord connector Use this guide when loading media. This guide is on the "Left" Left media guide when viewing the printer from the front. Use this guide when loading media.
-
Page 10: System Configuration Of This Machine
Introduction System Configuration of This Machine "VersaWorks 6" is written as "VersaWorks" in this manual. System configuration The following combination of devices and software can be used to generate output. • Commercially available application software + VersaWorks + BN-20D driver Verified application software Commercially available ap- •... -
Page 11: Opening The Utility Window/Exiting Utility
Opening the Utility Window/Exiting Utility Opening the Utility Window Click (the Utility icon) in the notification area. (Or, right-click , and then click [View/Hide].) The Utility window is displayed. MEMO Utility is "resident software" that is always running. To hide the window, click in the upper-right corner of the window or click [Close];... -
Page 12: Exiting Utility
Opening the Utility Window/Exiting Utility Exiting Utility Right-click (the Utility icon) in the notification area, and then click [End]. This exits the utility. Basic Information... -
Page 13: Starting Versaworks
Starting VersaWorks Windows 11 From the Start menu, click [VersaWorks]>[VersaWorks]. Windows 10 From the Start menu, click [VersaWorks]>[VersaWorks]. RELATED LINKS ・ VersaWorks Help Basic Information... -
Page 14: How To Open The Versaworks Help
How to Open the VersaWorks Help With VersaWorks running, click [Help]>[Show Help] from the menu. Windows 11 From the Start menu, click [VersaWorks]>[VersaWorks Help]. Windows 10 From the Start menu, click [VersaWorks]>[VersaWorks Help]. RELATED LINKS ・ P. 12Starting VersaWorks Basic Information... -
Page 15: About The Media Used
About the Media Used Types of Media In this manual, the paper used for output is called "media." The two main types of media used in this ma- chine are shown below. • Roll media: Media wound onto a paper tube •... -
Page 16: Four Different Output Methods
Four Different Output Methods The following four output methods are available for this machine. Printing (Only) Printing using ink. It is also called "Printing Only" to distinguish from "Printing and Cutting." Cutting using a blade such as for seal die cutting. It is also called "Cutting Only" to distinguish from Cutting (Only) "Printing and Cutting."... -
Page 17: Basic Operations
Basic Operations Switching Power On and Off ................17 Precautions When Operating the Power Supply ..........17 Switching the Power On .................17 Switching the Power Off (Sub-power Off) ............19 Sleep Mode (Power-saving Feature) ............19 Printing....................20 Step 1: Loading Media ................20 Step 2: Bidirectional Adjustment .............27 Step 3: Printing Tests and Normal Cleaning ..........29 Step 4: Correcting the Media Feed ............31 Step 5: Starting Print Output ..............33... -
Page 18: Switching Power On And Off
Switching Power On and Off Precautions When Operating the Power Supply IMPORTANT Make sure that the main power is on at all times Never switch the main power off. Continuous power on allows the automatic maintenance function to work periodically. Failure to ensure automatic maintenance will result in a malfunction of the machine, such as damaged print heads. - Page 19 Switching Power On and Off Basic Operations...
-
Page 20: Switching The Power Off (Sub-Power Off)
Switching Power On and Off Switching the Power Off (Sub-power Off) Procedure When output is completed, press and hold down the [POWER] key for one second or more. When the [POWER] key light is off, the power is off. Push the loading lever backward. Even if you are not going to switch the power off when the machine is not in use, make sure the loading lever is moved to the rear. -
Page 21: Printing
Printing This section describes operations when printing only. Refer to Cutting / Printing and Cutting(P. 40), Performing Printing and Cutting Separately(P. 47). Step 1: Loading Media Loading Roll Media Procedure Move the left media guide to the left edge. Push the loading lever ( ) backward. Move the left media guide ( ) to the left. - Page 22 Printing Load the roll media onto the media flange. Install the roll media so there is no gap between it and the media flange. MEMO Place the secured media flange at the bottom, so that the media feeds in the clockwise direction when viewed from above.
- Page 23 Printing Adjust the loaded position of the roll media. Move the roll media to the right so the media flange ( ) touches the right media guide ( ). Slide the left media guide ( ) and press it against the media flange. Pass the media through the printer.
- Page 24 Printing Start initial operation. Make sure the left media guide ( ) is pressed against the media flange. Close the front cover ( ). Pull the loading lever ( ) forward. Pull the loading lever forward to start initial operation. When the [POWER] key indicator changes from flashing to steady, initial operation is complete.
- Page 25 Printing Loading Sheet Media Procedure Move the left media guide to the left edge. Push the loading lever ( ) backward. Move the left media guide ( ) to the left. Install the sheet media. Move the media to the right so it touches the right media guide. Slide the left media guide so it touches the media.
- Page 26 Printing Not OK CAUTION The pinch rollers cannot be moved directly by hand. Move them with the media guide. Attempting to forcibly move these rollers may result in injury. As shown in the figure, pass the media under the front cover and pull the media out the other side. Start initial operation.
- Page 27 Printing Basic Operations...
-
Page 28: Step 2: Bidirectional Adjustment
Printing Step 2: Bidirectional Adjustment Perform this adjustment in the following situations. You do not need to perform this adjustment in other situations. Proceed to Step 3: Printing Tests and Normal Cleaning(P. 29). • When using this machine for the first time •... - Page 29 Printing Follow the on-screen instructions and enter the value for [New Value]. Click [Apply]. The value in [Current Value] changes to the entered value. Click [Close]. RELATED LINKS ・ VersaWorks Help Basic Operations...
-
Page 30: Step 3: Printing Tests And Normal Cleaning
Printing Step 3: Printing Tests and Normal Cleaning Procedure Open the Utility window. P. 10Opening the Utility Window/Exiting Utility Click [Check Nozzle Condition]. Click [Test Print]. A test pattern is printed. Follow the on-screen instructions to check for nozzle drop-out. •... - Page 31 Printing Check for nozzle drop-out again. If the nozzle drop-out is not fixed, perform [Normal Cleaning] again. For information about [Medi- um Cleaning] and [Powerful Cleaning], refer to the topic shown below. MEMO If nozzle drop-out occurs in two or three locations after cleaning, the output quality may not be affected. Print the actual printing data and use the machine as-is if you can confirm that there are no problems.
-
Page 32: Step 4: Correcting The Media Feed
Printing Step 4: Correcting the Media Feed Procedure Open the Utility window. P. 10Opening the Utility Window/Exiting Utility Click [Calibrate Sheet Feeding]. Click [Test Print]. A test pattern is printed. Follow the on-screen instructions and enter the value for [New Value]. The current correction value (A) is that of the figure indicated by "... - Page 33 Printing Click [Apply]. The value in [Current Value] changes to the entered value. Click [Close]. Basic Operations...
-
Page 34: Step 5: Starting Print Output
Printing Step 5: Starting Print Output Procedure Prepare the print data. Output the print data. Output the printing data from VersaWorks. Refer to [Basic Operations for Output] in the [VersaWorks Help]. VersaWorks Help When the output is complete, separate the media. IMPORTANT Output Is Not Possible in These Situations •... - Page 35 Printing ・ VersaWorks Help Basic Operations...
-
Page 36: Output-Start Location
Output-start Location The output-start location is always the point shown in the figure below. Printing area Right pinch roller Output-start location Blade protector 1.4 mm (0.06 in.) 5 mm (0.2 in.) Basic Operations... -
Page 37: Stopping Print Output
Stopping Print Output Canceling Output from the Printer Procedure Press and hold down the [POWER] key for one second or more during output. Output is canceled. You cannot resume output from the point it was canceled. Press the [POWER] key to turn the machine on. This operation does not cancel standby output data on the computer. -
Page 38: Canceling Output From The Computer
Stopping Print Output Canceling Output from the Computer Procedure Open the [View devices and printers] screen. • Windows 11 a. Click [Start]>[All Apps]>[Windows Tool]. b. Click [Control Panel]. c. Click [View devices and printers]. • Windows 10 a. Click [Start]>[Windows System]>[Control Panel]. b. -
Page 39: Fully Utilizing The Machine
Fully Utilizing the Machine... -
Page 40: Optimizing The Output Quality
Optimizing the Output Quali- Cutting / Printing and Cutting ................40 Adjusting Cutting.................40 Accurately Adjusting the Cutting-in Amount..........42 Printing and Cutting Adjustment ..............43 Creating Data for Cutting/Printing and Cutting ..........45 Cautionary Notes on Making Output with Cutting ...........46 Performing Printing and Cutting Separately ............47 Adjusting Cropping and Cutting ..............47 Printing with Crop Marks Followed by Cutting ..........49 Media Sizes Allowing Automatic Crop Mark Detection........51... -
Page 41: Cutting / Printing And Cutting
Cutting / Printing and Cutting Adjusting Cutting Adjust the cutting conditions to obtain clear cutting lines. Make adjustments to match the media thick- ness. MEMO When making these adjustments, use adhesive media that can be cut. Procedure Load the media to be cut. P. - Page 42 Cutting / Printing and Cutting Enter the [Cut Force][Cut Speed][Cut Times]. [Cut Force] This is the force of the blade during cutting. If this force is too strong, the blade cuts into the backing paper. (Default setting: 50 gf) [Cut Speed] This is the speed of the blade during cutting.
-
Page 43: Accurately Adjusting The Cutting-In Amount
Cutting / Printing and Cutting Accurately Adjusting the Cutting-in Amount When you want to perform accurate and fine adjustment of the cutting-in amount ( ), such as when cut- ting media with thin backing paper, you can obtain good results by adjusting the tip of the blade. Turn the cap portion of the blade holder to adjust the amount of blade extension. -
Page 44: Printing And Cutting Adjustment
Cutting / Printing and Cutting Printing and Cutting Adjustment When performing both printing and cutting, adjust and align the printing and cutting positions. Depending on the media thickness, sometimes printing and cutting positions are very slightly out of alignment. We recommend that you make corrections to match the media you are using. - Page 45 Cutting / Printing and Cutting Follow the on-screen instructions and enter the corrected values for [New Scanning Value] and [New Feeding Value]. Click [Apply]. The values in [New Scanning Value] and [New Feeding Value] change to "0." Click [Close]. Optimizing the Output Quality...
-
Page 46: Creating Data For Cutting/Printing And Cutting
Cutting / Printing and Cutting Creating Data for Cutting/Printing and Cutting Verified application software for creating drawings • Adobe Illustrator CC 2015 or later • CorelDraw X7 or later Procedure Create the printing data using application software for creating drawings. For details on the basic operations of this application software, refer to its documentation. -
Page 47: Cautionary Notes On Making Output With Cutting
Cutting / Printing and Cutting Cautionary Notes on Making Output with Cutting Points to Note When Cutting Only For roll media, let the media hang down to the rear before outputting. When using roll media and only performing cutting, let the media hang down to the rear of the machine. This prevents motor errors and the roll falling from the machine due to the media being pulled with exces- sive force. -
Page 48: Performing Printing And Cutting Separately
Performing Printing and Cutting Separately Adjusting Cropping and Cutting Depending on the composition of the media, the positioning of printing and cutting may be misaligned even when you are using crop marks. Make corrections for misaligned printing and cutting for the media you are using. - Page 49 Performing Printing and Cutting Separately Follow the on-screen instructions and enter the values for [New Scanning Value] and [New Feeding Val- ue]. Click [Apply]. The values in [New Scanning Value] and [New Feeding Value] change to "0." Click [Close]. Optimizing the Output Quality...
-
Page 50: Printing With Crop Marks Followed By Cutting
Performing Printing and Cutting Separately Printing with Crop Marks Followed by Cutting With this machine, you can print with crop marks, and then reload this media and cut it. (Example: Perform lamination or other processing after printing, then reload the media and perform cut- ting.) In this situation, carry out alignment to prevent misalignment of the printing results and the cutting lines. - Page 51 Performing Printing and Cutting Separately ・ VersaWorks Help Optimizing the Output Quality...
-
Page 52: Media Sizes Allowing Automatic Crop Mark Detection
Performing Printing and Cutting Separately Media Sizes Allowing Automatic Crop Mark Detection Pinch roller Crop mark 65 mm (2.56 in.) or more 22.5 mm (0.89 in.) 1.4 mm (0.06 in.) 60 mm (2.37 in.) or more Optimizing the Output Quality... -
Page 53: Utility : Other Function
Utility : Other Function Performing Various Adjustments Through a Sequence of Operations You can perform various output adjustments through a sequence of operations by clicking [Adjust All] on the [Adjustment] tab. The adjustment method is the same as when adjusting settings individually. Click [Adjust All] to display the screen shown in this figure. - Page 54 Utility : Other Function ・ P. 31Correcting the Media Feed ・ P. 40Adjusting Cutting ・ P. 43Printing and Cutting Adjustment ・ P. 47Adjusting Cropping and Cutting Optimizing the Output Quality...
-
Page 55: Setting The Dry Time
Utility : Other Function Setting the Dry Time You can set the time that the printer waits from the completion of the printing and cutting of one job to the starting of the printing and cutting of the next job. Especially in the case of printing and cutting, it is recommended to set a time that allows the ink to be sufficiently dried before cutting is started. -
Page 56: Resetting All Adjustments To Factory Default Values
Utility : Other Function Resetting All Adjustments to Factory Default Values Click [Factory Reset] on the [Option] tab of Utility to reset all the Utility settings to their factory default values. When you click [Factory Reset], the message shown in the figure is displayed. Click [Yes] to reset the set- tings. -
Page 57: Maintenance
Maintenance... -
Page 58: Introduction
Introduction Important Notes on Handling and Use...............58 Automatic Maintenance Function: Points to Note...........58 Keep Performing Maintenance ..............58 When Not in Use for a Prolonged Period............58 Checking Ink Levels and Replacing..............60 Checking for Remaining Ink..............60 How to Replace the Ink Cartridge .............61 Introduction... -
Page 59: Important Notes On Handling And Use
If you know that you will not use the machine for a prolonged period, follow the procedure below to replace the drain cartridge. For information about purchasing drain cartridges, contact your authorized Roland DG Corp. dealer. IMPORTANT Do not reuse drain cartridges. Doing so makes it impossible to manage the amount of discharged fluid, which may over- flow. - Page 60 Important Notes on Handling and Use RELATED LINKS ・ P. 66Replacing the Waste Cartridge Introduction...
-
Page 61: Checking Ink Levels And Replacing
Checking Ink Levels and Replacing Checking for Remaining Ink Ink levels can be checked in the Ink tab of the Utility window. A simple bar scale indicates the level of ink in each cartridge. Percentage values also indicate the level of ink remaining. When the ink cartridge is re- moved, "No Cartridge"... -
Page 62: How To Replace The Ink Cartridge
Checking Ink Levels and Replacing How to Replace the Ink Cartridge When ink runs out, a warning beep sounds and printing pauses. Pull out the empty cartridge and insert a new one. Printing resumes. IMPORTANT The precipitation of the ingredients in the ink disables printing in normal color. So that the ink mixes well, shake each ink cartridge 50 times (about 20 seconds) horizontally with a stroke length of around 5 cm (1.97 in.) from each end of the ink cartridge before inserting it. - Page 63 Checking Ink Levels and Replacing • Any location where high temperature may occur • Near bleach or any other such oxidizing agent or explosive material • Any location within the reach of children Fire may be a danger. Accidental ingestion by children may pose a health hazard. Introduction...
-
Page 64: Regular Maintenance
Regular Maintenance Daily Maintenance ..................64 Maintenance of Ink Cartridges ..............64 Cleaning ...................64 Replacing the Waste Cartridge ..............66 Care and Maintenance of the Print Heads ............68 Periodical Cleaning Maintenance..............69 Periodic Cleaning Menus ................69 Medium/Powerful Cleaning ..............70 Manual Cleaning ..................72 When Manual Cleaning Is Necessary ............72 Manual Cleaning Method ................73 Regular Maintenance... -
Page 65: Daily Maintenance
Daily Maintenance Maintenance of Ink Cartridges The ink ingredients have a tendency to separate and settle. Allowing the ink to stand can cause the settled material to harden, resulting in malfunction or other problems. So that the ink mixes well, periodically shake each ink cartridge 50 times (about 20 seconds) horizontally with a stroke length of around 5 cm (1.97 in.) from each end of the ink cartridge before reinserting it. - Page 66 Daily Maintenance Remove buildup of media scraps and other material using a brush. Never Grit roller use a metal brush. Periodically wipe away any grime. Failure to clean this part properly may Pinch roller result in the transfer of grime to the surface of media. Platen Wipe away any buildup of ink or grime on the media path.
-
Page 67: Replacing The Waste Cartridge
Daily Maintenance Replacing the Waste Cartridge When the waste cartridge is filled with waste fluid, the Utility window automatically opens and displays a message in the Status column that prompts the replacement of the cartridge. Follow the message's instruc- tions and prepare a replacement waste cartridge or replace the cartridge. CAUTION Before you remove the drain cartridge, wait for a message to be displayed in the utility. - Page 68 Never attempt to incinerate discharged fluid or discard it with ordi- nary trash. Also, do not dispose of it in sewer systems, rivers, or streams. Doing so may have an adverse im- pact on the environment. To purchase a waste cartridge, contact your authorized dealer or Roland DG. Regular Maintenance...
-
Page 69: Care And Maintenance Of The Print Heads
P. 69Periodical Cleaning Maintenance * Print heads are consumable parts and subject to wear. Depending on the frequency of use, periodical re- placement is required. Please order them directly from us or your authorized Roland DG Corp. dealer. Regular Maintenance... -
Page 70: Periodical Cleaning Maintenance
Periodical Cleaning Maintenance Periodic Cleaning Menus This machine has several cleaning menus. Perform the appropriate level of cleaning in accordance with the ink type, the cleaning period, and the machine condition. Regular Maintenance... -
Page 71: Medium/Powerful Cleaning
Periodical Cleaning Maintenance Medium/Powerful Cleaning If problems such as nozzle drop-out persist even after you have performed normal cleaning, carry out the more powerful [Medium Cleaning] two or three times. If this still does not resolve the problem, carry out the even more forceful [Powerful Cleaning]. - Page 72 Periodical Cleaning Maintenance Click [Test Print]. A test pattern is printed. Follow the on-screen instructions to check for nozzle drop-out. • Nozzle drop-out is present. -> Proceed to step 5. • No nozzle drop-out is present. -> Click [Close] to finish the procedure. Select the [Medium Cleaning], and then click [Go].
-
Page 73: Manual Cleaning
Manual Cleaning When Manual Cleaning Is Necessary The timing with which manual head cleaning is required varies depending on the type of ink you are using. Be sure to perform this cleaning with the required timing. P. 69Periodic Cleaning Menus Manual cleaning is recommended when the following symptoms occur. -
Page 74: Manual Cleaning Method
Manual Cleaning Manual Cleaning Method IMPORTANT Important notes on this procedure • Before attempting this operation, remove any media. • To prevent the heads from drying out, finish this procedure in 10 minutes or less. A warning beep sounds after 10 minutes. - Page 75 Manual Cleaning The manual cleaning procedure is displayed. Carefully read the on-screen instructions and carry out the work. Perform a printing test to check the results. Perform cleaning using the machine's cleaning feature several times when necessary. MEMO If nozzle drop-out occurs in two or three locations after cleaning, the output quality will not be affected. Print the actual printing data and use the machine as-is if you can confirm that there are no problems.
-
Page 76: Replacing Consumable Parts
Replacing Consumable Parts Replacing Parts for Maintenance ..............76 Replacing the Blade................76 Replacing the Wiper ................79 Replacing the Felt Wiper................81 Replacing the Cap Top ................83 Replacing Consumable Parts... -
Page 77: Replacing Parts For Maintenance
Replacing Parts for Maintenance Replacing the Blade If the blade becomes dull, if the edge of the blade is chipped, or if the cutting quality is lowered, replace the blade with a new blade. WARNING Be sure to perform operations as specified by the instructions, and never touch any area not specified in the instructions. - Page 78 Replacing Parts for Maintenance Replace the blade. Press the pin (A). Remove the old blade (B). Install a new blade (C). Support the screw from below and insert the blade holder. Failure to do this may adversely affect the cutting quality. Tighten the screw.
- Page 79 Replacing Parts for Maintenance Close the front cover. Click [Close]. This completes the replacement procedure. Make adjustments for cutting. RELATED LINKS ・ P. 40Adjusting Cutting Replacing Consumable Parts...
-
Page 80: Replacing The Wiper
Replacing Parts for Maintenance Replacing the Wiper The wiper is a component that is used for cleaning the print heads. When the message appears on the Util- ity icon in the computer's notification area, it is time to replace the wiper with a new one. Replace with new items. - Page 81 Replacing Parts for Maintenance When the operation is completed, close the front cover. Replacing Consumable Parts...
-
Page 82: Replacing The Felt Wiper
Replacing Parts for Maintenance Replacing the Felt Wiper The felt wiper is a component that is used for cleaning the print heads. When the message appears on the Utility icon in the computer's notification area, it is time to replace the wiper with a new one. Replace with new items. - Page 83 Replacing Parts for Maintenance When the operation is completed, close the front cover. Replacing Consumable Parts...
-
Page 84: Replacing The Cap Top
Replacing Parts for Maintenance Replacing the Cap Top The cap top is a part that prevents ink clogging due to the print heads drying out. The cap top sticks close to the print head surface and sucks out the ink, thereby preventing the print heads from drying out. To maintain stable printing at all times, replace the cap top once every 6 months. - Page 85 Replacing Parts for Maintenance A procedure for replacing the cap top is displayed. Carefully read the on-screen instructions and carry out the work. When the operation is completed, close the front cover. Replacing Consumable Parts...
-
Page 86: Troubleshooting Methods
Troubleshooting Methods. -
Page 87: Output Quality Problems
Output Quality Problems Printed results are coarse or contain horizontal stripes..........87 Do the print heads show nozzle clogging? ............87 Have you carried out[Calibrate Sheet Feeding] ? ..........87 Have you carried out [Bidirectional adjustment] ? ........87 Is the temperature of the room too low?.............87 Is the printer installed in a level and stable location? ........87 Is the printer installed in a location out of direct sunlight? .......87 Is the media loaded and set up correctly? ...........87... -
Page 88: Printed Results Are Coarse Or Contain Horizontal Stripes
Printed results are coarse or contain horizontal stripes Do the print heads show nozzle clogging? Carry out a printing test and make sure no nozzle clogging occurs. If nozzle clogging is present, perform head cleaning. RELATED LINKS ・ P. 29Printing Tests and Normal Cleaning ・... - Page 89 Printed results are coarse or contain horizontal stripes RELATED LINKS ・ P. 93Media Feed Problems Output Quality Problems...
-
Page 90: Colors Are Unstable Or Uneven
Colors are unstable or uneven Did you shake the ink cartridges gently before installing them? Shake new cartridges gently before you install them. So that the ink mixes well, periodically shake each ink cartridge 50 times (about 20 seconds) horizontally with a stroke length of around 5 cm (1.97 in.) from each end of the ink cartridge before reinserting it. -
Page 91: The Media Becomes Soiled When Printed
The media becomes soiled when printed Are the print heads dirty? The following may cause ink to drip on the media during printing. • Buildup of fibrous dust (lint) around the heads. • Ink transferred to the heads due to rubbing against the media. If this happens, perform manual head cleaning. -
Page 92: Cutting Is Misaligned Or Skewed
Cutting is misaligned or skewed Is the media loaded and set up correctly? If the media is not loaded and set up correctly, or media feed is not smooth, cutting may be adversely affected. Make sure the media is loaded and set up correctly. RELATED LINKS ・... -
Page 93: The Printed Surface Is Damaged When Cutting
The printed surface is damaged when cutting Does the tip of the blade holder cap scrap the printed surface? The tip of the blade holder cap may scrape, and soil or damage the printed surface. If this happens, in- crease the amount of blade extension. RELATED LINKS ・... -
Page 94: Media Feed Problems
Media Feed Problems The Media Jams..................94 Is the media warped or wrinkled? .............94 Media Wrinkles or Shrinks ................95 Is the media loaded and set up straight and securely? ........95 Was loaded media allowed to stand for some time?........95 Was the media loaded while the heater was hot?...........95 Is the temperature of room too low?............95 Is the humidity of the room too high?............95 Is the using media deflected? ..............95... -
Page 95: The Media Jams
The Media Jams If an error message is displayed because the media has jammed, immediately correct the problem. Failure to do so may damage the print heads. RELATED LINKS ・ P. 110Error Messages Is the media warped or wrinkled? Many factors can cause warping or wrinkling. Refer to the following and correct the problem. RELATED LINKS ・... -
Page 96: Media Wrinkles Or Shrinks
Media Wrinkles or Shrinks Is the media loaded and set up straight and securely? Feed is not smooth when the media is not straight or is tensioned unevenly on the left and right. Reload the media. RELATED LINKS ・ P. 20Loading Media Was loaded media allowed to stand for some time? Media may shrink or wrinkle if it is heated for an extended time. -
Page 97: Media Feed Is Not Straight
Media Feed Is Not Straight Is the media loaded and set up straight and securely? Feed is not smooth when the media is not straight or is tensioned unevenly on the left and right. Reload the media. RELATED LINKS ・ P. -
Page 98: Media Feed Is Not Smooth
Media Feed Is Not Smooth Do the media strike some other object? Make sure the media do not touch anything else. This may affect output, even when feed appears to be smoothly. RELATED LINKS ・ P. 20Loading Media Is the media too thick? Media that is too thick may not only cause unstable feed, but may scrape the print heads, resulting in mal- function. -
Page 99: Machine Problems
Machine Problems The Print Heads Stop Moving................99 What to Do First ..................99 If the print-head carriage move to the standby ..........99 The Printer Unit Doesn't Run................ 101 Is the power switched on? ..............101 Does the [POWER] key stay steadily lighted? ..........101 Is the [POWER] key flashing? .............. -
Page 100: The Print Heads Stop Moving
If the print-head carriage move to the standby If the heads still do not move after "What to Do First" is performed, carry out the following emergency response measure, then contact your authorized Roland DG Corp. dealer. Procedure Switch off the main power and open the front cover. - Page 101 The Print Heads Stop Moving Gently apply pressure from the right side to make sure the print heads don't move to the left. If the print heads move to the left, again move them slowly by applying pressure from the left side and make sure they lock in place.
-
Page 102: The Printer Unit Doesn't Run
The Printer Unit Doesn't Run Is the power switched on? Switch on the printer's main power, then press the [POWER] key and make sure the key lights up. Does the [POWER] key stay steadily lighted? Output is not performed when [POWER] key does not stay steadily lighted. After the media is loaded, pull the loading lever. -
Page 103: Is The Driver Installed Correctly
The Printer Unit Doesn't Run Is the driver installed correctly? If the connection to the computer is not made in the described sequence, the driver may not be installed correctly. Utility does not function normally when the driver is misconfigured. Check again to ensure that the connection was made using the correct procedure. -
Page 104: Driver Problems
Driver Problems The Driver cannot be Installed ..............104 Windows 11 ..................104 Windows 10 ..................105 Uninstalling the Driver................106 Windows 11 ..................106 Windows 10 ..................106 Driver Problems... -
Page 105: The Driver Cannot Be Installed
The Driver cannot be Installed If you have canceled installation or if the installation wizard does not appear when the USB cable is con- nected, follow the procedure below. Windows 11 Procedure Connect the machine and the computer with the USB cable, and switch on the machine. If the [Found New Hardware] message appears, click [Cancel] to close it. -
Page 106: Windows 10
The Driver cannot be Installed Windows 10 Procedure Connect the machine and the computer with the USB cable, and switch on the machine. If the [Found New Hardware] message appears, click [Cancel] to close it. Right-click the Start menu, and then click [Device Manager]. When the [User Account Control] window appears, click [Continue]. -
Page 107: Uninstalling The Driver
Uninstalling the Driver To uninstall the driver, follow the procedure below. IMPORTANT If the driver is uninstalled using a method other than the procedure given below, it might be impossible to reinstall the driver. Windows 11 Procedure Switch off the machine, and disconnect the connector cable between the computer and the machine. Log on to Windows as an administrator. -
Page 108: Handling Messages And Error Messages
Handling Messages and Error Messages Messages ....................108 [XX ink : Shake the cartridge well] ............108 [The Waste cartridge is full.] ............... 108 [Replace the wiper.] ................108 [Replace the felt wiper.]..............108 [The connection to the printer has been released.] ........108 [Clean the printer manually.] ............... -
Page 109: Messages
Messages These are the main messages that appear in the Utility window to prompt correct operation. They do not indicate any error. There are other messages that appear in the Utility window. Follow the displayed prompts and take action accordingly. [XX ink : Shake the cartridge well] Remove the ink cartridge that is indicated in *** and shake it well. - Page 110 Messages ・ P. 72Manual Cleaning Handling Messages and Error Messages...
-
Page 111: Error Messages
Error Messages This section describes the error messages that may appear in the Utility window and how to take action to remedy the problem. In addition to the messages described below, the Utility window shows the causes of errors and troubleshooting information. If the troubleshooting information displayed in the Utility window or action described here does not correct the problem or if an error message not described here appears, contact your authorized dealer. -
Page 112: [The Operation Has Been Stopped To Prevent The Print Heads From Drying Out. Turn The Printer Off.]
Error Messages [The operation has been stopped to prevent the print heads from drying out. Turn the printer off.] The print heads were forced to standby position to prevent them from drying out Operation cannot be continued. Switch the sub power off, and then back on. Opening the front cover while output is in progress causes an emergency stop. -
Page 113: [Data Error]
Error Messages [Data error] Output was stopped because a problem was found in the data received. Operation cannot be continued. Check whether or not there is an error in the data. Check for a problem with the connector cable or the computer, and then start output again. [Ink has run out.] Output was stopped because ink has run out. -
Page 114: [Bn-20D Utility Is Already Running.]
Error Messages [BN-20D Utility is already running.] An attempt was made to start Utility with it already running. Utility is resident software that remains active even when it is not displayed on the screen. When it is not displayed, it is located in the notification area in the lower-right corner of the computer's screen. -
Page 115: Appendix
Appendix... -
Page 116: Operations When Moving The Unit
Operations When Moving the Unit Preparing to Move the Machine..............116 Procedures from Preparing to Move to Reinstallation........... 117 Operations When Moving the Unit... -
Page 117: Preparing To Move The Machine
Preparing to Move the Machine To move the machine, you must completely drain all ink inside the machine and secure the print heads in place with packing materials to protect them. Attempting to move the machine without first doing this may result in damage to internal components due to leaking ink or damage to the print heads. -
Page 118: Procedures From Preparing To Move To Reinstallation
Procedures from Preparing to Move to Reinstal- lation Procedure Open the Utility window. P. 10Opening the Utility Window/Exiting Utility On the [Option] tab, click [Head Wash]. Proceed with the work by following the on-screen instructions. Do not switch off the power until the work is completed. -
Page 119: Main Specifications
Main Specifications Printing Area ..................119 Maximum Area .................. 119 Maximum Area When Using Crop Marks ............. 120 About the Blade..................121 Dimensional Drawing ................. 122 Specifications ..................123 Main Specifications... -
Page 120: Printing Area
Printing Area Maximum Area The printing or cutting area along the horizontal plane (the direction in which the carriages move) is de- termined by the position of the pinch rollers. Printing or cutting area Left pinch roller Right pinch roller Printing or cutting coordinates origin (0,0) Max. -
Page 121: Maximum Area When Using Crop Marks
Printing Area Maximum Area When Using Crop Marks Printing or cutting area Maximum area Crop mark 12.5 mm (0.5 in.) 10 mm (0.4 in.) Main Specifications... -
Page 122: About The Blade
About the Blade The cutting conditions and the service life of the blade change according to the media and the operating environment, even when you're using identical blades. The service life also differs according to the type of blade. A rough guide is shown below. Blade Media Blade force... -
Page 123: Dimensional Drawing
Dimensional Drawing Unit: mm Main Specifications... -
Page 124: Specifications
Colors Five colors (cyan, magenta, yellow, black, and white) Printing resolution (dots per inch) Maximum 1,440 dpi Cutting blade Type Roland CAMM-1 series compatible Blade offset 0.25 mm (9 mil) Cutting speed 1 to 15 cm/s Blade force 30 to 300 gf Software resolution (when cutting) 0.025 mm/step... - Page 125 • 487 to 515 mm (19.2 to 20.3 inch) The length of printing or cutting is subject to the limitations of the program. • Media type: Media specified by Roland DG Corp. • Temperature: 25 °C (77 °F), humidity: 50% •...
Need help?
Do you have a question about the VersaSTUDIO and is the answer not in the manual?
Questions and answers