Table of Contents
Advertisement
Advertisement
Table of Contents

Related Manuals for Paradox EVOHD+


Summary of Contents for Paradox EVOHD+
- Page 1 EVOHD+ Installation Guide High Security Access System...
- Page 2 It must be understood that while your Paradox alarm system is highly advanced and secure, it does not offer any guaranteed protection against burglary, fire or other emergency (fire and emergency options are only available on certain Paradox models). This is due to a number of reasons, including by not limited to inadequate or improper installation/positioning, sensor limitations, battery performance, wireless signal interruption, inadequate maintenance or the potential for the system or telephone lines to be compromised or circumvented.
-
Page 3: Table Of Contents
Table of Contents Restrict Arming on Anti Mask Troubles .............. 31 Timed Auto-Arming ....................32 Introduction ......... . . 5 No Movement Auto-Arming ................... - Page 4 Partitioning ........................54 Shabbat Feature ......................54 Installer Function Keys ....................55 Module Reset ........................55 Locate Module ......................55 Module Programming ....................55 Module and Label Broadcast ...................55 System Date & Time ....................55 Re-Address Scanning (TM50/TM70 Keypads only) .........56 Quarantine Modules (TM50/TM70 Keypads only) ...........56 Serial Number Viewing ....................56 Power Save Mode ......................56 Auto Trouble Shutdown ...................56...
-
Page 5: Introduction
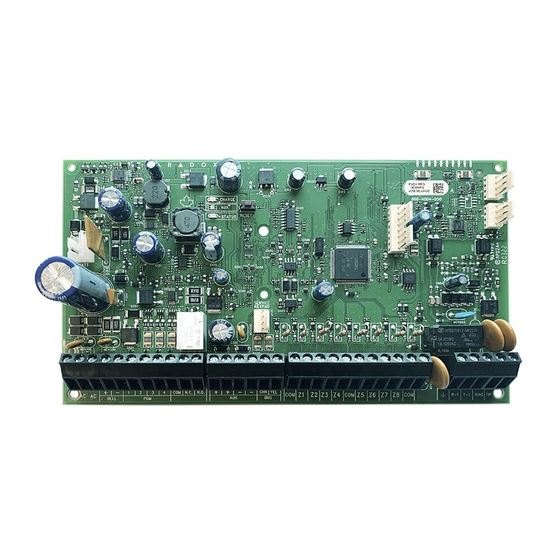
EVOHD+ Installation Guide Introduction The Digiplex EVOHD+ is a security and access control system with 8 on-board zone inputs (16 with zone doubling) that is expandable to 192 zones via the 4-wire Digiplex bus. The EVOHD+ control panel features up to 999 users, 8 partitions, 32 doors and can support up to 254 modules in any combination. The Digiplex EVOHD+ system provides the highest level of protection for banks, high-security military and government sites, luxurious residential homes and any place where maximum security is essential. -
Page 6: En 50131 Compliancy
5 - 90% All control panel outputs are rated to operate between 11.4Vdc and 12.5Vdc Specifications may change without prior notice. For latest product specifications and standards, please visit www.paradox.com. EN 50131 Compliancy In order to meet with EN 50131 compliancy, you will require the following: •... -
Page 7: Installation
EVOHD+ Installation Guide Installation Recommended Installation Procedure Connect a small group of modules, including a keypad. See Figure 5 on page 10 for connection information. Connect the battery and AC power. Enter section [4000] (see section on page 56). Only the Clock Loss trouble and/or Bell Absent trouble should appear. Verify the connection if a module does not appear in section [4000], or if a module trouble occurs. -
Page 8: Backup Battery
EVOHD+ Installation Guide Backup Battery Connect a 12Vdc 7Ah rechargeable acid/lead or gel cell backup battery (YUASA model #NP7-12 recommended). Verify the polarity, as reversed connections will blow the battery fuse. Battery Test When AC is present: The control panel conducts a dynamic battery test under load once every 24 hrs if battery is present. If the battery capacity is too low or if the battery voltage drops to 11.7V or less a “Battery Failure”... -
Page 9: Keypad Installation (K641R/K641+)
EVOHD+ Installation Guide Keypad Installation (K641R/K641+) Depending on the type of installation, select the appropriate mounting holes and secure with appropriate number of screws. Figure 4: Keypad Installation Keypad Specifications (K641R/K641+ only) The following specifications apply for the K641, K641R, and K641+ keypads only. Dimensions:12.2 cm x 14.4cm 4.8in x 5.67 Weight:0.26 kg (0.58 lbs.) Humidity:5 - 90%... - Page 10 EVOHD+ Installation Guide Figure 5: EVOHD+ Control Panel Wiring Diagram Enter section [3000] to unlock your EVOHD+ panel serial ports for use with third-party devices using a TM70/TM50, K641+, K656, or K641R keypad. To provide maximum lightning protection we strongly recommend having separate earth connections for the dialer and zone ground terminals.
-
Page 11: Calculating Power Requirements
EVOHD+ Installation Guide Calculating Power Requirements Table 1: Milliamp Consumption of Various Devices Device QTY. Consumption for Each Total mA __________ x 500 mA __________ __________ x 110 mA IP Communicator Module (IP150+) __________ Communicator Module(PCS265LTE/PCS250/G) __________ x 450 mA __________ LCD keypads (K641+, K656) __________... - Page 12 EVOHD+ Installation Guide Figure 6: Sample Power Requirement Calculations Power required by devices connected to control panel’s auxiliary output must not exceed the auxiliary output’s limit: (A) + (B) + (C) + (D) + (E) + (F) + (G) = 368mA<2000mA = OK (or 1000mA if a 40VA transformer is used) Control Panel aux.
- Page 13 EVOHD+ Installation Guide Table 2: Milliamps (mA) Limitations For Each Run of Wire Length Available Length Available Length Available Length Available Wire Wire Wire Wire (of each run of Milliamps (of each run of Milliamps (of each run of Milliamps (of each run of Milliamps Gauge...
-
Page 14: Keypad Zone Connections
EVOHD+ Installation Guide Keypad Zone Connections Every keypad has one hardwire input terminal. The keypad communicates the status of the zone to the control panel via the Digiplex bus. The detection device is connected as shown in Figure 5 on page 10. NOTE: Even with the ATZ feature enabled in the control panel, only one device can be connected to the keypad’s hardwired input terminal. - Page 15 EVOHD+ Installation Guide Figure 8: Single Zone Input Connections N.C. Contacts, No EOL N.C., With EOL Ul/ULC Configuration CONTROL PANEL TERMINAL CONTROL PANEL TERMINAL 1KΩ N.C. N.C. N.O. N.C. N.O. N.C. TAMPER TAMPER ALARM RELAY ALARM RELAY OUTPUT OUTPUT Detector Terminals Detector Terminals Normally Closed Zone input...
-
Page 16: Double Zone Connections
EVOHD+ Installation Guide Double Zone Connections Enabling the ATZ feature allows you to install two detection devices per input terminal. Connect the devices as shown in Figure 9. For UL listed Burglary System installations only, use EOL resistor part #2011002000. Figure 9: Double Zone Connections N.C., No EOL Resistor CONTROL PANEL TERMINALS... -
Page 17: Fire Circuits
EVOHD+ Installation Guide Fire Circuits Assign the smoke detectors connected to the control panel or zone expansion input terminals to a zone and define the zone's parameters as a Fire Zone (see section and section on page 23). Smoke Detector Installation (2-Wire)* PGM1 can be defined as a 2-wire smoke detector input (see page 52). -
Page 18: Programming Methods
EVOHD+ Installation Guide Programming Methods BabyWare Uploading/Downloading Software* We recommend programming the control panel with BabyWare. Refer to BabyWare Software on page 68 for details. * UL Note: Not verified by UL. Module Broadcast Keypads and other modules can also be programmed easily by using Module Broadcast. Once a module is programmed, its sections can be sent to other similar modules through the Digiplex bus. -
Page 19: Module Programming Mode
EVOHD+ Installation Guide Feature Select Programming Most of the options are programmed using the Feature Select Method. For LCD Keypads: The option is considered ON when the number appears within the brackets on the LCD keypad. Turn options ON and OFF by pressing the corresponding keys on the keypad and then press to save. -
Page 20: Zone Programming
EVOHD+ Installation Guide Zone Programming In any Zone Programming option, pressing [ACC] will save the data and go to the Enter Section [0400], then next zone on the same option screen. Pressing [TRBL] will save the data and go enter the number of the zone to the previous zone on the same option screen. -
Page 21: Zone Programming
EVOHD+ Installation Guide Zone Programming Two different methods can be used to program zones: Using section [0400] Allows you to program zones 001 through 192 as shown in the diagram on page 20. NOTE: In any Zone Programming option, pressing [ACC] will save the data and go to the next zone on the same option screen. Pressing [TRBL] will save the data and go to the previous zone on the same option screen. - Page 22 EVOHD+ Installation Guide Entry Delays 1 and 2 [0400]: F SECTION IRST DIGIT [0101] [0196]: F ECTIONS IRST DIGIT (default Entry Delay 1= 030, Entry Delay 2 = 060) A zone defined as Entry Delay 1 follows the Entry Delay 1 Timer of its assigned partition. A zone defined as Entry Delay 2 follows the Entry Delay 2 Timer of its assigned partition.
-
Page 23: Zone Partition Assignment
EVOHD+ Installation Guide 24Hr Freeze Zones* [0400]: F SECTION IRST DIGIT [0101] [0196]: F ECTIONS IRST DIGIT When a 24Hr Freeze zone opens, the control panel will immediately generate an alarm. * UL Note: UL Listed compatible devices must be used for UL systems. For UL Listed systems, this type of zone must be programmed as a silent auxiliary alarm. Delayed 24Hr Fire Zone (Not to be used with UL Listed systems) [0400]: F... - Page 24 EVOHD+ Installation Guide Auto Zone Shutdown [0400]: O SECTION PTION [0101] [0196]: O ECTIONS PTION (default = 000) When enabled, the control panel will stop generating alarms once the Auto Zone Shutdown Limit is reached. It resets every time the partition that is assigned to the corresponding zone is armed.
- Page 25 EVOHD+ Installation Guide Intellizone Options Use these options to enable or disable different Intellizone related options. Partition 1: [3126] Partition 3: [3326] Partition 5: [3526] Partition 7: [3726] Partition 2: [3226] Partition 4: [3426] Partition 6: [3626] Partition 8: [3826] Option Description Intellizone Delay (default = disabled) The zone stays in alarm for the entire Intellizone Delay.
-
Page 26: Input Speed
EVOHD+ Installation Guide Input Speed (001 to 255 X 30msec, default = 600ms) The Input Speed defines how quickly the control panel responds to an open zone detected on any hardwired input terminal (does not apply to addressable motion detectors and door contacts). Set the Input Speed (001 to 255 X 30ms, default = 600ms): [0961] Input 01 [0973]... -
Page 27: Remote Control Programming
EVOHD+ Installation Guide Remote Control Programming Hardware Requirements If the System Includes: EVOHD+ RTX3 Wireless Expansion Module And K641R / K641+ keypad Up to 999 remote controls can now be programmed into the EVOHD+ control panel and configured using a master code or installer code. Remote Control Template It is possible to set up to 16 different button templates which can then be assigned to individual users. - Page 28 EVOHD+ Installation Guide Template Data Entry Function K641/K641R/ K656 K641LX Button Disabled Regular Arm Stay Arm Instant Arm Force Arm Utility Key 5 Utility Key 6 Panic 1 Panic 2 A = [stay] A = [ Panic 3 B = [force] B = [ SLEEP Utility Key 1...
-
Page 29: Keyswitch Programming
EVOHD+ Installation Guide Keyswitch Programming Keyswitch Numbering [0501] [0532] ECTIONS Keyswitch Numbering allows you to assign any hardwired input in the system to any of the 32 keyswitch zones in the control panel (see Figure 15). UL Note: Do not use Keyswitches in UL Listed systems. Figure 15: Example of Keyswitch Numbering Control Panel SN#: 020000A2... -
Page 30: Keyswitch Partition Assignment
EVOHD+ Installation Guide Generates a Utility Key Event on Open and Close [0601] [0632]: F ECTIONS IRST DIGIT A Utility Key Event can be generated whenever the keyswitch input is opened or closed. The Utility Key Events increase from 32 to 64 events; one event for each state. -
Page 31: Arming And Disarming Options
EVOHD+ Installation Guide Arming and Disarming Options Arming Follows Partition (default = disabled) A partition can be set to follow the arming and disarming status of one or more partitions. Section: Partition arms & disarms with: Partition 1: [3121] Option [1] = Partition 1 Partition 2: [3221] Option [2] =... -
Page 32: Timed Auto-Arming
EVOHD+ Installation Guide Timed Auto-Arming (default = disabled) The control panel arms the selected partition every day at the time set. A 60-second Exit Delay (default value) triggers before the partition arms. It can be cancelled or postponed by entering a valid access code. If zones are open, the control panel arms the partition and considers all open zones as temporarily bypassed (except 24hr. -
Page 33: No Movement Auto-Arming
EVOHD+ Installation Guide No Movement Auto-Arming (default = disabled) If no movement occurs in a partition for the specified period, the control panel will automatically arm that partition. The Auto-Arming Option determines the arming method. The control panel will transmit the No Movement report code programmed in section upon arming. -
Page 34: Follow Zone Switches To Entry Delay 2
EVOHD+ Installation Guide Follow Zone Switches to Entry Delay 2 (default = enabled) When enabled and an Entry Delay zone is bypassed, an armed Follow Zone (page 22) that opens without an Entry Delay being triggered will switch to the partition’s Entry Delay 2. Enable option [8] in the desired section: Partition 1: [3122] Partition 3: [3322] Partition 5: [3522]... -
Page 35: Bell Squawk
EVOHD+ Installation Guide (default = 015) Program the duration of the keypad lockout from 001 to 255 minutes into the desired section. Programming 000 into these sections will not lockout the keypad, the control panel will transmit the Keypad Lockout report code programmed in section [3937] Partition 1: [3106] Partition 3: [3306]... -
Page 36: Alarm Options
EVOHD+ Installation Guide Alarm Options Bell/alarm Output (default = only option [1] enabled) When an alarm condition is detected in a partition, the control panel can trigger the on-board output enabling any bells or BELL sirens connected to it. In section enable the option to enable the bell output in the desired partition (off = disabled): [3032] Partition 1: Option [1]... -
Page 37: Police Code Timer
EVOHD+ Installation Guide Police Code Timer (default = 000) If an alarm condition occurs on a zone, the control panel generates an alarm and triggers the Police Code Timer. The Police Code programmed in [3934] will only be sent if one of the following conditions occurs during the delay: An alarm occurs on another zone. -
Page 38: Keypad Panic Options
EVOHD+ Installation Guide Tamper Bypass Options [3034]: O ECTION PTION (default = enabled) When enabled in section , the control panel will ignore the zone’s bypass definition and will follow the option set in section (page 37) if a [3034] tamper or wire fault occurs on a bypassed zone. -
Page 39: Event Reporting
EVOHD+ Installation Guide Event Reporting Figure 16: Event Reporting Related Features Reporting Account Number 1 Dialing Enabled/Disabled Partition 1 Section [3036] 3 or 4 digits (0-F) in Section [3061] Delay Before Alarm Transmission: [3055] Option [3] Reporting Account Number 2 Partition 2 Recent Closing Delay 3 or 4 digits (0-F) in Section [3062]... -
Page 40: Reporting Enabled
EVOHD+ Installation Guide Reporting Enabled [3036]: O ECTION PTION (default = disabled) If enabled, the control panel verifies if a report code was programmed in the section corresponding to event that happened. If a report code is programmed, the control panel dials the monitoring station telephone number. When the monitoring station answers, the control panel transmits the system account code and the programmed report code. - Page 41 EVOHD+ Installation Guide Special System Reporting Codes When the system generates one of the following events, the control panel can send the report code to the monitoring station identifying the event: [3900] Cold Start Control panel re-starts after complete shutdown (total power loss) [3901] Warm Start Control panel resets due to sudden problem other than power loss...
- Page 42 EVOHD+ Installation Guide Special Disarming Report Codes When using one of the special disarming features listed below, the control panel can send the report code identifying how the system was disarmed. Also, refer to Disarm Reporting Options in section on page 48. section [3920] Cancel Auto-Arm...
- Page 43 EVOHD+ Installation Guide System Trouble Codes Section Data Description [3940] ___/___ TLM trouble ___/___ AC failure ___/___ Battery failure ___/___ Auxiliary supply [3941] ___/___ Bell output trouble ___/___ Clock loss ___/___ Fire loop trouble ___/___ Panel Tamper [3950] ___/___ Wireless transmitter battery low ___/___ Wireless transmitter supervision trouble ___/___...
-
Page 44: Report Arming And Disarming
EVOHD+ Installation Guide Report Arming and Disarming These features identify when partitions should be armed or disarmed. It allow the control panel to report changes from the schedule. Arming and Disarming Report Schedules Arming and Disarming Report Schedules identify the days and times that a partition should be armed and disarmed. Each schedule consists of 2 programmable time periods called Intervals that determine the time span and days when the partition should be armed or disarmed (see Figure 17). -
Page 45: Monitoring Station Phone Number
EVOHD+ Installation Guide Monitoring Station Phone Number [3071] [3074] ECTIONS The control panel can dial up to 4 different monitoring station telephone numbers. Sections [3071] to [3074] represent monitoring station telephone numbers 1 through 4. Enter any digit up to a maximum of 32. Table 5: Special Telephone Number Keys Functions STAY... -
Page 46: Event Call Direction
EVOHD+ Installation Guide Standard Pulse Formats The control panel can use the Ademco slow, Silent Knight fast and Sescoa standard pulse reporting formats (see Table 7). Ademco Express The Ademco Express is a high-speed reporting format that communicates 2-digit (00 to FF) report codes. The Ademco Express does not use the Contact ID Report Codes. -
Page 47: Recent Close Delay
EVOHD+ Installation Guide Recent Close Delay (default = 000) If an alarm is generated within the programmed period after arming the partition, the control panel will transmit the Recent Close report code programmed into section [3933]. Enter any value between 001 and 255 to determine Recent Close Delay in seconds. Partition 1: [3109] Partition 3: [3309] Partition 5: [3509]... -
Page 48: Disarm Reporting Options
EVOHD+ Installation Guide Disarm Reporting Options (default = disabled) When disabled, the control panel sends the Disarming Report Codes (page 40) every time the partition is disarmed. When enabled, the control panel sends the Disarming Report Codes to the monitoring station only when the partition is disarmed following an alarm. Select the section that corresponds to the desired partition and enable or disable option Partition 1: [3123] Partition 3: [3323]... -
Page 49: Dialer Options
EVOHD+ Installation Guide Dialer Options Telephone Line Monitoring [3036]: O ECTION PTIONS When enabled, the system verifies the existence of the main telephone line once every second. After each successful test, the Status LED on the control panel flashes briefly. A line test failure occurs when the TLM detects less than 3 volts for the period defined by the TLM Fail Timer (see section ). If the line test fails, the control panel will generate one or more conditions as defined by the TLM settings below, until it detects the telephone line again. -
Page 50: Vdmp3 Voice Module
EVOHD+ Installation Guide VDMP3 Voice Module VDMP3 Installation Instructions Step English Power down the EVOHD+ control panel. Install the VDMP3 directly onto the EVOHD+ control panel’s EBUS connectors as shown in "VDMP3 Installation DIALER Install Instructions". Power up the EVOHD+ control panel. ... -
Page 51: Vdmp3 Setup Instructions
EVOHD+ Installation Guide VDMP3 Setup Instructions EVOHD+ Step English section Select the following options to enable voice reporting and arm/disarm function. [1] Voice module incoming call (default 1 and 2 ON) Enable [2] Voice reporting [3090] Functions [3] Report AC/battery trouble [4] Inhibit disarming on voice module Program up to 8 telephone numbers which will be called in sequence in the event of an alarm. -
Page 52: Programmable Outputs
EVOHD+ Installation Guide Programmable Outputs The control panel provides a maximum of 100 mA to PGM2 to PGM4. PGM1 is an open collector output and PGM5 is a 3A/28Vdc N.O./ N.C. relay output. Activating a PGM changes it’s state from open to closed or closed to open. See “Programmable Outputs” on page 8. PGM Programming Enter section [0901] - [0932]. -
Page 53: System Settings And Commands
EVOHD+ Installation Guide System Settings and Commands Hardware Reset A Hardware Reset sets sections [0001] to [3991] to default. Only the Panel ID, PC Password, PC Telephone Number and Event Buffer are not reset. The Installer Code Lock prevents Hardware Reset. Make sure the Installer Code Lock is disabled Press Reset button for 5 seconds (STATUS blinks) then release and press again for 1 second. -
Page 54: Daylight Savings Time Schedule
EVOHD+ Installation Guide Daylight Savings Time Schedule [3022] ECTION (default = 18) Select the schedule followed for the Daylight Savings Time adjustment. Canada/United States/Mexico/St- Cuba Johns/Bahamas/Turks and Caicos Brazil Chile Falkland Islands Paraguay European Union/United Kingdom/ Russia and surrounding countries Greenland South Australia/Victoria/Australian Tasmania/Lord Howe Island... -
Page 55: Installer Function Keys
EVOHD+ Installation Guide Installer Function Keys Press and hold the key and key in the to access the installer functions and then: INSTALLER CODE For LCD keypads: Press the key indicated in the list below that corresponds to the function you wish to activate. TEST REPORT: Sends the Test Report report code programmed in STAY section... -
Page 56: Re-Address Scanning (Tm50/Tm70 Keypads Only)
EVOHD+ Installation Guide Re-Address Scanning (TM50/TM70 Keypads only) This option will scan all addresses on the combus. If any missing modules are detected (e.g., detector removed from combus), the control panel will quarantine them. To permanently remove the module’s serial number from the system, refer to the Quarantine Modules section. To scan modules on your EVOHD+ panel: Press and hold the button and then enter your installer code. -
Page 57: System Labels
EVOHD+ Installation Guide System Labels The existing label displayed on the LCD screen can be modified to suit the installation’s needs. Each label contains a maximum of 16 characters. To re-program the System Label, enter the desired section and use Table 9, Table 11 and Table 10 (page 57) to modify the label. For other languages, refer to Table 12 to table 16 on page 59. - Page 58 EVOHD+ Installation Guide Table 12: Hebrew Keypad Letter Assignment Table 13: Russian Keypad Letter Assignment Table 14: Greek Keypad Assignment Press key once Press key twice Press key three times Table 15: Hebrew Special Characters Catalogue...
- Page 59 EVOHD+ Installation Guide Table 16: Russian Special Characters Catalogue Table 17: Greek Special Characters Catalogue A069...
-
Page 60: Access Codes
EVOHD+ Installation Guide Access Codes Installer Code [1000] ECTION (default = 000000) The Installer Code is six digits in length where each digit can be any value from 0 to 9. To change the Installer Code: Press and hold Enter [ INSTALLER CODE Key in [1000] Enter new 6-digit [... - Page 61 EVOHD+ Installation Guide Figure 18: Programming User Access Codes Where sections [1002] to [1999] represent Press & hold user access codes 002 to 999. the [0] key User Options Key in the [1][2]Master Feature INSTALLER OFFOFF Disabled CODE ONOFF Master - user can program user access codes only ONON Full Master - user can program user access...
-
Page 62: Partition Assignment
EVOHD+ Installation Guide Partition Assignment [1002] [1999]: A ECTIONS SSIGN CREEN PTIONS Each of the 998 user access codes can be assigned to one or more partitions. Users can only arm, disarm and view the status of the partitions assigned to their user access codes. - Page 63 EVOHD+ Installation Guide Access Control Options [1002] [1999]: A ECTIONS CCESS PTION SCREEN PTIONS The Access Control Options define how each Access Card can arm or disarm the partitions. To arm the partition(s) assigned to the door, a valid card is presented to the reader twice within approximately 5 seconds while the door remains closed.
-
Page 64: Access Control: System Features
EVOHD+ Installation Guide Access Control: System Features For details on connecting Access Control devices, refer to the “Digiplex Access Control Module Reference & Installation Manual”. Figure 19: Typical Access Control Installation 1 = Request for Exit Device (Paradoor) 2 = Door Contact 3 = Reader (R910 or R915) on other side of the wall 4 = Access Control Module (ACM12) -
Page 65: Access Levels
EVOHD+ Installation Guide Access Levels [2601] [2615] ECTIONS Access Levels determine which Doors a user can access. Each Access Level is a combination of the Doors from sections [2201] to [2232]. They are assigned to the users through their user access codes (refer to the “System Manager’s Manual”). Sections contains four screens representing the 32 Doors. Level 00 allows the user to access all. -
Page 66: Door Access Mode
EVOHD+ Installation Guide Door Access Mode [2251] [2282]: O ECTION PTION Access Door and user can be assigned to one or more partitions in the security system. Actions performed by the user will be directly linked to the partition(s) assigned to that door. Doors 01 to 32 are programmed in sections [2251] to [2282] respectively. “OR”... -
Page 67: Burglar Alarm On Forced Door Or Door Left Open
EVOHD+ Installation Guide Burglar Alarm On Forced Door or Door Left Open [3038]: O [5] (F ECTION PTION ORCED [3038]: O [7] (D ECTION PTION (default = disabled) If an Access Door is forced open or left open, a signal can be sent to the control panel to trigger the burglar alarm. The burglar alarm is generated instantly regardless of the zone’s definition. -
Page 68: Babyware Software
Verify the product information located in the window. In the drop down menu, select the most recent version of the firmware. Use this button to load additional firmware files from another location or download the panel firmware from the paradox.com or select the latest version for IP150+/PCS. - Page 69 EVOHD+ Installation Guide Figure 21: Upgrading Control Panels and Modules 307USB CV4USB TO COMPUTER’S USB PORT OR 9- PIN SERIAL PORT DB-9 (DB-9). PC LINK USB Product Link Rx/Tx TO COMPUTER’S 9-PIN SERIAL PORT (DB-9). Figure 22: Upgrading K641, K641R, K641+ Keypads BATTERY OR CONTROL PANEL AUX CONV4USB TO COMPUTER’S...
-
Page 70: Appendix 1: Automatic Report Code List
EVOHD+ Installation Guide Appendix 1: Automatic Report Code List Default Contact ID Report Code Default SIA Report Code System Event (when using sections [4032] to [4037]) (when using sections [4032] to [4037]) Arming with master code (##) 3 4A1 Close by user Closing report Arming with user code (##) 3 4A1... - Page 71 EVOHD+ Installation Guide Default Contact ID Report Code Default SIA Report Code System Event (when using sections [4032] to [4037]) (when using sections [4032] to [4037]) Global zone shutdown 1 574 Group bypass Close area Duress alarm 1 121 Duress Hold-up alarm Zone shutdown (##) 1 57A...
- Page 72 EVOHD+ Installation Guide Default Contact ID Report Code Default SIA Report Code System Event (when using sections [4032] to [4037]) (when using sections [4032] to [4037]) Zone went back to arm status 3 57A Zone bypass restore Zone included Printer fault restore 3 336 Local printer failure restore Printer restore...
-
Page 73: Appendix 2: Contact Id Report Code List
EVOHD+ Installation Guide Appendix 2: Contact ID Report Code List If using the Ademco contact ID format, enter the two-digit hexadecimal value (under the column heading Value intable 18) to program the desired report codes into sections [0201] to [0296], [0701] to [0832], [2001] to [2199], and [3900] to [3999]. Table 18: List of Ademco contact ID report codes Table 18: List of Ademco contact ID report codes Table 18: List of Ademco contact ID report codes... - Page 74 EVOHD+ Installation Guide Table 18: List of Ademco contact ID report codes Table 18: List of Ademco contact ID report codes Table 18: List of Ademco contact ID report codes Type CID # Reporting Code Value Type CID # Reporting Code Value Type CID # Reporting Code...
-
Page 75: Appendix 3: Keypad Installation Instructions
EVOHD+ Installation Guide Appendix 3: Keypad Installation Instructions Keypad Installation Instructions Connecting the Keypads The keypads are connected to the control panel's Digiplex bus in a star and/or daisy chain configuration. Connect the four terminals labeled red, black, green and yellow of each keypad to the corresponding terminals on the control panel. - Page 76 EVOHD+ Installation Guide Figure 25: : Access Control Connections K641R K641R Fused external power supply (recommended) No EOL required Paradoor (460) Request to Exit device. Must be connected to IN4007 terminal. Diode Door Lock K641R Door Contact Must be connected 1 terminal.
- Page 77 Reference & Installation Manual and to the EVOHD+ Programming Guide for more details. Section [101] to [148] = “Zone 01” to “Zone 48” respectively Section [200] = “Paradox Security” “First Area”, “Second Area”, “Third Area”, and Section [201] to [204] = “Fourth Area”...
- Page 78 EVOHD+ Installation Guide Confidential Mode [003]: O ECTION PTIONS In Confidential Mode, all LEDs will turn off and the display will change until either a button is pressed or an access code is entered. Option [4] OFF = Normal Mode (default) Option [4] ON = Confidential Mode Option [5] OFF =...
- Page 79 EVOHD+ Installation Guide Programmable Output Options PGM State [006]: O ECTION PTION Option [1] OFF = PGM is Normally Open (default) Option [1] ON = PGM is Normally Closed NOTE: The PGM can provide 50mA to any device connected to it. PGM Deactivation Mode [006]: O ECTION...
- Page 80 EVOHD+ Installation Guide Display Entry Delay Timer [003]: O ECTION PTION Option [3] OFF=Will not display the Entry Delay Timer (default) Option [3] ON=LCD screen will display Entry Delay Timer Confidential Mode [003]: O ECTION PTIONS Section [003]: Option [4] OFF=Normal Mode (default) Option [4] ON=Confidential Mode Option [5] OFF=LCD screen activated by entering an access code (default) Option [5] ON=LCD screen activated by pressing a button...
- Page 81 EVOHD+ Installation Guide Access Control Options Assigning Doors To Partitions [002]: O ECTION PTIONS The Access Control door can be assigned to one or more partition(s) in the alarm system. This means that the actions performed with the Access Control Card will be directly linked to the partition(s) assigned to that door.
- Page 82 EVOHD+ Installation Guide Door Left Open Interval Before Access Alarm [010] ECTION Enter any value between 001 and 255 to determine the number of seconds the door may remain open before the Access Alarm is triggered. Default = 60 secs. Door Left Open Pre-Alarm [004]: O ECTION...
-
Page 83: Index
EVOHD+ Installation Guide Index Numerics BabyWare Software 69 Double Zone Connections 17 Battery 9 Duress 63 24Hr Zones 23 Battery Test 9 Bell Earth Ground 8 AC Failure not Displayed 57 Bell/siren Output 9 Enable Access Control 65 AC Power 8 Bell/Siren Output During Fire Alarm 24 Enable Reporting 41 Access Alarm 65... - Page 84 EVOHD+ Installation Guide Connections 9 Pulse Dialing 50 Timed and Hourly Test Transmission 48 Definitions 30 Pulse formats. See Standard Pulse Formats Timed Test Transmission when Armed/Disarmed 48 Disabled 30 Pulse Ratio 50 TLM Fail Timer 50 Keyswitch Numbering 30 Pulsed Audible Alarm 25 Tolerance Window 45 Maintained 30...
- Page 85 This equipment must be installed and maintained by qualified service personnel only. Warranty For complete warranty information on this product please refer to the Limited Warranty Statement found on the website www.paradox.com/terms. Your use of the Paradox product signifies your acceptance of all warranty terms and conditions.
- Page 87 The whole Paradox team wishes you a successful and easy installation. We hope this product performs to your complete satisfaction. Should you have any questions or comments, please contact us at support@paradox.com. Additional information can be found on our website www.paradox.com/support...
Need help?
Do you have a question about the EVOHD+ and is the answer not in the manual?
Questions and answers