Table of Contents
Advertisement
Quick Links
Advertisement
Table of Contents

Related Manuals for Hanna Instruments HI 5321


Summary of Contents for Hanna Instruments HI 5321
- Page 1 All manuals and user guides at all-guides.com...
- Page 2 Dear Custo Thank you All manuals and user guides at all-guides.com Please read the necess If you need worldwide c WARR HI 5321 is quaran intended pu months. Th Damage du is not If service is the model n by the warr...
-
Page 3: Table Of Contents
All manuals and user guides at all-guides.com TABLE OF CONTENTS WARRANTY ............................PRELIMINARY EXAMINATION ........................GENERAL DESCRIPTION ........................... FUNCTIONAL DESCRIPTION ........................SPECIFICATIONS ............................ OPERATIONAL GUIDE ..........................DISPLAYING MODES ..........................SYSTEM SETUP ............................. CONDUCTIVITY SETUP ........................... RESISTIVITY SETUP ..........................TDS SETUP ............................ -
Page 4: Preliminary Examination
• 12 Vdc Power Adapter • Instruction Manual HI 5321-01 is supplied with 12 Vdc/115 Vac adapter. HI 5321-02 is supplied with 12 Vdc/230 Vac adapter. Note: Save all packing material until you are sure that the instrument works properly. -
Page 5: General Description
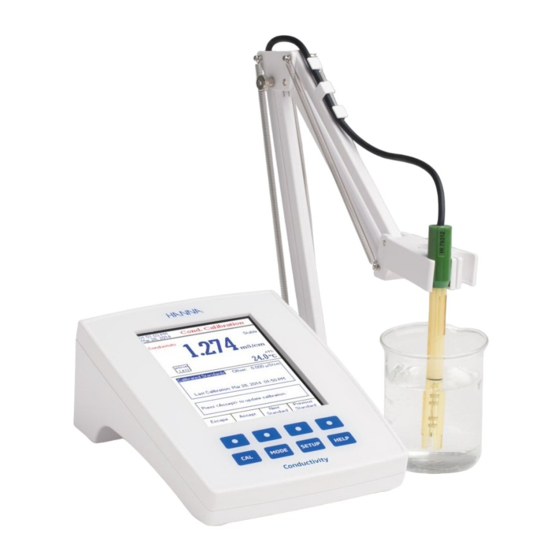
All manuals and user guides at all-guides.com GENERAL DESCRIPTION HI 5321 is a professional bench meter with color graphic LCD , conductivity, resistivity, TDS, salinity temperature measurements. The display may be viewed with: Basic information only, GLP information, Graph and L The main features of the instruments are: •... -
Page 6: Functional Description
All manuals and user guides at all-guides.com FUNCTIONAL DESCRIPTION HI 5321 DESCRIPTION FRONT PANEL REAR PANEL 1) Liquid Crystal Display (LCD) 2) Capacitive touch keypad 3) ON/OFF switch 4) Power adapter socket 5) Conductivity probe connector 6) USB connector... - Page 7 KEYBOAR FUNCTION All manuals and user guides at all-guides.com To enter/e To select To enter S Setup) an To obtain VIRTUAL K T h e upper ro virtual k place perform the in M mode). LCD GENE...
-
Page 8: Specifications
All manuals and user guides at all-guides.com SPECIFICATIONS 0 . 0 9 . 9 S µ m c / 0 0 . 9 9 . S µ m c / 0 . 0 9 . 9 S µ m c / e g n 0 . - Page 9 All manuals and user guides at all-guides.com 0 . 0 9 . 9 0 0 . 9 9 . 0 . 0 9 . 9 e g n 0 . 1 9 . 9 t p p 0 0 . 9 9 .
-
Page 10: Operational Guide
All manuals and user guides at all-guides.com b y e K d r a o s y e k a p a c e v i t i c h c u o t w o P S r e y l p p u c d V r e t p a... -
Page 11: Displaying Modes
All manuals and user guides at all-guides.com DISPLAYING MODES For measurement mode’s the following display configurations are available: Basic, Gr A GLP display is available for Conductivity and Salinity Percent scale. Basic The main measured value and it’s units are displayed on the LCD, along with the temperature value, temperature probe status and basic calibration information... - Page 12 Graph The on-line TDS, All manuals and user guides at all-guides.com when this o If there is n To access • Press while in Measure mode. T Choos Configurati ” messag messages • Press . • Press to begin To Zoom G •...
- Page 13 All manuals and user guides at all-guides.com Log History The measurement, along with LOG History , will be visible when this option is selected: 1) The last stored logged data (Not actively logging) or 2) The last data logged from an active logging lot or 3) An empty display - NO LOTS saved, Not currently logging The log history list also contains the main measured value, the temperature, as well as a record time stamp.
-
Page 14: System Setup
All manuals and user guides at all-guides.com SYSTEM SETUP The System Setup menu allows the user to customize the user interface, view meter i external serial communication interface and to restore the manufacturer settings. Accessing System Setup • Press while in Measure mode. •... - Page 15 All manuals and user guides at all-guides.com Saving Confirmation Enable this option to force verification of a change made to a “GLP Data Option field” or a Sample ID name. If Saving Confirmation is enabled, the user will have to accept the change with a key stroke. If Saving Confirmation is disabled, the changes made to these fields change automatically without verification.
- Page 16 All manuals and user guides at all-guides.com T o add the GLP Data: • Press while in Measure mode. • Press • Use to select the GLP Data option. • Press and use to highlight the desired option. • P ress to edit the desired information.
- Page 17 • Use or to selec • Press and use or to high All manuals and user guides at all-guides.com Date and T • Press to confirm to select ne and u or to set the to save the • For the oth to conf and select •...
- Page 18 All manuals and user guides at all-guides.com Color Palette This option allows the user to choose a desired color palette. T o select the Color P alette: • Press while in Measure mode. • Press • Use to select the Color P alette option.
- Page 19 All manuals and user guides at all-guides.com Serial Communication This option allows the user to set the desired speed for the serial communication (baud ra and the PC program must have the same baud rate. T o set the Serial Communication: •...
- Page 20 All manuals and user guides at all-guides.com Restore Factory Settings This option allows the user to erase all user settings and reset the instrument to the defau T o restore the Factory Settings: • Press while in Measure mode. • Press •...
-
Page 21: Conductivity Setup
All manuals and user guides at all-guides.com CONDUCTIVITY SETUP The Conductivity Setup menu allows the user to set the parameters related to the conductivity and calibration. Accessing Conductivity Setup • Press while in Measure mode and then select the Conductivity measurement mode. - Page 22 Save Profile T o save a pr All manuals and user guides at all-guides.com • Press while in Conducti mode. • Press . • Use or to highli Profile option. • Press and then or to hig . • Press Save Profil .
- Page 23 All manuals and user guides at all-guides.com • Press . A list with all customized profiles will be displayed on the screen. • Use to select the desired profile and press to confirm or to exit without selecting. Delete Profile T o delete one of the existing profiles: •...
- Page 24 All manuals and user guides at all-guides.com • Use to highlight the Temperature option from the Conductivity Setup menu. • Press to access the Temperature option. T emperature Source T o set the temperature source: Note:The HI 76312 sensor has an integrated temperature sensor and will provide the bes measurement.
- Page 25 All manuals and user guides at all-guides.com • Press to confirm your selection or press to cancel operation. Note : Whatever form of compensation is used, the reading will not be as accurate as taking a reading of the sample’s conductivity at the reference temperature.
- Page 26 All manuals and user guides at all-guides.com Compensation Coefficient ( Linear temperature compensation only) The temperature coefficient is a factor used to express the rate a solution’s conductivi increase in temperature and is expressed as a % increase in conductivity, for a temperature change of 1 °C.
- Page 27 The followin Standard R All manuals and user guides at all-guides.com The user ca Automati recogn Use (w custom sta • Press while in Conducti mode. • Press . • Use or to highli Calibra option • Press and then se or to hig Standard R option.
- Page 28 All manuals and user guides at all-guides.com Calibration Reminder This option allows the user to set the calibration reminder as Daily , P eriodic or Disabled . T o set the calibration reminder: • Press while in Conductivity mode. • Press •...
- Page 29 All manuals and user guides at all-guides.com Clear Calibration Accessing this option, the existent conductivity calibration can be cleared. If the calibrat calibration has to be performed. T o clear calibration: • Press while in Conductivity mode. • Press • Use to highlight the Calibration option.
- Page 30 All manuals and user guides at all-guides.com Units The user can select the desired measurement unit. The available options are: µ S/cm , mS/cm or AutoRanging • Press while in Conductivity mode. • Press • U se to highlight the Units option.
- Page 31 All manuals and user guides at all-guides.com Edit Sample ID This option allows the user to edit the sample ID. If ID increment is None , a T e xt Editor screen is displayed. If I increment is Automatic , a Numeric Editable screen is displayed. T o access the Sample ID: •...
- Page 32 Automatic - the mea Manual - a snapsh All manuals and user guides at all-guides.com depresses Auto Hold - this is co Direct/ read measurem to initia Hold even removes s T o set the Lo ype: • Press while in Conducti mode.
- Page 33 All manuals and user guides at all-guides.com Sampling P eriod This option allows the user to select the desired sampling period for automatic logs. T o set the Sampling P eriod: • Press while in Conductivity mode. • Press • Use to highlight the Log option.
- Page 34 All manuals and user guides at all-guides.com Alarm State Three settings are available for the Alarm State option: Disabled - the alarm will be disabled. Inside Limits - the alarm state will trigger when the measured value is inside the set limits. Outside Limits - the alarm state will trigger when the measured value is outside the set limits.
-
Page 35: Resistivity Setup
All manuals and user guides at all-guides.com RESISTIVITY SETUP The Resistivity Setup menu allows the user to set the parameters related with the resis Accessing Resistivity Setup • Press and then to select resistivity measurement mode. • Press and then to access Resistivity Setup menu. - Page 36 All manuals and user guides at all-guides.com Temperature - see Conductivity Setup section. Units Ω.c m , K Ω.c m , M Ω.c m o r A u t o R α n g i n g u n i t s . The user can choose between T o s e l e c t t h e u n i t s : •...
-
Page 37: Tds Setup
SETU All manuals and user guides at all-guides.com TDS Setup menu allo Accessing • Press and then to selec • Press and then to acce TDS S menu To access TDS Setup option: • Use or to highli • Press to access The followi Profile... - Page 38 All manuals and user guides at all-guides.com TDS factor TDS factor is a conversion factor used to convert conductivity to TDS by the equation: 25 . The TDS conversion factor can be set from 0.40 to 1.00. A typical TDS conversion fac solutions is 0.5, while for a weak ionic solutions (e.g.
-
Page 39: Salinity Setup
All manuals and user guides at all-guides.com SALINITY SETUP Salinity measurements are related to the salt in ocean water. The Salinity Setup menu allows the user to set the parameters related to Salinity measu calibration. Accessing Salinity Setup • Press and then to select Salinity measurement mode. - Page 40 All manuals and user guides at all-guides.com Clear Calibration This function only works for the P ercent Scale T o clear calibration: • Press while in Salinity mode. • Press • Use to highlight the Clear Calibration option. • Press to clear calibration.
-
Page 41: Conductivity Calibration
All manuals and user guides at all-guides.com CONDUCTIVITY CALIBRATION For optimum measurements: • Insert probe in the center of the beaker away from container bottom or walls. • Fix the probe so it does not move during measurements and add sufficient solution to on probe. - Page 42 • Pour a sma minimize a All manuals and user guides at all-guides.com • For accura One for rin • Insert the p • Swirl probe • Insert the p • Swirl and t • Enter calib • Wait to sta •...
-
Page 43: Conductivity Measurement
All manuals and user guides at all-guides.com CALIBRATION MESSAGES • Wrong standard solution. Check the standard solution. This message appears when the differen between the reading and the value of the selected standard is significant. If this mes check if you have selected the appropriate calibration standard. •... -
Page 44: Usp Evaluation
WFI (W For Injection). The HI 5321 meter supports conductivity measurements that are needed for off line in a Stage 2 of the regulation. Stage 1 verification may be carried out in a container but th an in-line measurement. - Page 45 All manuals and user guides at all-guides.com Stage 1 - this is an in-line test. The procedure follows: • Measure the temperature of the water and the absolute conductivity readings. The measurement must be an in-line measurement. Results may be verified using a laboratory method.
- Page 46 All manuals and user guides at all-guides.com Stage 2 - this is an off-line test. To perform this test: • Store the water sample in an enclosed clean container that has been rinsed previously with water of the same quality. •...
- Page 47 Note: A tempera measurem All manuals and user guides at all-guides.com • Take the w tage 2 test an increa ionic streng • Use 100 m the sample • Calibrate a buffers. • Thermally • Measure s • The pH of •...
-
Page 48: Tds Measurement
All manuals and user guides at all-guides.com • Press and then to select resistivity measure mode. • Select the Direct reading mode (see Resistivity Setup section). • Proceed the same as for the conductivity measurement (see Conductivity Measurement section). DIRECT/AUTOHOLD MEASURE MENT To measure resistivity of a sample using the Direct/AutoHold... -
Page 49: Salinity Calibration
All manuals and user guides at all-guides.com DIRECT/AUTOHOLD MEASURE MENT To measure TDS of a sample using the Direct/AutoHold reading mode: • Select the Direct/AutoHold reading mode (see TDS Setup section). • Proceed the same as for the conductivity measurement. (see Conductivity Measurement section). -
Page 50: Salinity Measurement
All manuals and user guides at all-guides.com SALINITY MEASURE MENT Th r ee met h o d s fo r calcu l at i n g seaw a t e r sali n i t y are su p po r t e d ( N a t u r al Sea W a t e r Scale , Pract i c al Sali n i t y Scale... -
Page 51: Temperature Calibration
All manuals and user guides at all-guides.com =0. 0 08 =0. 0 005 =2. 0 7 0 ·10 =6 . 7 6 6 0 9 7 · 10 - 1 0 =- 0 . 1 6 9 2 =- 0 . 0 056 =- 6 . - Page 52 LOGG There are 5 All manuals and user guides at all-guides.com combinatio d a e g n i e d o u A t c e r i m o t c i t a ) 1 ( l a u n ) 2 ( o t u A d l o H...
- Page 53 All manuals and user guides at all-guides.com 3) Direct/AutoHold Reading Mode and Automatic Log Press and then keys must be pressed on front display to initiate this function. Real time continuous measurements are on display with “ AutoHold ” flashing and real time continuous logging into meter memory, until the meter reaches the stability criteria to go into Auto Hold mode.
- Page 54 All manuals and user guides at all-guides.com • Press to select the desired Log Report type. All logged lots for the selected Log Report type will be displayed on the LCD. • To filter the displayed lots, press and then the desired parameter.
-
Page 55: Logging
(optional). HI 92000 also offers graphing and on-line help features. Data logged on the HI 5321 meter can be exported to the most popular spreadsheet applicatio analysis. The instrument has an USB interface. Use a standard USB cable to connect your instrument to the PC. -
Page 56: Ec Probe Use And Maintenance
All manuals and user guides at all-guides.com EC PROBE USE AND MAINTENANCE MEASURE • Rinse conductivity probe with deionized water and shake off excess water. • To avoid cross-contamination, rinse probe with a sample of solution to be tested. solution is that contained within the sleeve. •... - Page 57 TROUB All manuals and user guides at all-guides.com Y S t o n t n e m g n i d a n r e t s e o d t r a t s e f o s r e r a w t e h t .
-
Page 58: Accessories
All manuals and user guides at all-guides.com ACCESSORIES CONDUCTIVITY STANDARD SOLUTIONS HI 70033P84 µS/cm, 20 mL sachets (25 pcs.) HI 7033M 84 µS/cm, 230 mL bottle HI 7033L 84 µS/cm, 500 mL bottle HI 8033L 84 µS/cm, 500 mL FDA approved bottle HI 70031P1413 µS/cm, 20 mL sachets (25 pcs.) HI 7031M 1413 µS/cm, 230 mL bottle HI 7031L 1413 µS/cm, 500 mL bottle... - Page 59 To avoid electrical shock, do not use these instruments when voltages at the measurem 24 Vac or 60 Vdc. To avoid damage or burns, do not perform any measurement in microwave ovens. Hanna Instruments reserves the right to modify the design, construction or appearance o advance notice.
- Page 60 All manuals and user guides at all-guides.com Hanna Instruments Inc. Highland Industrial Park 584 Park East Drive Woonsocket, RI 02895 USA T echnical Support for Customers Tel. ( 800) 426 6287 Fax (401) 765 7575 E-mail tech@hannainst.com www.hannainst.com Local Sales and Customer Service Office...
Need help?
Do you have a question about the HI 5321 and is the answer not in the manual?
Questions and answers