Table of Contents
Advertisement
Quick Links
Advertisement
Table of Contents

Subscribe to Our Youtube Channel
Related Manuals for Gio Electric WISP


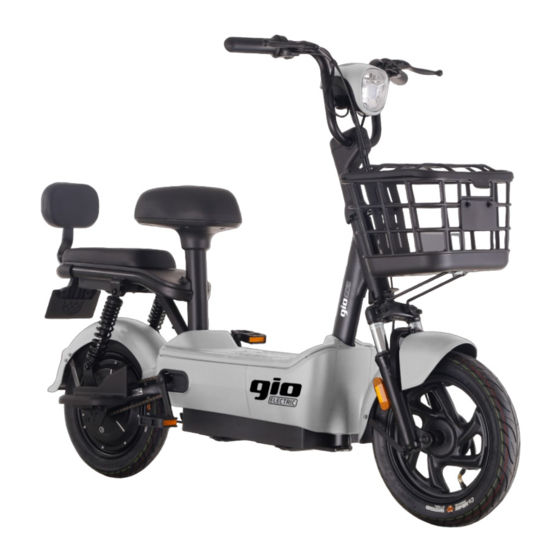
Summary of Contents for Gio Electric WISP
- Page 3 7. Please be responsible and dispose of all old batteries through a local battery recycler. 8. Illustrations/images in this manual may differ from the final product. 9. As GIO Electric is always striving for a better product, details and specifications in this manual may vary from the final product 10.
-
Page 4: Table Of Contents
Never ride while using headphones/cell phones as they mask traffic sounds and emergency vehicle sirens, and cause distracted driving which can lead to accidents. Never consume drugs or alcohol before or while operating your GIO electric eScooter, they can impair your judgment and reaction time. - Page 5 Always follow the inspection and maintenance procedures described in this manual. ⚠ DO NOT MAKE ANY ALTERATIONS OR MODIFICATIONS TO THIS GIO ELECTRIC ESCOOTER OR ADD ANY PARTS NOT AUTHORIZED BY GIO EXCEPT THOSE DISCUSSED IN THIS MANUAL OR THOSE REQUIRED BY LAW. DO NOT REMOVE ANY REFLECTORS, LIGHTS OR OTHER STANDARD EQUIPMENT.
-
Page 6: Assembly
Assembly Unpack and ensure you have all of the following components. We recommend saving all packing materials until your eScooter is fully assembled to prevent the accidental disposal of small parts/hardware. Please note assembly requires a Phillips Screwdriver, 4mm & 6mm Allen wrenches and a 14mm open ended wrench. -
Page 7: Rear Fender & Footrests
Rear Fender and Footrests Begin and position the rear fender over the rear wheel. Secure the front of the fender with the provided 2x M5*12 bolts. Then attach the fender brackets to the sides of the fender with the 4x M5*10 bolts, 2 bolts on each side. -
Page 8: Handlebars
Handlebars Begin handlebar installation by sliding the handlebar stem cover over the stem as shown. (Handlebars depicted upside down in photo) Insert the handlebar stem into the steering tube, correctly align the handlebar perpendicular to the front wheel and secure the handlebars into place by tightening the hex bolt with a 6mm Allen wrench. -
Page 9: Pedals
Replace the footboard and bolts, you are now ready to charge your eScooter. ⚠ PLEASE NOTE YOUR WISP ESCOOTER DOES NOT ARRIVE FULLY CHARGED AND MUST BE CHARGED COMPLETELY BEFORE FIRST USE. -
Page 10: Operating Your Escooter - Accelerating
Charging ⚠ YOUR WISP ESCOOTER SHIPS WITH THE BATTERY PACKS DISCONNECTED PLEASE REFER TO THE INSTRUCTIONS ON PAGE #5 TO RECONNECT THE BATTERIES PRIOR TO YOUR FIRST CHARGING! To charge your eScooter, first make sure the ignition key is switched to off, then plug the output plug from the charger into the charging port. -
Page 11: Maintenance And Care
The charging time for the Wisp is 8-10 hours. If charging does not finish after 12 hours, it is likely a problem has developed, unplug the charger and contact GIO Customer Service. It is normal for the charger to get warm, and always be sure it is well ventilated, unobstructed and kept dry at all times. -
Page 12: Schedule
Schedule The frequency of maintenance and cleaning depends on how much you ride and under which conditions. Recreational riders should need far less maintenance than daily commuters. The harder you ride or harsher your riding conditions, the more you have to take care of your eScooter if you want it to last.There are various time intervals for proper maintenance. -
Page 13: Battery
The polarity, as well as the input and output voltages of the charger supplied with your eScooter is of the correct rating and type for your Wisp. This information should be located on a label on the bottom of the charger. - Page 14 ♻ ALWAYS DISPOSE OF OLD BATTERIES THROUGH AN APPROVED BATTERY RECYCLER, AND KEEP CHILDREN AND PETS AWAY FROM BATTERIES Troubleshooting Issue Possible Cause Solution No power / no lights Ignition Switch “OFF” Turn to “ON” Battery not connected Ensure battery properly connected Battery needs charging Charge battery...
-
Page 15: Warranty
The limited warranty as contained herein is exclusive and in lieu of all other warranties expressed or implied. There are no warranties that extend beyond the description in this limited warranty. GIO Electric guarantees this product, including charger, motor, controller, to be free of manufacturing defects for a period of 12 months.
Need help?
Do you have a question about the WISP and is the answer not in the manual?
Questions and answers