Table of Contents
Advertisement
Advertisement
Table of Contents

Summary of Contents for Gio Electric ITALIA-MK
- Page 3 ⚠ Before operating, please read this manual carefully and familiarize yourself with GIO Electric scooter components and how they function 1. Please observe all local traffic laws. Remember: ignorance of the law is no excuse. 2. Please check both front and rear brakes before operating and adjust if necessary.
-
Page 4: Table Of Contents
Table of Contents Safe Operation Guide Operating your scooter Handlebar Layout Turning your scooter on Accelerating Braking Lights and turn signals LCD Display Charging your scooter Kickstands Security Locks Scooter Component Information Motor Controller Maintenance and Care Pre-ride Checklist Schedule Cleaning Lubrication Adjustments... -
Page 5: Safe Operation Guide
Do not ride while using headphones/cell phones as they mask traffic sounds and emergency vehicle sirens, and cause distracted driving which can lead to accidents. Never consume drugs or alcohol before or while operating your GIO electric scooter, they can impair your judgment and reaction time. -
Page 6: Operating Your Scooter
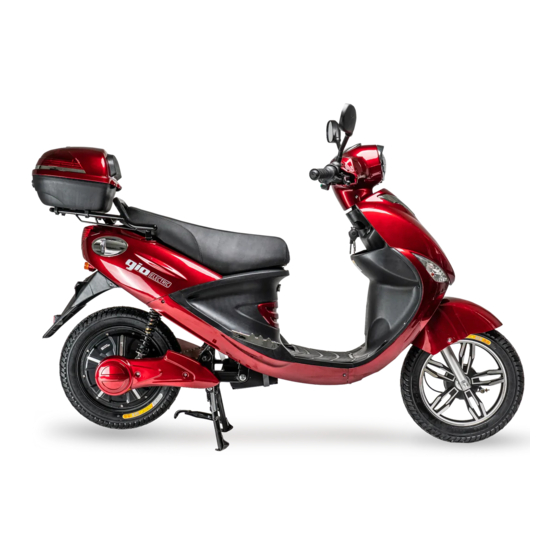
Operating your scooter Handlebar Layout Front brake lever Light switch (front side) High/low beam switch Horn button - right Turn signal switch Twist grip throttle Horn button - left On/Off switch LCD display Speed button Bag hook Rear brake lever (front side) Ignition switch... -
Page 7: Turning Your Scooter On
Turning your scooter on Your Italia-MK features a keyed ignition and an on/off switch to control the power. The ignition functions as the master switch with on/off switch functioning as an easy access kill switch for the power. The ignition is located on the steering column (see diagram) and has the following settings. -
Page 8: Braking
The LCD screen is set into the center of the handlebars and current speed, battery life and distance traveled. Please note that at this time the Italia-MK only has speeds/distances in metric and the final version of the display may vary slightly... -
Page 9: Charging Your Scooter
Remove the charger from the wall outlet and then from the scooter/battery as soon as charging is complete. The charging time for the Italia-MK is 4-6 hours. If charging does not finish after 12 hours, it is likely a problem has developed, unplug the charger and contact GIO Customer Service. -
Page 10: Kickstands
Kickstands Your scooter includes 2 kickstands, a side kick stand used for parking on a flat road and a main kickstand used for parking on hills or/and windy weather conditions and for rear suspension maintenance. The Side kickstand is located near the middle of the footboard on the left side od the scooter. -
Page 11: Scooter Component Information
Scooter Component Information Motor Your scooter features a high torque, high efficiency, permanent magnet (brushless) motor. The motor is maintenance-free, but it is generally advisable to check all other components for loose or corroded connections on a regular basis, and it is normal for the motor to make some noise when activated. -
Page 12: Cleaning
Cleaning Cleaning is the number one thing you can do in order to ensure your GIO will serve you for a long time. In the long run, it will save you money and a lot of time waiting for the scooter to be repaired. -
Page 13: Tires
⚠ If your brakes are not working properly and you are not able to remedy this by using the above adjustment, please contact GIO customer service. Tires Make sure that the air pressure for all tires is between 30-40 PSI. If the tires have less than the recommended amount of pressure, it may result in a decrease in battery usage time, poor handling, and damage to the tires and rims. -
Page 14: Battery
Battery As mentioned before the batteries of your scooter ship disconnected. You will need to connect the batteries correctly before your first use and after any time they are removed. Begin by opening the seat and removing the strap that holds the top battery pack in place (a). -
Page 15: Storage
The polarity, as well as the input and output voltages of the charger supplied with your scooter is of the correct rating and type for your Italia-MK. This information should be located on a label on the bottom of the charger. - Page 16 Once the battery packs are removed place them in a dry temperature regulated space. First ensure that the wire lead from the upper battery pack is connected to the lower battery pack. Once both batteries are connected only then can the charger be plugged directly into the upper battery pack and then into the wall outlet.
-
Page 17: Troubleshooting
Troubleshooting Issue Possible Cause Solution No power / no lights Ignition Key “OFF” Turn to “ON” On/Off Switch “OFF” Turn to “ON” Fuse Check Fuse Battery not connected Ensure battery properly connected Battery needs charging Charge battery Loose or damaged wiring Check connections between ignition, battery etc. -
Page 18: Wiring Schematic
Wiring Schematic Serial/VIN # Location VIN number stamped on the steering column and hidden underneath the plastic column panel. To view the number simply remove the rectangular cap located just above the footboard to expose its location. -
Page 19: Warranty
The limited warranty as contained herein is exclusive and in lieu of all other warranties expressed or implied. There are no warranties that extend beyond the description in this limited warranty. GIO Electric guarantees this product, including charger, motor, controller, to be free of manufacturing defects for a period of 12 months. All warranty periods commence from the date of shipment.


Need help?
Do you have a question about the ITALIA-MK and is the answer not in the manual?
Questions and answers
I have an Italia electric scooter (not Italia MK). I am trying to find the « main fuse inside battery box » which my owner’s manuel revers to on p.12. Can you help me ?