Table of Contents
Advertisement
For product information,
Owner's Manual translations,
and more, visit
www.MillerWelds.com
Continuum 350 And
Continuum 500
w/Insight Coret
OM-272844J
Processes
Processes
MIG (GMAW) Welding
Pulsed MIG (GMAW-P)
Flux Cored (FCAW) Welding
Air Carbon Arc (CAC-A)
Cutting and Gouging
Description
Arc Welding Power Source
®
®
CE
File: Advanced Manufacturing Systems
2021−08
Advertisement
Table of Contents
Troubleshooting

Related Manuals for Miller Continuum 350


Summary of Contents for Miller Continuum 350
- Page 1 MIG (GMAW) Welding Pulsed MIG (GMAW-P) Flux Cored (FCAW) Welding Air Carbon Arc (CAC-A) Cutting and Gouging Description Arc Welding Power Source Continuum 350 And ® Continuum 500 ® w/Insight Coret For product information, File: Advanced Manufacturing Systems Owner’s Manual translations, and more, visit www.MillerWelds.com...
- Page 2 We know you don’t have time to do it any other way. That’s why when Niels Miller first started building arc welders in 1929, he made sure his products offered long-lasting value and superior quality.
-
Page 3: Table Of Contents
TABLE OF CONTENTS SECTION 1 − SAFETY PRECAUTIONS - READ BEFORE USING ....... . . 1-1. - Page 4 TABLE OF CONTENTS SECTION 8 − CONFIGURATION ............. . 8-1.
- Page 5 DECLARATION OF CONFORMITY for European Community (CE marked) products. MILLER Electric Mfg. LLC, 1635 Spencer Street, Appleton, WI 54914 U.S.A. declares that the product(s) identified in this declaration conform to the essential requirements and provisions of the stated Council Directive(s), Commission Regulation(s) and Standard(s).
- Page 6 DECLARATION OF CONFORMITY For United Kingdom (UKCA marked) products. MILLER Electric Mfg. LLC, 1635 Spencer Street, Appleton, WI 54914 U.S.A. declares that the product(s) identified in this declaration conform to the essential requirements and provisions of the stated Council Directive(s), Commission Regulation(s) and Standard(s).
- Page 7 EMF DATA SHEET FOR ARC WELDING POWER SOURCE Product/Apparatus Identification Product Stock Number CONTINUUM 350 400V CE 907645 CONTINUUM 500 400V CE 907648 Compliance Information Summary Applicable regulation Directive 2014/35/EU Reference limits Directive 2013/35/EU, Recommendation 1999/519/EC Applicable standards IEC 62822-1:2016, IEC 62822-2:2016...
-
Page 9: Section 1 − Safety Precautions - Read Before Using
SECTION 1 − SAFETY PRECAUTIONS - READ BEFORE USING som 2020−02 Protect yourself and others from injury — read, follow, and save these important safety precautions and operating instructions. 1-1. Symbol Usage DANGER! − Indicates a hazardous situation which, if Indicates special instructions. - Page 10 D Do not cut or weld on tire rims or wheels. Tires can explode if heat- FUMES AND GASES can be hazardous. ed. Repaired rims and wheels can fail. See OSHA 29 CFR 1910.177 listed in Safety Standards. D Do not weld on containers that have held combustibles, or on Welding produces fumes and gases.
-
Page 11: Additional Hazards For Installation, Operation, And Maintenance
D Never weld on a pressurized cylinder − explosion will result. CYLINDERS can explode if damaged. D Use only correct compressed gas cylinders, regulators, hoses, and fittings designed for the specific application; maintain them Compressed gas cylinders contain gas under high and associated parts in good condition. -
Page 12: California Proposition 65 Warnings
H.F. RADIATION can cause interference. ARC WELDING can cause interference. D High-frequency (H.F.) can interfere with radio D Electromagnetic energy can interfere with navigation, safety services, computers, and sensitive electronic equipment such as communications equipment. computers and computer-driven equipment such as robots. D Have only qualified persons familiar with electronic equipment D Be sure all equipment in the welding area is electromagnetically perform this installation. -
Page 13: Section 2 − Consignes De Sécurité − Lire Avant Utilisation
SECTION 2 − CONSIGNES DE SÉCURITÉ − LIRE AVANT UTILISATION som_2020−02_fre Pour écarter les risques de blessure pour vous−même et pour autrui — lire, appliquer et ranger en lieu sûr ces consignes relatives aux précautions de sécurité et au mode opératoire. 2-1. - Page 14 D Déplacer toutes les substances inflammables à une distance de LES PIÈCES CHAUDES peuvent 10,7 m de l’arc de soudage. En cas d’impossibilité les recouvrir provoquer des brûlures. soigneusement avec des protections homologués. D Ne pas toucher à mains nues les parties chaudes. D Ne pas souder dans un endroit là...
-
Page 15: Symboles De Dangers Supplémentaires En Relation Avec L'installation, Le Fonctionnement Et La Maintenance
D Protéger les bouteilles de gaz comprimé d’une chaleur excessive, Les CHAMPS ÉLECTROMAGNÉTIQUES (CEM) des chocs mécaniques, des dommages physiques, du laitier, des peuvent affecter les implants médicaux. flammes ouvertes, des étincelles et des arcs. D Placer les bouteilles debout en les fixant dans un support station- D Les porteurs de stimulateurs cardiaques et naire ou dans un porte-bouteilles pour les empêcher de tomber ou autres implants médicaux doivent rester à... -
Page 16: Proposition Californienne 65 Avertissements
D Effectuer régulièrement le contrôle et l’entretien de l’installation. LIRE LES INSTRUCTIONS. D Maintenir soigneusement fermés les portes et les panneaux des sources de haute fréquence, maintenir les éclateurs à une distan- D Lire et appliquer les instructions sur les ce correcte et utiliser une terre et un blindage pour réduire les étiquettes et le Mode d’emploi avant l’instal- interférences éventuelles. -
Page 17: Section 3 − Definitions
SECTION 3 − DEFINITIONS 3-1. Additional Safety Symbols And Definitions Some symbols are found only on CE products. Warning! Watch Out! There are possible hazards as shown by the symbols. Safe1 2012−05 Wear dry insulating gloves. Do not touch electrode with bare hand. Do not wear wet or damaged gloves. Safe2 2017−04 Protect yourself from electric shock by insulating yourself from work and ground. - Page 18 Do not remove or paint over (cover) the label. Safe20 2017−04 When power is applied failed parts can explode or cause other parts to explode. Safe26 2012−05 Flying pieces of parts can cause injury. Always wear a face shield when servicing unit. Safe27 2012−05 Always wear long sleeves and button your collar when servicing unit.
-
Page 19: Miscellaneous Symbols And Definitions
3-2. Miscellaneous Symbols And Definitions Some symbols are found only on CE products. Rated Maximum Voltage 1max Supply Current Arc Force Purge By Gas Voltage Input Locked Increase Protective Earth (Ground) Process Rated No Load Voltage (OCV) Arc Force Arc Control Hertz Direct Current Duty Cycle... -
Page 20: Section 4 − Specifications
4-3. Information About Default Weld Parameters And Settings NOTICE − Each welding application is unique. Although certain Miller Electric products are designed to determine and default to certain typical welding parameters and settings based upon specific and relatively limited application variables input by the end user, such default settings are for reference purposes only;... -
Page 21: Dimensions And Weight
4-6. Dimensions And Weight Hole Layout Dimensions 17.52 in. (445 mm) *27.19 in. **29 in. 17.33 in. (441 mm) (691 mm) (737 mm) 26.17 in. (665 mm) 16.09 in. (409 mm) 24.89 in. 2.28 in. (58 mm) (632 mm) .47 in. (12 mm) .47 x 1 in. - Page 22 EEP_2016−06 E. EU Ecodesign Information Model Input Minimum Power Source Effi- Maximum Idle State Power ciency Consumption Continuum 350 400V, Three-Phase 87.5% 83.7 W Continuum 500 400V, Three-Phase 89.7% 82.3 W Do not discard product (where applicable) with general waste.
-
Page 23: Duty Cycle And Overheating
4-9. Duty Cycle And Overheating Duty Cycle is percentage of 10 min- 350 Model utes that unit can weld at rated load without overheating. If unit overheats, thermostat(s) opens, output stops, and cooling fan runs. Wait fifteen minutes for unit to cool. Reduce amperage or duty cycle before welding. -
Page 24: Section 5 − Installation
SECTION 5 − INSTALLATION 5-1. Selecting A Location Do not move or operate unit where it could tip. Movement Location And Airflow Special installation may be required where gasoline or volatile liquids are present − see NEC Article 511 or CEC Section 20. -
Page 25: Weld Output Terminals And Selecting Cable Sizes
5-3. Weld Output Terminals And Selecting Cable Sizes* NOTICE − The Total Cable Length in Weld Circuit (see table below) is the combined length of both weld cables. For example, if the power source is 100 ft (30 m) from the workpiece, the total cable length in the weld circuit is 200 ft (2 cables x 100 ft). Use the 200 ft (60 m) column to determine cable size. -
Page 26: Connecting Weld Output Cables
5-5. Connecting Weld Output Cables Turn off power before connecting to weld output terminals receptacles. Failure to properly connect weld cables may cause excessive heat and start a fire, or damage your machine. Ensure all connections are tight. Do not place anything between weld cable terminal and output terminal. -
Page 27: Remote 10 Wire Feeder Control Receptacle Rc2 Information
5-6. Remote 10 Wire Feeder Control Receptacle RC2 Information Socket Socket Information +50 Volts DC Common +50 Volts DC Common Voltage Sense +50 Volts DC Power +50 Volts DC Power ENET Rx − ENET Tx − Drain ENET Tx + ENET Rx + Ref. -
Page 28: Supplementary Protector Cb1 And Communication Panel
5-8. Supplementary Protector CB1 And Communication Panel Ethernet Receptacle Used for connecting a computer di- rectly to the power source to ac- cess configuration web pages. Supplementary Protector CB1 CB1 protects the wire feed motor from overload. If CB1 opens, the wire feeder does not work. -
Page 29: Electrical Service Guide
5-10. Electrical Service Guide Elec Serv 2020-02 Failure to follow these electrical service guide recommendations could create an electric shock or fire hazard. These recommenda- tions are for an individual branch circuit sized for the rated output and duty cycle of one welding power source. In individual branch circuit installations, the National Electrical Code (NEC) allows the receptacle or conductor rating to be less than the rating of the circuit protection device. -
Page 30: Connecting 3-Phase Input Power
5-11. Connecting 3-Phase Input Power L1 (U) L2 (V) = GND/PE Earth Ground L3 (W) Input Power Contactor Connections Side View Of Unit Tools Needed: 3/8 in. 3/16 in. input5 2016−06 / 275971-A OM-272844 Page 22... - Page 31 5-11. Connecting 3-Phase Input Power (Continued) See rating label on unit and check input volt- Input Conductors L1, L2, L3 Installation must meet all National and age available at site. Local Codes − have only qualified per- Connect input conductors L1, L2, and L3 to sons make this installation.
-
Page 32: Section 6 − Recommended Setup Procedures
SECTION 6 − RECOMMENDED SETUP PROCEDURES 6-1. Welding Circuit Minimizing the welding circuit loop can prevent extreme voltage drops that produce poor welding characteristics. Welding Power Source Electrode Cable Feeder Cable Work Cable Standard Welding Circuit Volt Sense Lead Wire Feeder Workpiece In pulse welding applications using inverter... -
Page 33: Arranging Welding Cables To Reduce Welding Circuit Inductance
6-2. Arranging Welding Cables To Reduce Welding Circuit Inductance Welding Power Source Electrode Cable Feeder Cable Work Cable Voltage Sense Lead Wire Feeder Workpiece The arrangement of the cables has an effect that is significant to the welding properties. As an example, Accupulse welding process can produce high welding circuit inductance depending on cable length and arrangement. -
Page 34: Points Of Mechanics In Mig Welding
6-3. 30 Points Of Mechanics In MIG Welding 30 Pts MIG − 2014-09 Primary Power Check primary power connection at line disconnect switch or receptacle and/or cord plug. Check primary power connection at welding power source. Secondary Power Check secondary weld output connections at welding power source. Inspect condition and routing of positive weld cable to wire drive motor. -
Page 35: Arc Blow
6-4. Arc Blow Arc blow is the deflection of the welding arc from its normal path due to magnetic forces. This condition is usually encountered in direct current welding of magnetic materials, such as iron and nickel. Arc blow can happen in alternating current welding under certain conditions, but these cases are rare and the intensity of the arc blow is always less severe. -
Page 36: Basic Welding Troubleshooting
6-5. Basic Welding Troubleshooting Listed below are some problems, causes and remedies related to welding operations; however, this list does not contain every possible condition that could be encountered in welding. Trouble Probable Cause Remedy No weld output; unit completely Line disconnect switch in Off position. - Page 37 Trouble Probable Cause Remedy Porosity in weld. Dirty base metal, heavy oxides, mill scale, oil, etc. Clean base metal by brushing, grinding or use chemical cleansing before welding. Regulator/flowmeter faulty. Adjust or replace regulator/flowmeter. Gas cylinder valve closed. Open gas cylinder valve. Gas regulator diaphragm defective.
- Page 38 Trouble Probable Cause Remedy Wandering, hunting or erratic arc. Restriction in unspooler or drum adapter. Replace unspooler or repair restriction. Dirty or worn gun liner or inlet cable. Remove gun liner or inlet cable and clean or re- place. Sharp bends or kinks in gun cable or liner. Straighten gun cable and/or replace liner.
-
Page 39: Section 7 − Operation
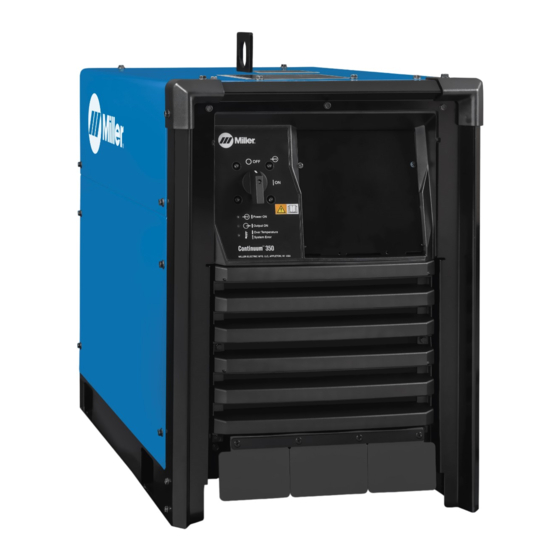
SECTION 7 − OPERATION 7-1. Operator Controls Power Switch Turns unit On or Off. Power On LED Power LED illuminates when unit is energized. Output On LED Output LED illuminates when weld output is energized. Error LED On Solid− Unit has overheated and weld out- put has been disabled. -
Page 40: Section 8 − Configuration
SECTION 8 − CONFIGURATION 8-1. Accessing Configuration Web Pages To access the power source configuration webpages you will need the optional communication panel (See Section 5-8). Connect a PC directly to the jack on the communication panel with a CAT5 or CAT6 Ethernet cable. Enter the default IP address, 169.254.0.2, into a web browser and the welder configuration web pages will open to the Home screen. -
Page 41: Setup Screen
8-3. Setup Screen Information Bar Displays the minimum and maximum Jog Auto Thread speeds in inches per minute (IPM). Edit button Displays the Load Rate in inches per minute Displays general information on welding pow- allows minimum and maximum jog speed set- (IPM) and Torch Length (Inches) to determine er source, location, asset number, serial num- ting to be changed for forward and reverse jog. -
Page 42: Arc Management Screen
8-4. Arc Management Screen Active Program Edit button allows changes to these parame- Weld Processes ters. Displays the program number, process, wire size and alloy, and gas. Edit button allows Displays available weld processes. Edit but- Lock Status these parameters to be changed. ton allows processes to be enabled or dis- Commands abled. -
Page 43: Data Management Screen
8-5. Data Management Screen Productivity Factory Reset button will take user to a Facto- System Log ry Reset screen. Read and follow all instruc- Displays arc time and wire used in inches and Displays the last entry into the system log. tions on Factory Reset screen to perform a pounds. -
Page 44: Section 9 − Maintenance & Troubleshooting
SECTION 9 − MAINTENANCE & TROUBLESHOOTING 9-1. Routine Maintenance Maintain more often Disconnect power before maintaining. during severe conditions. n = Check Z = Change ~ = Clean l = Replace Reference * To be done by Factory Authorized Service Agent l Unreadable Labels ~ Weld Terminals nl Weld Cables... -
Page 45: Error Code Troubleshooting Description And Tables
9-3. Error Code Troubleshooting Description And Tables RED LED LCD Display Description Possible Causes Potential Solutions Display Message BOOT ERROR System Booting One of the components in the Wires in the interconnecting Replace the interconnecting cable from or BOOT FAIL system is not connected to cable are disconnected. - Page 46 RED LED LCD Display Description Possible Causes Potential Solutions Display Message WRN SOFT- WARNING The software in another com- A component in the system is Update system software. WARE Incompatible ponent in the system is creat- newer than the rest of the software detect- ing a software mismatch.
- Page 47 RED LED LCD Display Description Possible Causes Potential Solutions Display Message WRN OVER- WARNING The duty cycle of the power The welding output was too Allow the welder to be powered on and AVER source has been exceeded. high for too long of a period of sitting idle until the error clears, typically Duty cycle ex- The power source shut down...
-
Page 48: Troubleshooting
9-4. Troubleshooting Trouble Remedy No weld output; completely inoperative Place line disconnect in On position (see Section 5-11). Check and replace line fuse(s), if necessary, or reset circuit breaker (see Section 5-11). Check for proper input power connections (see Section 5-11). No weld output;... -
Page 49: Section 10 − Insight Coret Installation
10-1. License Agreement You have acquired a device (Insight Core) which includes software licensed by Miller Electric Mfg. Co. Such software products, as well as associated media, printed materials, and “online” or electronic documentation for such software are protected by international intellectual property laws and treaties. -
Page 50: Enabling Insight Core Through The Continuum's Web
10-4. Enabling Insight Core Through The Continuum’s Web Pages Connect a computer to the welding power source with an Ethernet cable and open a browser. Enter the system IP address (see Section 10-3) into the address bar. The default IP address is 169.254.0.2. Press Enter. - Page 51 Under Data Connections, click Edit. Figure 10-4. Setup Page Enable or disable Insight Core by clicking your selection. After your selection is made, click Save All. Cycle the machine power by turning the machine off, waiting until the Power On light goes off, and turning power on again. Figure 10-5.
-
Page 52: Configuring The Network Connection
10-5. Configuring The Network Connection If this is the initial installation of a unit, determine what type of installation will be required. Connection information is required for each new installa- tion of the Insight Core product. To set up more than one Continuum system, or if a computer near the Continuum is not available, it is more efficient to use the Insight Core Configu- ration Utility available at the Insight Core Downloads web page: https://insight.millerwelds.com/download Connect a computer to the power source with an Ethernet cable and open a browser. - Page 53 On the screen that appears, under Security Setup, enter your network name (SSID), security type, and security key. This information is found on the Network Connectivity Survey completed by your IT Department (see Section 10-2). Click Save Security Settings to save your wireless network settings. Under WiFi Address, select Dynamic.
- Page 54 B. WiFi Connection Using Static Addressing On the Setup page, under WiFi Settings, click Edit (see Figure 10-6). On the screen that appears, under Security Setup, enter your network name (SSID), security type, and security key. This information is found on the Network Connectivity Survey completed by your IT Department (see Section 10-2).
- Page 55 C. Wired (Ethernet) Connection Using DHCP (Dynamic Addressing) On the Setup page, under Ethernet Settings, click Edit. At the top of the screen that appears, select Dynamic underneath the IP address. The Network Information below will automatically fill in. Under DNS Address, select DHCP Automatic. When finished, click Save All.
- Page 56 D. Wired (Ethernet) Connection Using Static Addressing On the Setup page, under Ethernet Settings, click Edit. At the top of the screen that appears, select Static under the IP address. Under Network Information, enter your IP address, subnet mask, and network gateway. This information is found on the Network Connectivity Survey completed by your IT Department (see Section 10-2).
-
Page 57: Verifying Network Connection
10-6. Verifying Network Connection It can take up to five minutes for a WiFi network to connect the first time. To verify the network connection, reference the feeder (or pendant) display. If a WiFi connection is being used, the box next to WiFi should be yellow. If an Ethernet connection is being used, the box next to Ethernet should be yellow. -
Page 58: Determining Device Serial Number And License Key
10-7. Determining Device Serial Number And License Key Obtaining the device serial number and license key is necessary for product registration. Registration will activate your Insight Core account and give access to all Insight Core data. Insert a USB drive into the front port on the Continuum Feeder. USB Port Ref. - Page 59 Remove the USB drive from the feeder and insert it into your computer. Allow time for the computer to recognize the USB drive. Find and open the folder named Device License Keys on the USB drive. Figure 10-15. Device License Keys Folder Open the .txt file called “IP_MAC_ADDR_LIC…”...
-
Page 60: Registering Initial Device And Creating An Account
10-8. Registering Initial Device And Creating An Account Open a web browser and navigate to https://insight.millerwelds.com/registration. Fill in all information shown in Figure 10-18. Use serial number and license key from Section 10-7. If this device is an additional module to be added to your existing fleet already registered, click Log In button and proceed to Section 10-9. Serial Number MC10001Z AC1000000X1X1X00XX00X0XX... -
Page 61: Registering Additional Devices
10-9. Registering Additional Devices Log in to Insight Core website at https://insight.millerwelds.com/. Click on the Configuration tab (See Figure 10-20). On the Configuration tab, click on the Register New Device button. Figure 10-20. Configuration Screen Enter the information for the new device you intend to register. A confirmation screen will appear. -
Page 62: Section 11 − Electrical Diagrams
SECTION 11 − ELECTRICAL DIAGRAMS Figure 11-1. Circuit Diagram For Continuum 350 Model (Page 1 of 2) OM-272844 Page 54... - Page 63 272802-B OM-272844 Page 55...
- Page 64 TO PC2 RC6(SHEET 1) TO PC3 RC1 (SHEET 1) Figure 11-2. Circuit Diagram For Continuum 350 Model (Page 2 of 2) OM-272844 Page 56...
- Page 65 272802-B OM-272844 Page 57...
- Page 66 Figure 11-3. Circuit Diagram For Continuum 500 Model (Page 1 of 2) OM-272844 Page 58...
- Page 67 272800-B OM-272844 Page 59...
- Page 68 TO PC2 RC6(SHEET 1) TO PC3 RC1 (SHEET 1) Figure 11-4. Circuit Diagram For Continuum 500 Model (Page 2 of 2) OM-272844 Page 60...
- Page 69 272800-B OM-272844 Page 61...
-
Page 70: Section 12 − Parts List For 350 And 500 Models
SECTION 12 − PARTS LIST FOR 350 AND 500 MODELS Figure 12-7 Figure 12-6 Figure 12-2 Figure 12-3 Figure 12-4 Figure 12-5 275982-D Figure 12-1. Main Assembly OM-272844 Page 62... - Page 71 Item Dia. Part Mkgs. Description Quantity Figure 12-1. Main Assembly Model Model ... . . +283001 Base ,Continuum .........
- Page 72 Hardware is common and not available unless listed. Ref. 269780-D Figure 12-2. Right-Hand Windtunnel w/Components Item Dia. Part Mkgs. Description Quantity Figure 12-2. Right-Hand Windtunnel w/Components (Figure 12-1, Item 12) Model Model ....265243 Windtunnel, Rh .
- Page 73 Hardware is common and not available unless listed. 269781-B Figure 12-3. Left-Hand Windtunnel w/Components Item Dia. Part Mkgs. Description Quantity Figure 12-3. Left-Hand Windtunnel w/Components (Figure 12-1, Item 13) Model Model ..L1-L4 ..252375 Inductor, Input .
- Page 74 Hardware is common and not available unless listed. 269782-C Figure 12-4. Fan Panel Assembly Item Dia. Part Mkgs. Description Quantity Figure 12-4. Fan Panel Assembly (Figure 12-1, Item 6) ....284550 Panel, Fan Motor .
- Page 75 Hardware is common and not available unless listed. 269783-C Figure 12-5. Front Panel Assembly Item Dia. Part Description Quantity Mkgs. Figure 12-5. Front Panel Assembly (Figure 12-1, Items 5, 7 and 9) ....283066 Panel, Front .
- Page 76 Hardware is common and not available unless listed. 275951-D Figure 12-6. Penthouse Assembly Item Dia. Part Description Quantity Mkgs. Figure 12-6. Penthouse Assembly (Figure 12-1, Item 10) ....170647 Bushing, Snap-in Nyl 1.312 Id X 1.500 Mtg Hole .
- Page 77 Hardware is common and not available unless listed. Ref. 269785-H Figure 12-7. Rear Panel Assembly Item Dia. Part Description Quantity Mkgs. Figure 12-7. Rear Panel Assembly (Figure 12-1, Item 4) ....283083 Panel, Rear .
- Page 78 Notes...
- Page 79 Effective January 1, 2021 (Equipment with a serial number preface of NB or newer) This limited warranty supersedes all previous Miller warranties and is exclusive with no other guarantees or warranties expressed or implied. LIMITED WARRANTY − Subject to the terms and conditions TIG Torches (No Labor) below, Miller Electric Mfg.
- Page 80 Contact the Delivering Carrier to: File a claim for loss or damage during shipment. For assistance in filing or settling claims, contact your distributor and/or equipment manufacturer’s Transportation Department. © ORIGINAL INSTRUCTIONS − PRINTED IN USA 2021 Miller Electric Mfg. LLC 2021−01...
Need help?
Do you have a question about the Continuum 350 and is the answer not in the manual?
Questions and answers