Table of Contents
Advertisement
Quick Links
Baby Trend, Inc.
www.babytrend.com
13048 Valley Blvd.
Fontana CA 92335
Imported by:
Big W Australia
1 Woolworths Way
Bella Vista, NSW. 2153 Australia
Customer Service:
TOMY Australia
Toll Free No : 1 800 492 236
Read all instructions BEFORE assembly and USE of product.
TM
KEEP INSTRUCTIONS FOR FUTURE USE.
ST04
Instruction Manual
TM
ST04XXX_083019AU
Advertisement
Table of Contents

Summary of Contents for BABYTREND ST04
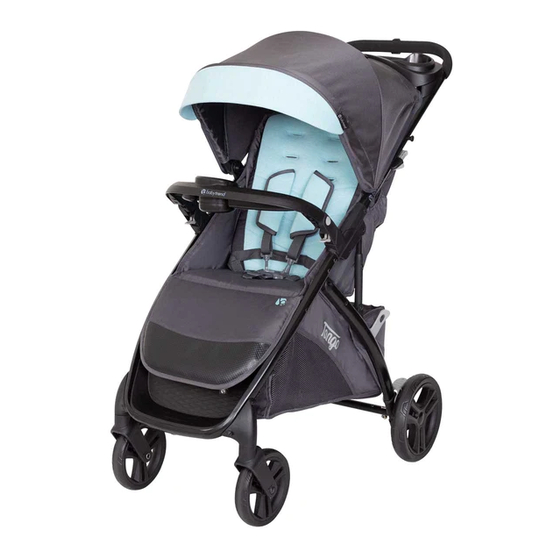
- Page 1 KEEP INSTRUCTIONS FOR FUTURE USE. Baby Trend, Inc. www.babytrend.com 13048 Valley Blvd. Fontana CA 92335 Imported by: Big W Australia 1 Woolworths Way Bella Vista, NSW. 2153 Australia Customer Service: TOMY Australia Toll Free No : 1 800 492 236 ST04 Instruction Manual ST04XXX_083019AU...
- Page 2 PARTS WARNING WARNING: Check that you have all the parts for this model before Please follow all of these assembling the stroller. instructions to ensure the safety of your child. Keep these instructions for future reference. WARNING: Failure to follow these instructions could result in serious injury or death.
- Page 3 WARNING ASSEMBLY IMPORTANT! NEVER leave the harness buckled when not fitted to a child To ensure safe operation of your in the stroller because the harness can form loops which may stroller, please follow these instructions carefully. Please pose a strangulation hazard. keep these instructions for future reference.
-
Page 4: Unfold The Stroller Frame
ASSEMBLY ASSEMBLY UNFOLD THE STROLLER FRAME FRONT WHEELS / REAR WHEELS • To unfold, unlock the release The front wheels and rear wheels MUST be installed prior to use. lever by pulling it out from the rivet (Fig. 1a). Unfold the stroller frame by pulling upward on the •... - Page 5 ASSEMBLY ASSEMBLY SEAT BACK POSITION CANOPY • press the To recline the seat: pull front of 4) • To open the canopy: side tabs on the adjuster and canopy forward (Fig. 4a). pull downward. To place the seat into the upright position, hold the strap hoop and push the adjuster upward On the front edge of the canopy,...
- Page 6 ASSEMBLY ASSEMBLY To Insert The Parent Tray: (1) gently move FLIP-UP LEG REST / BASKET ACCESS 6) • the canopy rod forward until it clicks into the last position (Fig. 6a). • Reach under the leg rest to (2) Align the parent tray tabs to the inner tabs unsnap the strap and lift it up to •...
- Page 7 ASSEMBLY ASSEMBLY Mobile phone positioner: Align CHILD TRAY • mobile phone to the clip and insert it through the grips. Make WARNING: sure to push the phone all the way down into the positioner child’s tray is not a restraint (Fig.
-
Page 8: Rear Brakes
SAFETY SAFETY REAR BRAKES SECURE THE CHILD WARNING: WARNING: Avoid serious injury from falling or Always sliding out. Always use the safety harness. set brakes when the stroller STRANGULATION is not being pushed so that the stroller will not roll HAZARD: Child can strangle in loose safety away. - Page 9 SAFETY SAFETY • To make adjustments: undo the hook and loop fasteners • To secure the child, place Adjust for a snug fit underneath the fabric on the rear of the seat. Grip the the safety harness around buckles and pass them through the slots (1). the child’s waist and over the shoulders.
-
Page 10: To Fold Stroller
SAFETY FOLD USING THE STROLLER TETHER STRAP TO FOLD STROLLER WARNING: Use the tether strap to stop the stroller WARNING: Care from rolling away. must be taken when folding • The stroller is designed for use on flat or gently sloping and unfolding the stroller to surfaces, and may be unstable on higher sloping and prevent finger entrapment. -
Page 11: To Unfold Stroller
FOLD UNFOLD • Holding the straps lift the stroller frame until it fully closes (Fig. TO UNFOLD STROLLER 11c). Compress the stroller and lock the release lever (Fig. 11d). CAUTION: • Always tuck the pull straps back into the seat fabric (Fig. 11e). Do not allow children near stroller while unfolding. -
Page 12: Maintenance
MAINTENANCE MAINTENANCE SECURING THE SEAT FABRIC • Secure the shorter straps with D-Rings around the bar underneath the seat as shown • If assembly or replacement in (Fig. 13c). Thread each needed: Always ensure strap completely through the the strap under the seat is D-ring opening to create a loop. -
Page 13: Care And Maintenance
MAINTENANCE MAINTENANCE FRONT WHEEL RELEASE CARE AND MAINTENANCE • If replacing the front wheel, push SEAT PAD the release button on the side of the wheel hub and pull the wheel • To clean the seat pad, use from the hub (Fig. 14). only mild household soap or detergent and warm water on a sponge or clean cloth. - Page 14 Copyright © 2019, Baby Trend Inc., All Rights Reserved. Copyright © 2019 Baby Trend Inc., All Rights Reserved.


Need help?
Do you have a question about the ST04 and is the answer not in the manual?
Questions and answers