Sime MURELLE EQUIPE 220 BOX ErP User, Installation And Servicing Instructions
Hide thumbs
Also See for MURELLE EQUIPE 220 BOX ErP:
- Manual (80 pages) ,
- Installation and servicing instructions (56 pages) ,
- Manual (72 pages)
Advertisement
Quick Links
6331835A
6331835B - 09/2022 - R0
Cod. 6316191 - 08/2013
- 09/2022 - R0
Cod. 6316191 - 08/2013
EN
EN
BRAVA DGT HE
BRAVA DGT HE
MURELLE EQUIPE
25 - 30 - 35
25 - 30 - 35
220-330-440-550-660 BOX ErP
INSTALLATION AND SERVICING INSTRUCTIONS
USER, INSTALLATION AND SERVICING INSTRUCTIONS
INSTALLATION AND SERVICING INSTRUCTIONS
ENSURE THAT THESE
ENSURE THAT THESE
INSTRUCTIONS ARE LEFT
INSTRUCTIONS ARE LEFT
FOR THE USER AFTER
FOR THE USER AFTER
COMPLETION OF THE
COMPLETION OF THE
BENCHMARK SECTION
BENCHMARK SECTION
PLEASE READ THE
PLEASE READ THE
IMPORTANT NOTICE
IMPORTANT NOTICE
WITHIN THIS GUIDE
WITHIN THIS GUIDE
REGARDING YOUR BOILER
REGARDING YOUR BOILER
WARRANTY
WARRANTY
199839
199838
199838
BOILER DETAILS
please position here a sticker
from installation pack
TRANSLATION OF THE ORIGINAL INSTRUCTIONS
Advertisement

Related Manuals for Sime MURELLE EQUIPE 220 BOX ErP


Summary of Contents for Sime MURELLE EQUIPE 220 BOX ErP
- Page 1 6331835A 6331835B - 09/2022 - R0 Cod. 6316191 - 08/2013 - 09/2022 - R0 Cod. 6316191 - 08/2013 BRAVA DGT HE BRAVA DGT HE MURELLE EQUIPE 25 - 30 - 35 25 - 30 - 35 220-330-440-550-660 BOX ErP INSTALLATION AND SERVICING INSTRUCTIONS USER, INSTALLATION AND SERVICING INSTRUCTIONS INSTALLATION AND SERVICING INSTRUCTIONS ENSURE THAT THESE...
- Page 2 For the first year all of our appliances are protected by our manufacturer’s guarantee which covers both parts and labour. As you would expect from Sime Ltd, it is our aim to provide our valued customers with the best in after sales and service.
-
Page 3: Table Of Contents
CONTENTS DEVICE DESCRIPTION ............................INSTALLATION ............................... CHARACTERISTICS ..............................COMMISSIONING, USE AND MAINTENANCE ......................FAULT FINDING ..............................ESPLOSI PER PARTI DI RICAMBIO .......................... APPENDIX 1 (GUIDANCE HHIC - OCTOBER 2018 ISSUE 1.0) ................... USER INSTRUCTIONS ............................. Important Information IT IS A STATUTORY REQUIREMENT THAT ALL GAS APPLIANCES ARE INSTALLED BY COMPETENT PERSONS, IN ACCORDANCE WITH THE GAS SAFETY (INSTALLATION AND USE) REGULATIONS (CURRENT EDITION). -
Page 4: Device Description
NOTE: The installation must incorporate a hydraulic separator or plate heat exchanger. The hydraulic separator available from Sime Ltd is supplied with modules in a kit code 8101552 and the tubes connecting the hydraulic separator in the kit code 8101532. - Page 5 NOTE: The installation must incorporate a hydraulic separator or plate heat exchanger. The hydraulic separator available from Sime Ltd is supplied with modules in a kit code 8101552 and the tubes connecting the hydraulic separator in the kit code 8101532.
- Page 6 NOTE: The installation must incorporate a hydraulic separator or plate heat exchanger. The hydraulic separator available from Sime Ltd is supplied with modules in a kit code 8101553 and the tubes connecting the hydraulic separator in the kit code 8101533.
- Page 7 1.2.4 “MURELLE EQUIPE 660 BOX ErP” (fig. 1/c) 3300 FIXTURES System supply (Flange PN6-DN100) System return (Flange PN6-DN100) Gas (Flange PN6-DN50) S3 Condensation drain ø 40 NOTE: Assembly of a hydraulic separator or plate exchanger is also mandatory. The hydraulic separator is supplied with modules in a kit code 8101553 and the tubes connecting the hydraulic separator in the kit code 8101533.
- Page 8 TECHNICAL SPECIFICATIONS 220 BOX 330 BOX 440 BOX 550 BOX 660 BOX MURELLE EQUIPE Generators with a heat output kW 105.4 n° Heat output nominal (80-60°C) (Pn max) 212,4 318,6 424,8 531,0 637,2 Heat output nominal (50-30°C) (Pn max) 225.2 337.8 454.0 563.0...
- Page 9 OPERATING DIAGRAM (FIG. 2) 17 Safety valve 5 bar 18 Return manifold 1 Cascade delivery probe (SMC) 19 Gas manifold 2 Hydraulic compensator 20 Delivery manifold 3 Ankle boot ISPESL 21 3-way valve Ø 1 1/4 “ A - Thermometer 0-120 ° C 22 8 liter expansion vessel B - 0-10 bar pressure gauge with tap 23 Gas cock...
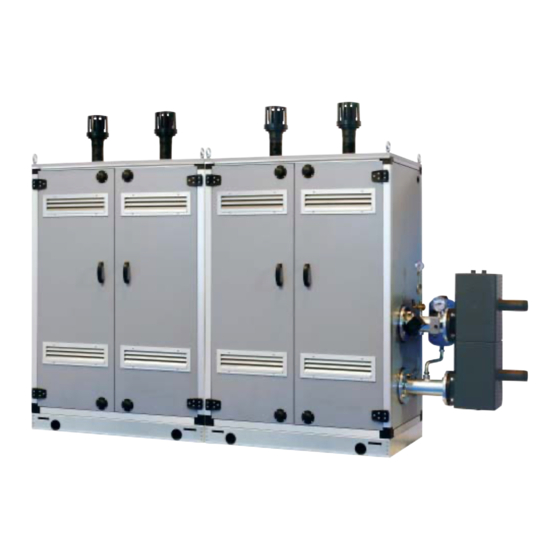
- Page 10 MAIN COMPONENTS (FIG. 3) Code 8117080 Model MURELLE EQUIPE 220 BOX ErP Serial n. 9999999999 PAR 1 = 68 (G20) / 70 (G31) PAR 2 = 9 System return manifold Gas isolation valve System supply manifold Gas valve Ignition electrode Primary exchanger Ignition transformer Control panel 10 Heating return probe (SR)
-
Page 11: Installation
INSTALLATION for modules “440-550-660 BOX ErP” The unit is suitable for external INSTALLATION installation in a fixed location. It must Double box (size: 1100 x 790 x 1600) for be installed by qualified engineers hydraulic separator code 8101527 2.2.1 Indoors in compliance with all instructions Hydraulic separator kit code 8101552 “MURELLE EQUIPE 220-330-440-550-... - Page 12 The system should be treated Installed in a room in accordance with BS 7593. Sime Ltd High level (within 15% of the room height 2.3.2 Filter on the gas pipe recommend only the use of Fernox prod- from ceiling) - 2cm²/KW of net heat input...
- Page 13 It is however possible to move the exhaust of the left by simply rotating the manifold 180°. MURELLE EQUIPE 220 BOX ErP MURELLE EQUIPE 330 BOX ErP MURELLE EQUIPE 220 BOX ErP MURELLE EQUIPE 330 BOX ErP...
- Page 14 MURELLE EQUIPE 440 BOX ErP MURELLE EQUIPE 440 BOX ErP exhaust manifold kit con kit collettore fumi code 8102532 cod. 8102532 ø MURELLE EQUIPE 440 BOX ErP MURELLE EQUIPE 440 BOX ErP (with box container for hydraulic separator (con box contenitore per separatore idraulico code 8101527) e kit sicurezze ISPSEL cod.
- Page 15 MURELLE EQUIPE 550 BOX ErP MURELLE EQUIPE 550 BOX ErP exhaust manifold kit con kit collettore fumi code 8102533 cod. 8102533 ø MURELLE EQUIPE 550 BOX ErP MURELLE EQUIPE 550 BOX ErP (con box contenitore per separatore idraulico (with box container for hydraulic separator e kit sicurezze ISPSEL cod.
- Page 16 MURELLE EQUIPE 660 BOX ErP MURELLE EQUIPE 660 BOX ErP con kit collettore fumi exhaust manifold kit cod. 8102534 code 8102534 ø 250 ø 200 MURELLE EQUIPE 660 BOX ErP MURELLE EQUIPE 660 BOX ErP (con box contenitore per separatore idraulico (with box container for hydraulic separator e kit sicurezze INAIL cod.
- Page 17 TUBES CONNECTING THE HYDRAULIC SEPARATOR KIT (FIG. 7 - FIG. 7/A) Tubes connecting the hydraulic separator kit code 8101532 supplied as option for “MURELLE EQUIPE 220-330 BOX ErP” models it is formed (fig. 7): System supply flanged section code 6291968 System return flanged section code 6291968 Gaskets, nuts and fastening screws M16 Expansion vessel 8 liters code 6245108...
- Page 18 RS-485 BOARD (FIG. 8) Each generator is supplied with the RS- 485 board which allows you to manage the boilers in sequence/cascade (see fig 8). The board is placed on the back of the control panel. 2.8.1 MODBUS mode This mode allows MODBUS...
- Page 19 2.9.2 Hydraulic separator “220-330 BOX ErP” (fig. 10) The hydraulic separator is supplied separately in a kit code 8101552 complete with gaskets, nuts and fastening screws (figure 10). 2.9.3 Hydraulic separator “440-550-660 BOX ErP” (fig. 10/a) The hydraulic separator is supplied separately in a kit code 8101553 complete with gaskets, nuts and fastening screws (figure 10/a).
- Page 20 2.10 ELECTRICAL CONNECTIONS NOTE: Sime declines all responsibility 230V – 50 Hz single phase voltage is for injury or damage to persons, required using a fuse protected main Each module is supplied with a power cord animals or property resulting from the switch with at least 3 mm.
- Page 21 2.10.2 Electrical connection of generators in sequence/cascade (fig. 11/a) WARNING: The manufacturer is not responsible for any WARNING: The external temperature sensor “SE” is damage caused by failure to earth the appliance or failure OBLIGATORY and MUST be connected to the master boiler to observe the information provided in the wiring diagrams WARNING: The external temperature sensor “SE”...
- Page 22 The heating demand can be controlled by must be set as follows: RESET button on the relevant boiler. use of remote control unit SIME HOME “0” to identify the master boiler A lockout in the master boiler is reset (code 8092281). The remote control unit “1”...
-
Page 23: Characteristics
ON = Electricity supply to boiler is on PC CONNECTION OFF = Electricity supply to boiler is on but nor ready To be used only with the SIME programming kit and only for functioning. However, the protection by authorised personnel. Do not connect other electronic functions are active. - Page 24 ACCESS TO INSTALLER’S INFORMATION 1. Display of external temperature, only 9. Display of fan speed in rpm x 100 (e.g. 4.800 and 1850 rpm) 1. Visualizzazione temperatura esterna 9. Visualizzazione numero giri ventilatore in rpm x 100 (es. 4.800 e 1.850 rpm) with external sensor connected solo con sonda esterna collegata 2.
- Page 25 18. Display of Heating return sensor value (SR) Display of valve closing opening control with board MIXED ZONE 2 18. Visualizzazione valore sonda ritorno riscaldamento (SR) 29. Visualizzazione comando chiusura valvola con schedino (respectively ON and OFF) ZONA MIX 2 (rispettivamente ON e OFF) 30.
- Page 26 0 = Disabled automatically after 60 seconds, or by of voltage 1 = Enabled Allocation of SIME HOME channels 0 = Not assigned pressing one of the control keys (2 fig. 12). 1 = Circuit 1 2 = Three-zone circuit 3.3.1 Replacing the board or RESETTING...
- Page 27 PARAMETERS INSTALLER BOILER PAR 2 EXPANSION CARD Instantaneous with diverter valve and flowmeter UNIT OF INC/DEC DEFAULT DESCRIPTION RANGE Instantaneous with diverter MEASUREMENT UNIT SETTING valve flowmeter and solar Number of expansion combination 0 ... 3 boards Remote control DHW Mix valve stroke time 0 ...
- Page 28 12.090 lockout. This can happen the first Interface with the following electronic 8.313 time the boiler is switched on after systems: remote control SIME HOME 5.828 a long period of inactivity due to the code 8092281, thermal regulator RVS, 4.161...
- Page 29 HEAD AVAILABLE TO SYSTEM (FIG. 14) Residual head for the heating system is shown as a function of rate of flow in the graph in fig. 14. 1200 1000 1000 1250 1500 1750 2000 2250 2500 2750 3000 3250 3500 3750 4000 4250...
-
Page 30: Commissioning, Use And Maintenance
Proceed to put the boiler into operation working gas supply pressure. If required Combustion check as follows: contact Sime Ltd for further assistance. Connect the flue gas analyser to the Check the operational (working) flue gas sampling point as shown in gas inlet pressure the diagram (fig. - Page 31 69 (*) (G20) power by adjusting the shutter (5 550 BOX ErP This operation must be performed by fig. 16): 660 BOX ErP authorised personnel using original Sime 220 BOX ErP MAX power components. 330 BOX ErP PROPANE CO2 (Methane)
- Page 32 MAINTENANCE (FIG. 20) To ensure correct operation and efficiency it is important that the boiler is serviced at regular intervals, at least once a year (this may also be a condition of the warranty). Servicing must only be done by a qualified technician. During the routine service the condensate drain can be checked, by carefully pouring water into the combustion chamber, while the...
- Page 33 FUNCTIONING ERRORS Apre When there is a functioning error, an Circuito Circuito alarm appears on the display and the blue riscaldamento 2 riscaldamento 2 luminous bar becomes red. Descriptions of the errors with relative alarms and solutions are given below: WATER PRESSURE ERROR...
- Page 34 Apre SAFETY/LIMIT THERMOSTAT ERROR ALARM 07 (fig. 23/6) If either the 95 degree stat or the heat Circuito exchanger safety stat opens, the burner riscaldamento 2 will turn off and ALL 07 will be displayed. Press the key of the controls (2) to start up the boiler again.
- Page 35 (impianto tre zone) “ALL 15” FAN ERROR (fig. 23/12) SAFETY THERMOSTAT INTERVENTION AUXILIARY SENSOR ANOMALY (S3) rcuito scaldamento 2 SECOND MIXED ZONE “ALL 22” (fig. 23/16) “ALL 26” (fig. 23/20) The fan speed does not fall within the Circuito riscaldamento 2 When it results that the MIXED ZONE When the solar probe is open or short rated speed range.
- Page 36 CAUTION: In the event of sequence/ Apre cascade connection, error codes 70 and 71 will appear on the SIME HOME remote control display: ALARM 70 When an anomaly affects cascade operation (cascade delivery sensor ALL Fig.
- Page 37 SERVICE RECORD It is recommended that your heating system is serviced regularly and that the appropriate Service Interval Record is completed. Service Provider Before completing the appropriate Service Record below, please ensure you have carried out the service as described in the manufacturer’s instructions. Always use the manufacturer’s specified spare part when replacing controls.
-
Page 40: Fault Finding
FAULT FINDING SHORT CIRCUIT CHECK RESISTANCE TO EARTH CHECK If an electrical fault occurs on the appli- ance the preliminary electrical system Switches turned FULL ON - meter set on Appliance must be disconnected from checks must be carried out first. ø... -
Page 41: Esplosi Per Parti Di Ricambio
ESPLOSI PER PARTI DI RICAMBIO MURELLE EQUIPE 220-230-440-550 BOX ErP... - Page 42 110-220-330 BOX 440-550 BOX...
- Page 43 P100 BOX / 110 BOX P200 BOX / 220 BOX P300 BOX / 300 BOX P400 BOX / 400 BOX...
- Page 44 P500 BOX / 550 BOX 220 BOX 330 BOX (GROPPALLI) (GROPPALLI)
- Page 45 440 BOX 550 BOX (GROPPALLI) (GROPPALLI)
- Page 46 ATTENTION: use only original spare parts. Failure to comply with the above may compromise the safety of the device and the immediate forfeiture of the warranty. Position Code Description Where used Advised parts 6294802 Boiler support 6278915 Main exchanger body 6010866 Control panel support bracket 6070815...
- Page 47 5193304 5192923 Bracket manifold kit 078A 5192920 Bracket manifold kit CENTROTHERM 6142410 Bend 3/4"x18 L=135 6304700 Control panel 6305160 Guidelight with led 6305120 Kit Rubber button 6247327 Cap for time programmer 6304890 Flap door assembly 6328950 Main PCB 2211610 Earth faston 6305000 Cover 6305010...
- Page 48 MURELLE EQUIPE 660 BOX ErP...
- Page 51 ATTENTION: use only original spare parts. Failure to comply with the above may compromise the safety of the device and the immediate forfeiture of the warranty. Position Code Description Where used Advised parts 5193304 6294802 Boiler support 6278915 Main exchanger body 6010866 Control panel support bracket 6070815...
- Page 52 8089530 Exhaust terminal kit PP D.80 5192923 Bracket manifold kit 6142410 Bend 3/4"x18 L=135 6304700 Control panel 6305160 Guidelight with led 6305120 Kit Rubber button 6247327 Cap for time programmer 6304890 Flap door assembly 6328950 Main PCB 6305000 Cover 6305010 connection cover 6305020 Time programmer cover...
-
Page 53: Appendix 1 (Guidance Hhic - October 2018 Issue 1.0)
APPENDIX 1 (GUIDANCE HHIC - OCTOBER 2018 ISSUE 1.0) Manufacturers Instructions Manufacturer’s instructions must be followed for the correct connection of the condensate discharge pipe from the boiler as this may vary due to the design of the boiler. For example a visible air break and trap is not required if there is a trap with a minimum condensate seal of 75 mm incorporated into the boiler. - Page 54 Figure 1 – Connection of condensate discharge pipe to internal soil and vent stack. Note – Check manufacturer’s instructions to see if an air break is required. Boiler Visible air break 75 mm trap Visible air break and trap not required if there is a trap with a minimum condensate seal of 75 mm incorporated into the boiler Soil and vent stack Invert...
- Page 55 Internal Condensate Pipe Discharge Termination Figure 2(a) – Connection of a condensate discharge pipe downstream of a sink, basin, bath or shower waste trap. Note – Check manufacturer’s instructions to see if an air break is required. Boiler Visible air break 75 mm trap Visible air break and trap not required if there is a trap with a minimum condensate seal of 75 mm incorporated into the boiler.
- Page 56 Internal Condensate Pipe Discharge Termination Figure 2(b) – Connection of a condensate discharge pipe upstream of a sink, basin, bath or shower waste trap Boiler Visible air break at plug hole – alternative connection can be below sink trap 75 mm sink, basin, bath or shower waste trap Open end of condensate discharge pipe direct into gully 25 mm min below grating but above water level;...
- Page 57 Internal Condensate Pipe Discharge Termination The possibility of waste pipes freezing downstream of the connection point should be considered when determining a suitable connection point - e.g. a slightly longer pipe run to an internal soil stack may be preferable to a shorter run connecting into a kitchen waste pipe discharging directly through the wall to an external drain.
- Page 58 Internal Condensate Pipe Discharge Termination Figure 3 – Connection of a condensate pump - typical method (NB manufacturer’s detailed instructions should be followed). Note – Any external pipe work should be insulated, pipe cut at 45 degrees and a drain/ leaf Condensate discharge from boiler Condensate pump Visible air break at plug hole...
- Page 59 External Connections External Connections pumped connection is impractical to install. The pipe work from the boiler should be of a minimum 19mm ID or as per manufacturer’s instructions and the condensate discharge pipe shall be run in a standard drainpipe material, e.g. poly (vinyl chloride) (PVC), un-plasticized poly (vinyl chloride) (PVC-U), acrylonitrile butadiene-styrene (ABS), polypropylene (PP) or chlorinated poly (vinyl chloride) (PVC-C).
- Page 60 External Connections Figure 4 – Connection of condensate discharge pipe to external soil and vent stack Boiler Visible air break 75 mm trap Visible air break and trap not required if there is a trap with a minimum condensate seal of 75mm incorporated into the boiler.
- Page 61 External Connections Alternative Solutions Cold weather protection methods approved or endorsed by boiler manufacturers and/or service organisations may be adopted if these are considered suitable by the parties involved. It is the responsibility of the manufacturer of these products to ensure they have completed the necessary testing or calculations to ensure the product offers suitable protection to prevent the condensate pipe from freezing.
- Page 62 External Connections Electric Trace Heating condensate pipe to raise the temperature of the condensate pipe in freezing conditions. Trace heating takes the form of an electrical heating element run in physical contact along the length of the condensate pipe. The pipe is usually covered with thermal insulation to retain heat losses from the pipe.
- Page 63 External Connections Figure 5 – External termination to rainwater downpipe (NB only combined foul/rainwater drain) Condensate discharge pipe from boiler Pipe size transition point Water/weather proof insulation 43mm 90° male/female bend External rain water pipe into foul water External air break Air gap Minimum internal diameter 19mm Minimum internal diameter 30mm...
- Page 64 External Connections External Termination of the Condensate Pipe Where the condensate discharge pipe is terminated over an open foul drain or gully, the pipe should terminate below the grating level, but above water level, in order to minimise “wind chill” at the open end. Pipe drainage and resistance to freezing will be improved if the termination end of the condensate pipe is cut at 45 degrees as opposed to a straight cut.
- Page 65 External Connections Figure 6 – External drain, gully or rainwater hopper Boiler Visible air break 38mm minimum trap Visible air break and trap not required if there is a trap with a minimum condensate seal of 38 mm incorporated into the boiler – refer to manufacturers instructions External length of pipe 3 m maximum Open end of condensate discharge pipe direct into gully 25 mm min below grating but above water level;...
- Page 66 External Connections Figure 7 – Example of a purpose made soakaway Condensate discharge pipe from boiler Ground (this section of the condensate discharge pipe may be run either above or below round level); End cut at 45° Diameter 100 mm minimum plastic tube Bottom of tube sealed Limestone chippings Two rows of three 12 mm holes at 25 mm centres, 50 mm from bottom of tube and facing...
-
Page 67: User Instructions
USER INSTRUCTIONS SINGLE MODULE IGNITION (fig. 24) The first ignition of the boiler must be car- ried out by qualified technical personnel. Apre Successively, if it is necessary to start up the boiler again, adhere strictly to the following instructions: open the gas tap to allow the flow of the fuel and move the main switch of the system to “ON”. - Page 68 ERRORS AND SOLUTIONS assistance from qualified technical ALL 70 and ALL 71 personnel. Apre These alarms appear on the SIME Circuito When there is a functioning error, the di- HOME remote control display. Request riscaldamento 2 splay shows an alarm and the blue lumi-...
- Page 72 Sime Ltd 1a Blue Ridge Park Thunderhead Ridge Glasshoughton, Castleford, WF10 4UA Phone: 0345 901 1114 Fax: 0345 901 1115 www.sime.co.uk Email: enquiries@sime.co.uk...
Need help?
Do you have a question about the MURELLE EQUIPE 220 BOX ErP and is the answer not in the manual?
Questions and answers