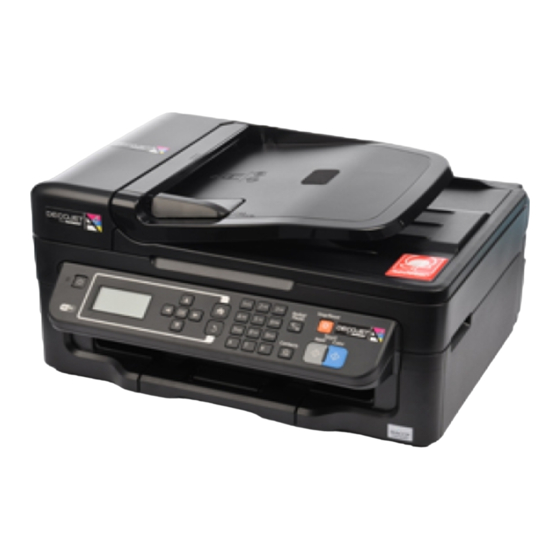
Modecor Decojet A4 Getting Started
Hide thumbs
Also See for Decojet A4:
- Getting started (58 pages) ,
- Quick start manual (9 pages) ,
- Getting started (3 pages)
Table of Contents
Advertisement
Quick Links
COME INIZIARE
GETTING STARTED
Indice -
Index
Garanzia di alimentarietà - Foodsafe guarantee - Alimentary Certification ................................... 2
Installazione stampante e prima accensione - Printer set-up ........................................................... 2
Installazione software - Install the software .................................................................................... 6
Pannello di comandi - Operation panel .......................................................................................... 12
Impostazione qualità consigliata da stampante - Quality settings ............................................... 13
Impostazione qualità consigliata da pc - Quality settings ............................................................ 14
Utilizzo del cassetto posteriore - Use of rear tray ......................................................................... 15
Eseguire una copia semplice - Copy in stand alone ....................................................................... 16
Eseguire una copia con adatta pagina - copy with auto fit to page ................................................ 16
Stampa di una foto da pc - Print a photo from your pc ................................................................. 18
Sostituzione cartucce - Ink Cartridge Replacement ....................................................................... 20
Acquisizione immagine da pc - Scanning image with PC ............................................................. 23
Eseguire la pulizia della testina - Printhead Cleaning.................................................................... 27
Utilizzo degli inchiostri - Use of inks ............................................................................................ 28
Decojet A4
GETTING STARTED 1
Advertisement
Table of Contents

Related Manuals for Modecor Decojet A4


Summary of Contents for Modecor Decojet A4
-
Page 1: Table Of Contents
Sostituzione cartucce - Ink Cartridge Replacement ............... 20 Acquisizione immagine da pc - Scanning image with PC ............. 23 Eseguire la pulizia della testina - Printhead Cleaning..............27 Utilizzo degli inchiostri - Use of inks .................... 28 Decojet A4 GETTING STARTED 1... -
Page 2: Garanzia Di Alimentarietà - Foodsafe Guarantee - Alimentary Certification
Garanzia di alimentarietà – Foodsafe guarantee – Alimentary Certification Il mancato utilizzo di consumabili Modecor (supporti, cartucce, inchiostri, ecc), comporterà la decadenza della garanzia e della certificazione di alimentarietà. The Guarantee and Alimentary Certification remain valid only if the printer is used exclusively with Modecor brand consumables (cartridges, spare parts, inks, etc.). - Page 3 5. Selezionare ora legale Select daylight saving time 6. Selezionare il formato data Select date format 7. Immettere la data Enter the date 8. Selezionare il formato ora Select time format 9. Immettere l’ora Enter hour GETTING STARTED...
- Page 4 10. Aprire il coperchio Raise the printer cover 11. Rimuovere la striscia gialla dalle cartucce (ATTENZIONE: controllare che il foro presente sotto il nastro protettivo sia completamente libero) First remove the yellow strip form the cartridge (WARNING: Check that the hole is completely free of the protective film and any eventual residues) 12.
- Page 5 16. Attendere la fine dell’installazione Wait until the process is completed GETTING STARTED...
-
Page 6: Installazione Software - Install The Software
Installazione software - Install the software 1. Inserire il cd del software nel computer Insert the set-up cd-rom 2. Accettare il contenuto del contratto di licenza e cliccare su avanti Accept all contracts and click next 3. Cliccare su Avvio e connessione Click Start and connect GETTING STARTED... - Page 7 4. Cliccare su Installa Click Install 5. Attendere il completamento dell’installazione Wait until installation is fully completed GETTING STARTED...
- Page 8 6. Cliccare Connessione cablata USB Click USB cable connection 7. Quando richiesto collegare la stampante al computer ed accenderla; attendere la fine dell’installazione When requested connect the printer to the computer and switch on; wait until installation is complete. GETTING STARTED...
- Page 9 GETTING STARTED...
- Page 10 8. Selezionare “Non installare” e cliccare Avanti Select “Do not install”, then click Next 9. Cliccare Avanti Click Next GETTING STARTED...
- Page 11 10. Cliccare Esci Click Exit 11. Cliccare ok e riavviare il pc Click ok and restart the pc GETTING STARTED...
-
Page 12: Pannello Di Comandi - Operation Panel
Pannello di comandi - Operation panel a. Accende e spegne il prodotto Turns the product on and off b. Accede alla modalità di copia Enters copy mode c. Accede alla modalita fax Enters fax mode d. Accede alla modalità di scansione. Enters scan mode e. -
Page 13: Impostazione Qualità Consigliata Da Stampante - Quality Settings
Impostazione qualità consigliata da stampante – Quality settings 1. Premere il tasto Impostazione Press the Settings 2. Selezionare Impostazioni Carta e Copia e premere il tasto OK Select Paper and Copy Settings and press OK 3. Selezionare la voce qualità e premere OK Select Quality option and press OK 4. -
Page 14: Impostazione Qualità Consigliata Da Pc - Quality Settings
Impostazione qualità consigliata da pc – Quality settings 1. Selezionare il menù stampanti del computer Select the printers menu in the computer 2. Cliccare con il tasto destro sulla stampante e selezionare la voce Preferenze stampa… Right click on the printer and select Printing Preferences 3. -
Page 15: Utilizzo Del Cassetto Posteriore - Use Of Rear Tray
Utilizzo del cassetto posteriore – Use of rear tray 1. Ribaltare la protezione dell'alimentatore in avanti Flip the feeder guard forward 2. Estrarre il supporto della carta e il vassoio di uscita, quindi sollevare il dispositivo di arresto - Lasciare uno spazio sufficiente davanti alla stampante in modo che il supporto possa essere espulso completamente Slide out the paper support and the output tray and... -
Page 16: Eseguire Una Copia Semplice - Copy In Stand Alone
Eseguire una copia semplice - Copy in stand alone 1. Premere il tasto colore per avviare la copia Press the colour copy key to start copying Eseguire una copia con adatta pagina - copy with auto fit to page 1. Premere il tasto Menu Press the Menu key 2. - Page 17 5. Tornare indietro utilizzando il tasto OK Return to copy menu with the OK key 6. premere il tasto colore per avviare la copia press the colour copy key to start copying GETTING STARTED...
-
Page 18: Stampa Di Una Foto Da Pc - Print A Photo From Your Pc
Stampa di una foto da pc - Print a photo from your pc Aprire la foto che si vuole stampare con il visualizzatore di immagini di windows e cliccare sul tasto stampa Open the photo with Windows Picture and Fax Viewer and press Print Entrati nella stampa guidata foto cliccare su avanti Click Next in the Photo printing wizard GETTING STARTED... - Page 19 Selezionare la stampante Epson e cliccare su avanti Select the Epson printer and click next Cliccare su avanti e verrà inviata la stampa alla stampante Click on Next and start printing GETTING STARTED...
-
Page 20: Sostituzione Cartucce - Ink Cartridge Replacement
Cliccare su fine Click on Exit Sostituzione cartucce - Ink Cartridge Replacement 1. Premere il tasto Menu Press the Menu key 2. Selezionare il menù Manutenzione e premere OK Select Maintenance and press OK 3. Selezionare la voce Cambio cartucce inchiostro e premere OK Select the Ink Cartridge Replacement and press OK GETTING STARTED... - Page 21 4. Aprire il coperchio della stampante Raise the printer cover 5. Rimuovere la striscia gialla dalle cartucce (ATTENZIONE: controllare che il foro presente sotto il nastro protettivo sia completamente libero) First remove the yellow strip form the cartridge (WARNING: Check that the hole is completely free of the protective film and any eventual residues) 6.
- Page 22 11. Tornare indietro utilizzando il tasto OK Return to the previous menus using the OK GETTING STARTED...
-
Page 23: Acquisizione Immagine Da Pc - Scanning Image With Pc
Acquisizione immagine da pc - Scanning image with PC Aprire il programma EPSON Scan Open the EPSON Scan software Cliccare sul pulsante Anteprima per vedere l’immagine presente sullo scanner Click on Preview to view the picture on the scanner GETTING STARTED... - Page 24 Cliccare sul pulsante Acquisisci per salvare l’immagine sul PC Click Capture to save the picture GETTING STARTED...
- Page 25 Cliccare sul pulsante OK per confermare il salvataggio sul PC Click OK to confirm saving on PC GETTING STARTED...
- Page 26 Selezione della lingua - Language selection 12. Premere il tasto Menu Press the Menu key 13. Selezionare il menù Impost. stampante e premere OK Select the Printer Setup and press OK 14. Selezionare la Lingua/Language e premere OK Select the Language and press OK 15.
-
Page 27: Eseguire La Pulizia Della Testina - Printhead Cleaning
Eseguire la pulizia della testina - Printhead Cleaning 1. Premere il tasto Menu Press the Menu key 2. Selezionare il menù Manutenzione e premere OK Select the Maintenance menu and press OK 3. Selezionare la voce Pulizia testina e premere OK Select Head Cleaning and press OK 4. -
Page 28: Utilizzo Degli Inchiostri - Use Of Inks
7. Tornare indietro utilizzando il tasto OK Return to the main menu pressing OK Utilizzo degli inchiostri - Use of inks Condizioni di utilizzo e conservazione per gli inchiostri alimentari Conditions during use and storage of azo food inks Temperatura di utilizzo: 18-25 °C Temperature during use: 18-25 °C Temperatura di conservazione: 18-25 °C Storage temperature: 18-25 °C...
Need help?
Do you have a question about the Decojet A4 and is the answer not in the manual?
Questions and answers