Table of Contents
Advertisement
Quick Links
Chattanooga Group is an ISO 13485
Certifi ed Company
Exercise Platform
Electromagnetic
Compatibility (EMC)
Tables
™
User Manual
Operation & Installation
Instructions for:
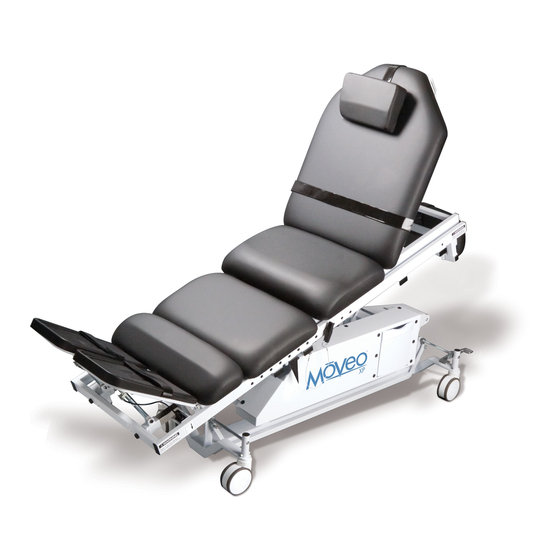
Moveo™ XP
8084 - 230 V Adjustable Table
8080 - 120 V Adjustable Table
Optional Equipment
80898 - LE Support Pad
80986 - Battery Backup
10-5211 - Cando® Exercise Bands
10-5330 - Cando® Handles
Advertisement
Table of Contents

Related Manuals for Chattanooga Moveo XP


Summary of Contents for Chattanooga Moveo XP
- Page 1 8084 - 230 V Adjustable Table 8080 - 120 V Adjustable Table Optional Equipment 80898 - LE Support Pad 80986 - Battery Backup 10-5211 - Cando® Exercise Bands 10-5330 - Cando® Handles Chattanooga Group is an ISO 13485 Electromagnetic Certifi ed Company Compatibility (EMC) Tables...
-
Page 2: Table Of Contents
Interrupting the Exercise......34 Benefits of the Moveo XP ......8 Stopping the Exercise. - Page 3 TABLE OF CONTENTS Moveo™ XP MAINTENANCE ........56 Cleaning .
-
Page 4: Foreword
© 2009 Encore Medical Corporation and its affiliates, Austin, Texas, USA. Any use of editorial, pictorial, or layout composition of this publication without express written consent from Chattanooga Group of Encore Medical, L.P. -
Page 5: Safety Precautions
SAFETY PRECAUTIONS Moveo™ XP PRECAUTIONARY DEFINITIONS The precautionary instructions found in this section and throughout this manual are indicated by specific symbols. Understand these symbols and their definitions before operating this equipment. The definition of these symbols are as follows: Explosion Hazard Text with an “Explosion Hazard”... -
Page 6: Cautions
• Inspect all cables and connectors before each use. consult the Chattanooga Group Service Department for help. • DO NOT exceed table weight capacity of 182 kg (400 lbs). •... -
Page 7: Warnings
Carriage. not use accessories manufactured by other companies on this table. • Chattanooga Group is not responsible for any consequence resulting DO NOT lock the Carriage when the table is inclined at any angle. The from using products manufactured by other companies. The use table must be completely horizontal before locking. - Page 8 SAFETY PRECAUTIONS Moveo™ XP WARNINGS (CONTINUED) • Charging efficiency of the Battery Backup drops at temperatures • Before, during, and after exercise, do the following: above 40 °C (104 °F) and can disrupt full charging and lead to • Monitor vital signs closely (i.e., heart rate, oxygen saturation, blood deterioration in performance and battery cell leakage.
-
Page 9: Dangers
Never dispose of Battery Backup in fire. Never short circuit specified on the Voltage Rating and Serial Number Plate. the battery. The battery may explode, ignite, leak or get hot Contact your Chattanooga Group dealer if the unit is not causing serious personal injury. properly rated. - Page 10 SAFETY PRECAUTIONS Moveo™ XP DANGERS (CONTINUED) Correct • DO NOT adjust the angles of the Foot Plates while the patient has any weight resting on them. • Both plungers (mechanical locking devices) on the Foot Plates should always be kept at an angle. When adjusting the Foot Plates, never allow the plungers to be straight up and down.
-
Page 11: Indications And Contraindications
SAFETY PRECAUTIONS Moveo™ XP INDICATIONS & CONTRAINDICATIONS The Moveo XP is a dynamic tilt table that allows patients to participate in partial weight-bearing strength training for the preparation of functional mobility. • Indications To promote urinary drainage • The Moveo XP is indicated for redeveloping muscles or restoring For preambulatory activity motion to joints. -
Page 12: Setup
SETUP Moveo™ XP After removing top and side panels of shipping crate, you may notice metal bands and plastic straps. These are used to secure various sections of the table and must be removed. • Do not lift table by Back Rest, Mid Section, or Foot Plates. •... -
Page 13: Nomenclature
NOMENCLATURE Moveo™ XP TABLE Right Side of Left Side of Table Table Back Rest Pelvic Section Carriage Release Foot Back Rest Transfer Pad Plates Head Rest LE Support (Optional) Foot Plate Release Caster (4) Foot Plate Cando Exercise Band Lock Knobs Winding Cleats Drawer Ankle Support... - Page 14 The Storage Drawer is used to keep accessories for the table such as Cando Exercise Bands and Cando Handles. Side Panel The Side Panels display the Moveo XP logo and conceal the cords and mechanical and electrical working parts of the table. •...
- Page 15 NOMENCLATURE Moveo™ XP TABLE (CONTINUED) Caster Four independently moving caster wheels allow the table to be positioned close to the patient's bed or wheelchair before transfer and away from the patient's bed before exercise. Depending on the position of the Caster Lock Bar, the casters have the following three settings: All Free All 4 casters move independently and turn in all directions.
- Page 16 The transfer pad supports the middle thigh and calf areas during transfer. Carriage The carriage consists of both the Pelvic Section and Back Rest and is the main operational component of the Moveo XP. The sliding motion of the carriage is what allows patients to use their own weight to exercise.
- Page 17 NOMENCLATURE Moveo™ XP TABLE (CONTINUED) Battery Backup (Optional - Not Shown) The Battery Backup is an optional accessory that allows the practitioner to administer exercise therapy without having to plug the table into an outlet. To recharge the Battery Backup, simply plug it into an outlet. The Battery Backup will charge whenever the table is plugged...
- Page 18 90°- 45° Weight Distribution Chart is to illustrate the correlation between the patient's body weight percentage and the degree of incline on the Moveo XP. For Degree of Incline more information on this chart, see page Angle of Incline (Left Side)
-
Page 19: Hand Controller
NOMENCLATURE Moveo™ XP HAND CONTROLLER LED (Illuminates Only if Battery Backup is Present) Raise Patient (UP Arrow) Lower Patient (DOWN Arrow) Button Button Tilt Forward (UP Arrow) Tilt Backward (DOWN Arrow) Button Button Elevation Tilt... -
Page 20: Hand Controller Symbol Definitions
NOMENCLATURE Moveo™ XP HAND CONTROLLER SYMBOL DEFINITIONS The LED (Light Emitting Diode) illuminates only if the Battery Backup is present. The LED: • illuminates green when the Battery Backup is charging and you press a button on the Hand Controller. •... -
Page 21: Specifications
SPECIFICATIONS Moveo™ XP TABLE Technical Data 120 V & 230 V Voltage/Frequency 120 VAC 60 Hz, 230 V 50 Hz MAXIMUM LENGTH Current Consumption 2.5 A, 1.3 A 256.54 cm (101 in) Output Voltage 24 VDC Maximum Output Current 18 A Electrical Safety Classification Class 1 Duty Cycle... -
Page 22: Control Unit
SPECIFICATIONS Moveo™ XP CONTROL UNIT Technical Data 120 V 230 V Voltage/Frequency 120 VAC 60 Hz 230 VAC 50 Hz Current Consumption 2.5 A 1.3 A Output Voltage 24 VDC 24 VDC Maximum Output Current 18 A 18 A Duty Cycle 1 min/9 min Intermittent 1 min/9 min Intermittent Electrical Safety Classification... -
Page 23: Motor
SPECIFICATIONS Moveo™ XP MOTOR Technical Data (120 V & 230 V) Push Force 12000 N Pull Force 8000 N Speed (at full load) 4.5 mm/sec (0.177 in/sec) Stroke 10-70 cm (3.94-27.56 in) Voltage 24 V Current Duty Cycle (on/off) 1 min/9 min Intermittent Electrical Safety Classification Class 1 Degree of Protection Against... -
Page 24: Battery Backup
SPECIFICATIONS Moveo™ XP BATTERY BACKUP Technical Data (120 V & 230 V) Type of Battery NiMH Input 24 V Output 24 V Rated Capacity 4.5 Ah Internal Resistance ~ 35 milli ohms Maximum Discharge Current 40 A Charging Voltage (Standby) -20 mV/deg C (13.5-13.8 V) Charging Voltage (Cycle Use) -15 mV/deg C (14.4-15.0 V) -
Page 25: Description Of Device Markings
Moveo™ XP DESCRIPTION OF DEVICE MARKINGS The markings on the Moveo XP are assurance of its conformity to the highest applicable standards of medical equipment safety and electromagnetic compatibility. The following markings appear on the device: Listed by Intertek Testing Services NA Inc. -
Page 26: Weight Distribution Chart
The purpose of the Weight Distribution Chart is to illustrate the correlation between the patient's body weight percentage and the degree of incline on the Moveo XP. The Weight Distribution Chart is for reference only. The appropriate exercise session should be based on the requirements and assessment of the individual patient. -
Page 27: Patient Preparation
Moveo™ XP TRANSFERRING THE PATIENT TO THE TABLE To transfer the patient from a hospital bed to the Moveo XP, do the following: Make certain the patient is aware of all procedures performed. Position patient in the supine position with the draw sheet extending from mid-thigh to above the shoulders. - Page 28 PATIENT PREPARATION Moveo™ XP TRANSFERRING THE PATIENT TO THE TABLE (CONTINUED) Using the DOWN Arrow button on the Hand Controller, position the Moveo XP so that it is completely horizontal. Make certain the transfer cushion is in place. Align the carriage pivot point to the patient's hip joint (greater trochanter).
- Page 29 Lock carriage on left side by inserting the Key Pin in the hole directly above the rubber stop. Using the Hand Controller, press the UP Arrow button to adjust the height of the Moveo XP to the exact height of the bed.
- Page 30 Make sure the patient's arms are crossed over the chest and the patient's chin is tucked. Using at least two people (one on each side), lift the patient up with draw sheet and transfer the patient to the Moveo XP.
- Page 31 Step on the Caster Lock Bar (so that the Caster Lock Bar is completely horizontal) to unlock the casters. Position the Moveo XP away from the patient's bed or wheelchair. NOTE: Transport the Moveo XP by using the Foot Plates.
- Page 32 PATIENT PREPARATION Moveo™ XP TRANSFERRING THE PATIENT TO THE TABLE (CONTINUED) Step on the side of the Caster Lock Bar closest to the Head Section to lock the casters before beginning exercise (Red).
-
Page 33: Operation
Starting the Exercise To begin using the Moveo XP, do the following: Record the patient's blood pressure, heart rate, oxygen saturation, and respiration rate. Remove the Transfer Cushion from the table. - Page 34 OPERATION Moveo™ XP STARTING, INTERRUPTING, AND STOPPING THE EXERCISE (CONTINUED) Pull out both left and right Key Pins so that the carriage moves freely. Position the carriage so that the patient's ankles are on the ankle support pad. Using the Foot Plate Release, adjust the Foot Plates to the appropriate angle.
- Page 35 OPERATION Moveo™ XP STARTING, INTERRUPTING, AND STOPPING THE EXERCISE (CONTINUED) Strap the patient's feet to the Foot Plates. Place the right Key Pin in the appropriate hole to allow for a shallow, practice squat. Place the left Key Pin in the same hole on the left side. Using the UP Arrow button on the Hand Controller, incline the patient to a 10°...
- Page 36 OPERATION Moveo™ XP STARTING, INTERRUPTING, AND STOPPING THE EXERCISE (CONTINUED) Place the right Key Pin in the appropriate hole for the desired amount of knee flexion (carriage travel), but no more than 90° of knee flexion. Place the left Key Pin in the same hole on the left side. DO NOT lock the carriage while the table is inclined.
-
Page 37: Interrupting The Exercise
OPERATION Moveo™ XP STARTING, INTERRUPTING, AND STOPPING THE EXERCISE (CONTINUED) Interrupting the Exercise To interrupt the exercise, do the following: For rest periods, decline the table to 0° and keep the Key Pins in the same place. Discontinue exercise in the event of the following: •... - Page 38 OPERATION Moveo™ XP STARTING, INTERRUPTING, AND STOPPING THE EXERCISE (CONTINUED) Replace the Transfer Cushion. Lock carriage on right side by inserting the Key Pin in the hole directly below the rubber stop. Lock carriage on left side by inserting the Key Pin in the hole directly above the rubber stop. Step on the Caster Lock Bar (so that the Caster Lock Bar is completely horizontal) to unlock the casters.
- Page 39 Unfasten all straps on the Moveo XP. Position the Moveo XP so that it is flush against the patient's bed. Using the Hand Controller, press the UP Arrow button to adjust the height of the Moveo XP to the exact height of the bed or wheelchair.
-
Page 40: Using The Le Support Pad
OPERATION Moveo™ XP USING THE LE SUPPORT PAD The LE Support Pad should be used: • For patients with a below-knee amputation. • For patients with a unilateral LE weight-bearing restriction. • For patients with hemiparesis. The LE Support Pad is used for muscle re-education of the affected lower extremity. The LE Support Pad supports the unaffected lower extremity in this application. - Page 41 OPERATION Moveo™ XP USING THE LE SUPPORT PAD (CONTINUED) Using the Foot Plate Release, adjust the occupied Foot Plate to 45°. Using the Foot Plate Lock Knob, completely lower the unoccupied Foot Plate. To perform the exercise, follow steps 3-16 on pages 31-33.
-
Page 42: Using The Cando® Exercise Bands
To use the Cando exercise bands in conjunction with the Moveo XP, do the following: Assess the appropriate type and resistance level for the patient. With a pair of scissors, cut the exercise band to the appropriate length. - Page 43 OPERATION Moveo™ XP USING THE CANDO® EXERCISE BANDS (CONTINUED) Attach the exercise bands to the Cando Exercise Band Winding Cleats located on the Back Rest, or run 1 single band through both. If applicable, attach the Cando Handles to the free ends of the exercise bands. Give the patient the free ends of the exercise bands (with or without handle).
-
Page 44: Treatment Tips
OPERATION Moveo™ XP TREATMENT TIPS Exercise Considerations Depending on the assessed needs of the patient, different techniques can be used to achieve the appropriate results. Use the following tips as guidelines only: Strength Training For patients requiring exercise to build strength, use an exercise regimen that includes the following: •... -
Page 45: Discontinuing The Moveo Xp Exercises
Discontinuing the Moveo XP Exercises Discontinue the use of Moveo XP exercises when the patient is able to safely stand with minimal to moderate assistance from a therapist. You may choose to progress to functional mobility and pre-gait activities. - Page 46 OPERATION Moveo™ XP TREATMENT TIPS (CONTINUED) If the answer is "Yes, " continue exercise session and increase intensity as tolerated. Unsure The answer is "Unsure" if the following are true: • Excessive increase in heart rate. • Excessive increase in blood pressure. •...
-
Page 47: Using The Battery Backup
USING THE BATTERY BACKUP The Battery Backup allows easy upgrade of the Moveo XP to create a battery powered table. The information in this section instructs the owner, operator, or user as to the initial set up and operation of the optional NiMH Battery Backup. No additional software is required for the Battery Backup as the table automatically recognizes its presence and activates all necessary functions. - Page 48 OPERATION Moveo™ XP USING THE BATTERY BACKUP (CONTINUED) Remove the Transfer Pad. Remove all 10 black retaining clips from the side panel. Remove the Side Panel.
- Page 49 OPERATION Moveo™ XP USING THE BATTERY BACKUP (CONTINUED) Using a coin or flat blade screwdriver, turn the slot on the controller to the unlock position and remove the cover. Disconnect all plugs from the controller. Using a Phillips head screwdriver, remove the green ground screw from the frame of the table. Using a Phillips head screwdriver, remove the 4 screws that secure the controller and discard the screws.
- Page 50 OPERATION Moveo™ XP USING THE BATTERY BACKUP (CONTINUED) Place the Battery Backup on a flat surface so that the batteries are visible. Place the controller on the Battery Backup so that the connections for the controller are on the same end as the power cord for Battery Backup. While holding them together, flip over the controller and Battery Backup.
- Page 51 OPERATION Moveo™ XP USING THE BATTERY BACKUP (CONTINUED) Connect the Battery Backup to the controller using the 6 star head screws (supplied) and star head screwdriver. NOTE: Do not over-tighten the screws. Insert the Battery Backup power cord into port 13 on the controller. Push the Battery Backup power cord into the appropriate cord retaining clip.
- Page 52 OPERATION Moveo™ XP USING THE BATTERY BACKUP (CONTINUED) Using the 4 new Phillips head screws and nuts (supplied with the Battery Backup) and a Phillips head screwdriver, secure the controller and the Battery Backup to the table. NOTE: Do not over-tighten the screws. Reconnect the Hand Controller plug into port 9 and press the cord into the appropriate retaining clip.
- Page 53 OPERATION Moveo™ XP USING THE BATTERY BACKUP (CONTINUED) Press the Power Cord, Battery Backup power cord, and the green ground wire into the same retaining clip. TILT MOTOR WIRE Reconnect the Tilt Motor plug into port 2. The Tilt Motor cord and plug are connected to the left side of the motor board. ELEVATION MOTOR WIRE Reconnect the Elevation Motor plug into port 1.
- Page 54 OPERATION Moveo™ XP USING THE BATTERY BACKUP (CONTINUED) Re-attach the controller cover. Using a coin or flat blade screwdriver, turn the slot on the controller to the lock position. Using a Phillips head screwdriver, secure the green ground wire with the screw.
- Page 55 OPERATION Moveo™ XP USING THE BATTERY BACKUP (CONTINUED) Re-attach the Side Panel. Press all 10 black retaining clips into the side panel.
-
Page 56: Charging The Battery Backup
OPERATION Moveo™ XP USING THE BATTERY BACKUP (CONTINUED) Charging The Battery Backup To charge the Battery Backup, do the following: After installing the Battery Backup ( pages 44-52), make sure the table is plugged into a power outlet. This allows the Battery Backup to charge, even during use. -
Page 57: Storage Of Battery Backup
OPERATION Moveo™ XP USING THE BATTERY BACKUP (CONTINUED) exceeded and should be replaced with a new Chattanooga Group Battery Backup. Never attempt to rebuild the Battery Backup. Properly dispose of old Battery Backup. Storage of Battery Backup When storing the Battery Backup, there are guidelines to follow in terms of long term and short term storage. -
Page 58: Accessories
The following provides the users of the Moveo XP table the necessary information to order the replacement accessories most commonly used with the table. This list of replacement accessories is designed for use with the Moveo XP. When ordering, provide the respective part number, description, and quantity desired. -
Page 59: Maintenance
CLEANING After each use, clean the table using a soft cloth dampened with Should the Moveo XP require service, contact the selling dealer or Chattanooga Group Service Department. All returned tables to the factory water and a mild antibacterial detergent or hospital-approved for service must include the following: detergent. -
Page 60: Lubrication
Moveo™ XP LUBRICATION At least once a year, the Moveo XP should be thoroughly inspected by a person qualified to recognize any signs of wear and tear, and looseness of bolts or parts. Replace any worn parts immediately. The Moveo XP should be lubricated at needed. - Page 61 MAINTENANCE Moveo™ XP LUBRICATION (CONTINUED) To lubricate, put a drop of oil on the following points of the Moveo XP as needed: NOTE: To lubricate the table, use a light machine oil. Do not use a penetrating type of lubricant.
- Page 62 MAINTENANCE Moveo™ XP LUBRICATION (CONTINUED) To lubricate, put a drop of oil on the following points of the Moveo XP as needed: NOTE: To lubricate the table, use a light machine oil. Do not use a penetrating type of lubricant.
-
Page 63: Warranty
Moveo™ XP Chattanooga Group ("Company") warrants that the Moveo XP ("Product") is free of defects in material and workmanship. This warranty shall remain in effect for two years (24 months) from the date of original consumer purchase. If this Product fails to function during the two-year warranty period due to a defect in material or workmanship, at the Company's option, the Company or the selling dealer will repair or replace this Product without charge within a period of thirty (30) days from the date on which the Product is returned to the Company or the dealer. - Page 64 MDSS GmbH Schiffgraben 41 30175 Hannover Germany Telephone : +49-511-6262-8630 Fax: +49-511-6262-8633 Chattanooga Group Chattanooga Group is an ISO 13485 Certifi ed Company 4717 Adams Road P.O. Box 489 Hixson, TN 37343 U.S.A. +1 423-870-7200 +1 423-870-2046 chattgroup.com 81090A © 2009 Encore Medical, L.P.
Need help?
Do you have a question about the Moveo XP and is the answer not in the manual?
Questions and answers