
Related Manuals for MRC NIR-CS-3000BT


Summary of Contents for MRC NIR-CS-3000BT
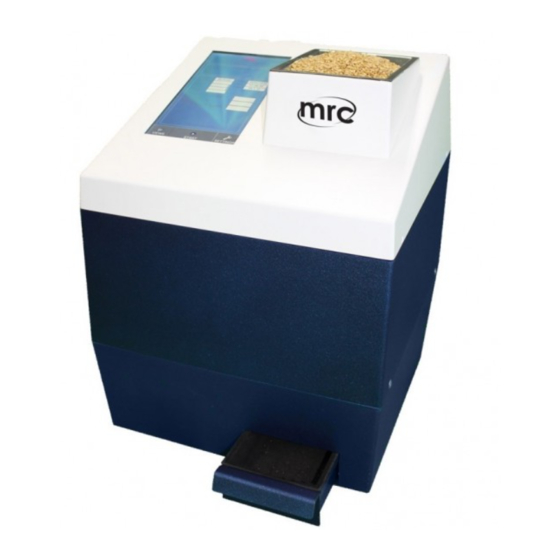
- Page 1 NIR-CS-3000BT WHOLE GRAIN ANALYSER With Test Weight Module User’s Guide Hagavish st. Israel 58817 Tel: 972 3 5595252, Fax: 972 3 5594529 ,3 mrc@mrclab.com MRC. 1.23 - 1 -...
-
Page 2: Table Of Contents
NIR-CS-3000BT Software Operation ..........................4 Start View Settings Maintenance Opening the NIR-CS-3000BT WHOLE GRAIN ANALYSER ............27 Changing Lamp ........................27 Changing External Fuse ......................27 Dusting Optics ........................27 Sample Handling Sample preparation procedure ..................... 28 Temperature dependence ....................28... -
Page 3: Overview
The NIR-CS-3000BT has been developed in Australia for use . by food manufacturers and organisations that need to analyse food and food ingredients is a full spectrum NIR Transmission Spectrophotometer. - Page 4 Operations Manual The NIR-CS-3000BT comes ready to use, with all internal software installed and standard calibrations saved into the Calibration folder. This internal software provides a means of predicting protein, oil and moisture in the standard grains Description The NIR-CS-3000BT is provided with the following equipment...
- Page 5 NIR-CS-3000BT Whole Grain Analyser Light from a tungsten halogen lamp is shone through a sample chamber, onto focusing optics and into a flat field spectrograph with a silicon photodiode array detector. The spectrograph disperses the light into the NIR spectra from 720-1100nm. Chemical bonds within grains and oil seeds absorb NIR light at specific wavelengths of light.
-
Page 6: Operation
To analyse a sample, the instrument collects the NIR spectrum for the sample, and the computer applies the calibration model and computes the % protein, % moisture, % oil etc. Operation Figure 3. shows the Boot Up Screen that appears on the NIR-CS-3000B/NIR-CS-3000BT PC Screen after boot up... - Page 7 NIR-CS-3000BT Whole Grain Analyse Figure 3 – NIR-CS-3000BT Whole Grain Analyser Initial Screen There are three options: VIEW, START and SETTINGS - 7 -...
-
Page 8: Start
Operations Manual START: Press the Start Button and the list of Products will appear. Select a Product and the following screen will appear. - Page 9 NIR-CS-3000BT Whole Grain Analyse Product Description User Details can be typed in by clicking on any field. These describers will be printed on report. Load Information that will be printed on reports. Prediction Data Status The Status message will display, “Warming Lamp Up...’. The lamp is turned on a allowed to stabilise for 15 seconds.
- Page 10 Operations Manual Predicted results Prompt for the Sample ID Type in any Alpha/Numeric Sample ID. Press ENTER. Depending on the Mode Configuration Menu setup, the software will prompt for: Sample ID Test Weight Screenings Retention Variety Grade Tonnage Type in the values and press ENTER.
- Page 11 Grades to select from. Pres the Print Report button to generate a load ticket. Your company logo can be loaded. Click on the MRC Logo and select .your logo Company details can be loaded by clicking on the lines. Press PRINT to generate a load ticket.
-
Page 12: View
Operations Manual VIEW: Click on the VIEWS button to Open a window where data can be displayed as: • Display Data: Table of predicted results • Plot Spectra: Plots the NIR Spectra of the samples after scanning. • Trend Plots: Plots the data each constituent in a Trend Chart. •... - Page 13 NIR-CS-3000BT Whole Grain Analyser Figure 6 Display Data Screen Plot Spectral Screen - 13 -...
-
Page 14: Settings
Operations Manual Plot Trend Screen Report Screen SETTINGS: The SETTINGS menu is only accessible to the System Administrator approved operators. An access code is required to enter the SETTINGS menu. Press the SETTINGS Button, enter the Access Code and a window opens to show the following options: •... - Page 15 SYSTEM MODE: Press the System button to open the following window. Mode Configuration: A Setup Screen to customise how the NIR-CS-3000BT operates and reports Diagnostics: A tool to allow the user to check the lamp, flaps, motor etc Library: Lists the Varieties and...
- Page 16 Test Weight: NIR-CS-3000BT: Prompts for the Test Weight or retrieves the Test Weight Directly from the Sievematic II NIR-CS-3000BT: Sets up the Test Weight function within the NIR- CS-3000BT. If Test Weight is not indicated then the instrument will not display a Test Weight...
- Page 17 NIR-CS-3000BT Whole Grain Analyser Output Angle 8mm: Sets the rate of feeding small grains such as Canola. The smaller the angle to slower the feed rate. Output Angle 16mm: Sets the rate of feeding medium grains such as wheat, barley, oats. The smaller the angle to slower the feed rate.
- Page 18 Operations Manual DIAGNOSTIC TESTING Select the Diagnostics button to open the following window. The Diagnostic window provides a comprehensive set of test functions. On the Lefts Hand side there are buttons to setup the electronics and optics to test the performance of the system.
- Page 19 NIR-CS-3000BT Whole Grain Analyser LIBRARY: Select the Library button to open the following window. Click on the Variety or Grade buttons. A list will open. Add New items or Delete items. Press OK to store these changes. - 19 -...
- Page 20 Operations Manual Plot Harvesting The Plot Harvesting screen is intended for use by plant breeders who are collecting data from plots 20 -...
- Page 21 NIR-CS-3000BT Whole Grain Analyser CALIBRATION SETUP Select the Calibration Setup button to open the following window. Slope and Bias Adjustment: Used to adjust the calibration models in order to align the systems predicted results with and external reference source. Delete Calibrations: Deletes old calibrations.
- Page 22 Operations Manual 22 -...
- Page 23 12.6 Bias Adjustment = Ave = By plotting the MRC vs Reference values using an Excel Spreadsheet, the equation of the line . of best fit is calculated. The Slope would be 0.778 and the Bias would be 2.6 The list of products will be displayed. Select the Product.
- Page 24 Operations Manual DELETE CALIBRATION When calibrations are updated or to be replaced, then they should be deleted from the list of available Products. Select the Delete Calibration button and the list of products will appear. Select the product to be deleted. The software will prompt to ensure that you are sure that you want to delete the product.
- Page 25 NIR-CS-3000BT Whole Grain Analyser DATA TRANSFER Select the Data Transfer button to open the following window. Calibration files are saved in the following directory. C:/Calibration Calibration files have extensions .bin. Data files are saved in the following directory: C:/Data Data files are saved as .csv files for each Product.
- Page 26 Operations Manual SHUTDOWN Press Shutdown button to open the following window. Administrative Tasks: By pressing this button, the PC closes the NIR- CS-3000BT software and opens the Desktop. Normal data and file manipulations can be undertaken in the Desktop. To return to the NIR- CS-3000BT software, double click on the NIR- CS-3000BT icon...
- Page 27 Setting up NIR-CS-3000BT Whole Grain Analyser To setup the NIR-CS-3000BT, perform the following actions Switch the ON/OFF power switch down to power up the NIR-CS-3000BT When the power switch is turned ON, the Touch Screen PC will light up and boot up into the Analysis Software, however the internal computer takes approx.
-
Page 28: Maintenance
Close the NIR-CS-3000BT, as described below To test the new lamp, turn ON the NIR-CS-3000BT. The instrument will test the operation of the new lamp in its opening test sequence Changing External Fuse To change the external fuse, perform the following actions: Look at the back of the NIR-CS-3000BT;... -
Page 29: Sample Preparation Procedure
As well, the instrument response is corrected for temperature between 10 and 45C. It is recommended that where possible, the NIR-CS-3000BT Whole Grain Analyser be kept in an air-conditioned environment at approximately 22C As a general guide, sample temperature will affect the accuracy by approximately 0.02% per degree. -
Page 30: Trouble Shooting
Operations Manual Trouble Shooting Problem Solution NIR-CS-3000BT Whole Grai Ensure that the power is connected and that the power Analyser does not start supply is functional. The power supply is ON when the green light on the case is illuminated. - Page 31 Microcontroller Failure Indicates that the WGA.INI file has been corrupted. Use llremote to connect to the NIR-CS-3000BT and downloa the WGA.INI file from the floppy disk supplied Outside Temperature Range Either the instrument temperature or sample temperature is outside the instrument or calibration limits.
- Page 32 The calibration file selected specifies a different sample cell from the one detected. Ensure the sample cell matches the product being analysed. The NIR-CS-3000BT Whole Grain Analyser could not Cell Contact Error collect the sample temperature because there is an error with the cell contacts.
-
Page 33: Warranty
Whole Grain Analyser Warranty The NIR-CS-3000BT Whole Grain Analyser is warranted for 12 months. The warranty includes all parts and labour for the repair of any component that has failed within the recommended operating conditions. If there is damage to the instrument due to inappropriate handling, then... -
Page 34: Calibration Of Nir Instruments
The following steps, also presented in the following flow chart, outline the general steps in developing a calibration: • Optimise sampling method. ▪ Pathlength considerations (MRC 2-4abs, NIT 0-2abs) ▪ Homogenisation procedures (FOP and NIT) ▪ Reproducibility of chosen sampling technique •... - Page 35 NIR-CS-3000BT Whole Grain Analyser Flow Chart for Calibration Development Optimise Pathlength Ensure Reproducible Spectra Select Samples (Box Car Distribution) Analyse Samples In Duplicate Scan Samples In Duplicate PLS or MLR Calibration Evaluate Calibration Models Add 5 Low Temp and 5 High Temp Scans...
- Page 36 Operations Manual Calibration Techniques Traditional Method for UV-Vis: Simple Linear Regression (SLR) sometimes known as Univariate Regression. NIR Region: Usually requires some form of baseline correction, as a result of skew (caused by scatter or poorly resolved or overlapping peaks). As such, Multiple Linear Regression (MLR) techniques were developed to correct for these anomalies.
- Page 37 NIR-CS-3000BT Whole Grain Analyser and b =partial regression coefficients Used in the case where the determination of one component is being interfered with by another. A simple two-component example serves as an example. Univariate calibration using one wavelength shows a high correlation to tryptophan concentration, but the predictive ability is poor.
- Page 38 Operations Manual Actual Predicted 10.26 11.14 28.20 Addition of a second wavelength to the model, based on visual inspection of the spectral data, shows that is relatively free from the absorption of tryptophan and contains more information on tyrosine. Model [C]=-0.00067+43.68A +39.78A compensates for the absorbance due to tyrosine.
- Page 39 NIR-CS-3000BT Whole Grain Analyser Partial Least Squares (PLS) Calibrations PLS has become the preferred calibration technique as they allow the development of models for constituents, which cannot be modelled by MLR. PLS models also average the spectra and improve the signal to noise ratio PLS is defined as a global technique, i.e.
- Page 40 Operations Manual - Place the instrument into a cold room or refrigerator for 2 hours. Remove the instrument and turn on. When the instrument reaches 10C, scan the 5 samples again and save the spectral data. - Place the instrument into a hot chamber set at 45C for 2 hours. Remove the instrument and turn on.
- Page 41 NIR-CS-3000BT Whole Grain Analyser Temperature Stability = the differences between the results obtained at standard temperature (4 and the results obtained at +/-5 and 10C from the standard temperature Cool three samples to –10C below the standard temperature used to develop the calibration, ie, room temperature = 22C –...
Need help?
Do you have a question about the NIR-CS-3000BT and is the answer not in the manual?
Questions and answers