Juniper EX4600 Hardware Manual
Hide thumbs
Also See for EX4600:
- Hardware manual (230 pages) ,
- Quick start manual (13 pages) ,
- Quick start manual (10 pages)

Subscribe to Our Youtube Channel
Related Manuals for Juniper EX4600


Summary of Contents for Juniper EX4600
- Page 1 EX4600 Switch Hardware Guide Modified: 2019-03-06 Copyright © 2019, Juniper Networks, Inc.
- Page 2 END USER LICENSE AGREEMENT The Juniper Networks product that is the subject of this technical documentation consists of (or is intended for use with) Juniper Networks software. Use of such software is subject to the terms and conditions of the End User License Agreement (“EULA”) posted at https://support.juniper.net/support/eula/.
-
Page 3: Table Of Contents
EX4600 System Overview ..........17 EX4600 Switch Hardware Overview ....... . . 17 EX4600 Hardware . - Page 4 Unpacking an EX4600 Switch ........
- Page 5 Powering Off an EX4600 Switch ........103...
- Page 6 Compliance Statements for Acoustic Noise for EX Series Switches ..155 Statements of Volatility for Juniper Network Devices ..... . 155...
- Page 7 Figure 24: Attaching Mounting Rails to the EX4600 ..... . . 69 Figure 25: Attach EX4600 Switch to Rack ....... 70 Figure 26: Slide Mounting Blade into EX4600 Mounting Rail .
- Page 8 Figure 37: Removing a Fan Module from an EX4600 Switch ....86 Figure 38: Installing a Fan Module in an EX4600 Switch ....87 Figure 39: Removing a Power Supply from an EX4600 Switch .
- Page 9 Table 9: EX4600-EM-8F Status LED ........
- Page 10 Table 33: Alarm Terms ..........107 Copyright © 2019, Juniper Networks, Inc.
-
Page 11: About The Documentation
® To obtain the most current version of all Juniper Networks technical documentation, see the product documentation page on the Juniper Networks website at https://www.juniper.net/documentation/ If the information in the latest release notes differs from the information in the documentation, follow the product Release Notes. -
Page 12: Table 1: Notice Icons
RFC 1997, BGP Communities Attribute Italic text like this Represents variables (options for which Configure the machine’s domain name: you substitute a value) in commands or [edit] configuration statements. root@# set system domain-name domain-name Copyright © 2019, Juniper Networks, Inc. -
Page 13: Documentation Feedback
We encourage you to provide feedback so that we can improve our documentation. You can use either of the following methods: Online feedback system—Click TechLibrary Feedback, on the lower right of any page on the Juniper Networks TechLibrary site, and do one of the following: Copyright © 2019, Juniper Networks, Inc. xiii... -
Page 14: Requesting Technical Support
7 days a week, 365 days a year. Self-Help Online Tools and Resources For quick and easy problem resolution, Juniper Networks has designed an online self-service portal called the Customer Support Center (CSC) that provides you with the following features: Find CSC offerings: https://www.juniper.net/customers/support/... -
Page 15: Creating A Service Request With Jtac
About the Documentation Join and participate in the Juniper Networks Community Forum: https://www.juniper.net/company/communities/ Create a service request online: https://myjuniper.juniper.net To verify service entitlement by product serial number, use our Serial Number Entitlement (SNE) Tool: https://entitlementsearch.juniper.net/entitlementsearch/ Creating a Service Request with JTAC You can create a service request with JTAC on the Web or by telephone. - Page 16 EX4600 Switch Hardware Guide Copyright © 2019, Juniper Networks, Inc.
-
Page 17: Overview
Top-of-rack in small, low -density data centers Data center distribution in small, low -density data centers In addition to operating as a standalone switch, the EX4600 switch can act as a member switch in a non-mixed Virtual Chassis, a Virtual Chassis composed entirely of EX4600 switches, as well as participate as member switches in a mixed Virtual Chassis with EX4300 switches. -
Page 18: Ex4600 Hardware
Layer 2 and Layer 3 features. In addition to a high-throughput Packet Forwarding Engine, the performance of the control plane running on the EX4600 model is enhanced by the 1.5 -GHz dual-core Intel CPU with 8 GB of memory and 32 GB of solid-state drive (SSD) storage. -
Page 19: System Software
EX4300 switches must be in the linecard role. An EX4600 Virtual Chassis enables you to interconnect up to 10 switches into one logical device and manage the device as a single chassis. An EX4600 Virtual Chassis is cabled in a ring topology. -
Page 20: Understanding Redundancy Of Ex4600 Switch Components And Functionality
Chassis Physical Specifications for an EX4650 Switch on page 21 Field-Replaceable Units in an EX4600 Switch on page 21 Port Panel of an EX4600 Switch on page 22 Access Port and Uplink Port LEDs on an EX4600 Switch on page 23 Copyright © 2019, Juniper Networks, Inc. -
Page 21: Chassis Physical Specifications For An Ex4650 Switch
Chassis Status LEDs on an EX4600 Switch on page 26 Expansion Modules for the EX4600 on page 28 Chassis Physical Specifications for an EX4650 Switch The EX4600 switch chassis is a rigid sheet-metal structure that houses the hardware components. Table 4 on page 21 summarizes the physical specifications of the EX4650 chassis. -
Page 22: Port Panel Of An Ex4600 Switch
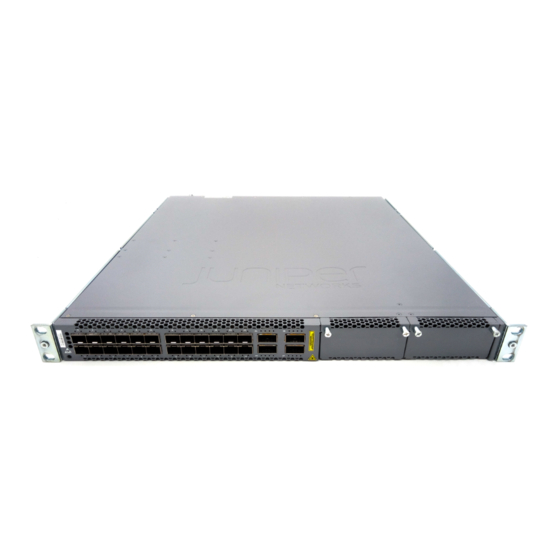
Installing and Removing EX4600 Switch Hardware Components on page 102 Port Panel of an EX4600 Switch The fixed portion of the port panel of the EX4600-40F switch supports up to a maximum of 40 logical 10 GbE ports. Twenty-four physical ports (... -
Page 23: Access Port And Uplink Port Leds On An Ex4600 Switch
Expansion module bays with cover panels Access Port and Uplink Port LEDs on an EX4600 Switch The Link/Activity and Status LED configuration for an EX4600 switch uses bi-colored LEDs. The two figures in this topic show the location of those LEDs:... -
Page 24: Table 6: Network Port Leds On Sfp+ Ports On An Ex4600 Switch
EX4600 Switch Hardware Guide Table 6 on page 24 describes how to interpret the SFP+ port LEDs. Table 6: Network Port LEDs on SFP+ Ports on an EX4600 Switch Color State Description Link/Activity Unlit The port is administratively disabled, there is no power, the link is down, or there is a fault. -
Page 25: Management Panel Of An Ex4600 Switch
All four LEDs blink to indicate the beacon function was enabled on the port. Management Panel of an EX4600 Switch The management panel of the EX4600 switch is located on the Field Replaceable Unit (FRU) side of the switch, as shown in Figure 7 on page 25. -
Page 26: Chassis Status Leds On An Ex4600 Switch
Console port (RJ-45) to support RS-232 serial ports. The LEDs above the port indicate status and link. Chassis Status LEDs on an EX4600 Switch The EX4600 switch has four status LEDs on the field-replaceable unit (FRU) end of the chassis, next to the management ports (see Figure 9 on page 27). -
Page 27: Figure 9: Chassis Status Leds On An Ex4600 Switch
Juniper Networks Technical Assistance Center (JTAC). Table 8 on page 28 describes the chassis status LEDs on an EX4600 switch, their colors and states, and the status they indicate. You can view the colors of the three LEDs... -
Page 28: Expansion Modules For The Ex4600
Expansion Modules for the EX4600 The EX4600 switch has two bays on the port panel in which you can optionally install one or two expansion modules. The EX4600 supports the same two expansion modules as the QFX5100, which increase port density: EX4600-EM-8F, which provides 8 additional 10-Gigabit Ethernet Enhanced Small Form-Factor Pluggable (SFP+) ports. -
Page 29: Ex4600-Em-8F
Chapter 1: Overview QFX-EM-4Q, which provides 4 additional 40-Gigabit Quad SFP+ (QSFP+) ports. The EX4600 is configured for the QFX-EM-4Q by default, but any combination of the two modules is supported. Expansion modules can be hot-inserted or hot-removed. However, when an EX4600-EM-8F is inserted instead of the default QFX-EM-4Q, the new configuration causes the interfaces to temporarily go down. -
Page 30: Qfx-Em-4Q
QFX-EM-4Q The QFX-EM-4Q, provides 4 additional 40-Gigabit Ethernet QSFP+ ports to one of the bays in the EX4600 switch. Port 0 and port 2 can be used for port channelization by configuring the system mode for 104 port mode. Figure 11 on page 30 shows the QFX-EM-4Q ports and LEDs. -
Page 31: Cooling System And Airflow In An Ex4600 Switch
Cooling System and Airflow in an EX4600 Switch The cooling system in an EX4600 switch consists of five fan modules and a single fan in each power supply. The switch can be set up to work in one of two airflow directions: Airflow In–Air enters the switch through the vents in the field-replaceable units (FRUs) -
Page 32: Figure 12: Fan Module For Ex4600 Switches
EX4600 Switch Hardware Guide Figure 12: Fan Module for EX4600 Switches You remove and replace a fan module from the FRU end of the chassis. The switch continues to operate for a limited period of time (30 seconds) during the replacement of the fan module without thermal shutdown. -
Page 33: Figure 13: Air In Airflow Through Ex4600 Switch Chassis
AIR IN on switch components are next to the cold aisle, and labels on switch AIR OUT components are next to the hot aisle. Figure 13: Air In Airflow Through EX4600 Switch Chassis Copyright © 2019, Juniper Networks, Inc. -
Page 34: Switch
Do not mix AC and DC power supplies in the same chassis. Do not mix power supplies with different wattages in the same chassis. However if you need to convert an EX4600 switch to have a different airflow, you can change the airflow pattern. To convert an... -
Page 35: Fan Module Status
) for each fan module on the left side of the corresponding fan module slot. It indicates the status of all the fan modules. Table 12 on page 35 describes the Status LED on the fan module in an EX4600 switch. Table 12: Fan Module LED LED State... -
Page 36: Ex4600 Power System
The AC power supply is 650 W. It is the same power supply used in Juniper Networks QFX5100 switches. -
Page 37: Figure 16: Ac Power Supply In Ex4600 Switches
Chapter 1: Overview Figure 16: AC Power Supply in EX4600 Switches 1— Handle 3— AC appliance inlet 2— Security latch 4— Ejector lever The power supply provides FRU-to-port or port-to-FRU airflow depending on the product SKU you purchase. On legacy switches, or switches with an LCD, this airflow is called back-to-front and front-to-back. -
Page 38: Ac Power Supply Leds On An Ex4600 Switch
EX4600 Switch Hardware Guide Table 14: Airflow Direction in EX4600 and QFX5100 AC Power Supplies Color of Power Supply Product Number Direction of Airflow Handle JPSU-650W-AC-AFI FRU-to-port Juniper azure blue QFXC01-PWRACI-650A JPSU-650W-AC-AFO Port-to-FRU Juniper gold To avoid electrical injury, carefully follow instructions in “Connecting AC Power to an... -
Page 39: Ac Power Specifications For An Ex4600 Switch
(approximately 14.75 feet) in length, to comply with National Electrical Code (NEC) Sections 400-8 (NFPA 75, 5-2.2) and 210-52 and Canadian Electrical Code (CEC) Section 4-010(3). The cords that can be ordered for the EX4600 switch are in compliance. Table 17 on page 40 lists AC power cord specifications provided for each country or region. -
Page 40: Dc Power Supply In An Ex4600 Switch
CBL-EX-PWR-C13-UK DC Power Supply in an EX4600 Switch Except for the EX4600-40F-S switch, the EX4600 is shipped from the factory with two power supplies pre-installed. Each power supply is a hot-removable and hot-insertable field-replaceable unit (FRU) when the second power supply is installed and running. You can install replacement power supplies in the two slots next to the fan modules without powering off the switch or disrupting the switching function. -
Page 41: Figure 19: Dc Power Supply In Ex4600 And Qfx5100 Switches
Chapter 1: Overview Figure 19: DC Power Supply in EX4600 and QFX5100 Switches 1— Terminal block 3— Ejector lever 2— ESD grounding point 4— Handle NOTE: The DC power supply in the switch has four terminals labeled V-, V-, V+, and V+ (see... -
Page 42: Dc Power Supply Leds In Ex4650 Switches
“Removing a Power Supply from an EX4600 Switch” on page See Also Connecting DC Power to an EX4600 Switch on page 74 DC Power Supply LEDs in EX4650 Switches Figure 21 on page 42 shows the location of the LEDs on the DC power supply. -
Page 43: Dc Power Specifications For An Ex4600 Switch
(EMI) requirements. To ground an EX4600 switch, connect a grounding cable to earth ground and then attach it to the chassis grounding points. - Page 44 The grounding lug required is a Panduit LCD10-10A-L or equivalent (not provided).. The grounding lug should accommodates 14–10 AWG (2–5.3 mm²) stranded wire. The grounding cable that you provide for a EX4600 must be 14 AWG (2 mm²), minimum 60° C wire, or as permitted by the local code.
-
Page 45: Site Planning, Preparation, And Specifications
CHAPTER 2 Site Planning, Preparation, and Specifications Site Preparation Checklist for an EX4600 Switch on page 45 EX4600 Site Guidelines and Requirements on page 46 EX4600 Network Cable and Transceiver Planning on page 54 EX4600 Management Cable Specifications and Pinouts on page 61... -
Page 46: Ex4600 Site Guidelines And Requirements
General Site Guidelines on page 51 Installing and Connecting an EX4600 Switch on page 65 Mounting an EX4600 Switch in a Rack or Cabinet on page 67 EX4600 Site Guidelines and Requirements Environmental Requirements and Specifications for EX Series Switches on page 46... -
Page 47: Site Planning, Preparation, And Specifications
32° F 4 earthquake 10,000 feet range 10% through 85% (0° C) through 113° F (45° C) requirements as per (3048 meters) (noncondensing) GR-63, Issue 4. Copyright © 2019, Juniper Networks, Inc. - Page 48 (3048 meters) (noncondensing) 32° F (0° C) through 113° GR-63, Issue 4. F (45° C) EX4550-32T switches— Normal operation is ensured in the temperature range 32° F through 104° F (40° C) Copyright © 2019, Juniper Networks, Inc.
-
Page 49: Site Planning, Preparation, And Specifications
5% through 90% (0° C) through 104° F requirements as per (3048 meters) (noncondensing) (40° C) GR-63. Nonoperating storage temperature in shipping container: – 40° F (–40° C) to 158° F (70° C) Copyright © 2019, Juniper Networks, Inc. - Page 50 Install EX Series switches only in restricted areas, such as dedicated equipment rooms and equipment closets, in accordance with Articles 110– 16, 110– 17, and 110– 18 of the National Electrical Code, ANSI/NFPA 70. Copyright © 2019, Juniper Networks, Inc.
-
Page 51: General Site Guidelines
Use a twisted-pair cable with a good distribution of grounding conductors. If you must exceed the recommended distances, use a high-quality twisted-pair cable with one ground conductor for each data signal when applicable. Copyright © 2019, Juniper Networks, Inc. -
Page 52: Rack Requirements
Secure the rack to the building structure. If earthquakes are a possibility in your geographical area, secure the rack to the floor. Secure the rack to the ceiling brackets as well as wall or floor brackets for maximum stability. Copyright © 2019, Juniper Networks, Inc. -
Page 53: Cabinet Requirements
Rack-Mounting and Cabinet-Mounting Warnings on page 127 Clearance Requirements for Airflow and Hardware Maintenance for an EX4600 Switch When planning the site for installing an EX4600 switch, you must allow sufficient clearance around the installed chassis (see Figure 22 on page 54). -
Page 54: Ex4600 Network Cable And Transceiver Planning
Leave at least 24 in. (61 cm) both in front of and behind the EX4600 switch. For service personnel to remove and install hardware components, you must leave adequate space at the front and back of the switch. -
Page 55: Figure 23: Port Panel Of Ex4600
The 40-Gigabit Ethernet QSFP+ transceivers that are used in EX Series switches use 12-ribbon multimode fiber crossover cables with female MPO/UP, MPO/UPC, or MPO/APC connectors. The fiber can be either OM3 or OM4. These cables are not sold by Juniper Networks. -
Page 56: Table 25: Qsfp+ Mpo Cable Signals
Table 25: QSFP+ MPO Cable Signals Fiber Signal Tx0 (Transmit) Tx1 (Transmit) Tx2 (Transmit) Tx3 (Transmit) Unused Unused Unused Unused Rx3 (Receive) Rx2 (Receive) Rx1 (Receive) Rx0 (Receive) Table 26: QSFP+ MPO Fiber-Optic Crossover Cable Pinouts Copyright © 2019, Juniper Networks, Inc. -
Page 57: Switches
Table 26: QSFP+ MPO Fiber-Optic Crossover Cable Pinouts (continued) Network Cable Specifications for EX4600 Switches EX4600 switches have interfaces that use various types of network cables. Table 27 on page 57 lists the specifications for the cables that connect the console ( and management ( ) ports to management devices. -
Page 58: Signal Loss In Multimode And Single-Mode Fiber-Optic Cable
In addition, the total dispersion must be within the limits specified for the type of link in Telcordia Technologies document GR-253-CORE (Section 4.3) and International Telecommunications Union (ITU) document G.957. Copyright © 2019, Juniper Networks, Inc. -
Page 59: Calculating The Ex Series Switch Fiber-Optic Cable Power Budget
) that is zero or negative indicates insufficient power to operate the receiver. See the specification for your receiver to find the maximum receiver input power. Before you begin to calculate the power margin: Copyright © 2019, Juniper Networks, Inc. -
Page 60: Table 28: Estimated Values For Factors Causing Link Loss
(13 dBm) – (0.5 dBm [HOL]) – ((5) * (0.5 dBm)) – ((2) * (0.5 dBm)) – ((2 km) * (1.0 dBm/km)) – (1 dB [CRM]) = P 13 dBm – 0.5 dBm – 2.5 dBm – 1 dBm – 2 dBm – 1 dBm = P Copyright © 2019, Juniper Networks, Inc. -
Page 61: Ex4600 Management Cable Specifications And Pinouts
RJ-45 patch cable (100 meters) 1000BASE-T operation USB Port Specifications for an EX Series Switch The following Juniper Networks USB flash drives have been tested and are officially supported for the USB port on all EX Series switches: RE-USB-1G-S RE-USB-2G-S... -
Page 62: Console Port Connector Pinout Information
USB flash drive is formatted. Console Port Connector Pinout Information The console port on a Juniper Networks device is an RS-232 serial interface that uses an RJ-45 connector to connect to a console management device. The default baud rate for the console port is 9600 baud. -
Page 63: Rj-45 Management Port Connector Pinout Information
Chapter 2: Site Planning, Preparation, and Specifications RJ-45 Management Port Connector Pinout Information Table 31 on page 63 provides the pinout information for the RJ-45 connector for the management port on Juniper Networks devices. Table 31: RJ-45 Management Port Connector Pinout Information Signal Description... - Page 64 EX4600 Switch Hardware Guide Copyright © 2019, Juniper Networks, Inc.
-
Page 65: Initial Installation And Configuration
Installing and Connecting an EX4600 Switch on page 65 Unpacking an EX4600 Switch on page 66 Mounting an EX4600 Switch in a Rack or Cabinet on page 67 Installing and Connecting an EX4600 Switch You can mount an EX4600 switch: Flush with the front of a 19-in. -
Page 66: Unpacking An Ex4600 Switch
53 Unpacking an EX4600 Switch The EX4600 switch chassis is a rigid sheet-metal structure that houses the hardware components. A EX4600 switch is shipped in a cardboard carton, secured with foam packing material. The carton also contains an accessory box and quick start instructions. -
Page 67: Mounting An Ex4600 Switch In A Rack Or Cabinet
Installing and Connecting an EX4600 Switch on page 65 Mounting an EX4600 Switch in a Rack or Cabinet You can mount the EX4600 switch on a four post 19-in. rack or cabinet using the mounting kit provided with the device. - Page 68 CAUTION: The EX4600 require two people for installation. If you are installing the EX4600 switch above 60 in. (152.4 cm) from the floor, you can remove the power supplies and fan modules to minimize the weight before attempting to install the switch.
-
Page 69: Four Post Procedure
Align the holes in the mounting rail with the holes on the side of the chassis. See Figure 24 on page 69 to see the proper alignment for the EX4600 switch. Figure 24: Attaching Mounting Rails to the EX4600 Attach the mounting rail to the switch using the mounting screws (and cage nuts and washers if your rack requires them). -
Page 70: Connecting The Ex4600 To Power
See Also Connecting AC Power to an EX4600 Switch on page 72 Connecting DC Power to an EX4600 Switch on page 74 Connecting the EX4600 to Power... -
Page 71: Connecting Earth Ground To An Ex4600 Switch
(see Figure 27 on page 72). Before you connect earth ground to the protective earthing terminal of a EX4600 switch, ensure that a licensed electrician has attached an appropriate grounding lug to the grounding cable. -
Page 72: Connecting Ac Power To An Ex4600 Switch
Grounded Equipment Warning on page 131 Connecting AC Power to an EX4600 Switch The EX4600 is shipped from the factory with two power supplies. Each power supply is a hot-removable and hot-insertable field-replaceable unit (FRU) when the second power supply is installed and running. You can install replacement power supplies in the two slots next to the fan modules without powering off the switch or disrupting the switching function. -
Page 73: Figure 28: Connecting An Ac Power Cord To An Ac Power Supply In An Ex4600
Figure 28 on page 73). Figure 28: Connecting an AC Power Cord to an AC Power Supply in an EX4600 Switch 1— Power cord retainer If the AC power source outlet has a power switch, set it to the OFF (O) position. -
Page 74: Connecting Dc Power To An Ex4600 Switch
AC Power Supply in an EX4600 Switch on page 36 Connecting DC Power to an EX4600 Switch The EX4600 is shipped from the factory with two power supplies. Each power supply is a hot-removable and hot-insertable field-replaceable unit (FRU) when the second power supply is installed and running. - Page 75 Install the power supply in the chassis. For instructions on installing a power supply in an EX4600 switch, see “Installing a Power Supply in an EX4600 Switch” on page Ensure that you have the following parts and tools available: DC power source cables (14–16 AWG) with ring lug (Molex 190700069 or equivalent)
- Page 76 Figure 29 on page 77 Figure 30 on page 78 The EX4600 is designed to operate with a DC power supply that has a single, non-redundant, feed input. For source redundancy, two DC power supplies must be installed in EX4600; connect source (A) to one power supply and connect source (B) to the second power supply.
-
Page 77: Figure 29: Dc Power Supply Faceplate For An Ex4600 Switch
Tighten the screws on the power supply terminals until snug using the screwdriver. Do not overtighten—apply between 5 in-lb (0.56 Nm) and 6 in-lb (0.68 Nm) of torque to the screws. Figure 29: DC Power Supply Faceplate for an EX4600 Switch 1— Shunt negative input terminals (-48V) 5—... -
Page 78: Connecting The Ex4600 To Management Devices
EX4600 Switch Hardware Guide Figure 30: Securing Ring Lugs to the Terminals on the EX4600 DC Power Supply Replace the terminal block cover. Close the input circuit breaker. NOTE: The switch powers on as soon as power is provided to the power supply. -
Page 79: Connector
RJ-45 to DB-9 serial port adapter are supplied with the device. Figure 33 on page 79 shows the RJ-45 connector of the Ethernet cable. Figure 33: RJ-45 Connector on an Ethernet Cable Copyright © 2019, Juniper Networks, Inc. -
Page 80: Connecting Ex4600 Switches In A Virtual Chassis
Figure 35: Connecting a Device Directly to a Management Console Connecting EX4600 Switches in a Virtual Chassis EX4600 switches can be cabled together to create a Virtual Chassis in a ring topology. Each Virtual Chassis can have up to 10 switches (members) participating in the ring. The Virtual Chassis can be comprised of all EX4600 switches filling the master Routing Engine (RE), backup RE, and linecard roles. -
Page 81: Configuring Junos Os On The Ex4600
CLI command. show chassis version See for a diagram of how to cable two EX4600 switches and two EX4300 switches into a Virtual Chassis for Junos OS Release 14.1X53-D25 and later. Figure 36: Four Member Virtual Chassis with EX4600 Master and Backup... - Page 82 [edit] root@# set interfaces em0 unit 0 family inet address address/prefix-length CAUTION: Although the CLI permits you to configure two management Ethernet interfaces within the same subnet, only one interface is usable and supported. Copyright © 2019, Juniper Networks, Inc.
- Page 83 [edit] root@# set system services telnet NOTE: When Telnet is enabled, you cannot log in to the EX4600 switch through Telnet using root credentials. Root login is allowed only for SSH access. Commit the configuration to activate it on the switch.
- Page 84 EX4600 Switch Hardware Guide Copyright © 2019, Juniper Networks, Inc.
-
Page 85: Maintaining Components
Before removing the fan module, ensure you have a replacement fan module at hand. Before you remove a fan module from an EX4600 switch, ensure that you have taken the necessary precautions to prevent electrostatic discharge (ESD) damage (see “Prevention of Electrostatic Discharge Damage”... -
Page 86: Installing A Fan Module In An Ex4600 Switch
See Also Cooling System and Airflow in an EX4600 Switch on page 31 Installing a Fan Module in an EX4600 Switch The fan modules in an EX4600 switch are hot-removable and hot-insertable field-replaceable units (FRUs): you can remove and replace them without powering off the switch or disrupting switch functions. -
Page 87: Figure 38: Installing A Fan Module In An Ex4600 Switch
LCD, this airflow is called front to back and back to front. Before you install a fan module in an EX4600 switch, ensure that you have taken the necessary precautions to prevent electrostatic discharge (ESD) damage (see “Prevention... -
Page 88: Maintaining The Ex4600 Switch Power System
Installing a Power Supply in an EX4600 Switch on page 89 Removing a Power Supply from an EX4600 Switch The EX4600 is shipped from the factory with two power supplies. Each power supply is a hot-removable and hot-insertable field-replaceable unit (FRU) when the second power supply is installed and running. -
Page 89: Installing A Power Supply In An Ex4600 Switch
AC Power Supply in an EX4600 Switch on page 36 Installing a Power Supply in an EX4600 Switch The EX4600 is shipped from the factory with two power supplies. Each power supply is a hot-removable and hot-insertable field-replaceable unit (FRU) when the second power supply is installed and running. -
Page 90: Figure 40: Installing A Power Supply In An Ex4600 Switch
EX4600 Switch Hardware Guide Before you install a power supply in an EX4600 switch, ensure that you have taken the necessary precautions to prevent electrostatic discharge (ESD) damage (see “Prevention of Electrostatic Discharge Damage” on page 141). Ensure that the airflow direction of the power supply is the same as the chassis. Labels on the power supply handle indicate the direction of airflow. -
Page 91: Maintaining The Expansion Module In An Ex4600 Switch
Maintaining the Expansion Module in an EX4600 Switch Removing an Expansion Module from an EX4600 Switch on page 91 Installing an Expansion Module in an EX4600 Switch on page 92 Removing an Expansion Module from an EX4600 Switch... -
Page 92: Installing An Expansion Module In An Ex4600 Switch
Figure 41: Removing a QFX-EM-4Q Expansion Module from an EX4600 Switch Installing an Expansion Module in an EX4600 Switch The EX4600 switch allows up to two expansion modules to be added to the port panel to increase port density. The EX4600 switch holds two bays of expansion modules that can be mixed and matched as desired. - Page 93 ESD grounding strap. If a grounding strap is not available, follow the alternative grounding method described in Step 1 of the following procedure. Phillips (+) screwdriver, number 2 To install an expansion module in an EX4600 switch (see Figure 42 on page 94): Attach the ESD grounding strap to your bare wrist, and connect the strap to the ESD point on the chassis.
-
Page 94: Maintaining Transceivers
Figure 42 on page 94 shows how to install a QSFP+ expansion module on the port panel of a EX4600 switch. Figure 42: Installing a QFX4Q Expansion Module in an EX4600 Switch NOTE: If you have a Juniper Care service contract, register any addition, change, or upgrade of hardware components at . - Page 95 Remove the cable connected to the transceiver. Cover the transceiver and the end of each fiber-optic cable connector with a rubber safety cap immediately after disconnecting the fiber-optic cables. Copyright © 2019, Juniper Networks, Inc.
-
Page 96: Figure 43: Removing An Sfp, Sfp+, Xfp, Or A Qsfp+ Transceiver
To prevent electrostatic discharge (ESD) damage to the transceiver, do not touch the connector pins at the end of the transceiver. By using your fingers, grasp the body of the transceiver and pull it straight out of the port. Copyright © 2019, Juniper Networks, Inc. -
Page 97: Installing A Transceiver
(JTAC) can help you diagnose the source of the problem. Your JTAC engineer might recommend that you check the third-party optic or cable and potentially replace it with an equivalent Juniper Networks optic or cable that is qualified for the device. - Page 98 Remove the rubber safety cap when you are ready to connect the cable to the transceiver. WARNING: Do not look directly into a fiber-optic transceiver or into the ends of fiber-optic cables. Fiber-optic transceivers and fiber-optic cables connected to transceivers emit laser light that can damage your eyes. Copyright © 2019, Juniper Networks, Inc.
-
Page 99: Maintaining Fiber-Optic Cables
If the fiber-optic cable connector is covered with a rubber safety cap, remove the cap. Save the cap. Remove the rubber safety cap from the optical transceiver. Save the cap. Insert the cable connector into the optical transceiver (see Figure 45 on page 100). Copyright © 2019, Juniper Networks, Inc. -
Page 100: Disconnecting A Fiber-Optic Cable
Disconnecting a Fiber-Optic Cable Juniper Networks devices have field-replaceable unit (FRU) optical transceivers to which you can connect fiber-optic cables. Before you begin to disconnect a fiber-optic cable from an optical transceiver, ensure that you have taken the necessary precautions for safe handling of lasers. -
Page 101: Maintaining Fiber-Optic Cables
Cover the fiber-optic cable connector with the rubber safety cap. Maintaining Fiber-Optic Cables Fiber-optic cables connect to optical transceivers that are installed in Juniper Networks devices. To maintain fiber-optic cables: When you unplug a fiber-optic cable from a transceiver, place rubber safety caps over the transceiver and on the end of the cable. -
Page 102: Removing The Ex4600 Switch
Removing an EX4600 Switch from a Rack or Cabinet on page 105 Installing and Removing EX4600 Switch Hardware Components The EX4600 switch chassis is a rigid sheet-metal structure that houses the hardware components. The field-replaceable units (FRUs) in EX4600 switches are:... -
Page 103: Powering Off An Ex4600 Switch
“Removing a Fan Module from an EX4600 Switch” on page To install an SFP+ or QSFP+ transceiver in an EX4600 switch, follow the instructions in “Installing a Transceiver” on page 97. To remove an SFP+ or QSFP+ transceiver from an EX4600 switch, follow the instructions in “Removing a Transceiver”... - Page 104 AC power supply—If the AC power source outlet has a power switch, set it to the OFF (O) position. If the AC power source outlet does not have a power switch, gently pull out the male end of the power cord connected to the power source outlet. Copyright © 2019, Juniper Networks, Inc.
-
Page 105: Removing An Ex4600 Switch From A Rack Or Cabinet
Uncable the switch before removing it from the rack or cabinet. Removing an EX4600 Switch from a Rack or Cabinet If you need to relocate an installed EX4600 switch, use the procedure described in this topic. (The remainder of this topic uses “rack” to mean “rack or cabinet.” ) - Page 106 Remove the EX4600 switch from the rack or cabinet. Use the screwdriver to remove the mounting screws that attach the mounting blades attached to the rear of the rack or cabinet.
-
Page 107: Troubleshooting Hardware
This topic applies only to the J-Web Application package. Alarms alert you to conditions that might prevent normal operation of the switch. Before monitoring alarms on a Juniper Networks EX Series Ethernet switch, become familiar with the terms defined in Table 33 on page 107. -
Page 108: Interface Alarm Messages
Fibre Channel alarms are only valid on QFX3500 devices. NOTE: When red alarms or major alarms are issued on QFX5100 and EX4600 switches, the alarm LED glows amber instead of red. By default, major alarms are configured for interface link-down conditions on the control plane and management network interfaces in a QFabric system. -
Page 109: Creating An Emergency Boot Device
In the following procedure, we assume that you are creating the emergency boot device on a switch. You can create the emergency boot device on another Juniper Networks switch or router, or any PC or laptop that supports Linux. The steps you take to create the emergency boot device vary, depending on the device. -
Page 110: Performing A Recovery Installation
The emergency boot device (external USB install media) is detected. At this time, you can load the Junos OS from the emergency boot device onto the internal flash storage. The software prompts you with the following options: Copyright © 2019, Juniper Networks, Inc. - Page 111 Chapter 5: Troubleshooting Hardware Junos Snapshot Installer - (c) Juniper Networks 2013 Reboot Install Junos Snapshot [13.2-20131115_x_132_x51_vjunos.0Boot to host shell [debug] Select Install Junos to format the internal flash storage and install the Junos OS on the emergency boot device onto the internal flash storage.
- Page 112 EX4600 Switch Hardware Guide Copyright © 2019, Juniper Networks, Inc.
-
Page 113: Components
Packing an EX4600 Switch or Component for Shipping on page 116 Returning an EX4600 Switch or Component for Repair or Replacement If you need to return an EX4600 switch or component to Juniper Networks for repair or replacement, follow this procedure: Determine the serial number of the component. -
Page 114: Locating The Serial Number On An Ex4600 Switch Or Component
Locating the Serial Number on an EX4600 Switch or Component If you are returning a switch or component to Juniper Networks for repair or replacement, you must locate the serial number of the switch or component. You must provide the serial number to the Juniper Networks Technical Assistance Center (JTAC) when you contact them to obtain a Return Materials Authorization (RMA). -
Page 115: Locating The Chassis Serial Number Id Label On An Ex4600 Switch
Figure 46 on page 115 for an example of where to find the serial number ID on the EX4600 switch. Figure 46: Location of the Serial Number ID Label on an EX4600 Switch SN:TC3113280064 Locating the Serial Number ID Labels on FRU Components The power supplies, fan module, and expansion modules installed in EX4600 switches are field-replaceable units (FRUs). -
Page 116: Contacting Customer Support To Obtain Return Material Authorization
Packing an EX4600 Switch or Component for Shipping If you are returning an EX4600 switch or component to Juniper Networks for repair or replacement, pack the item as described in this topic. Before you pack an EX4600 switch or component:... -
Page 117: Packing An Ex4600 Switch For Shipping
“Powering Off an EX4600 Switch” on page 103. Remove the cables that connect the EX4600 switch to all external devices. Remove all field-replaceable units (FRUs) from the switch. Have one person support the weight of the switch while another person unscrews and removes the mounting screws. -
Page 118: Packing Ex4600 Switch Components For Shipping
Do not stack switch components. Return individual components in separate boxes if they do not fit together on one level in the shipping box. To pack and ship EX4600 switch components: Place individual FRUs in antistatic bags. Ensure that the components are adequately protected with packing materials and packed so that the pieces are prevented from moving around inside the carton. -
Page 119: Safety And Compliance Information
Multiple Power Supplies Disconnection Warning on page 149 TN Power Warning on page 150 Agency Approvals for EX Series Switches on page 150 Compliance Statements for EMC Requirements for EX Series Switches on page 151 Copyright © 2019, Juniper Networks, Inc. -
Page 120: General Safety Guidelines And Warnings
EX4600 Switch Hardware Guide Compliance Statements for Acoustic Noise for EX Series Switches on page 155 Statements of Volatility for Juniper Network Devices on page 155 General Safety Guidelines and Warnings The following guidelines help ensure your safety and protect the device from damage. -
Page 121: Definitions Of Safety Warning Levels
Avant de travailler sur un équipement, soyez conscient des dangers posés par les circuits électriques et familiarisez-vous avec les procédures couramment utilisées pour éviter les accidents. Copyright © 2019, Juniper Networks, Inc. -
Page 122: Qualified Personnel Warning
Varoitus Ainoastaan koulutettu ja pätevä henkilökunta saa asentaa tai vaihtaa tämän laitteen. Attention Tout installation ou remplacement de l'appareil doit être réalisé par du personnel qualifié et compétent. Warnung Gerät nur von geschultem, qualifiziertem Personal installieren oder auswechseln lassen. Copyright © 2019, Juniper Networks, Inc. -
Page 123: Warning Statement For Norway And Sweden
In addition, you should establish procedures to protect your equipment in the event of a fire emergency. Juniper Networks products should be installed in an environment suitable for electronic equipment. We recommend that fire suppression equipment be available in the event of a fire in the vicinity of the equipment and that all local fire, safety, and electrical codes and ordinances be observed when you install and operate your equipment. -
Page 124: Installation Instructions Warning
To keep warranties effective, do not use a dry chemical fire extinguisher to control a fire at or near a Juniper Networks device. If a dry chemical fire extinguisher is used, the unit is no longer eligible for coverage under a service agreement. -
Page 125: Chassis And Component Lifting Guidelines
Attention Cet appareil est à installer dans des zones d'accès réservé. Ces dernières sont des zones auxquelles seul le personnel de service peut accéder en utilisant un outil spécial, un mécanisme de verrouillage et une clé, ou tout Copyright © 2019, Juniper Networks, Inc. -
Page 126: Ramp Warning
When installing the device, do not use a ramp inclined at more than 10 degrees. Waarschuwing Gebruik een oprijplaat niet onder een hoek van meer dan 10 graden. Varoitus Älä käytä sellaista kaltevaa pintaa, jonka kaltevuus ylittää 10 astetta. Copyright © 2019, Juniper Networks, Inc. -
Page 127: Rack-Mounting And Cabinet-Mounting Warnings
De onderstaande richtlijnen worden verstrekt om uw veiligheid te verzekeren: De Juniper Networks switch moet in een stellage worden geïnstalleerd die aan een bouwsel is verankerd. Dit toestel dient onderaan in het rek gemonteerd te worden als het toestel het enige in het rek is. - Page 128 Les directives ci-dessous sont destinées à assurer la protection du personnel: Le rack sur lequel est monté le Juniper Networks switch doit être fixé à la structure du bâtiment. Si cette unité constitue la seule unité montée en casier, elle doit être placée dans le bas.
- Page 129 Le seguenti direttive vengono fornite per garantire la sicurezza personale: Il Juniper Networks switch deve essere installato in un telaio, il quale deve essere fissato alla struttura dell'edificio. Questa unità deve venire montata sul fondo del supporto, se si tratta dell'unica unità...
- Page 130 Para garantizar su seguridad, proceda según las siguientes instrucciones: El Juniper Networks switch debe instalarse en un bastidor fijado a la estructura del edificio. Colocar el equipo en la parte inferior del bastidor, cuando sea la única unidad en el mismo.
-
Page 131: Grounded Equipment Warning
Laser and LED Safety Guidelines and Warnings Juniper Networks devices are equipped with laser transmitters, which are considered a Class 1 Laser Product by the U.S. Food and Drug Administration and are evaluated as a Class 1 Laser Product per EN 60825-1 requirements. -
Page 132: General Laser Safety Guidelines
Varning! Laserprodukt av klass 1. Class 1 LED Product Warning WARNING: Class 1 LED product. Waarschuwing Klasse 1 LED-product. Varoitus Luokan 1 valodiodituote. Attention Alarme de produit LED Class I. Warnung Class 1 LED-Produktwarnung. Copyright © 2019, Juniper Networks, Inc. -
Page 133: Laser Beam Warning
Radiation from Open Port Apertures Warning WARNING: Because invisible radiation might be emitted from the aperture of the port when no fiber cable is connected, avoid exposure to radiation and do not stare into open apertures. Copyright © 2019, Juniper Networks, Inc. -
Page 134: Maintenance And Operational Safety Guidelines And Warnings
While performing the maintenance activities for devices, observe the following guidelines and warnings: Battery Handling Warning on page 135 Jewelry Removal Warning on page 136 Lightning Activity Warning on page 137 Operating Temperature Warning on page 137 Product Disposal Warning on page 139 Copyright © 2019, Juniper Networks, Inc. -
Page 135: Battery Handling Warning
Desechar las baterías gastadas según las instrucciones del fabricante. Varning! Explosionsfara vid felaktigt batteribyte. Ersätt endast batteriet med samma batterityp som rekommenderas av tillverkaren eller motsvarande. Följ tillverkarens anvisningar vid kassering av använda batterier. Copyright © 2019, Juniper Networks, Inc. -
Page 136: Jewelry Removal Warning
à terra, podendo causar queimaduras graves ou ficarem soldados aos terminais. ¡Atención! Antes de operar sobre equipos conectados a líneas de alimentación, quitarse las joyas (incluidos anillos, collares y relojes). Los Copyright © 2019, Juniper Networks, Inc. -
Page 137: Lightning Activity Warning
Varning! Vid åska skall du aldrig utföra arbete på systemet eller ansluta eller koppla loss kablar. Operating Temperature Warning WARNING: To prevent the device from overheating, do not operate it in an area that exceeds the maximum recommended ambient temperature. To Copyright © 2019, Juniper Networks, Inc. - Page 138 6 in. (15.2 cm) of clearance around the ventilation openings. Waarschuwing Om te voorkomen dat welke switch van de Juniper Networks router dan ook oververhit raakt, dient u deze niet te bedienen op een plaats waar de maximale aanbevolen omgevingstemperatuur van 40°...
-
Page 139: Product Disposal Warning
The intrabuilding ports on the device are suitable for connection to intrabuilding or unexposed wiring or cabling only. The addition of primary protectors is not sufficient protection for connecting these interfaces metallically to OSP wiring. Copyright © 2019, Juniper Networks, Inc. -
Page 140: Action To Take After An Electrical Accident
Use caution. Be aware of potentially hazardous conditions that could cause further injury. Disconnect power from the device. If possible, send another person to get medical aid. Otherwise, assess the condition of the victim, then call for help. Copyright © 2019, Juniper Networks, Inc. -
Page 141: Prevention Of Electrostatic Discharge Damage
141). If you are returning a component, place it in an antistatic bag before packing it. Figure 47: Placing a Component into an Antistatic Bag CAUTION ELECTROSTATIC SENSITIVE DEVICES DO NOT OPEN OR HANDLE EXCEPT AT A STATIC-FREE WORKSTATION Copyright © 2019, Juniper Networks, Inc. -
Page 142: Ac Power Electrical Safety Guidelines
To disconnect power, unplug all power cords (one for each power supply). Power Cable Warning (Japanese) WARNING: The attached power cable is only for this product. Do not use the cable for another product. Copyright © 2019, Juniper Networks, Inc. -
Page 143: Ac Power Disconnection Warning
Run two wires from the circuit breaker box to a source of 48 VDC. A DC-powered device that is equipped with a DC terminal block is intended only for installation in a restricted-access location. In the United States, a restricted-access Copyright © 2019, Juniper Networks, Inc. -
Page 144: Dc Power Disconnection Warning
(OFF) et, à l'aide d'un ruban adhésif, bloquer la poignée du disjoncteur en position OFF. Copyright © 2019, Juniper Networks, Inc. -
Page 145: Dc Power Grounding Requirements And Warning
The grounding conductor is a separately derived system at the supply transformer or motor generator set. Copyright © 2019, Juniper Networks, Inc. -
Page 146: Dc Power Wiring Sequence Warning
–48 V varten – 48 V, +RTN varten +RTN, maajohto maajohtoon. Attention Câblez l'approvisionnement d'alimentation CC En utilisant les crochets appropriés à l'extrémité de câblage. En reliant la puissance, l'ordre approprié de câblage est rectifié pour rectifier, +RTN à +RTN, puis –48 V à Copyright © 2019, Juniper Networks, Inc. - Page 147 último. Varning! Korrekt kopplingssekvens ar jord till jord, +RTN till +RTN, –48 V till –48 V. Korrekt kopplas kopplingssekvens ar –48 V till –48 V, +RTN till +RTN, jord till jord. Copyright © 2019, Juniper Networks, Inc.
-
Page 148: Dc Power Wiring Terminations Warning
¡Atención! Cuando se necesite hilo trenzado, utilizar terminales para cables homologados, tales como las de tipo "bucle cerrado" o "espada", con las Copyright © 2019, Juniper Networks, Inc. -
Page 149: Multiple Power Supplies Disconnection Warning
Varning! Denna enhet har mer än en strömförsörjningsanslutning; alla anslutningar måste vara helt avlägsnade innan strömtillförseln till enheten är fullständigt bruten. Copyright © 2019, Juniper Networks, Inc. -
Page 150: Tn Power Warning
EN 60950-1 European Norm, Safety of Information Technology Equipment IEC 60950-1 Information Technology Equipment - Safety - Part 1: General Requirements (with country deviations) EN 60825-1 Safety of Laser Products - Part 1: Equipment Classification, Requirements, and User’ s Guide Copyright © 2019, Juniper Networks, Inc. -
Page 151: Compliance Statements For Emc Requirements For Ex Series Switches
FCC Part 15 Statement on page 153 Nonregulatory Environmental Standards on page 154 Canada This Class A digital apparatus complies with Canadian ICES-003. Cet appareil numérique de la classe A est conforme à la norme NMB-003 du Canada. Copyright © 2019, Juniper Networks, Inc. -
Page 152: Taiwan
European Community This is a Class A device. In a domestic environment this device might cause radio interference, in which case the user needs to take adequate measures. Israel The preceding translates as follows: Copyright © 2019, Juniper Networks, Inc. -
Page 153: Japan
Part 15 of the FCC Rules. These limits are designed to provide reasonable protection against harmful interference in a residential installation. This equipment generates, uses, and can radiate radio frequency energy and, if not installed Copyright © 2019, Juniper Networks, Inc. -
Page 154: Nonregulatory Environmental Standards
All EX8200 switches EX9251 EX9253 These switches meet the following NEBS compliance standards: SR-3580 NEBS Criteria Levels (Level 4 Compliance) GR-1089-CORE: EMC and Electrical Safety for Network Telecommunications Equipment Copyright © 2019, Juniper Networks, Inc. -
Page 155: Compliance Statements For Acoustic Noise For Ex Series Switches
The emitted sound pressure is below 70 dB(A) per EN ISO 7779. Statements of Volatility for Juniper Network Devices A statement of volatility—sometimes known as letter of volatility—identifies the volatile and non-volatile storage components in Juniper Networks devices, and describes how to remove non-volatile storage components from the device. NOTE: Statements of volatility are not available for all Juniper Networks devices. - Page 156 M7i Compact Forwarding Engine Board (CFEB) M40e and M10i M320 MX5, MX10, MX40, and MX80 MX240, MX480, and MX960 RE-A-2000 Route Engine RE-S-X6-64G Routing Engine QFX Series: QFX3008-I QFX3100 QFX3500 QFX3600 QFX5100-24Q QFX5100-48S QFX5100-48T QFX5200 QFX5200-32C QFX10008 and QFX10016 Copyright © 2019, Juniper Networks, Inc.
- Page 157 Chapter 7: Safety and Compliance Information SRX Series: SRX100 SRX110 SRX210B SRX210H-POE SRX210H-P-MGW SRX220 SRX240H SRX240H-POE SRX300 SRX320 SRX340 and SRX345 SRX550 SRX650 SRX1400 SRX1500 SRX3400 and SRX3600 SRX5400, SRX5600, and SRX5800 SRX-MP-1SERIAL SSG-520M T Series: RE-A-2000 Route Engine Copyright © 2019, Juniper Networks, Inc.
- Page 158 EX4600 Switch Hardware Guide Copyright © 2019, Juniper Networks, Inc.
Need help?
Do you have a question about the EX4600 and is the answer not in the manual?
Questions and answers