Advertisement
This is the quick start guide for your first operation.
For detail, refer to the operator manual available on your region's website (www.satoworldwide.com).
Illustrations used in this quick guide is thermal transfer model unless otherwise specified.
Accessories

- CT4-LX
- AC adapter
- Power cord*
- Quick guide
- Global Warranty Program leaflet
- Documents
- Core adapters (2)
- Ribbon core (3 types)
* The shape of power plug varies depending on the region.
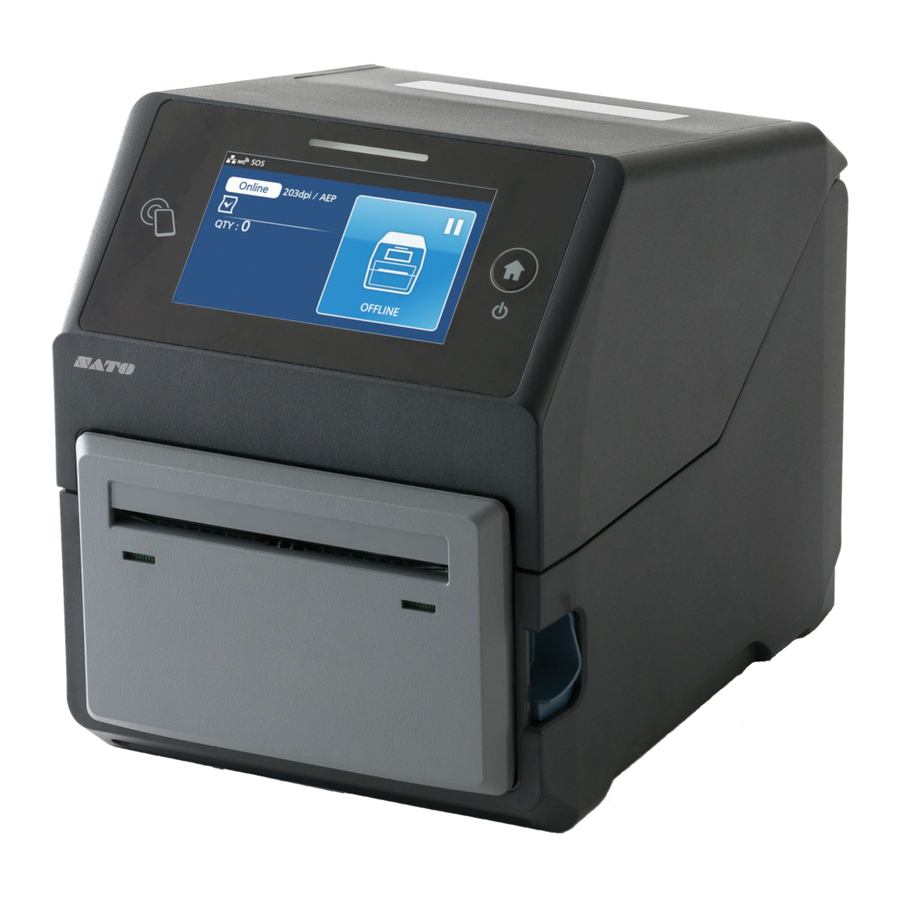
Parts Identification

- NFC built-in antenna
- LCD/Touch panel
- LED indicator
![]() (Power/Home) button
(Power/Home) button- Media discharge outlet
- Cover open latch
- DC input connector
![]() USB connector (Type B)
USB connector (Type B)![]() USB connector (Type A)
USB connector (Type A)![]() LAN connector
LAN connector- Media loading port
- Print head
![]() USB connector (Type A) *
USB connector (Type A) *![]() (ribbon cover open) mark
(ribbon cover open) mark- Top cover
- Media guide
- Platen roller
 USB connector (Type B)
 LAN connector
 (ribbon cover open) mark
* This USB connector is inside the top cover.
Options

- Cutter unit
- Dispenser unit
Interface Options
- RS-232C for connection with RS-232C cable
- WLAN/Bluetooth for wireless connection
Connecting the AC Adapter

- Connect the power cord
![]() to the AC adapter
to the AC adapter ![]() .
. - Connect the plug of the AC adapter to the DC input connector
![]() of the CT4-LX
of the CT4-LX ![]() .
. - Plug the power cord into an AC outlet.
 to the AC adapter
  .
. of the CT4-LX
  .
.Setting the Carbon Ribbon (Thermal transfer model only)


- Setting the Core adapter
![]() with the carbon ribbon
with the carbon ribbon - Loading the Carbon Ribbon
![]()
![]() Open the top cover and
Open the top cover and ![]() pull the
pull the ![]() mark of the ribbon unit (C). The ribbon cover (A) is drawn forward.
mark of the ribbon unit (C). The ribbon cover (A) is drawn forward. ![]()
![]() Set the carbon ribbon (B) on the ribbon cover.
Set the carbon ribbon (B) on the ribbon cover.![]() Attach the carbon ribbon to the ribbon core
Attach the carbon ribbon to the ribbon core ![]() with adhesive tape (D) or the like, and
with adhesive tape (D) or the like, and ![]() wind them in the direction of the arrow a few rounds.
wind them in the direction of the arrow a few rounds.![]()
![]() Set the ribbon core.
Set the ribbon core.![]() Close the ribbon cover (A), and
Close the ribbon cover (A), and ![]() turn the dial (E) to wind the carbon ribbon a few rounds.
turn the dial (E) to wind the carbon ribbon a few rounds. ![]() Close the top cover.
Close the top cover.
 with the carbon ribbon
 Open the top cover and
  pull the
 Set the carbon ribbon (B) on the ribbon cover.
 with adhesive tape (D) or the like, and
 Loading Media

- When the media roll is installed properly, the flap (F) will be vertical.
- Pass the media under the tab (G) at the edge of the media guide
![]() .
. - Use only the supply products specified by SATO.
- Adjust the media guide
![]() to the media size.
to the media size.
 .
.Turning on the Power
Press the  (Power/Home) button
  .
.
Turning off the Power
Press the (Power/Home) button , then tap  on the LCD/Touch panel
  .
.
Basic Specifications
Print method: Direct thermal, Thermal transfer
Head density (Resolution): 203 dpi/305 dpi
Model name: CT4-LX
Dimensions: 178 (W) x 238 (D) x 214 (H) mm (7 x 9.4 x 8.4 in.) (not including protruding parts)
Weight: Direct thermal model: Approx. 3.3 kg (7.3 lb), Thermal transfer model: Approx. 3.4 kg (7.5 lb) (not including media and options)
Power consumption:
Input power voltage condition: AC 100 - 240 V, 50 - 60 Hz
At peak: 155 VA/95 W (AC100V, 30% printing ratio), 187 VA/88 W (AC240V, 30% printing ratio)
Standby: 18 VA/8 W (AC100V), 24 VA/8 W (AC240V)
Power requirements: AC adapter
Input voltage: AC 100 - 240 V, 50 - 60 Hz
Output voltage: DC 24 V ±5% ![]() 2.7 A (DC Symbol
2.7 A (DC Symbol ![]() )
)
Maker: Lead Year Enterprise Co., Ltd.
Model: TG16-0064-01
Environmental conditions (Temperature/Humidity):
Operating: 0 - 40 ºC (32 - 104 ºF), 30 - 80% RH (non-condensing)
Storage: −10 - 60 ºC (14 - 140 ºF), 15 - 90% RH (non-condensing)
Technical Specification ([B] Bluetooth [W] Wireless LAN [N] NFC)
Frequency band: [B] 2402 - 2480 MHz, [W] 2412 - 2472 MHz, 5180 - 5825 MHz, [N] 13.56 MHz, Modulation: [B] GFSK, Π/4 DQPSK, 8DQPSK, [W] DSSS, OFDM, [N] NFC Type 2 Tag (Passive), Channel Spacing: [B] 1 MHz, [W] 5, 20, 40, 80 MHz, Max. output power*: [B] 4 dBm, [W] 20.5 dBm, Antenna gain (2.4 GHz)*: [B] +5 dBi, [W] +5 dBi, Antenna gain (5 GHz)*: [W] +5 dBi
* [N] Operating distance of up to 100 mm (depending on various parameters, such as field strength and antenna geometry)
To display the regulatory information on the LCD/Touch panel, tap "Offline" - " (Setting)" - "Information" - "Regulatory."
Open Source Software
This printer product includes open source software applied to the open source software license. Please see our web site for more information. http://www.satoworldwide.com/licenses/OSS.aspx

First edition: Oct. 2019
Q05296700
©2019 SATO Corporation

Documents / Resources
References
Download manual
Here you can download full pdf version of manual, it may contain additional safety instructions, warranty information, FCC rules, etc.
Advertisement


Need help?
Do you have a question about the CT4-LX1 and is the answer not in the manual?
Questions and answers