
Related Manuals for SOLIS S3-WIFI-ST


Summary of Contents for SOLIS S3-WIFI-ST
- Page 1 User Manual External WiFi Data Logger for Remote System Monitoring Model Number: S3-WIFI-ST Version 1.3 Release Date: 01/12/2023...
- Page 2 ● Tampering or unsafe repairs. ● Use or installation by unqualified persons. ● This manual is to be used for the S3-WIFI-ST data logger only. It should not be used for any other Solis device. ● For additional assistance with SolisCloud, please go to the Ginlong US website and download the SolisCloud user manual: www.ginlong.com/us...
- Page 3 FCC Certification This device complies with part 15 of the FCC rules. Operation is subject to the following two conditions: (1) This device may not cause harmful interference (2) This device must accept any interference received, including interference that may cause undesired operation FCC Warning: Any changes or modifications not expressly approved by the party responsible for...
- Page 4 Table of Contents Introduction Installation Configuration Commissioning Decommissioning Technical Specs...
-
Page 5: Table Of Contents
Table of Contents 1. Introduction ..................1.1 Data Logger Description ..............1.2 Compatible Solis US Inverter Models ..........1.3 LED Indicator Lights ................. 2. Installation ................... 2.1 Pre-Installation Steps ............... 2.2 Installation Steps ................2.3 Connecting Multiple Inverters to One Data Logger ....... -
Page 6: Introduction
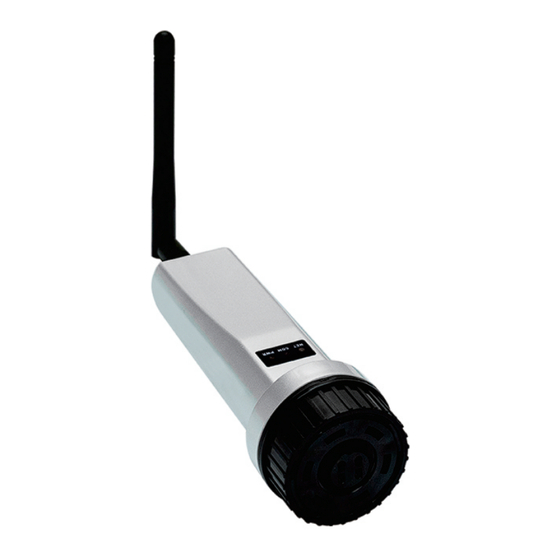
1. Introduction 1.1 Data Logger Description The Solis WiFi Data Logger is an external device which plugs directly into to a port on the bottom of a Solis inverter. The logger relays information from the inverter to the Solis monitoring platform, called SolisCloud. This logger connects to a local 2.4GHz WiFi network, it is incompatible with 5GHz networks. -
Page 7: Led Indicator Lights
1. Introduction 1.3 LED Indicator Lights The Solis S3-WIFI-ST data logger has three LED indicator lights. These lights depict the status of the logger. There are three lights: NET, COM, and PWR. The chart below explains what the lights mean when they are flashing, solid, or off. lf the LED lights are all off when the inverter is getting proper voltages, please contact Solis Support. -
Page 8: Installation
This port is protected by a black cap that screws on. The first step is to unscrew the cap. Figure 2.1 shows the Solis-1P10K-4G-US inverter wire box as an example. Other Solis inverters will have a similar green COM port on the bottom of the wire box. Figure 2.1 COM Port... -
Page 9: Connecting Multiple Inverters To One Data Logger
2. Installation Step 2: Attach the antenna and plug the logger into the COM port A.Screw the antenna onto the logger. Then plug the logger into the COM port. Be sure the LED indicator lights are facing forward. The logger will only plug in if the joint matches. B.Twist the black lock ring at the top the logger clockwise until it feels snug against the bottom of the inverter. -
Page 10: Configuration
Reset button on the back of the data logger for 15 seconds. If the AP network still does not appear or if the password fails again, contact Solis Support. Contacting Solis Technical Support... - Page 11 Status tab. If you get a message stating that the login information is incorrect, please try holding the Reset button down for 15 seconds. Then go through the configuration steps once more. If the message occurs again, please contact Solis Technical Support. Step 3: Connect the data logger to the WiFi network Tap Quick Set on the left side of the page.
- Page 12 3. Configuration Enter the WiFi network password. To view the password as you are entering it, tap on the semicircle that is in the password field. Once the password has been entered, tap Save. A message stating that the set up is finished will appear. If the logger is able to connect to the WiFi network, your phone will automatically be disconnected from the logger access point network and the green light should go solid.
-
Page 13: Commissioning
. Step 1: Download the SolisCloud application or go to the SolisCloud website Search “SolisCloud” in the app store and download the app. If you search “Solis” many apps will appear, please see figure 4.1 for the correct app SolisCloud. -
Page 14: Create A New Plant For The System
4. Commissioning 4.2 Create a New Plant for the System Once you are logged in you will need to create a new plant for your system. After that, you will be able to add the data logger to the plant. The inverter will automatically populate into the plant as soon as the logger reports to SolisCloud. -
Page 15: Decommissioning
Step 3: Store or ship the logger Now that the logger has been removed, it can now be installed on another inverter or shipped back to Solis. To pair the logger with a different inverter, please follow the same steps that have been outlined in this manual. -
Page 16: Technical Specifications
6. Technical Specifications Models S3-WiFi-ST Solis inverter (all models except S6-EH1P(3.8-11.4)K-H-US) Supported device type Number of connected inverters ¡Ü 1 0 Data collection intervals 5 minutes Status indicator LED × 3 Communication interface 4 Pin Wireless communication 802.11b/g/n (2.4G—2.483G) Mobile App/Website Configuration method... - Page 17 Ginlong Technologies Co., Ltd. No. 57 Jintong Road, Binhai Industrial Park, Xiangshan,Ningbo, Zhejiang, 315712, P.R. China. Telephone: +1(866)438-8408 Email: usservice@solisinverters.com Website: www.ginlong.com/us If you encounter any problems with the logger, please take note of the logger serial number and then contact us using the phone number or email listed above.
Need help?
Do you have a question about the S3-WIFI-ST and is the answer not in the manual?
Questions and answers