
Related Manuals for Hikari HX68S Series


Summary of Contents for Hikari HX68S Series
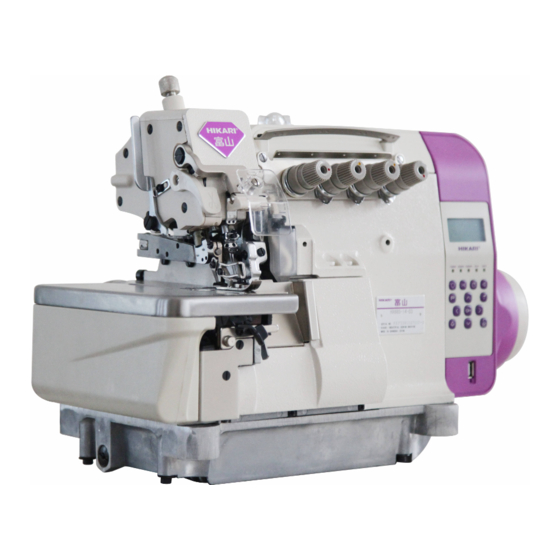
- Page 1 HX68S 系列 Serles 电脑超高速步进包缝机 COMPUTERIZED STEPPER DRIVE INTELLIGENT V1.00 SUPER - HIGH SPEED OVERLOCK SEWING MACHINE...
-
Page 2: Table Of Contents
目 录 一、显示及操作界面................. 2 二、用户区参数的修改..............3 三、自动/半自动模式的修改............3 四、吸气模式的修改................. 3 五、剪线模式的修改................. 3 六、抬压脚模式的修改..............3 七、最高转速的修改................. 3 八、用户及技术区参数的修改.............3~4 九、布料选择模式及光眼值校正.............4 十、快捷恢复参数及密码功能............4 十一、操作参数说明表..............4~7 电控相关的要求及操作使用注意事项....8~11 十二、 - 1 -... -
Page 3: 一、显示及操作界面
一、显示及操作界面 序号 图标 说明 备注 点按为选择参数的快揵;长按为设值 用户参数设定键 参数的快揵 左移键 左移动光标 点按为选择参数的快揵;长按为设值 技术参数设定键/速度设定键 参数的快揵 上移键 参数项加和参数值加 确认键 修改参数值确认 下移键 参数项减和参数值减 右移键 右移动光标 LED 亮度调整键 点按为选择参数的快揵; 模式转换键 点按为选择参数的快揵 点按为选择参数的快揵;长按为设值 剪线模式调整键 参数的快揵 点按为选择参数的快揵;长按为设值 吸气模式调整键 参数的快揵 点按为选择布料的快揵;长按为查看 料选择快捷键 或手动校正光眼值的快揵 点按为选择参数的快揵;长按为设值 抬压脚模式调整键 参数的快揵 - 2 -... -
Page 4: 二、用户区参数的修改
二、用户区参数的修改 键时,进入用户参数模式; 、 修改对应的 当用户长按下 通过按键 参数号,通过按键 、 修改对应的参数值, 键确认。显示相应的 按 参数序号及参数内容;当 键,退回到待机界面。 用户点按下 三、自动/半自动模式的修改 键时,进入人工、半自动、自由缝和全自动模式的修改状 当用户点按下 态,不断按键时,模式循环如以下四种状态:人工、 和 半自动、自由缝 全自动。 四、吸气模式的修改 键时,即可修改吸气模式。不断点按时,模式循环如以下 当用户点按下 几种状态:前吸气、后吸气、前后吸气、关闭; 长按 键时,相关参数调整的快 。 揵键 五、剪线模式的修改 键时,即可修改剪线模式。不断点按时,模式循环如以下 当用户点按下 几种状态:前剪线、后剪线、前后剪线、关闭; 长按 键时,相关参数调整的快 。 揵键 六、抬压脚模式的修改 键时,即可修改抬压脚模式。不断点按时,模式循环如以下几 当用户点按下 种状态:前抬压脚、后抬压脚、前后抬压脚、关闭;... -
Page 5: 八、用户及技术区参数的修改
八、用户及技术区参数的修改 当用户长按住 键不放,则显示“密码:0000 ”。要求用户输入参数密码,用户通 、 修改对应的密码位。通过按 键、 修改对应的密码值。 过按键 键确认。 每调整一个密码值,对应的字符位显示相应的数值。密码输入完成后,按 若密码输入正确, 则进入用户及技术参数修改模式。显示相应的参数序号及参数 内容。 九、布料选择模式及光眼值校正 1)首次点按 键时为布料选择模式 当前界面再次点按 键是查看光眼数值和手动微调光眼数值; 2)出厂默认为普通布料,当遇到不同布料时,请先点按 键,出现“布料选择”界面 时,根据不同的需求选择相应的布料,再按 键,系统自动校正光眼值 ; 3)布料适用范围:A:厚料 B:普通 C:薄料 D:透明 E:大网 F:小网 备注:在选择布料时,请勿将布料遮挡光眼;在正常使用系统时,要及时清理光眼上的布屑 等。 十、快捷恢复参数及密码功能 键,选择 P98 参数,输入包缝的参数密码“XXXX”,长按 键 2s,直到界 长按 面跳回主界面,恢复当前的区域参数为出厂默认值。 - 4 -... -
Page 6: 十一、操作参数说明表
十一、操作参数说明表 序号 功能参数 默认值 设定范围 单位 参数说明 备注 0:半自动 1:全自动 工作模式 0:关闭 1:开启 电眼选择 0:关闭剪线 1: 前剪线开 2: 自动剪线 后剪线开 3:前、后剪线开 0:关闭剪线 1: 前剪线开 2: 83BL ※※ 自动剪线 后剪线开 3:前、后剪线开 0:关闭吸气 1:前吸气开 自动吸气 2:后吸气开 3:前、后吸气开 0:关闭吸气 1:前吸气开 83BL ※※ 自动吸气 2:后吸气开... - Page 7 1~99 前吸气开启针数 根据要求客户可自行调整参数 1~99 ※ 前吸气开启针数 根据要求客户可自行调整参数 1~99 前吸气关闭针数 根据要求客户可自行调整参数 1~99 ※ 前吸气开启针数 根据要求客户可自行调整参数 根据要求客户可自行调整参数 后吸气开启针数 1~99 根据要求客户可自行调整参数 ※ 前吸气开启针数 1~99 10~9999ms 后吸气关闭针数 根据要求客户可自行调整参数 1~99 ※ 前吸气开启针数 根据要求客户可自行调整参数 0~99 吸屑启动针数 预留 0~99 吸屑关闭针数 预留 U30※ 0~99 松线开启针数 根据要求客户可自行调整参数 U31※ 0~5000 松线关闭针数...
- Page 8 0 全关;1 人工开;2 半自动开;3 全自 动开;4 人工和半自动开;5 半自动 手动吸气开关 和全自动开;6 人工全和自动开;7 人工、半自动和全自动开 0 全关;1 人工开;2 半自动开;3 全自 动开;4 人工和半自动开;5 半自动 手动切线开关 全自动开;6 人工全自动开;7 人工 半自动全自动开 0 无布时动作;1 有布时动作 ;2 手动切线动作有效 随时动作 0 无布时动作;1 有布时动作 ;2 U56※ 手动松线动作有效 随时动作 0 无布时动作;1 有布时动作 ;2 后踏切线动作有效...
- Page 9 U72※※ 0~9000 83BL 后踏吸气时间 U73※※ 3500 200~6000 83BL 速度调控 0:关闭 1:开启 前放压脚模式 0:缝制中途上针位,缝制结束停 上针位 1:缝制中途下针位,缝 刹车针杆位置 制结束停上针位; 预留 30~500 前通道响应时间 20~200 中通道响应时间 2~200 后通道响应时间 0~99 前通道灵敏度 根据要求客户可自行调整参数 0~99 中通道灵敏度 根据要求客户可自行调整参数 0~99 根据要求客户可自行调整参数 后通道灵敏度 5~120 前通道响应值 5~120 中通道响应值 5~120 后通道响应值 0 全关;1 人工开;2 人工、 半自动全 安全开关...
-
Page 10: 十二.电控相关的要求及操作使用注意事项
十二.电控相关的要求及操作使用注意事项 0.主要技术数据 供电电压范围:AC220V±15% 供电电源频率:50Hz/60Hz 1、 安全注意事项 1.1 使用范围 本伺服控制器是为工业缝纫机开发设计的,如果在其它方面使用,请注意使 用者的安全。 1.2 工作环境 1.2.1 电源电压请遵照电控电压±15%范围内。 1.2.2 请远离高频电磁波发射器等,以免所产生的电磁波干扰本控制器 而发生错误动作。 1.2.3 温湿度 : a.请在室温 5°C 以上、 45°C 以下的场所操作。 b.禁止在日光直接照射的场所或室外运作。 c.请不要过于接近暖气 (电热器) 旁运作。 d.请保持 30 % ~ 95 % 相对湿度(无凝露)。 1.2.4 请不要在可燃气体或爆炸物附近操作。 1.3 安装 1.3.1 控制器请遵照说明书进行正确安装。... - Page 11 1.5 危险提示 这个标示符号表示机器在安装时,安全上需要 特别加以注意的事项,忽视此标记而进行错误操作 可能会导致人员或是机器损伤。 1.6 其它安全规定 1.6.1、在第一次接通电源后,请先以低速操作缝纫机并检查转动方向是否正确。 1.6.2、缝纫机运转时,请不要去触摸手轮、机针等会动作的部位。 1.6.3、所有可动作的部份,必须以所提供的防护装置加以隔离,防 止身体接触,请勿在装置内塞入其它物品。 1.6.4、请不要在拆下电机护罩及其它安全装置的情形下操作。 1.6.5、不要使电机或控制箱掉在地上。 1.6.6、不要让茶水等液态物体流入控制箱或电机内部。 2. 安装与调整 2.1 控速器的安装 ).将脚踏控速器安装于台板下方 2). 将踏板与控速器安装连结 3).安装后示 意图 2.2 停针位的调整 2.2.1、 由专业的技术人员通过操作界面的学习界面,可调整到合理的停针位置; - 10 -...
- Page 12 2.3 脚踏板后踏力量的调整 调整需求 调 整 结 果 当螺栓愈向下时,则后踏力量愈重。当螺栓愈向上时,则后踏力量愈轻。 踏板后踏力量的调整 3. 接线与接地 3.1 电源线的接法 本控制器适用于AC220V单相电源,电压输入范围为电控电压±15%。 注意: 黄/绿色电源线为接地线,为了人员安全及设备可靠工作,一定要 做好系统的接地工程。 - 11 -...
- Page 13 3.2 控制器接线端子图:如下图 序号 端口名称 电控电源端口 松线(KSC) 预留 预留 吸风 预留 预留 倒回缝(吸线头) 倒回缝(松线) 机灯 中光眼发射 前光眼发射 手动剪线 后光眼发射 前光眼接收 中光眼接收 后光眼接收 压脚霍尔 预留 缝台安全开关 预留 NET31-1 主程序升级端口 步进电机编码器端口 步进电机电源端口 电机编码器端口 电机电源端口 - 12 -...
- Page 14 4. 故障分析和故障表 故障显 故障描述 故障原因 故障排除方法 示代码 电机信号线端子头接 找不到 断电后检查电机信号线是否松动,然后重新上电,如果还 Er01 触不良 停针位 不能解决,请联系售后服务人员 1:开机时没插调速器 断电后检查控速器连接或插头是否接触不良, 然后重新上 Er02 控速器信号错误 2:控速器线接触不良 电,如果还不能解决,请联系售后服务人员 电机信号线插头接触 断电后检查电机信号线是否松动,然后重新上电,如果还 Er03 电机相位信号错误 不良 不能解决,请联系售后服务人员 断电后检查: 1:缝纫机过重或堵死 1、请检查机头是否被卡住 2:电机过载 Er04 电机堵转保护 2、请检查电机是否被卡住 3:电机 4 线驱动线没 3、电机电源端子脱落或松动 连接好或插反 然后重新上电,如果还不能解决,请联系售后服务人员 断电后检查:...
- Page 15 Er19 AB 相电流检测故障 1.电机驱动电源电压过低,220V 电源电压低于限定值 (AC91V),或电机驱动电源电压低于限定值(DC130V), Er20 欠压故障 上位机通信故障 或电压检测回路故障。 注:(110V 电源电压低于限定值(AC45.5V), 或电机驱动电源电压低于限定值(DC65V)) Er22 控速器故障 控速器接触不良 关机查看转接线插头是否接处不良 5.此说明书仅作参考,如有更改恕不另作通知。 - 14 -...
- Page 16 Contents 1、Display and operation panel..........- 2 -14 2、Modification of user parameters..........14 3、Modification of auto & semi-auto mode........14 4、Modification of the suction mode..........14 5、Modification of the trimming mode........14~15 6、Modification of the cloth-pulling mode........15 7、Modification of the mode for lifting presser foot....... 15 8、Modification of the max speed............15 9、Cloth select mode and sensor value correction ......15 10、Fast reset the parameter and password fucntion.......
-
Page 17: 1、Display And Operation Panel
1、 Display and operation panel Icon Explanation Notes Click the shortcut key to select the parameter, long press the shortcut Parameter setting key for setting the parameter. Click the shortcut key to move the cursor left or select the parameter; Left-Moving long press the shortcut key for setting the parameter. -
Page 18: 2、Modification Of User Parameters
2、 Modification of user parameters When the user long press , enter the user parameter mode ; Through Through , modify the modify the corresponding parameter number; corresponding parameter number; Confirm with ; When the user clicks it will return to the standby interface. 3、Modification of auto &... -
Page 19: 5、Modification Of The Trimming Mode
5、Modification of the trimming mode When the user clicks ,You can modify the trimming mode .When the keys are cycled, the modes are circulated in the following states : Front trimming, back trimming , front-back trimming , off;Long press related parameters to adjust the shortcut keys. -
Page 20: 9、Cloth Select Mode And Sensor Value Correction
9、Cloth select mode and sensor value correction 1)Press the for the cloth selecting mode Press the again to review the sensor value and to manually mirco adjust the value 2)The setting mode is for the normal fabric,when stitching different type fabric, pls press to choose different mode, and press again,the system will... -
Page 21: 11、 Form Of The Operation Parameters
Form of the operation parameters 10、 Default Setting Notes Function Explanation value range Work mode 0:Semi-Auto 1:Auto Sensor selection 0:Off 1:On 0:Trimmer Off 1:Front trim Auto trimming 2:Rear trim 3:Front & Rear trim 0:Trimmer Off 1:Front trim 83BL Auto trimming ※※... - Page 22 F-trimming delay S-N 0~600 Adjusting parameters to customer requirements R-trimming Delay S-N 0~600 Adjusting parameters to customer requirements R-trimming Delay S-N 0~600 Adjusting parameters to customer requirements 83BL ※※ F- suction on S-N 0~99 Adjusting parameters to customer requirements F- suction on S-N 0~99 Adjusting parameters to customer requirements ※...
- Page 23 suction switch On ;4ManualAndSemi-AutomaticOn ;5Semi-Autom aticandAutomaticOn ;6ManualandAutomaticOn ;7M anual and Semi-Automatic and Automatic On R-Pedal trimming switch 0 Off ;1ManualOn ;2Semi-AutomaticOn;3Automatic On ;4ManualAndSemi-AutomaticOn ;5Semi-Autom aticandAutomaticOn ;6ManualandAutomaticOn ;7M anual and Semi-Automatic and Automatic On Mannual suction 0 Off ;1ManualOn ;2Semi-AutomaticOn;3Automatic switch On ;4ManualAndSemi-AutomaticOn ;5Semi-Autom aticandAutomaticOn ;6ManualandAutomaticOn ;7M anual and Semi-Automatic and Automatic On...
- Page 24 stitches no. R- Puller off stitches no. 5~100 Reserve R-thread release off 83BL ※※ stitches no. 5~9000 Puller position As stop 0:No lift As Stop; Reserve 1:Puller is up and down As Stop sewing U68※ F-release on S-N 0~600 F-suction on Stitches 83BL ※※...
-
Page 25: Electrical Control Related Requirements And Operating Precautions
Interface recovery time 0~9999 0:Off1~5: Represents 5s Off; 5~9999(not including5s): Represent Set Value Off Rearlight contrast Rearlight brightness Head lamp brightness Password 0~9999 Restore factory set 0~9999 Languages 0:Chinese 1:English PA78XX as panel Software version 1 0~9999 PA85XX as panel Software version 1 0~9999 83BL... - Page 26 1.3.3 Please keep away from rotating parts when installing the power cord, the distance should be at least 3cm. 1.3.4 In order to prevent noise interference or electric accident, make sure that the sewing machine and the control box are connected to ground. 1.3.5 Make sure that the fluctuation in the power voltage should be within the range of ±15% according to the control box marked before turning on.
- Page 27 2. Installation and adjustment 2.1 Installation of the control box 2.1.1 Install the control box and the foot-controllor beneath the table. 2.1.2 Please connect the pedal with the control device 2.1.3 1).Installation diagram Steep slope that connected with the pedal Adjust the slope of the pedal to adjust the boundary between the low speed area and the acceleration area.
- Page 28 Adjustment requirements Adjustment result reverse Rotate the bolt at down, the pressure will be heavy. Adjustment of the reverse pressure for foot presser reverse Rotate the bolt at up, the pressure will be light. 3. Connection and grounding Connection of power supply The controller is suitable for power supply of AC220V (one phase), the fluctuation of input voltage is within ±15% as the plate marked.
- Page 29 3.2 Controller terminal diagram: Port name 序号 Electric control power access port Trimming Presser foot lift Suction Puller Backlatch stitching( Sunction) Backlatch( Thread release ) Light Middle emission Front emission Manual trimming Rear emission Front receiver Middle receiver RR receiver Presser foot Hall Reserved Sewing table safety Switch...
- Page 30 Error code analysis Error Error description Error reason Solutions Code Cannot find After power off, check whether the motor signal wire The terminal of the Stopping needle is loose or not, and then power on again. If the motor signal wire is Er01 position problem is still not solved, please contact the...
- Page 31 1:The voltage of motor is over. 2:The 220V voltage exceeds the limit value (AC310V), or the load inertia is too large, causing the regeneration voltage to exceed the limit value Overvoltage Er16 (DC440V), or the voltage detection circuit fails. Note: (The 110V control system power supply voltage exceeds the limit value (AC155V), or the load inertia is too large and the regeneration voltage exceeds the limit value (DC220V).
- Page 32 富山IoT 微信公众号 抖音官方号 邮箱/E-mail:hikari@chinahikari.com 上海市金山区朱泾镇工业园区中达路800号 网址/Web: www.chinahikari.com NO.800, ZHONGDA ROAD, ZHUJING INDUSTRIAL ZONE, 传真/Fax:(00)86-21-67311311 JINSHAN DISTRICT, SHANGHAI CHINA 电话/Tel:(00)86-21-67311111 ( 转外贸部/ext .Foreign Trade Dept )...
Need help?
Do you have a question about the HX68S Series and is the answer not in the manual?
Questions and answers