Table of Contents
Advertisement
Quick Links
Advertisement
Table of Contents

Related Manuals for Hikari HW740TA


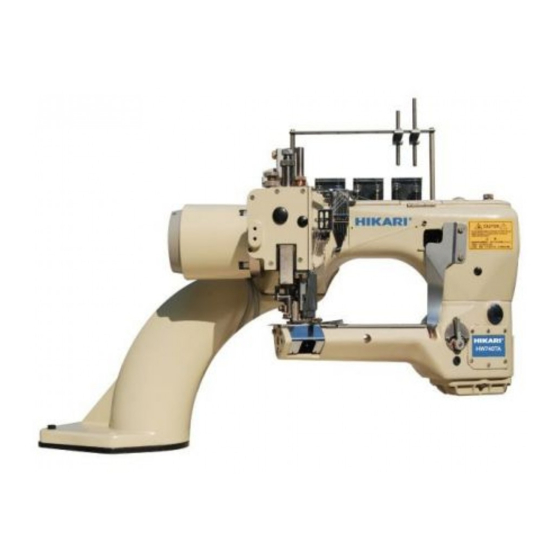
Summary of Contents for Hikari HW740TA
-
Page 2: Table Of Contents
目錄 目錄 目錄 目錄 CONTENTS 安裝 Installation 桌板尺寸 Table dimensions 調整抬壓腳 Adjusting presser foot lift 馬達和皮帶 Motor and belt 其它部份 Other Parts 馬達轉速和皮帶輪轉動方向 Sewing speed and rotating direction of pulley 潤滑 Lubication 潤滑油 Lubricating oil 潤滑系統 Lubricating 啟動注油 Priming oil 補充油... -
Page 3: Installation
Installation 安裝 1. 1.1 桌板尺寸 1.1 Table dimensions Fig.1 1.2 調整抬壓腳 Adjusting presser foot lift 1.2.1 抬壓腳連接桿 1.2.1 Presser foot connecting lever ○ ○ 1 螺絲 2 。(Fig.2) 設置壓腳連接軸 ○ Set the presser foot connecting lever 1 with the ○ screw (Fig.2) Fig.2... - Page 4 Installation 安裝 1. 1.2.2 抬壓腳 1.2.2 Presser foot lift ○ ○ 1 跟壓腳連接托架 2 留 1mm 的間隙。(Fig.3,4) 1.當壓腳緊貼在針板上時,在抬壓腳連接軸 註:壓腳主體跟壓腳彈片之間要有 0.3mm 的間隙。 ○ 1. As standard, makethe clearance between the presser bar lifter lever 1 and the presser bar ○ connecting bracket 2 to 1 mm when the presser foot touches the stitch plate closely.(Fig.
- Page 5 Installation 安裝 1. 調整: ○ ○ 4 才可以檢查間隙。(Fig.5) (1) 移除油塞 ○ 5 。(Fig.6) (2) 放鬆壓腳連接桿螺絲 ○ 6 右邊或左邊去調整間隙。 (3) 移開壓腳連接桿(短) Adjusting : ○ ○ (1) Remove the seal plugs 4 to check the clearance.(Fig. 5) ○ (2) Loosen the screw 5 of the presser foot lifter lever link (long).
- Page 6 Installation 安裝 1. ○ 1 和上 2.當針柱在最低位置和壓腳完全抬舉時,針鎦 ○ 2 需留間隙 0.3mm。(Fig.7) 網線勾 2. As standard , make the clearance between the ○ notch of the needle clamp 1 and the top cover ○ thread hook 2 to 0.3mm when the needle bar is at the lowest point and the presser foot is raised by pressing the presser foot pedal fully.
- Page 7 Installation 安裝 1. 1.2.3 過線組 1.2.3Tension release unit ○ 1 和鬆線器座之間要有 0.5mm 不踩踏板時鬆線器 的間隙。 ○ 1 會向上推,之後上夾線 當踩下踏板時,六個鬆線器 ○ 2 開始離開下夾線片。(Fig.9) 片 As standard, make the clearance between the ○ tension release pins 1 and the tension release ○ shaft 3 to 0.5mm when six tension release pins ○...
-
Page 8: Motor And Belt
Installation 安裝 1. 1.3 馬達和皮帶 Motor and belt 使用 M 型之 V 皮帶。安裝馬達時,機器皮帶輪和馬達 皮帶輪的中心線需成一直線。(Fig.11) To install the clutch motor, align the center of the machine pulley with that of the motor pulley when the motor pulley shifts to the left with toeing down the pedal.(Fig. -
Page 9: Other Parts
Installation 安裝 1. 1.4 其它部份 Other parts 機頭線架 ○ ○ ○ 3 裝在線架固定座 7 ,再將過線架 4 用 將線架支柱 ○ ○ ○ 5 鎖在線架支柱 3 ,調整過線桿 6 ,使穿線平 螺絲 順,不致於線會糾結在一起。(Fig.12) Setting thread eyelets: ○ Stand the thread guide plate supports 3 on the ○... -
Page 10: Sewing Speed And Rotating Direction Of Pulley
Sewing speed and rotating direction of pulley 2. 馬達轉速和皮帶輪轉動方向 機器轉速最高速為 4200R.P.M,平常使用 3800R.P.M。 在前 200 個小時(約一個月)使用 3000-3360R.P.M 左右的速度,這樣機器使用時間可以延長。 The sewing speed is 4200 rpm at the maximum and3800rpm is usual. Run a new machine at a speed of 15-20% lower than maximum sewing speed during the first 200 hours(for about one month) so that the machine can offer a long service life in good condition. -
Page 11: Lubricating Oil
Lubrication 潤滑 3. 3.1 潤滑油 Lubricating oil 注意: 絕對不要在油內加入任何添加物(劑) ,否則將惡化 油的品質,並損害機器。 CAUTION Never add additives to the oil. If added, it can cause the deterioration of the oil and the machine damage. 3.2 潤滑系統 Lubricating ○ ○ 1 和 2 然後加油。(Fig.13) (1) 旋開油塞螺絲... -
Page 12: Priming Oil
Lubrication 潤滑 3. 注意: 太多或太 的油會造成機器漏油和機器故障。維持油的水平在 2 條紅線之間。 CAUTION Too much oil or not enough oil can cause oil leakage and machine trouble. Be sure to keep the oil level between the lines. 3.3 啟動注油 Priming oil 裝新機器或使用久未使用的機器,如果油沒有循環完 ○ 1 ,注入油後裝回螺 整,需移除幫浦上的油塞螺絲... -
Page 13: Changing Oil
Lubrication 潤滑 3. 3.4 補充油 Replenishing oil 在箭頭處需滴一些油潤滑。如果油漏在壓腳和上刀周 圍會導致沾汙布,要確實的把油擦乾淨。 (Fig.16,17,18) Replenish a drop of oil from the points indicated arrowswith an oiler (accessories) if needed. If oil leaks around the presser foot and the upper knife, it can cause oil stain on the material. Be sure to wipe it completely. - Page 14 Lubrication 潤滑 3. 3.5.2 換油程序 ○ ○ 1 和 2 下面放置接油容器。 (1) 分別在螺絲 ○ ○ 1 和 2 後油會自行流出。 (2) 拆下螺絲 ○ ○ 1 和 2 。 (3) 裝回螺絲 (4) 注入新油。 (5) 裝上皮帶蓋。 Procedrue for changing : (1) Set containers received the oil under the screws ○...
-
Page 15: Proper Operation
Proper operation 使用說明 4. 4.1 車針系列 4.1 Needle system 4.1.1 縫紉機用針 Japanese 4.1.1 Sewing needle : standard 日本規格 格洛茲貝克牌(Groz-Beckert) UY118GKS Metric 風琴牌(Organ) FLX118GCS Standard 公制規格 表格二 提醒: 請選用適合的針給不同的材料。有些尺寸並沒有販售,請從目錄上確認尺寸。 4.1.2 假針 4.1.2 Retainer needle : 四支針配合一支假針。 Japanese One retainer needle is used with four sewing needles. standard 日本規格... -
Page 16: Installing Needle
Proper operation 使用說明 4. 4.2 針的安裝 Installing needle (1) 旋轉轉輪將針抬到最高點。 ○ 1 。(Fig.21) (2) 放鬆螺絲 (3) 平面擺在前方將新針放入針鎦內最頂端,然後鎖 ○ 1 。 緊螺絲 (1) Rotate the handwheel to raise the needles at the highest point. ○ (2) Loosen the screws 1 and pull the needles down. (3) Face the flat parts front, insert new needles into the needle clampas far as they will go. -
Page 17: Threading
Proper operation 使用說明 4. 4.3 線 Threading 先用易穿的線從 ABCDEF 孔穿至針鎦前,然後結上要用的線拉到針前,把結剪掉。 線正確位置(Fig.28)。 A , B , C , D:針線 E:上飾線 F:下勾針線 When threaded, pull the thread out until it is in front of the needles. Then cut off the knot before needle eye to rethread. -
Page 18: Thread Tension
Proper operation 使用說明 4. 4.4 線鬆緊 Thread tension ○ ○ 6 取決於布線寬度 調整線架上的鬆緊度是靠螺母 和其它狀況。(Fig.29) ○ ○ ○ ○ 4 :針的線( 1 :右針, 4 :左針) ○ 5 :上網線 ○ 6 :下網線 ○ ○ ! 如果調緊線時,以順時間方向調下 6 螺絲。 ○ ○ ! 如果調鬆線時,以逆時間方向調上 6 螺絲。... -
Page 19: Up-And-Down Position Of Presser Foot
Proper operation 使用說明 4. 4.6 調整壓腳高低 Up-and-down poition of presser foot 輕微的調高或降低壓腳 會有明顯的成效。 Following effective points will be obtained by slightly raising the presser foot. ! 預防勾齒抓痕。 ! 改善壓腳彈片的耐久度。 ! 增減壓腳彈片的壓力度。 Fig.25 ! 減 噪音和振動。 ! 可細微的調整針織的寬度。 ! Prevention of fabric jam ! Prevention of feed scratch mark ! Improvement of durability of presser foot spring plate... -
Page 20: Adjusting Differential Feed Dog
Proper operation 使用說明 4. 4.7 調整差動 Adjusting differential feed dog ○ 5 在刻度“4” (1) 移動調整桿向右或左去調整差動桿 和刻度“5”之間是相同的動作和差動。即主牙和 差動牙的運作相同。(Fig.27) ○ ○ 6 是用來固定調整桿 5 和保持差動的多或 (2) 螺絲 。 ○ (1) Move the differential feed operating lever 5 right or left to adjust differential feed dog. ○... -
Page 21: Adjusting Stitch Length
Proper operation 使用說明 4. 4.8 調整針距 Adjusting stitch length 粗細針的範圍標準為 1.6-2.5mm,但可調整至更大。 Stitch length ranges 1.6-2.5 ㎜ as standard and can be adjustable infinitely. 調整: ○ ○ 1 ,移動針檔 2 (後)到最後面。然後 (1) 放鬆螺絲 輕微鎖緊。減 針寬時可以省略。 ○ 3 。 (2) 退掉油塞螺絲 ○ 4 去調整粗細針。... - Page 22 Proper operation 使用說明 4. 表格四為針距大小使每英吋或每 30mm 的距離有幾 針距(mm) 1 英吋針數 30mm 針數 針。 Table 4 shows the number of stitches per inch (25.4 ㎜) and 30 ㎜ converted stitch length. 16.5 注意: 調整針距必須注意後針檔的位置。 CAUTION Be sure to adjust needle guard(rear) after changing 表格四...
-
Page 23: Adjusting Lapped Width Of Upper Fabric
Proper operation 使用說明 4. 4.9 調整切布刀 Adjusting lapped width of upper fabric ○ ○ 1 的標準位置要留距離在底刀 1 尖端和鎖 (1) 底刀 ○ 2 之間 0-0.5mm。(Fig.30) 底刀座 ○ ○ ○ 3 在最左邊時,上刀 3 和底刀 1 要有 (2) 當上刀 0.5mm 的重疊。 ○ ○ 4 和... -
Page 24: Sp Device
Proper operation 使用說明 4. 4.10 過線油組 SP device 4.10 當機器在高速運轉或使用特殊線或特殊纖維時,矽 油壺組是標準配備,以防止斷線跳針。 ○ ○ 1 放入矽油壺 2 內。 當使用機器時,將毛氈 (Fig.33) SP device (needle thread oiling) is equipped as standard to prevent thread breakage and skip stitch when running a machine at high speed or using synthetic thread and/or synthetic fabric. -
Page 25: Use Of Lap Former
Proper operation 使用說明 4. 4.11 導布器 Use of lap former 4.11 4.11.1 調整左右邊的標準位置 4.11.1 Standard left-and-right position ○ 4 調整位置,視刀的邊緣和刀齒去輕微的 鬆開螺絲 調整使導布器上的 A 點跟 4 支針的中間成一直線。 ○ Align the point A of the lap former 1 with the center of four needles. Depending on lapped edges of the fabrics or fabric ○... -
Page 26: Adjustments
Adjustments 調節裝置 5. 5.1 針線鬆緊 Needle thread tension 5.1.1 針線線圈調整片 5.1.1 Needle thread strike-off pin 4 支針各有自己的過線片可調整線圈的鬆緊。 ○ 1 轉到最低位置。(Fig.36) (1) 抬線架 ○ 2 要跟右邊第四針的線平齊。(Fig.37) (2) 第一片 ○ ○ 3 離第一片 2 的高度為 3.2mm。 (3) 設定第四片 ○ ○ 4 離第一片 2 的高度為... - Page 27 Adjustments 調節裝置 5. 5.1.2 針線孔 5.1.2 Needle thread eyelet ○ ○ 1 要跟線孔 3 成一直線。 (1) 右邊最高的過線孔 (Fig.38) ○ ○ 4 比 1 低 5mm。 (2) 設定過線孔 ○ ○ 5 比 1 低 9mm。 (3) 設定過線孔 ○ ○ 6 比 1 低...
-
Page 28: Looper Thread Tension
Adjustments 調節裝置 5. 5.2 下底線 Looper thread tension ○ ○ 1 和支撐 2 要成一直線。 底線導板 ○ Align the right of the looper thread take-up guide ○ with that of the eyelet supporting plate 5.2.1 底線收緊時機 5.2.1 Timing of looper thread take-up ○... -
Page 29: Top Cover Thread Tension
Adjustments 調節裝置 5. 5.2.2 下勾針凸輪的位置 5.2.2 Position of looper thread take-up eyelet ○ ○ 6 和 7 標準位置為最右邊。放鬆螺絲 底線過線片 ○ ○ 8 和 9 左右移動去調整。(Fig.43) ○ ○ Set the looper thread take-up eyelets 6 and 7 at the extreme right as standard. ○... - Page 30 Adjustments 調節裝置 5. 5.3.2 調整上網線的時機 5.3.2 Timing of top cover thread take-up ○ 4 勾到小勾針上的線時(Fig.45),網線 當大的上勾針 ○ 5 時 和凸輪的尖端距離為 0-1.0mm 之間,調整凸輪 ○ 6 。(Fig.44) 鬆開螺絲 The moment the top cover thread is hooked with ○ the top cover thread hook 4 (Fig.
-
Page 31: Height Of Needle
Adjustments 調節裝置 5. 5.4 針位高度 Height of needle 第四支針跟針板的距離為“N”的高度,但針距大 小不同,高度就不同,如表格五所示。 Make height “N” of the needle from the top of the stitch plate to the tip of the fourth needle from the left when the needle is at the highest point. 針距... -
Page 32: Top Cover Thread Carrier And Hook
Adjustments 調節裝置 5. 5.5 上勾針 Top cover thread carrier and hook 上網線的時間點: 調整上勾針的位置形成線圈,使第一針和第二針插 ○ ○ 5 調整上勾針 1 。(Fig.49) 入線圈內,放鬆螺絲 Top cover thread carrier : ○ Position the top cover thread carrier 1 so that top cover thread loop formed with the hook behind the first and the second needles from the left when the ○... -
Page 33: Looper
Adjustments 調節裝置 5. 注意: 在調整機器之前,一定要先把電源關掉,並確定馬 達完全停止。 WARNING Before adjusting, always turn the motor switch OFF and check that the motor has already stopped. Fig.52 5.6 下勾針 Looper 高度: ○ ○ ○ 1 到下勾針座上 6 然後鎖緊螺 2 。 裝下勾針 Height : ○... - Page 34 Adjustments 調節裝置 5. 下勾針的前後位置: ○ 1 移動從左到右,會在針的後面。調整其 當下勾針 位置使下勾針更接近針,其間隙 0-0.05mm,但不能 碰到針,當下勾針的尖端在左針的中間時,放鬆螺絲 ○ ○ 4 轉動螺絲 5 調整前後位置。調整之後檢查間隙和 ○ 4 。(Fig.54 , 55) 鎖緊螺絲 ○ ! 順時間旋轉螺絲 5 會往前。 ○ ! 逆時間旋轉螺絲 5 會後後。 Front-and-rear position of looper and needle: Fig.54 ○...
-
Page 35: Needle Guard (Front)
Adjustments 調節裝置 5. 5.7 前針檔 Needle guard (front) ○ 1 ,使針和下勾針的 當針在左針中間時,推前針檔 ○ 2 去調整它。 間隙為 0mm。放鬆螺絲 ○ 3 有無碰到針的 當下勾針左移到右時,檢查下勾針 後面,看針有無左右移動。(Fig.56,57) ○ Push the needle guard(front) 1 so that the clearance between the needle and the looper is 0 ㎜ when the looper tip comes at the center of the left needle. -
Page 36: Height Of Feed Dog
Adjustments 調節裝置 5. 注意: 當有調整針距時,注意後針檔要重新整調。 CAUTION After changing stitch length, the clearance changes between the needle guard(rear) set on the main feed doh and the needle. Readjust the position of the needle guard(rear) after changing stitch length. 注意: 在調整機器之前,一定要先把電源關掉,並確定馬達完全停止。 WARNING Before adjusting, always turn the motor stitch OFF and check that the motor has already stopped. -
Page 37: Replacing Presser Foot
Adjustments 調節裝置 5. 高度微調: ○ 8 來控制。(Fig.65) 狗齒的高度後調要旋轉偏心銷 ○ ○ 7 然後調整偏心銷 8 的高低。 放鬆螺絲 ○ ! 順時針旋轉偏心銷 8 降低狗齒。 ○ ! 逆時針旋轉偏心銷 8 調高狗齒。 Fine adjustment of height : Make fine adjustment of height of the main and differential feed dogs with the feed bar eccentric ○... - Page 38 Adjustments 調節裝置 5. 5.10.1Removing : ○ (1) Remove all needles and the seal plug ○ (2) Loosen the adjusting screw 2 and then the ○ screw 3 of the presser bar connecting bracket. ○ (3) Loosen the screws 4 of the knife holder guide collar to be free the complete set including the upper knife, the knife holder, and the knife holder shank.
- Page 39 Adjustments 調節裝置 5. 5.10.2 組裝方法 (1) 拆掉全部的針重新裝上壓腳在左右壓腳檔之間, 向右旋轉,放正壓腳。 ○ ○ 11 到帶動桿 12 裡面。 (2) 重新裝上上勾針驅動片 ○ 11 後鎖上壓腳後 (3) 安裝壓腳柱插入上勾針驅動片 ○ 8 。 面的螺絲 (4) 檢查壓腳是否順暢沒有左右晃動,如果有卡住, ○ ○ 13 的螺絲 14 去調整。 (5) 鬆開左壓腳檔 ○ ○ 5 固定在刀座 6 支撐架上。 (6) 重新裝上刀台...
-
Page 40: Replacing Presser Foot Spring Plate
Adjustments 調節裝置 5. ○ (7) Reset the adjusting screw 2 when the needle is at the lowest point and the presser foot touches ○ closely on the stitch plate. Then tighten the screw 3 of the presser bar connecting bracket while pushing slightly down. -
Page 41: Replacing And Adjusting Knives
Adjustments 調節裝置 5. 5.11.2 Reseting : ○ ○ (1) Reset each presser foot spring plate 2 with the spring plate holder ○ ○ (2) Reset the plates 2 parallel each other on the presser foot ○ (3) Tighten the screws 1 securely. - Page 42 Adjustments 調節裝置 5. ○ ○ 1 和下刀 2 成一直線時,上刀不能碰到壓腳壁,正確後固定彈簧軸環。 註:上刀 ○ ○ Note: Align the front sides of the upper 1 and lower 2 knives without touching the upper knife to the ○ presser foot. After check them, fix the knife holder guide collar 4 with the screw.
- Page 43 內 Specifications 規格 6. 機型 FV1 740TA 說明 曲臂型四針六線拼縫機 體積 長 420mm x 寬 300mm x 高 410mm 圓週 針棒下線最小圓週 148mm 工作空間 圓週 210mm 重量 23 公斤(頭部) 車縫速度 最高 3800 R.P.M. ; 普通 2800 R.P.M. 1.6-2.5mm 縫距 每英吋 10-16 針;每 30mm 12-19 針 車針:Organ FLX118GCS ;...
Need help?
Do you have a question about the HW740TA and is the answer not in the manual?
Questions and answers