Table of Contents
Advertisement
Quick Links
Advertisement
Table of Contents

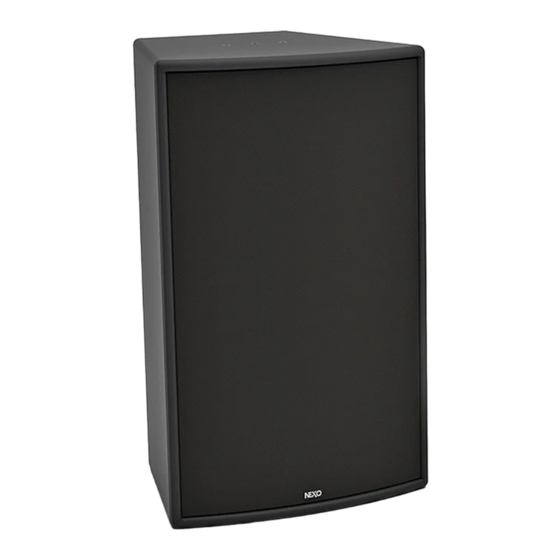
Summary of Contents for Nexo ePS12
- Page 1 DP6764-01-DI ePS12 User manual...
-
Page 2: Table Of Contents
ARRAY EQ ____________________________________________________________________________ 12 MAINTENANCE ________________________________________________________________________ 13 TECHNICAL SPECIFICATIONS ___________________________________________________________ 15 USER NOTES _________________________________________________________________________ 16 EU Conformity declaration NEXO SA ZA DU PRE DE LA DAME JEANNE 60128 PLAILLY – France Declare under our sole responsibility that the product Loudspeaker... -
Page 3: Warnings
Do not open the speaker, do not try to disassemble it neither to modify it in any way. The system doesn’t include any user-repairable part. If the system seems to be malfunctioning or damaged, stop using it at once and have it repaired by a NEXO qualified technician. -
Page 4: Equipment
EQUIPMENT EQUIPMENT On each side of the cabinet, two M6 with 80 mm pitch plus one M10 fittings will connect the ePS12 to accessories (VNI-HCPL600, VNU-BUMP, VNU-HBRK600, or eye-bolts). The back of the speaker is fitted with 3x M6 (70mm pitch) to connect wallmount in both vertical and horizontal positions (VNI-WM02). -
Page 5: Description
3.31 mm (12 to 15 AWG) copper section. Cable with maximum outside diameter of 11mm. → To wire ePS12, slit the membrane of the grommet crosswise, pass the cable through and make the connection to the screw terminals. Place the IPCOV. -
Page 6: Preset
PRESET PRESET Please consult nexo-sa.com for NEXO TD Controllers firmware information. For the ePS12, the following setups are available: • ePS12 MAIN PA, 60-120kHz • ePS12 MAIN PA, 85-120kHz. • ePS12 MAIN PA, 120-120kHz. ePS12 ePS12 + eLS18 Page 6 / 18... -
Page 7: Hf Directivity
HF DIRECTIVITY HF DIRECTIVITY → The ePS12 speaker can be used in horizontal or vertical position. → It’s easy to change the HF dispersion to deal with every request. Remove the 4 screws that hold the horn. Remove it. Place a flathead screwdriver in the space between the grille and the cabinet to release the grille. -
Page 8: Accessories
WARNINGS All ePS accessories are specifically rated in agreement with structural computations. Never use other accessories when assembling ePS12 cabinets than the ones provided by NEXO: NEXO will decline responsibility if any component is purchased from different supplier. PROHIBITED: ePS12 below ePS12 or ePS12 below eLS18 without dedicated accessory VNU-BUMP LiftBar, can be used with VNI-WMADAPT. - Page 9 2 guides. Tight with the fasteners provided with VNI-CLADAPT. Refer to the Product Data Sheet VNU-PLADAPT Pole adapter Place VNU-PLADAPT on VNU-HBRK600, use only fasteners provided. Tight properly. Refer to the Product Data Sheet Page 9 / 18 ePS12...
- Page 10 ACCESSORIES VNI-HCPL600 Coupler ePS12 under horizontal eLS18 Refer to the Product Data Sheet VNI-WM380 Wallmount, usable with: VNI-WMADAPT / VNU-BUMP VNU-HBRK600 ePS12 / BUMP / WMADAPT Place the assembly on VNI-WM380. Tight with the fasteners provided with VNI-WM380. Refer to the Product Data Sheet ePS12 / HBRK600 Place the assembly on VNI-WM380.
- Page 11 ACCESSORIES VNI-WM02 Wall mount adapter 25kg max Remove 2 of the 3 screws on the back. Screw speaker plate to ePS12 (use only screws provided with ePS12). Place the speaker holder with ePS12 into wall bracket. Fix by tightening bolted assembly.
-
Page 12: Array Eq
ARRAY EQ The ArrayEQ allows to adjust the system frequency response in its lower range (see curves below, with different ArrayEq values): e S1 rray ad usting Frequency H e S1 rray ad usting Frequency H Page 12 / 18 ePS12... -
Page 13: Maintenance
Tightening torque: 3.5 Nm (Thread Locker: Loctite 242) Remove the grille. Remove the 4 screws at the back of ePS12 and the 4 screws To access the HF diaphragm, remove the 4 screws. that hold the horn. Remove it. - Page 14 MAINTENANCE Spare parts MARK QUANTITY REFERENCE DESIGNATION 05EPS12-UA ePS12 complete grille Black 05EBEPS12 ePS12 Empty cabinet Black 05PAVEPS12 ePS12 Horn sub-assembly 05HPADE250-16 DE250 Driver HF 16 ohm 05NH25-16R/K DE250-16 diaphragm (with screws) ass driver 1 ” neodynium ohms with screws...
-
Page 15: Technical Specifications
TECHNICAL SPECIFICATIONS TECHNICAL SPECIFICATIONS WITH NEXO ELECTRONICS Model ePS12 60 Hz – 20 kHz Frequency range (±6dB) Sensivity 1W@1m 103 dB SPL Nominal Peak SPL Level (1m) 133 dB Peak Operating voltage 35 Vrms Vertical Dispersion +25°/-30° Horizontal Dispersion: 50° to 100° asymmetrical... -
Page 16: User Notes
USER NOTES USER NOTES Page 16 / 18 ePS12... - Page 17 USER NOTES Tel: +33 3 44 99 00 70 NEXO S.A. Fax: +33 3 44 99 00 30 E-mail: info@nexo.fr arc d’activité de la Dame Jeanne nexo-sa.com F-60128 PLAILLY Page 17 / 18 ePS12...
- Page 18 USER NOTES Page 18 / 18 ePS12...


Need help?
Do you have a question about the ePS12 and is the answer not in the manual?
Questions and answers