Table of Contents
Advertisement
Quick Links
Advertisement
Table of Contents

Related Manuals for Nexo ePS6


Summary of Contents for Nexo ePS6
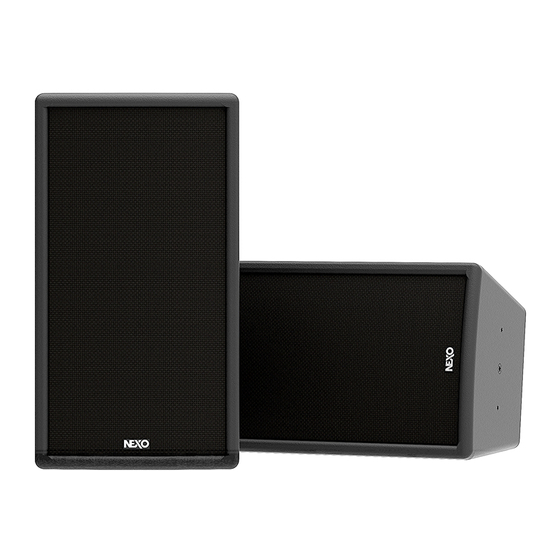
- Page 1 DP6076-01-DI ePS6 User manual...
-
Page 2: Table Of Contents
ARRAY EQ ____________________________________________________________________________ 13 MAINTENANCE ________________________________________________________________________ 14 TECHNICAL SPECIFICATIONS ___________________________________________________________ 16 USER NOTES _________________________________________________________________________ 17 EU Conformity declaration NEXO SA ZA DU PRE DE LA DAME JEANNE 60128 PLAILLY – France Declare under our sole responsibility that the product Loudspeaker... -
Page 3: Warnings
If the system seems to be malfunctioning or damaged, stop using it at once and have it repaired by a NEXO qualified technician. Do not expose the system directly to the sun or to the rain, do not immerse it into fluids, do not place objects filled with liquid on the system. -
Page 4: Equipment
EQUIPMENT EQUIPMENT On each side of the cabinet, two M6 with 80 mm pitch plus one M10 fittings will connect the ePS6 to accessories (VNI- VCPL365, VNU-BUMP, VNU-HBRK365, or eye-bolts). The back of the speaker is fitted with 3x M6 (70mm pitch) to connect wallmount in both vertical and horizontal positions (VNI-WB02, VNI-WM01, VNI-WM02). -
Page 5: Description
3.31 mm (12 to 15 AWG) copper section. Cable with maximum outside diameter of 11mm. → To wire ePS6, slit the membrane of the grommet crosswise, pass the cable through and make the connection to the screw terminals. Place the IPCOV. -
Page 6: Preset
PRESET PRESET Please consult nexo-sa.com for NEXO TD Controllers firmware information. For the ePS6, the following setups are available: • ePS6 MAIN, 90-20kHz. • ePS6 MAIN, 120-20kHz. • ePS6 MAIN, 150-20kHz. ePS6 ePS6 + eLS400 Page 6 / 18 ePS6... -
Page 7: Hf Directivity
HF DIRECTIVITY HF DIRECTIVITY → The ePS6 speaker can be used in horizontal or vertical position. → t’s easy to change the HF dispersion to deal with every request. Remove the 4 screws that hold the horn. Remove it. Place a flathead screwdriver in the space between the grille and the cabinet to release the grille. -
Page 8: Accessories
WARNINGS All ePS accessories are specifically rated in agreement with structural computations. Never use other accessories when assembling ePS6 cabinets than the ones provided by NEXO: NEXO will decline responsibility if any component is purchased from different supplier. PROHIBITED: ePS6 below ePS6 or ePS6 below eLS400 without dedicated accessory VNU-BUMP LiftBar, can be used with VNI-WMADAPT. - Page 9 2 guides. Tight with the fasteners provided with VNI-CLADAPT. Refer to the Product Data Sheet VNU-PLADAPT Pole adapter Place VNU-PLADAPT on VNI-HBRK365, use only fasteners provided. Tight properly. Refer to the Product Data Sheet Page 9 / 18 ePS6...
- Page 10 ACCESSORIES VNI-WM200 Wallmount, usable with: VNI-WMADAPT / VNU-BUMP VNU-HBRK365 ePS6 / BUMP / WMADAPT Place the assembly on VNI-WM200. Tight with the fasteners provided with VNI-WM200. Refer to the Product Data Sheet ePS6 / HBRK365 Place the assembly on VNI-WM200. Tight with the fasteners provided with VNI-WM200.
- Page 11 Remove 2 of the 3 screws on the back. Screw speaker plate to ePS6 (use only screws provided with ePS6). Place the speaker holder with ePS6 into wall bracket. Fix by tightening bolted assembly. Refer to the Product Data Sheet...
- Page 12 Remove 2 of the 3 screws on the back. Screw speaker plate to ePS6 (use only screws provided with ePS6). Place the speaker holder with ePS6 into wall bracket. Fix by tightening bolted assembly. Refer to the Product Data Sheet...
-
Page 13: Array Eq
ARRAY EQ ARRAY EQ The ArrayEQ allows to adjust the system frequency response in its lower range (see curves below, with different ArrayEq values): rray ad usting Fre uency H rray ad usting Fre uency H Page 13 / 18 ePS6... -
Page 14: Maintenance
MAINTENANCE MAINTENANCE NOTE: Speakers and Grills can be sent back to NEXO for recycling Driver access Remove the 4 screws to access the LF driver. Place a flathead screwdriver in the space between the grille and the cabinet to release the grille. - Page 15 DESIGNATION 05EPS6-UA Complete grille Black 05EBEPS6 Cabinet Black 05NH12ND1.0R/K HF diaphragm ” complete 05HPB6-44 Recone Kit ” 05HPB6-44R/K 05LOGNEXO3 Logo NEXO 05VXTSTHC1012 HEADLESS Screw M10x12 Black (x10) 05VXTCFX616N VXFX 6x16 Black (x10) 05PASF-DG9E1 Grommet DG11 Page 15 / 18 ePS6...
-
Page 16: Technical Specifications
TECHNICAL SPECIFICATIONS TECHNICAL SPECIFICATIONS WITH NEXO ELECTRONICS Model ePS6 90 Hz – 20 kHz Frequency range (±6dB) Peak SPL Level (1m) 125dB Peak Operating voltage 25Vrms Vertical Dispersion +25°/-30° Horizontal Dispersion: 50° to 100° asymmetrical Crossover Frequency 90, 120, 150 Hz... -
Page 17: User Notes
USER NOTES USER NOTES Page 17 / 18 ePS6... - Page 18 Tel: +33 3 44 99 00 70 NEXO S.A. Fax: +33 3 44 99 00 30 E-mail: info@nexo.fr arc d’activité de la Dame Jeanne nexo-sa.com F-60128 PLAILLY Page 18 / 18 ePS6...
Need help?
Do you have a question about the ePS6 and is the answer not in the manual?
Questions and answers