
Related Manuals for Schaeffler EWELLIX SLIDEKIT 2.0


Summary of Contents for Schaeffler EWELLIX SLIDEKIT 2.0
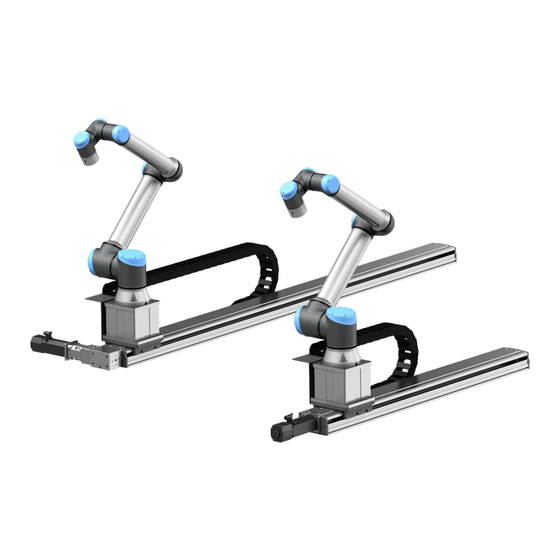
- Page 1 CAT E G O R Y M A X 2 L I N E S I N S TA L L AT I O N , O P E R AT I O N A N D M A I N T E N A N C E M A N UA L SLIDEKIT 2.0...
- Page 2 S L I D E K I T Quick start guide For more details on each step, read the full instructions LIFTKIT Mount LIFTKIT or Universal Robot UR10/16 on SLIDEKIT 2. Matching number of Safety-I/O cable Safety I/O connection Promixity Switch cable Cobot Interface cable connecting cables and Digital-I/O...
- Page 3 Q u i c k s t a r t g u i d e 4. Software installation 4.1. Go to System ⮑ URCaps and press + 4.2. Insert the SLIDEKIT USB Drive into the USB port at the teach pendant, choose the URCaps file from the SLIDEKIT USB drive, then press "Restart".
-
Page 4: Table Of Contents
S L I D E K I T Contents 8.0 Appendix ..............17 1.0 General information ............5 1.1 Information in this manual ..........5 8.1 Controller ............... 17 1.2 Explanation of symbols and signal words ......5 8.2 Limit switch ..............17 1.3 SLIDEKIT designations ...........6 9.0 SLIDEKIT 2.0 Troubleshooting ........ -
Page 5: General Information
1 .0 G e n e r a l i nfo r m a ti o n 1.0 General information These installation instructions describe the setup and opera- DANGER tion of SLIDEKIT, a horizontal sliding axis for collaborative Indicates a dangerous situation, which will lead to death or serious personal robots. -
Page 6: Slidekit Designations
S L I D E K I T 1.3 SLIDEKIT designations SLIDEKIT contains a Linear module, a controller and addi- tional accessories enabling easy integration with a collabo- rative robot. Different product configurations are available, according to the product ordering key. Ordering key S L I D E K I T - U R - - S F M - S 0 0... -
Page 7: Safety
2 .0 S afe t y 2.0 Safety 2.4 Application notes This section provides some safety aspects supplementary to the safety aspects described in the relevant operating manuals of the included devices. Failure to comply with the • Integration with an emergency-stop is required for its in- guidelines and safety instructions contained in this manual tended use. -
Page 8: Slidekit Components
S L I D E K I T 3.0 SLIDEKIT components 3.1 Scope of delivery 16. 2 pins Ø 5 mm to align UR3 robot (Ø 5 x 10L) 1 Linear module (with motor) 17. 2 pins Ø 8 mm to align UR5/UR10/UR16 robot 2. -
Page 9: Mechanical Installation
4 .0 M e c h a n i c a l i n s t a l l a ti o n 4.0 Mechanical installation 4.1 Tools required • 5 mm & 6 mm wrench 4.2 Robot installation on the linear module Take SLIDEKIT out of the box 2. -
Page 10: Dimensional Drawing
S L I D E K I T 4.4 Dimensional drawing Ball Screw version For LIFTKIT For any Robot 4x2 - M6 Tap Thru 320 + Stroke 300 + Stroke For LIFTKIT For UR Robot 92,5 Stroke 37.5 and UR Robot UR10, 16 UR10, 16 A (P200 x B) - Page 11 4 .0 M e c h a n i c a l i n s t a l l a ti o n Belt version For LIFTKIT For any Robot 4x2 - M6 Tap Thru 330 + Stroke 310 + Stroke For LIFTKIT For UR Robot 35.5...
-
Page 12: Electrical Connection
S L I D E K I T 5.0 Electrical connection Connect the main power cable (cable 7) to the SLIDEKIT controller in connection MAIN POWER (7) 2. Connect the two connectors of the Motor power (ca- ble 6) and CANopen Interface (cable 5) cables in con- nector (6), (5) of the SLIDEKIT controller 3. -
Page 13: Software Installation
6 .0 S of t wa r e I n s t a l l a ti o n 6.0 Software Installation 3. Go to System ⮑ URCaps and press + The software screencaps shown use the e-Series design. Functionality on the CB-Series is similar but might have a different appearance. -
Page 14: Software Operation
S L I D E K I T 7.0 Software operation The SLIDEKIT URCaps enables movement of SLIDEKIT di- 7.1.2 Communication rectly in the UR Polyscope environment. When going into • Serial interface: Select the correct serial interface on the programming mode in Polyscope, the SLIDEKIT setup can UR controller. -
Page 15: Position Setup
7.0 S of t wa r e o p e r a ti o n 7.2 Program note 7.1.4 Position Setup • With the Move- and Move+ buttons you can move 7.2.1 Insert a URCap command SLIDEKIT manually while pressed •... -
Page 16: Script Calls (Only For Advanced Users)
S L I D E K I T 7.2.2 Script calls (only for advanced users) • Beside using the URCap command, there is a possibility to use script commands. get_slidekit_check_connection() - returns True if SLIDEKIT connection status is established, else False. get_slidekit_is_moving() - returns True if SLIDEKIT is moving, else False. -
Page 17: Appendix
8 .0 A p p e n d i x 8.0 Appendix 8.1 Controller Safety-I/O 4-Ø8,5 Switch #1 (Home) (Control unit mount hole Cobot Interface Switch #2 (+Limits) Digital-I/O Wall mount bracket RS stock no.:842-8471 Bolt: 4EA Nut: 4EA Bracket: 4EA CANopen Interface Motor Power 8.2 Limit switch... -
Page 18: Slidekit 2.0 Troubleshooting
S L I D E K I T 9.0 SLIDEKIT 2.0 Troubleshooting 9.1 Introduction 9.2 Program errors This Troubleshooting Guide is intended to provide guidance 9.2.1 Connection with SLIDEKIT is not to the SLIDEKIT 2.0 end users in the detection and correc- tion of programming issues within Polyscope’s robot established program. -
Page 19: Slidekit Is Not Initialized
9.0 S L I D E K I T 2 .0 Tr o u b l e s h o o ti n g 9.2.2 SLIDEKIT is not initialized 9.2.4 Invalid virtual limits Issue: Program can’t run since SLIDEKIT is not initialized. Issue: Program can’t run since set virtual limits are not valid. -
Page 20: Invalid Program Data
S L I D E K I T 9.2.6 Invalid program data 9.2.8 Not connected to Polyscope’s RTDE Issue: Program can’t run, entered program data is invalid. Possible causes: Issue: Program can’t run, no connection with Polyscope’s • Entered program value for velocity is outside min velocity –... -
Page 21: Disconnection While Program Is Running
9.0 S L I D E K I T 2 .0 Tr o u b l e s h o o ti n g 9.2.11 SLIDEKIT has entered in fault state 9.2.10 Disconnection while program is running Issue: SLIDEKIT has entered the fault state. Possible causes: •... -
Page 22: Program General Exception
S L I D E K I T 9.3 Homing errors 9.2.12 Program general exception 9.3.1 Homing error: interrupted or not started Issue: Homing procedure is interrupted or not started. Issue: General communication error. Solution(s): Possible causes: • Confirm message and try to perform homing again. If •... -
Page 23: Homing Error: Velocity Is Not Zero
9.0 S L I D E K I T 2 .0 Tr o u b l e s h o o ti n g 9.3.3 Homing error: velocity is not zero 9.3.6 Homing error: no response from the motor Issue: No response from SLIDEKIT during homing Issue: Homing procedure is stopped automatically. - Page 24 ewellix.com © Ewellix All contents of this publication are the property of Ewellix, and may not be re- produced or given to third parties (even extracts) without permission. Although great care has been taken in the production of this catalog, Ewellix does not take any responsibility for damage or other loss resulting from omissions or ty- pographical errors.
Need help?
Do you have a question about the EWELLIX SLIDEKIT 2.0 and is the answer not in the manual?
Questions and answers