Advertisement
Quick Links
WARRANTY
DO NOT RETURN YOUR PRODUCT TO THE STORE. PLEASE CONTACT
BABY TREND® FOR REPLACEMENT PARTS, SERVICE AND REPAIR.
The Baby Trend® warranty covers workmanship defects within 1 year of purchase. Any
product which has been subjected to misuse, abuse, abnormal use, excessive wear and
tear, improper assembly, negligence, environmental exposure, alteration or accident, or has
had its serial number altered or removed invalidates all claims against the manufacturer. Any
damage to property during installation is the sole responsibility of the end user.
Customer Service Department can be contacted at 1 (800) 328-7363 Monday through Friday
between 8:00 a.m. and 4:30 p.m. (PST). Return Authorizations are required prior to returning
product(s) to Baby Trend®. Please visit http://babytrend.com/pages/limited-warranty
for complete warranty details.
NO DEVUELVA SU PRODUCTO A LA TIENDA. POR FAVOR CONTACTE A
BABY TREND® PARA PIEZAS DE REPUESTO, SERVICIO Y REPARACION.
La garantía de Baby Trend® cubre defectos de fábrica por 1 año después de la compra.
Cualquier producto que haya sido sometido a uso inadecuado, abuso, uso anormal,
desgaste excesivo, montaje incorrecto, negligencia, exposición ambiental, alteración o
accidente, o cuyo número de serie haya sido alterado o removido, anula todos los reclamos
contra el fabricante. Cualquier daño a la propiedad durante la instalación es la exclusiva
responsabilidad del usuario final. El Departamento de Servicio al Cliente está disponible
llamando al 1 (800) 328-7363, de lunes a viernes de 8:00 a. m. a 4:30 p. m. (PST). Se
requiere una Autorización de Devolución antes de poder devolver el o los productos a
Baby Trend®. Visite http://babytrend.com/pages/limited-warranty
para conocer todos los detalles de la garantía.
Baby Trend, Inc.
13048 Valley Blvd.
Fontana CA 92335
GARANTIA
1-800-328-7363
(8:00am ~ 4:30pm PST)
www.babytrend.com
Read all instructions BEFORE assembly and USE of product.
KEEP INSTRUCTIONS FOR FUTURE USE.
Lea todas las instrucciones ANTES de armar y USAR el producto.
CONSERVE LAS INSTRUCCIONES PARA USO FUTURO.
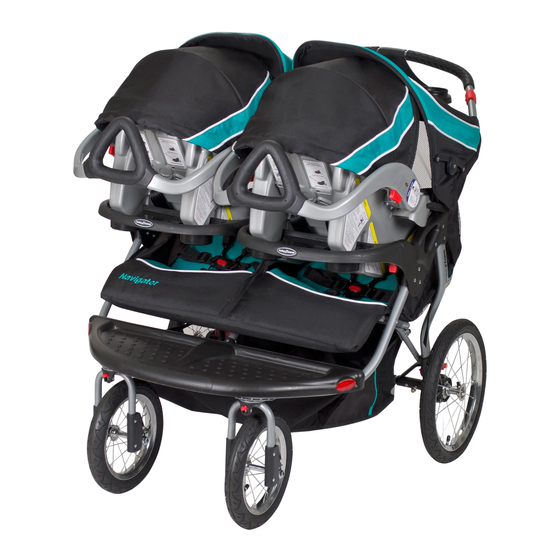
Navigator
Instruction Manual
Manual de Instrucciones
DX60
®
DX60XXX_3L_111021.1
Advertisement

Related Manuals for BABYTREND Navigator DX60


Summary of Contents for BABYTREND Navigator DX60
- Page 1 Customer Service Department can be contacted at 1 (800) 328-7363 Monday through Friday between 8:00 a.m. and 4:30 p.m. (PST). Return Authorizations are required prior to returning product(s) to Baby Trend®. Please visit http://babytrend.com/pages/limited-warranty for complete warranty details. GARANTIA NO DEVUELVA SU PRODUCTO A LA TIENDA.
- Page 2 WARNING WARNING WARNING: • NEVER use the stroller with roller skates, in-line skates, skateboards or Please follow all of these bicycles. instructions to ensure the safety of your child. Keep • We recommend that the child occupant be at least 6 months of age prior these instructions for future reference.
- Page 3 ADVERTENCIA ADVERTENCIA ADVERTENCIA: • El uso del carrito con niños que pesan más de 50 libras (22.62 kg) (no Por favor, siga todas más que estas instrucciones para garantizar la seguridad de 50 libras (22.62 kg) por silla) o más de 100 libras (45.25 kg) en total o su hijo.
- Page 4 ASSEMBLY MONTAJE PARTS PIEZAS IMPORTANT! Check that you have all the parts for this model before assembling the stroller. To ensure safe operation of your stroller, Verifique que tenga todas las piezas para este modelo antes de montar el carrito. please follow these instructions carefully.
- Page 5 ASSEMBLY MONTAJE ASSEMBLY MONTAJE Remove stroller from box. The front wheels, rear wheels, fender, and parent tray • Levante la manija de la carreola ahacia arriba con dos manos asta que el armazón de la carreola esté derecha y firmamente sujetada en need to be installed prior to use.
- Page 6 ASSEMBLY MONTAJE ASSEMBLY MONTAJE • With the wheel in position, install the • Estos tubos deben estar alineados con los axel nuts and tighten with standard agujeros del armazón delantero (Fig. 5b). crescent, box, or open end wrench. • Alinee el guardabarros delantero y You should feel significant resistance and the wheel should be held tightly presiónelo en el armazón delantero (Fig.
- Page 7 ASSEMBLY MONTAJE ASSEMBLY MONTAJE • Incline el carrito hacia delante de modo que se apoye en las ruedas • To attach the parent tray, position the Press to set Cierre a Presión delanteras. Para colocar las ruedas traseras, empuje el eje de cada parent tray in the center of the stroller rueda dentro del accesorio plástico de la esquina (Fig.
- Page 8 ASSEMBLY MONTAJE ASSEMBLY MONTAJE • To fold the canopy: pull SEATBACK POSITIONING upwards on the tensioners POSICIONED DEL RESPALDO and then pull backwards on the front edge (Fig. 10). • The seat has a multiple position recline • Para plegar la cubierta: that is controlled by a strap and buckle tire hacia arriba de los assembly behind the seat (Fig.
- Page 9 ASSEMBLY MONTAJE ASSEMBLY MONTAJE • To access the child seat: Pull one side of the release lever • When placing a child into or taking a child (Fig. 11b), located on the underside of the child tray and lift upward out of the stroller, it is recommended that (Fig.
- Page 10 Infant car seat sold separately (visit babytrend.com for compatibilty chart) Angle point Punto angular Asiento infantil para automóvil se vende por separado (visite babytrend.com para ver la tabla de compatibilidad) “Click” “Clic” CS01 EZ-Lift, CS02 EZ-Lift PLUS and CS03 EZ-Lift PRO Infant Car Seats CAR SEATS MODULE CONNECTION CONEXIÓN DE SILLITA PARA EL AUTOMÓVIL...
- Page 11 INFANT CAR SEAT SILLITA PARA EL AUTOMÓVIL INFANT CAR SEAT SILLITA PARA EL AUTOMÓVIL RETIRADA DE LA SILLA DE AUTO: OTHER COMPATIBLE CAR SEATS REMOVING THE CAR SEAT: OTROS ASIENTOS DE COCHE COMPATIBLES WARNING: Never jog or run with your •...
- Page 12 ACCESSORY ACCESORIO INFANT CAR SEAT SILLITA PARA EL AUTOMÓVIL • Position the infant car seat so that it MP3 SPEAKER Locks into tray Se traba en la bandeja faces toward the rear of the stroller BOCINAS PARA MP3 and the seat shell goes into the front tray and latches into place (Fig.
- Page 13 SAFETY SEGURIDAD SAFETY SEGURIDAD BRAKES FRONT WHEEL LOCK FRENOS BLOQUEO DE LAS RUEDA DELANTERAS WARNING: WARNING: Always set brakes when the Always lock the front swivel wheels in STRAIGHT position before placing or stroller is not being pushed so that the stroller will not removing your children from the jogger.
- Page 14 SAFETY SEGURIDAD SAFETY SEGURIDAD TO SECURE THE CHILD • The shoulder straps of the 5-point Adjust for a snug fit Regule para lograr un buen ajuste harness have 2 adjustment PARA SUJETAR AL NIÑO positions. Select the position that places the shoulder strap level Shoulder Strap Correa del hombro with, or below the top of the child’s...
- Page 15 SAFETY SEGURIDAD SAFETY SEGURIDAD JOGGING WITH YOUR STROLLER • LOCK THE FRONT SWIVEL WHEELS IN STRAIGHT POSITION TROTAR CON SU CARRITO • TRABE LAS RUEDAS DELANTERAS GIRATORIAS EN LA POSICIÓN RECTA WARNING: Never jog or run with • SAFETY WRIST STRAP: Always your newborn in the car seat position.
- Page 16 SAFETY SEGURIDAD FOLD PLEGAR TIRES TO FOLD STROLLER NEUMÁTICOS PARA DESPLEGAR EL CARRITO WARNING: Care must be taken when • Tires are shipped un-inflated. The tires should be inflated on a regular basis to the P.S.I. specified on each tire. Always use a bicycle style folding and unfolding the stroller to prevent finger hand air pump to inflate the tires.
- Page 17 FOLD PLEGAR FOLD PLEGAR • Cierre la cubierta como se describe en la TO UNFOLD STROLLER sección de la cubierta. Suelte la hebilla PARA DESPLEGAR EL CARRITO para reclinar el asiento como se describe en la sección sobre las posiciones del CAUTION: respaldo.
- Page 18 OTHER OTRO OTHER OTRO • Lift front end of the stroller up and pull down TESTING FOR PROPER WHEEL INSTALLATION on wheel to ensure its attached (Fig. 22). PARA VERIFICAR LA INSTALACION DE LAS RUEDAS NOTE: The wheel must not detach. WARNING: •...
- Page 19 OTHER OTRO OTHER OTRO WHEEL ADJUSTMENT: FLAT TIRE: AJUSTE DE RUEDAS: NEUMÁTICO DESINFLADO: AJUSTEMENT DE LA ROUE : PNEUS A PLAT : • It should be noted that all four wheel vehicles can be easily influenced to • The jogging stroller features bicycle tires to allow for extended wear and ease deviate from a straight line.
- Page 20 ® BABY TREND CUSTOMER SERVICE The Customer Service Department can be contacted at 1 (800) 328-7363 Monday through Friday between 8:00 a.m. and 4:30 p.m. (PST). Return Authorizations are required prior to returning product(s) to Baby Trend®. ® BABY TREND SERVICIO AL CLIENTE El Departamento de Servicio al Cliente puede ser contactado a 1 (800) 328-7363 Lunes a viernes...
Need help?
Do you have a question about the Navigator DX60 and is the answer not in the manual?
Questions and answers