
Subscribe to Our Youtube Channel
Related Manuals for NeuraLabel Callisto


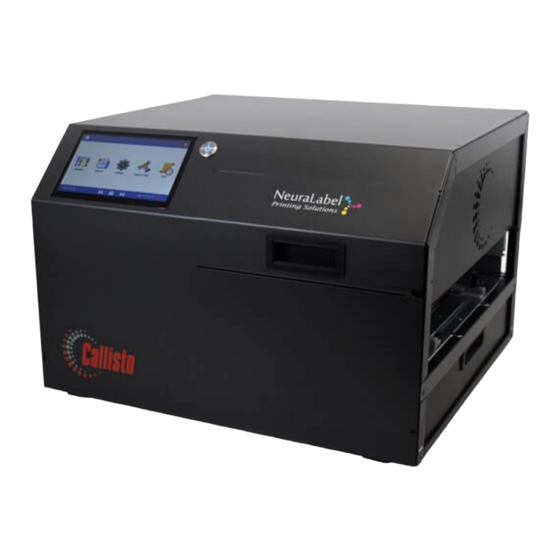
Summary of Contents for NeuraLabel Callisto
- Page 1 Callisto Printer User Guide 1-281-240-2525 www.neuralog.com support@neuralog.com © 2021 Neuralog, LP...
- Page 2 NeuraLabel Callisto Printer User Guide Congratulations on your NeuraLabel Callisto Printer. This User Guide will get you printing labels as quickly as possible, provide important information about printer features, and offer tips for workflow optimization and problem troubleshooting. Note that the information in this User Guide may change as further printer development in done.
- Page 4 – without the written permission of the publisher. Neuralog® is a registered trademark of Neuralog, LP. NeuraLabel Callisto™ is a trademark of Neuralog LP. NeuraLabel Printing Solutions® is a registered trademark of Neuralog, LP. All other products that are referred to in the document may be either trademarks and/or registered trademarks of the respective owners.
-
Page 6: Table Of Contents
Table of Contents www.neuralog.com ......................i 1. Setting up the Printer .............1-1 2. Tour of the Callisto Printer ............2-3 Callisto Printing Technology .................... 2-3 Callisto Printer Media Entrance Side ................2-3 Callisto Printer Media Exit Side ..................2-4 Callisto Printer Back Side ....................2-5 3. - Page 7 Sending a Print ......................5-20 Print Job Continuation ....................5-20 Die-Cut Labels ....................... 5-20 Printing as a Web Press ....................5-21 6. Installing the Printer Driver ........... 6-23 Special Case Driver Installation ..................6-25 7. Setting up and Using the Printer Driver ......... 7-27 Set Printing Defaults ......................
- Page 8 Job Holding ........................ 7-36 Job Attributes Tab ......................7-36 8. Callisto Operator Panel ............8-39 Home Screen ......................... 8-39 Home Icon ......................8-39 Search Icon ......................8-40 About Icon ......................8-40 Time ........................ 8-40 Media Present Indicator ..................8-40 Network Address ................8-40 Jog and Pause Buttons ..............
- Page 9 Settings ....................... 8-45 Print Settings ......................8-45 Device Settings ......................8-47 Preferences ......................8-48 Mark/Gap Settings ....................8-48 Vacuum Control ..................... 8-50 Printer Features ......................8-50 Label Cost Calculator ..................... 8-50 Vision Portal by Reliance Label Solutions, Inc............8-51 Roll to Roll Continuous Copies ................
- Page 10 Check Service Tray ....................8-61 Advance Service Tray ..................... 8-61 Callisto Troubleshooting Menu ................8-61 Calisto Printer Updates ....................8-62 Advanced Support Tools .................... 8-63 Rest Commands ......................8-64 Printhead Height ....................... 8-64 Set Custom Printhead Height ................. 8-64 Use Custom Printhead Height ................8-65 Printer Controller.......................
- Page 11 Determining the media size ................. 10-83 Creating the label page size in the driver ............. 10-84 Determining the Image or Artwork Size ............... 10-84 Ordering media from NeuraLabel ................ 10-84 Fine Sizing of the label page ................. 10-85 Selecting Driver Parameters ..................10-85 Set the Label Form Settings Media Type and Orientation........
- Page 12 Driver Fails to Install ....................11-93 Print does not start ...................... 11-93 Print does not start at correct position (top of form) ........... 11-93 Printer stops printing in middle of print ............... 11-93 Media will not load ...................... 11-94 Printer does not detect media ..................11-94 Printer prints at wrong speed ..................
-
Page 14: Setting Up The Printer
1. Setting up the Printer The Callisto printer ships in a two-piece box and usually on a pallet. Unbox your Callisto printer and remove all packing materials. Make sure the printer is set on a sturdy table with plenty of room for both entrance and exit of the label media. - Page 15 The printer has handles on either side that allow it to be more easily carried if it should need to be moved. Keep in mind the Callisto printer weighs about 55 pounds and may require two people to lift and move it. If you need to move the printer to another location within the same room or building, no special packaging care is required.
-
Page 16: Tour Of The Callisto Printer
Make sure the media box lid is completely removed and make sure there is no plastic in the box. The Callisto Ink Door lifts out and up to access the ink cartridges. Lift the ink door to install and replace cartridges. The four high-capacity color cartridges slide into their respective slots and... -
Page 17: Callisto Printer Media Exit Side
Adjustable Media Guides Lock Nut Right Handle Figure 2-1. Callisto Media Entrance Side Callisto Printer Media Exit Side Media exits the printer on its left side. Because the media path is short and simple, a vacuum table is used to aid in holding the media in place. It is critical to make sure there are no obstructions to the printer exit. -
Page 18: Callisto Printer Back Side
Figure 2-2. Callisto Media Exit Side Callisto Printer Back Side The back side of the Callisto printer contains the master power switch, the power port, and the network port. The master power switch will generally remain on because for normal operations the front power button will be accessed to turn the printer on/off. - Page 19 7-digit number. Master Power Switch Power and Network Ports Printer Serial Number Figure 2-3. Callisto Back...
-
Page 20: Callisto Consumables
Figure 3-1. Callisto Ink Cartridge Set Ink Status The status of the Callisto Ink Cartridges is available in the Supplies section of the printer operator panel. To check the cartridge ink levels: Touch the Supplies button on the home view of the operator panel. - Page 21 Touch an individual Cartridge to see a view of that ink supply. Notice the QR code for each supply. This code takes you to the NeuraLabel online store. You must create an account and login to the store to purchase supplies.
-
Page 22: Ink Access
Figure 3-4. Cartridge Status Ink Access Callisto ink is installed in the printer by opening the printer ink door located to the right of the operator panel. Only open this door when the printer is in a ready state or powered off. Do not attempt to change Callisto ink when the printer is actively printing. -
Page 23: Service Tray
Figure 3-6. Ink Cartridge Access When all cartridges are in place, close the Callisto ink door by pulling down and out until the door is in place. NOTE: Whenever the door is closed, the Callisto printer goes through an ink checking routine that may take a few moments. -
Page 24: Service Tray Status
Service Tray Status The status of the Callisto Service Tray is available in the Supplies section of the printer operator panel. To check the cartridge ink levels: Touch the Supplies button on the home view of the operator panel. Touch the Supplies Summary to see a summary view of all printer supplies. - Page 25 To remove the service tray: Touch the Support Tools icon on the Operator Panel home view. Touch Maintenance and then Service Tray in the menu that appears. Touch Remove. Follow the instructions on the panel that appears and select the Eject button when ready to remove the tray.
-
Page 26: Label Media
Label Media The Callisto can use a variety of media including papers and synthetics. Matte, satin and glossy finishes are supported. Many specialty materials such as transparent or BS5609-rated materials are supported. Media should be high quality and inkjet coated. Both die-cut and unconverted media can work in the Callisto printer. - Page 27 3-14...
-
Page 28: Setting Up The Network
The Callisto printer has a Host Name that can be used to access it over the network. By default, the Host Name will be set to the printer’s serial number, however the Host Name may be changed by the end user. - Page 29 To assign an IPV4 dynamic network address simply plug in the network cable. To assign a static network address do the following on the printer Operator Panel. Touch the Settings Icon Select Device Settings->Networking->IPV4 Settings. Select the Manual choice and enter the corresponding data for your network. Touch the Apply button.
- Page 30 Figure 4-3. IPV6 Settings View When connected to a network, the printer will display the network address in the right lower section of the operator panel. If no network is detected the words No Network Detected are displayed. 4-17...
- Page 31 4-18...
-
Page 32: Working With Labels And Media
Loosen the latch, slide the track guides to the proper position, and retighten the latch. Load the media by grasping each side with two hands and guiding it into the Callisto track. The media should slide freely through the track, but the track should be tight enough to keep the media straight. -
Page 33: Sending A Print
Keep hands clear of the printer entrance at all times during printing. Note that the Callisto does not print on the first die-cut label on a new media load. Also the printer cannot print on the last die-cut label of a media roll or stack. -
Page 34: Printing As A Web Press
Web Press Print Mode and None for Mark Mode. Figure 5-2. Web Press Mode When using Callisto in the Web Press Print Mode, a gap of 0.4-0.5 inches must be set between the printed pages. Web Press mode requires this gap because of the characteristics of the printhead itself. - Page 35 Continuous Copies is a printer feature that is activated through the features view. For more information about using the Callisto as a Web Press in this mode, contact NeuraLabel. 5-22...
-
Page 36: Installing The Printer Driver
NeuraLabel website, however if you wish to, it is available for download in the Callisto Support section of www.neuralabel.com. To install the Callisto printer driver follow these steps to copy the driver from the printer to your host PC. - Page 37 TIP: If you are using dynamically assigned IP addresses on your company network, add the printer using the Host Name. This will preserve the printer connection even if the network address changes. Figure 6-2. Printer Driver->Copy the Files When complete, you will see the following screen. Figure 6-3.
-
Page 38: Special Case Driver Installation
Select Next. If desired, set the Callisto as the default printer. Figure 6-4. Printer Driver->Default Printer At this point you have installed the Callisto printer driver and can access it in the Printers and Devices area of the Control Panel. - Page 39 CallistoPrinter account and the password you created when prompted during printer setup. Remember this password. If you are installing multiple printers on the network, the other printers will need these same steps performed. Figure 6-6. Password Protection for the Callisto 6-26...
-
Page 40: Setting Up And Using The Printer Driver
7. Setting up and Using the Printer Driver The Callisto printer driver ships with preset defaults for many label types and sizes. However it is likely you will need to define the specific print setting such as page size and mark/gap configuration for your specific media. -
Page 41: Quality Tab
Quality Tab Set the Print Quality. The Callisto Quality choices are Draft, Normal, Best and Max DPI. The most appropriate quality setting depends on the types of labels you are printing. Here are some guidelines for Print Quality. Figure 7-2. Quality Tab... -
Page 42: Draft Print Quality
Draft print quality to achieve faster speeds for sequenced labels that require less detail. Draft quality prints at 300 DPI and is comparable to the draft setting of NeuraLabel’s other label printers. Draft quality is often suitable for larger labels, such as drum labels, that have a primary function as information preservation and do not require superior quality. -
Page 43: Label Form Tab
Select one of the Paper Sizes that correspond with the label size you will use. Note that any media width between 1.5” and 12.1” will fit in the track and may be used with the Callisto printer. You may create a page of any width that is needed or that matches your label up to 12 inches. - Page 44 The Callisto printer has a center-based gap/mark sensor and requires a center mark for marked media. Note that the Callisto printer itself has a “gap between pages” requirement for printing die-cut labels. This is due to the geometry of the stationary printhead. However any label within the width and length specification can be printed with the right media and page size definition.
-
Page 45: Borderless Printing, Overspray And Underspray
Figure 7-3. Label Form Tab Borderless Printing, Overspray and Underspray The Borderless Printing option included in the Callisto printer driver actually has an expanded functionality. It can be used to enlarge or reduce any individual page to more precisely fit the label media. -
Page 46: Label Placement Tab
The Label Placement tab is where the general type of printing is specified, as well as the individual parameters needed for that type of printing. Callisto printer modes include Labels used to print die-cut labels, Banner for printing continuous or stitched images, and Web Press mode. -
Page 47: Non-Continuous Direction Label Placement
Figure 7-4. Placement Tab Non-Continuous Direction Label Placement Callisto is center-based, and no left-right positioning is normally needed. However, if you do need to adjust the label image in the non-continuous direction, Left Offset should be used. Facing the printer where the printed label has exited the printer, a more positive or larger value in Left Offset will move the printed image to the left. -
Page 48: Start Of Print
Start of Print For die-cut label printing the Callisto printer prints on the gap or mark of the die-cut labels, regardless of the On Leading Edge or On First Mark setting. Die-cut label printing does not use this setting. For die-cut label printing the Callisto printer prints on the gap or mark of the die-cut labels, regardless of the value in Top Offset. -
Page 49: Cut After Present
Job Holding Job Holding places the print job on the Callisto hard drive into the Permanent Held Jobs folder, accessible through the printer Operator Panel. From here the job may be reprinted or deleted. - Page 50 The Callisto printer does include periodic service routines to exercise all printer dies and colors. As-needed printhead cleanings are also useful for keeping the printhead in a healthy state.
- Page 51 Leading Blank Pages and Trailing Blank Pages allow for blank media to automatically be placed on a printed roll so that the media is ready for an applicator or finishing equipment. It is also just as effective to jog the media as needed to create these pages. Pause after Leading Blanks is not currently used because these functions can easily be performed manually.
-
Page 52: Callisto Operator Panel
8. Callisto Operator Panel The Callisto printer has a 7-inch built-in touch display to help you navigate the printer and its settings. This section will provide detailed information about the Callisto Operator Panel. Search Button About Panel Home Button Media Present... - Page 53 Touch the Search icon to search the Callisto Operator Panel for any keyword. An On-Screen Keypad (OSK) will appear for you to enter the search criteria. Touch the About icon to see the current version information about the Callisto printer, as well as the printer serial number.
-
Page 54: Printer Icons
Hiding the menu makes the current view larger for easier touch interaction. Printer Icons Supplies shows Callisto ink and service tray levels. Detailed information for each color cartridge and the service tray can be found in the Supplies View. Figure 8-3. Printer Supplies Menu Reports incudes Callisto reports such as Device Information, Device Statistics, and Quality Reports. -
Page 55: Device Information
Figure 8-4. Printer Reports Menu Device Information Device Information contains data about the printer. Access this panel to provide information to technical support when needed. Figure 8-5. Device Information Report Device Statistics Device Statics contains basic statistical data about the printer. Ink Usage in Drops and Printed Pages are available. -
Page 56: Print Quality Report
Print Quality Report Print Quality Report gives quick access to a variety of quality reports, or test patterns, that are useful for diagnosing any quality issues that the printer might have. Access the following reports through this panel. Figure 8-7. Print Quality Report •... -
Page 57: Event Logs
Send Log to Support Figure 8-9. Event Logs The logging level can be set for Callisto logs. Note that the logging level applies to all Callisto logs and will update for future logs when the value is changed. Logging levels include the following. -
Page 58: Print Settings
NeuraLabel recommends keeping the logging level at WARN or ERROR. Normally the logging level would be changed by support to diagnose a printer problem. The Callisto printer saves a “rolling” set of the last few logs for each subsystem, and the most recent log is displayed. Note that the printer’s web server includes a means of downloading all printer logs into a zipped file... - Page 59 Die-cut labels are printed using Labels Print Mode and Black Mark or Gap Mark Mode. Mark Adjustment is in inches or centimeters and is usually close to 0. There are no other parameters on this page that need to be set for overriding label printing. Figure 8-12.
-
Page 60: Device Settings
Figure 8-13. Printhead Height Max Print Speed allows the printer’s maximum print speed to be overridden with values specified in this view. This is useful for preventing the printer from printing too fast and resulting in print errors. If multiple users are accessing the same printer, it is reasonable to override the print speed so that all users print at the same speed and do not print beyond the printer’s capabilities. -
Page 61: Preferences
For most label media the recommended setting is Auto mode with Brightness set above 85. Sensitivity is not used in the Auto configuration. Manual mode should only be used for troublesome media and with the help of NeuraLabel support. Manual mode may be used to diagnose label printing issues. - Page 62 Figure 8-17. Mark/Gap Sensor Settings Notice the Current Active Values for Gap and Mark at the bottom of the Mark/Gap Sensor Settings view. Slide the Brightness slider to see these settings change. Guidelines for sensor readings are as follows. • Low number means lots of light (300-700) •...
-
Page 63: Vacuum Control
Figure 8-18. Vacuum Control Printer Features Printer Features include any special applications that have been deployed with your Callisto printer. Contact your Neuralog representative for a list of currently available printer features. The following printer features are released as of January 2022. -
Page 64: Vision Portal By Reliance Label Solutions, Inc
The Vision Portal is a feature that works with the Reliance Label Solutions Vision system to print variable data over the web to the Callisto printer. Clients using this system should activate this feature and work with NeuraLabel support to print labels through the Vision system. Keep this feature unchecked unless this special configuration is needed. -
Page 65: Printer Statistics Module
The Callisto printer will work with the 300x printer driver. If you are using the 300x printer driver with the Callisto printer, you will need to check this Rotate 180 box to orient the labels in the same direction that the 300x driver produced. This feature might be needed for proper presentation to an applicator. -
Page 66: Clean Printhead Maintenance Routine
Figure 8-21. Support Tools Menu There are several maintenance routines; the next figure shows all the Maintenance menu listings. Figure 8-22. Maintenance Routines Clean Printhead Maintenance Routine Printhead cleaning may be run any time a quality defect is observed. It should be run whenever a printer is moved. - Page 67 Figure 8-23. Printhead Cleaning View The Full Cleaning Routines (Levels 1-3) are designed to alleviate minor print defects that have resulted from a printhead nozzle being clogged. Sometimes a bit of dry ink or dust will temporarily block a printhead and a white line will be seen in the printed image. Occasionally a bit of media or debris will block a printhead nozzle.
-
Page 68: Die Leveling Maintenance Routine
Out Database. These tools will help alleviate any print quality that might appear on the printer. Die Leveling Maintenance Routine The Callisto printer has 14 stationary print dies. These dies are calibrated at the factory to ensure that the same levels of ink come from each die to ensure a smooth image. If one or more dies appear to be too light or too dark and a wide band (a little less than an inch) appears in the printed image, use Die Leveling to alleviate the problem. - Page 69 TIP: Touch the number keyin to directly edit the number in the popup. An on-screen keypad will appear. Select Set in the popup to see the number update in the die leveling grid. Select Apply to temporarily apply the values, and then select Quick Print to review the results on the printed test pattern.
-
Page 70: Die Alignment Maintenance Routine
Die Alignment Maintenance Routine The 14 Callisto stationary dies have an overlap of nozzles between each adjacent pair. This overlap, or alignment, is calibrated at the factory to ensure a seamless die integration. If a dark or light line appears in the image at a die seam, the die alignment may need further adjusting. - Page 71 Select Set in the popup to see the number update in the die alignment grid. Note that Die Alignment does not have the “Apply Preview” that was available in Die Leveling. Touch the Save button to save the die alignment settings. Print the Quick Print to verify your results.
-
Page 72: Nozzle Management Maintenance Routine
Nozzle Management Maintenance Routine The Callisto printer has a database where it stores any faulty printer nozzles, in order to compensate for those nozzles. Nozzle Management has been done at the factory. It is not currently available for end users to edit, but it may become available as a tool at a later date. -
Page 73: Install Service Tray
Instructions for installing a service tray are found directly on the operator panel. To access this view do the following. On the operator panel touch the Support/Tools icon. Select Maintenance-> Service Tray->Install Follow the instructions on the Callisto operator panel. They are shown here as well. Figure 8-30. Install Service Tray 8-60... -
Page 74: Check Service Tray
Figure 8-32. Advance Service Tray Callisto Troubleshooting Menu The Callisto printer contains an extensive troubleshooting section. These printer functions are designed to help Neuralog Support diagnose any printer issues. The troubleshooting menu is listed below. -
Page 75: Calisto Printer Updates
Support/Tools->Check for Updates View. Printer updates will be available for printers that have active maintenance plans. The Updates view will show the version of printer firmware currently installed on the Callisto printer. It will also query the Neuralog website to determine the shipping firmware version, as well as the printer maintenance status. -
Page 76: Advanced Support Tools
From the Updates view the following information is available. Installed Version of Callisto firmware. Latest Version of Callisto firmware available for download. Printer’s Maintenance Date through which product support and updates are available. The upper section of the updates view allows downloading of all updates, and updating the printer Operator Panel and associated components. -
Page 77: Rest Commands
Figure 8-35. Advanced Support Tools Rest Commands Rest Commands will allow Neuralog support to send diagnostic queries to the printer. Use these commands only with the direction of Neuralog support. Printhead Height The Advanced Printhead Height menu choice may be of particular use for some users. From this view a custom printhead height can be created. -
Page 78: Use Custom Printhead Height
Select Advanced->Printhead Height On the view that appears, use the slider or -/+ buttons to adjust the custom height. Touch the Apply button to save the value. Note that you can touch the Auto, Low, Medium or High labels to reset the slider to those positions. -
Page 79: Printer Controller
Printer Controller Printer Controller will allow Neuralog support to send diagnostic queries to the printer. Use these commands only with the direction of Neuralog support. Reset There are a set of Reset commands that can be used to reset the printer or one of its subsystems. -
Page 80: Job Log
Job Log Every time a file is sent to the Callisto printer, an entry is made in the job log. Touch the Job Log tab to access this view. Each job contains a summary report with useful information about the print. -
Page 81: Job Queue
Job Queue. If the job does not appear in the Job Queue or it appears only briefly, then there is a problem with Callisto Printing. It may be that the printer is not in a ready state, or it might be the case that the printing application is not properly send the job to the printer. -
Page 82: Held Jobs
Held Jobs Held Jobs allows you to store any label job (or other) print on the Callisto printer built-in hard drive. Once a job is held it can be printed at any time. The number of job copies can be changed from Held Jobs, however most other attributes of the job cannot be changed. - Page 83 Held Jobs is sorted alphabetically. Touch the Document Name label at the top of the Held Jobs list to re-sort the job list by date, so that the most recently added job appears at the top of the list. Held Jobs are permanently stored and will remain on the Callisto printer until they are deleted.
-
Page 84: Callisto Web Server
9. Callisto Web Server The Callisto printer has a built-in web server that mimics many of the operations found on the operator panel. The web server interface makes it possible to interact with the printer from a client machine on your local network at your desk or office. The printer interface can be accessed from any network location as long as you are able to see the network where the printer resides. -
Page 85: Maintenance Quality Toolbox
The web interface workflow is the same as the operator panel workflow. Review the section Die Leveling in the Callisto Operator Panel Chapter 7 for instructions on using this page. Figure 9-2. Web Server: Die Leveling... -
Page 86: Die Alignment
The web interface workflow for changing printhead height is the same as the operator panel workflow. Review the section Printhead Height in the Callisto Operator Panel Chapter 7 for instructions on using this page. 9-73... -
Page 87: Settings
Print Speed may be overridden if desired. The speed at which labels can be printed on the Callisto printer depends of a variety of factors including print quality, file complexity and file width. Copies can be printed at faster speeds than sequenced labels. -
Page 88: Reports
Figure 9-5. Web Server: Print Parameters Figure 9-6. Web Server: Print Speed Reports The Callisto Web Server contains the reports that are found in the operator panel. Device Information includes system versions and serial numbers of device components. 9-75... - Page 89 Figure 9-7. Web Server: Device Information Device Statistics includes a report for ink usage and a report for printed pages. Figure 9-8. Web Server: Device Statistics->Ink Usage 9-76...
- Page 90 Figure 9-9. Web Server: Device Statistics->Printed Pages The Print Quality Report page allows the built-in printer quality reports to be printed from the web server. Figure 9-10. Web Server: Print Quality Report 9-77...
- Page 91 The Network Settings report provides a summary of the printer’s network settings. Figure 9-11. Web Server: Network Settings The Event Logs page allows any of the printer’s event logs to be viewed and downloaded. This can be very helpful when printer support is needed. Figure 9-12.
-
Page 92: Support Tools
Update Printer Firmware, found in Support Tools Maintenance section of the web server, is useful for updating Callisto printer firmware when the printer is not on the internet and cannot access cloud updates. The most straightforward way to update the Callisto printer firmware is to directly access the update through the operator panel. -
Page 93: Print Jobs
Send Job to Printer will send any valid Callisto print file to the printer for immediate printing. Send Job to Held Jobs will send any valid Callisto print file to Held Jobs to be stored on the printer. Be sure to use only valid Callisto printer files. These files normally have a .prn file extension. - Page 94 Figure 9-15. Web Server: Send File to Printer Figure 9-16. Web Server: Send File to Held Jobs 9-81...
- Page 95 The web server also offers a means of downloading recently printed files from the printer. On the printer operator panel in the Jobs section there is a Job Log view showing the most recently printed jobs. The last few print files (PRNs) are always saved for reprinting. The Get Print File from Printer feature allows the user to download recently printed jobs.
-
Page 96: 10. Printing Labels
Note that if you want to print a full-bleed, or full-coverage, label, you will need a media gap of 0.5”. NeuraLabel can provide you with media that meets this requirement. If you are printing labels that allow white space around the artwork, the media gap can be smaller. -
Page 97: Creating The Label Page Size In The Driver
Creating the label page size in the driver Once you have the label measured it is easy to create a page in the Callisto printer driver. Page Width = W Page Length = L + G – 0.5” If you need the labels to be full coverage then G needs to be at least 0.4” in length. Otherwise G can be any value less than 0.5 inches. -
Page 98: Fine Sizing Of The Label Page
Fine Sizing of the label page The Callisto printer driver includes a special feature that allows fine sizing of the printed page. This feature is called Borderless printing and is found on the Label Form tab. If you are printing a full coverage label, you may want to slightly oversize the printed page. Do the following to accomplish this. -
Page 99: Select Labels, Gap Or Mark And Offsets For Label Placement Settings
Up to 18 ips possible Table. Print Quality and Speed Guidelines While you are learning the Callisto printer, select a slower speed. After you are comfortable printing labels, you can try the upper end of the recommended speeds. 10-86... -
Page 100: Select The Printhead Height
Select the Printhead Height The printhead height setting is found on the Job Attribute tab of the printer driver. Most media will use the lowest value of Auto. Try the Auto printhead height setting first. If you see ink smudges or smears on the printed image, try one of the higher printhead settings. If you still see ink smears with a setting of high, create a custom printhead height to use. -
Page 101: Printing The Label Job
Printing the Label Job Once you are satisfied with the layout and quality of the sample print, you are ready to print the label batch. Print a small batch of 10-20 labels. Verify that all labels have printed successfully. The table provides a summary of issues you might see and suggested adjustment for each of those issues. - Page 102 not printing may take a few moments to cancel because the files are locked by printing system processes. The job will cancel when the process releases the file. From the Home View do the following to cancel the current job. Touch the read X to immediately cancel the current job.
-
Page 103: Clearing A Label Jam In The Printer
If jogging does not work, move to the printer exit. With both hands gently pull the media to remove it from the printer. If a small fragment of media or a piece of tape gets caught inside the Callisto printer track do the following: Turn the Callisto printer off or unplug the network cable to make sure no one has access to communicate with the printer and cause the service tray to move. -
Page 104: Changing An Ink Cartridge
Changing an Ink Cartridge Callisto ink may be changed in between jobs when the cartridge reads low or very low. If the cartridge runs out of ink during a printing job, an “Out of Ink” alert will appear on the screen. -
Page 105: Running Out Of Media During The Print
Operator Panel. Callisto Ink must be purchased from NeuraLabel or a NeuraLabel supplier. Only NeuraLabel ink that has been designed to work with the Callisto printhead will work in the Callisto printer. Running out of Media during the print If media runs out during a print the printer will allow the user to continue the job. -
Page 106: 11. Troubleshooting
11. Troubleshooting Driver Fails to Install Make sure you are connected to the printer over a network. Special Case Driver Installation Follow the steps in the section in the section on Installing the Printer Driver. Print does not start Make sure the printer is in the Printer Ready state before printing. Remember that the printer takes about two minutes to boot up. -
Page 107: Media Will Not Load
Media will not load Make sure the edge of the media is not damaged. Make sure the media is not severely curled. Media near the end of a roll on a 3-inch core will sometimes not load. Flatten the media to load. Make sure the guides have been adjusted so that the media glides through them. -
Page 108: Print Prints Blank Pages
Label is Stuck in Printer The Callisto printer has been designed for easy removal of stuck labels and related materials. If it is determined that a label is stuck inside the printer, an operator panel routine can be run to access the print zone for direct remove of the label. -
Page 109: Printing Copies From Microsoft Word Gives Trouble
Printing copies from Microsoft Word gives Trouble When generating copies, Microsoft Word may create a large file with multiple copied pages, instead of a small file with a single page and a copy count flag. This is an oddity of Microsoft Word, but a workaround exists. -
Page 110: 12. Index
12. Index 11-14 inches per second, 2-3 Callisto printer driver, 6-23 14 stationary print dies, 8-55 Callisto.zip, 9-79 18 inches per second, 2-3 cancel, 10-88 Cancel job, 8-69 caution, 5-20 center-based, 2-3, 5-19, 7-31, 7-34 7-27 300 DPI, 5-21, , 7-28... - Page 111 Ink Usage in Drops, 8-42 ink-jet coated label media, 5-19 Edge, 9-71 install service tray, 3-12 eject, 5-19 Intensity, 7-30 encoder, 2-3 Internet Explorer, 9-71 entrance, 2-3 IP address, 6-23 Estimated Ink Levels, 9-71 IPV Settings, 8-47 Event logs, 8-44 IPV4 Settings, 4-16 Event Logs, 9-78 IPV6, 4-15, 4-16, 4-17...
- Page 112 media present indicator, 11-93 Print Settings, 8-45, 11-94 Media Present Indicator, 8-40 Print Speed, 7-36, 8-45, 8-47 media sensor, 5-19 Print Speed wrong, 11-94 Media will not load, 11-94 printable side, 11-93 Microsoft Word, 11-96 PrintBar, 8-63 motor stall, 1-1 Printed Pages, 8-42 multipage copies, 8-52 Printer does not detect media, 11-94...
- Page 113 serial number, 2-5, 4-15, 8-40 track guides, 5-19 service routines, 7-37 trailing blank pages, 7-38 service tray, 3-7 Troubleshooting, 11-93 Service Tray, 3-10, 8-59 Service Tray Advance, 8-61 Service Tray Check, 8-61 uncollated, 8-52 Service Tray Install, 8-60 Uncollated Copies, 11-96 Service Tray Remove, 8-59 unconverted media, 5-21 Settings, 9-74...
Need help?
Do you have a question about the Callisto and is the answer not in the manual?
Questions and answers