Advertisement
Advertisement
Table of Contents

Related Manuals for Diamond RVE/3C-SBC


Summary of Contents for Diamond RVE/3C-SBC
- Page 1 11/2018 Mod: RVE/3C-SBC Production code: MN3E...
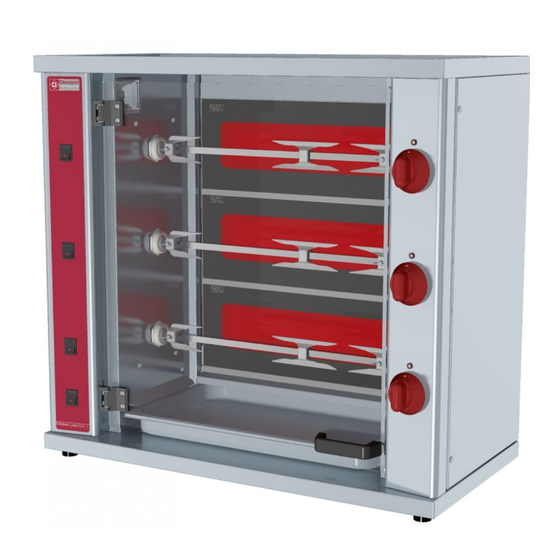
- Page 2 USER’S MANUAL P.23 ELECTRIC MINI OVENS MOD. RVE/2C-SBC RVE/3C-SBC...
-
Page 3: Index English
INDEX ENGLISH Chapter 1…. DESCRIPTION OF THE APPARATUS Chapter 2…. INSTALLATION Chapter 3… DESCRIPTION OF THE CONTROLS Chapter 4..LOADING AND CLEANING THE OVEN Chapter 5…. TECHNICAL INSTRUCTIONS FOR INSTALLATION AND ADJUSTMENT Chapter 6…. ASSEMBLY OF THE SPARE PARTS Appendix A… LIST OF SPARE PARTS Appendix B ELECTRIC DIAGRAMS P.44... -
Page 4: Installation
DOORS The doors consist of two panes of tempered glass with insulated handles. The glass panels are assembled on the front of the oven. Their purpose is to protect you from the heat while the oven is in operation and to protect the food from external agents. - Page 5 WARNING: Make sure the installation voltage is the same as the one indicated on the characteristics plaque placed at the frontal bottom left hand corner of the roaster. Do not place any object on top of the oven or along its sides that could obstruct the ventilation grilles.
-
Page 6: Loading The Oven
CHAPTER 4 LOADING AND CLEANING THE OVEN LOADING THE OVEN a) Put the simple skewer (1) in the spit (3) until it reaches the safety limit of the spit. Then fix it with the screw (2). (See fig. 5). b) Then place a chicken on the spit and hold it in place with the skewer already in position. Put the double skewer (4) on the spit and in a chicken. - Page 7 (1) once the chain is properly tautened. Fig. 9 TECHNICAL DATA - ELECTRIC OVENS Model Lenght x Depth x Height Kg net Tension Power 800 x 400 x 555 31 Kg 400v+N+T 4.4Kw RVE/2C-SBC 800 x 400 x 735 46 Kg 400v+N+T 6.6Kw RVE/3C-SBC...
- Page 8 CHAPTER 6 ASSEMBLY OF SPARE PARTS WARNING: These operations can only be done by an authorised technician CHANGING DE MOTOR REDUCER a) remove the Disconnect the oven from the mains. Remove the cover of the transmission on the left side of the oven by loosening the screws fastening it.
- Page 9 Motor reducer 220V 020112 Element 193100 Switch 060004 Spit without skewers 195001 Simple Skewer (without screw) 050107 Double Skewer 050110 Skewer screw 050116 Spit handle 050112 Hook for removing spits 050114 Oven glass, model.RVE/2C-SBC 194201 Oven glass, model. RVE/3C-SBC 194301...
- Page 10 Electric diagram REV Position 0 Position 3 Position 2 Position 1...
Need help?
Do you have a question about the RVE/3C-SBC and is the answer not in the manual?
Questions and answers