
Related Manuals for abc Wall-mounted Bookcase With Door


Summary of Contents for abc Wall-mounted Bookcase With Door
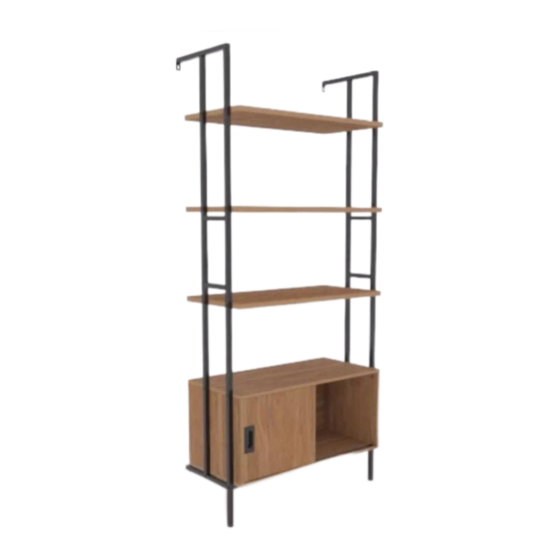
- Page 1 Wall-mounted Bookcase With Door NOTE: THIS INSTRUCTION BOOKLET CONTAINS IMPORTANT SAFETY INFORMATION. PLEASE READ AND KEEP FOR FUTURE REFERENCE. English pg 1-17 Français pg 18-20 Español pg 21-23 Lot # 538503 02/21/20 Purchased: __________________...
- Page 2 Table of Contents Assembly Tools Required Part Identifi cation No. 2 Phillips Screwdriver Tip Shown Actual Size Hardware Identifi cation Assembly Steps 6-17 Straight Edge Screwdriver Français 18-20 Español 21-23 Electric drill with 5/16" bit (ONLY in indicated step) Safety 24-26 Warranty...
- Page 3 Now you know Part Identifi cation our ABCs. å While not all parts are labeled, some of the parts will have a label or an inked letter on the edge to help distinguish similar parts from each other. Use this part identifi cation to help identify similar parts. TOP (1) BACK (1) DOOR (1)
- Page 4 Hardware Identifi cation å Screws are shown actual size. You may receive extra hardware with your unit. HIDDEN CAM - 6 CAM SCREW - 6 PULL - 1 WOOD DOWEL - 6 UPPER GUIDE - 2 LOWER GUIDE - 2 WALL ANCHOR - 2 L-WRENCH - 1 APPLIQUE CARD - 1...
-
Page 5: Table Of Contents
Hardware Identifi cation å Screws are shown actual size. You may receive extra hardware with your unit. 3/8" MACHINE SCREW - 2 1-9/16" PAN HEAD SCREW - 6 1-3/16" HEX HEAD SCREW - 8 1/2" FLAT HEAD SCREW - 8 1-15/16"... - Page 6 Hardware Usage Guide HOW TO USE A HIDDEN CAM & CAM SCREW OR CAM DOWEL NOTE: Various CAM SCREWS or a CAM DOWEL may be used. Turn the CAM SCREW or gently tap the CAM DOWEL until the shoulder is against the surface of the part.
- Page 7 Step 1 Assemble your unit on a carpeted fl oor or on the empty å carton to avoid scratching your unit or the fl oor. Just think. The sooner you do this, the sooner Turn six CAM SCREWS (2) into the TOP (A). å...
- Page 8 Step Step 2 Insert three WOOD DOWELS (3) into the TOP (A). å Fasten the ENDS (B and C) and UPRIGHT (D) to the TOP (A). å Tighten six HIDDEN CAMS. NOTE: Be sure the WOOD DOWELS in the TOP insert into the å...
- Page 9 Step Step 3 Slide the BACK (E) into the grooves å in the ENDS (B and C) and TOP (A). With the palm of your hand, tap the BACK down into the groove. u r f a i s h e F i n...
-
Page 10: 1-9/16" Pan Head Screw
Step Step 4 Insert three WOOD DOWELS (3) into the ENDS (B and C), å and UPRIGHT (D). Fasten the BOTTOM (F) to the ENDS (B and C), and UPRIGHT (D). å Use six 1-9/16" PAN HEAD SCREWS (11). NOTE: Be sure the WOOD DOWELS in the ENDS and UPRIGHT å... -
Page 11: 1-3/16" Hex Head Screw
Step Step 5 Fasten the BRACES (G) to the BOTTOM (F). Tighten four å 1-3/16" HEX HEAD SCREWS (12) using the L-WRENCH (8). Now might be a good time to refresh NOTE: You should start each SCREW a few turns before å... -
Page 12: 1/2" Hex Head Screw
Step Step 6 Fasten a UPPER FRAME (H) to a LOWER FRAME (K). å Tighten four 1/2" HEX HEAD SCREWS (14) using the L-WRENCH (8). NOTE: You should start each SCREW a few turns before å completely tightening any of them. Repeat this step for the remaining FRAMES. -
Page 13: 1-15/16" Hex Head Screw
Step Step 7 Turn the assembly onto its back edges. å Fasten the FRAMES (H and K) to the TOP (A) å and SHELVES (L). Tighten sixteen 1-15/16" HEX HEAD SCREWS (15) using the L-WRENCH (8). NOTE: You should start each SCREW a few turns before å... -
Page 14: 2" Pan Head Screw
Step Step 8 -Carefully stand your unit upright against the wall in its fi nal location. Strike a mark through the center of the hole in å the UPPER FRAMES (H). Lay your unit down. -Drill a 5/16" hole on the marks. å... - Page 15 Step Step 9 Fasten the PULL (4) to the DOOR (J). Use two 3/8" å MACHINE SCREWS (10). If you're doing this to help a friend, don't Fasten the GUIDES to the DOOR (J). Use eight 1/2" FLAT å leave without a bite. HEAD SCREWS (13).
- Page 16 Step Step 10 NOTE: The UPPER GUIDE (5) tabs should be down before starting this step. å Insert the LOWER GUIDES (6) in the DOOR (J) at an angle into the groove in the BOTTOM (F). Then, tilt å the DOOR (J) up vertically. Push the UPPER GUIDE (5) tabs up into the groove in the TOP (A). NOTE: The DOOR should slide freely in the track.
- Page 17 Step Step 11 Peel APPLIQUES from the APPLIQUE CARD (9) and stick them onto each visible HIDDEN CAM. å NOTE: Please read the back pages of the instruction booklet for important safety information. å This completes assembly. Clean with a damp cloth. Wipe dry. å...
- Page 18 Bibliothèque montée au mur avec porte Utilisez les instructions d’ a ssemblage en français avec les NOUS CONTACTER EN PREMIER schémas étape par étape du manuel d’instruction en anglais. AVANT D'EFFECTUER TOUT RETOUR AU MAGASIN. Chaque étape en français correspond à la même étape en Nous faisons de notre mieux pour nous assurer que votre meuble anglais.
- Page 19 Guide d'utilisation de la visserie ÉTAPE 4 UTILISATION DE LA EXCENTRIQUE ESCAMOTABLE ET DE LA Insérer trois CHEVILLES EN BOIS (3) dans les EXTRÉMITÉS (B et C) VIS D'EXCENTRIQUE OU DE LA CHEVILLE D’EXCENTRIQUE et le MONTANT (D). 1.. REMARQUE : Plusieurs VIS D'EXCENTRIQUE ou une CHEVILLE Fixer le DESSOUS (F) aux EXTRÉMITÉS (B et C) et au MONTANT (D).
- Page 20 ÉTAPE 7 ÉTAPE 10 Retourner l’ensemble sur ses bords arrière. REMARQUE : Les pattes du GUIDE SUPÉRIEUR (5) doivent être en bas avant de commencer cette étape. Fixer les CADRES (H et K) au DESSUS (A) et aux TABLETTES (L). Serrer seize VIS TÊTE HEX 50 mm (15) à...
- Page 21 Biblioteca montada en la pared con puerta Use estas instrucciones de ensamblaje en español junto con las CONTÁCTENOS PRIMERO fi guras paso-a-paso provistas en el folleto inglés. Cada paso en ANTES DE HACER DEVOLUCIONES A LA TIENDA. español corresponde al mismo paso en inglés. Compare la “Lista Tratamos de asegurar que su mueble llega en condición excelente.
- Page 22 Guía de uso de herrajes PASO 4 CÓMO UTILIZAR EL EXCÉNTRICO ESCONDIDO Y LA BIELA DE Inserte tres PASADORES DE MADERA (3) en los EXTREMOS (B y C) EXCÉNTRICO O PASADOR DE EXCÉNTRICO y el PARAL (D). 1. NOTA: Varias BIELAS DE EXCÉNTRICO o un PASADOR DE Fije el FONDO (F) a los EXTREMOS (B y C) y al PARAL (D).
- Page 23 PASO 7 PASO 10 Voltee el conjunto para que repose sobre sus bordes posteriores. NOTA: Las lengüetas de la GUÍA SUPERIOR (5) deben estar abajo antes de comenzar este paso. Fije los MARCOS (H y K) al PANEL SUPERIOR (A) y a los ESTANTES (L).
- Page 24 WARNING Please use your furniture correctly and safely. Improper use can cause safety hazards, or damage to your furniture or household items. Carefully read the following chart. Look out for: What can happen: How to avoid the problem: • Overloaded shelves. •...
- Page 25 AVERTISSEMENT Prière d’utiliser le mobilier à bon escient et avec prudence. Une mauvaise utilisation peut être à l’ o rigine de risques d’ a ccident ou peut endommager le mobilier et les articles ménagers. Lire attentivement le tableau suivant. À surveiller : Danger éventuel : Solution : •...
- Page 26 ADVERTENCIA Por favor use el mobiliario correcta y seguramente. El mal uso puede causar riesgos de seguridad o daño a las unidades o artículos domésticos. Cuidadosamente lea la tabla a continuación. Esté alerto de: Puede ocurrir: Evitar el problema: • Estantes sobrecargados •...
- Page 27 5-YEAR LIMITED WARRANTY 1. provides limited warranty coverage to the original purchaser of this product for a 4. This Warranty applies only to warranted defects that fi rst arise and are reported period of fi ve years from the date of purchase against defects in materials or within the warranty coverage period.
Need help?
Do you have a question about the Wall-mounted Bookcase With Door and is the answer not in the manual?
Questions and answers