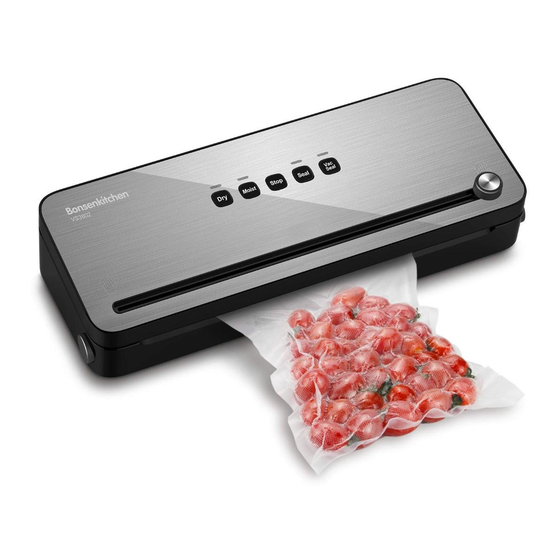
BonsenKitchen VS3802 Operation Manual
Hide thumbs
Also See for VS3802:
- Operation instructions manual (15 pages) ,
- Operation instructions manual (80 pages) ,
- Operating instruction (92 pages)
Table of Contents
Advertisement
Available languages
Available languages
Quick Links
Advertisement
Table of Contents

Related Manuals for BonsenKitchen VS3802


Summary of Contents for BonsenKitchen VS3802
- Page 1 Vacuum Sealer Operation Manual Model: VS3802 Bedienungsanleitung 2-15 Operating instruction 16-28 Mode d’emploi 29-41 Manual del usuario 42-55 Istruzioni per l'uso 56-69 Customer Service: customer-service@bonsenoa.com...
- Page 3 Vakuumiergerät VS3802 Einleitung Herzlichen Glückwunsch zum Kauf dieses modernen und hochwertigen Produktes. Diese Betriebsanleitung enthält wichtige Informationen zur Sicherheit, Verwendung und Entsorgung. Machen Sie sich vor der Verwendung des Produkts mit allen Handhabungs- und Sicherheitsrichtlinien vertraut. Dieses Gerät darf nur wie beschrieben und für die angegebenen Zwecke verwendet werden.
-
Page 4: Persönliche Sicherheit
von einem Erwachsenen beaufsichtigt werden und über die sichere Handhabung des Gerätes informiert sind und sich möglicher Risiken bewusst sind. Reinigung und Wartung dürfen nur von Kindern durchgeführt werden, die mindestens 8 Jahre alt sind und unter Aufsicht stehen. ... -
Page 5: Elektrischer Anschluss
Verwenden Sie das Vakuumiergerät nicht für einen anderen als den vorgesehenen Zweck. Halten Sie das Gerät von Wärmequellen fern. Beim Vakuumieren ist darauf zu achten, dass der Deckel richtig sitzt und gesichert ist, bevor der Vorgang wird. VORSICHT: Um Schäden am Gerät zu vermeiden, verwenden Sie bei der Reinigung kein Wasser oder eine Flüssigkeit. - Page 6 ► Lassen Sie das Netzkabel nicht über Kanten hängen (Stolperdraht-Effekt). ► Stecken Sie den Stecker in die Steckdose. Vakuumbeutel versiegeln ► Die Beutelbreite darf 30cm nicht überschreiten. Sonst kann sie nicht richtig verschweißt werden. ► Verwenden Sie nur Nylon-PE-Folien mit einer Struktur (Punkte oder Nuten) auf einer Seite und einer Dicke von ca.
- Page 7 Geräteteile 1. Funktionstasten: 1) Trockenmodus 2) Feuchtmodus 3) Stop 4) Versiegeln 5) Vakuumieren 15) Schalter externe Schnittstelle/ Saugschalter 2. Anzeigeleuchten: 16) Anzeige Trockenmodus 17) Anzeige Feuchtmodus 18) Versiegelungsanzeige 19) Vakuumierungsanzeige 3. Sonstige Geräteteile: 6) Schneideklinge 7) Taste Öffnen 8) Vakuumbeutel 9) Vakuumkammer 10) Schweißdraht 11) Verschlussleiste...
- Page 8 Bedienung des Geräts 1. Aus Bonsenkitchen-Beutelfolie einen Beutel anfertigen: (Abb. 1) (Abb. 2) (Abb. 3) Das Vakuumiergerät anschließen. Die Beutelfolie über die Die Anzeigeleuchte „Dry“ leuchtet Versiegelungsleiste ziehen (Abb.2). auf. Die Drucktasten an beiden Es ist empfehlenswert, Enden des Deckels drücken, um beim Vakuumierversiegeln mind.
- Page 9 2. Bedienung im Trockenmodus („Dry“): (Abb. 1) (Abb. 2) Nachdem Sie (wie im Abschnitt Beide Seiten des Deckels „Aus Bonsenkitchen-Beutelfolie herunterdrücken, bis ein einen Beutel anfertigen“ auf Seite Verschlussgeräusch deutlich 7 einen Beutel angefertigt zu hören ist. (Abb. 2) Vergewissern...
- Page 10 3. Bedienung im Feuchtmodus („Moist“): (Abb. 1) (Abb. 2) Beide Seiten des „Moist“-Taste drücken; die Leuchtanzeige Deckels herunterdrücken, bis leuchtet auf. (Abb. 2) ein Verschlussgeräusch deutlich zu hören ist. (Abb. 1) (Abb. 3) (Abb. 4) Die Deckel öffnen, sobald „Vac/Seal“-Taste drücken, um den Die Leuchtanzeigen „Vac“...
- Page 11 4. Bedienung zum ausschließlichen Versiegeln: (Abb. 1) (Abb. 2) Beide Seiten des Deckels Um einen Beutel ohne Vakuumierung herunterdrücken, bis ein zu versiegeln, die „Seal“-Taste Verschlussgeräusch deutlich drücken. Daraufhin leuchtet die zu hören ist. (Abb. 1) -Anzeige auf. (Abb. 2) (Abb.
- Page 12 5. Ein Gefäß vakuumieren: (Abb. 2) (Abb. 1) Die graue Gummitaste auf dem Ein Ende des Zubehörschlauchs in Gerät drücken, um die die Zubehöröffnung des Geräts Vakuumierung zu starten. Wenn einführen. Das andere Ende in die kein Geräusch zu hören ist, wurde passende Öffnung des Gefäßes der Vorgang abgeschlossen.
- Page 13 7. Einsetzen des Beutelschneiders: 1) Auseinandernehmen (Abb. 1) (Abb.2) Den Schneider gegen den Uhrzeigersinn Die Schutzkappe des Schneiders abnehmen (Abb. 2) um etwa 100 ° drehen (Abb. 1) 2) Zusammensetzen (Abb. 1) (Abb. 2) Klinge und Schutzkappe miteinander Die Schutzkappe des Schneiders um etwa 100 °...
-
Page 14: Garantie
Hinweis: Nachdem Sie 5 Beutel kontinuierlich versiegelt haben, lassen Sie das Gerät ca. 1 Minute abkühlen. Während dieser Abkühlphase können Sie das Gerät nicht starten. Nach der Abkühlphase können Sie das Gerät wie gewohnt benutzen. Reinigung ► Ziehen Sie den Netzstecker, bevor Sie das Gerät reinigen. ►... -
Page 15: Technische Daten
Teile. Das Gerät wurde mit Sorgfalt hergestellt und vor der Auslieferung sorgfältig geprüft. Bitte bewahren Sie Ihre Quittung als Kaufbeleg auf. Im Garantiefall wenden Sie sich bitte an unseren Kundendienst. Technische Daten Modell No.: VS3802 Betriebsspannung: 100-240VAC 50/60Hz Leistungsaufnahme: 140W Max. Breite für Versiegeln/Vakuumieren: 300mm(11.81Inch) Vakuumwert: <-70Kpa Geräuschpegel: about 72 dB... -
Page 16: Fehlerbehebung
Fehlerbehebung Serienn- Anomalie Ursache für versagung Fehlfunktion aktiviert ummer Das linke und das rechte Schloss sind Glätten Sie den schwarzen Dichtungss- nicht verriegelt, der Beutelversiege- chaum / die schwarzen Dichtungsperlen lungsbereich ist nicht flach (die und das schwarze Klebeband, reinigen Sie schwarze Versiegelungsbaumwolle / die oberen und unteren Dichtungsbereiche Nicht versiegelt... -
Page 17: Safety Instructions
Vacuum Sealer VS3802 Introduction Congratulations on the purchase of this modern and high-quality product. This instruction manual contains important information on safety, usage and disposal. Before using the product, familiarize yourself with all handling and safety guidelines. This devicee may only be used as described and for the purposes indicated. -
Page 18: Personal Safety
the supplied power cord is damaged, it should be replaced by a qualified technician in order to avoid a hazard. SAVE THESE INSTRUCTONS OPERATING INSTRUCTIONS If the SUPPLY CORD is damaged, it must be replaced by the manufacturer, its service agent or similarly qualified person in order to avoid a hazard. -
Page 19: Scope Of Delivery
ease of disposal, and are therefore recyclable. Returning the packaging to the materials cycle conserves raw materials and reduces the amount of waste that is generated. Dispose of packaging materials that are no longer needed in accordance with applicable local regulations. NOTE: ►... - Page 20 cover release and fold the cover upwards. Place the open end of the bag in the machine so that the opening of the bag lies centrally under the lower sealing ring. The bag should not be inserted further than the rear sealing ring and must lie between the front and rear sealing ring.
-
Page 21: Operating The Equipment
Functions & Vacuuming Operating the equipment 1. How to Make a Bag from a Bonsenkitchen Vacuum Seal Roll: ( Pic.2) ( Pic.3) ( Pic.1) Pull bag material over the sealing Plug in the vacuum sealer, “Dry” strip(Pic.2). Suggest to leave 20cm (8 indicator light will turn on. - Page 22 Push down both sides of the lid until the “How to Make a Bag from a hear a big lock-up sound. (Pic.2) Bonsenkitchen Vacuum Seal Roll” Please check whether the dry light is section, on page 19), Place item(s) in on.
- Page 23 3. How to use “Moist”vacuum mode : (Pic.2) (Pic.1) Press” Moist” button, indicator light Push down both sides of the lid until hear a big lock-up sound. (Pic.1) turns on.(Pic.2) (Pic.3) (Pic.4) Press “Vac/Seal” button, it will Open the lids by pressing the buttons automatically vacuum the seal.(Pic.3) on both sides after “Vac”...
- Page 24 4. How to seal only : (Pic.1) (Pic. 2) Push down both sides of the lid until If you want to seal a bag without hear a big lock-up sound. (Pic.1) vacuuming, press “Seal” button, indicator light turns on.(Pic.2) (Pic. 3 ) Open the lids by pressing the buttons on both sides after indicator light turns off, then take out the bag...
- Page 25 5. How to vacuum packaging jar: (Pic.2) (Pic.1) Press the gray rubber button on the Insert one end of Accessory Hose into appliance, it starts to vacuum. When Accessory Port on appliance. Insert the it has no sound, it means job has been other end into port on the jar.
- Page 26 7. How to install bag cutters : 1) Disassemble (Pic. 1) (Pic. 2) Twist the cutter anticlockwise Lift up the cap of cutter (Pic.2) approximately 100°(Pic.1) 2) Assemble (Pic. 2) (Pic. 1) Twist the cap of cutter clockwise Assemble the knife and the cap.(Pic.1) approximately 100°(Pic.2)
-
Page 27: Warranty Claim Procedure
NOTE: Once you have sealed 5 bags continuously, allow the appliance to cool down for about 1 minute. During this cool-down phase, you cannot start the appliance. After the cool-down phase, you can use the appliance as normal. Cleaning ► Unplug the unit before cleaning it. ►... -
Page 28: Technical Data
Technical Data Model No.: VS3802 Operating Voltage: 100-240VAC 50/60Hz Power Consumption: 140W Max. Width for Shrink-wrapping: 300mm (11.81Inch) Vacuum Value: <-70Kpa Noise Level: about 72 dB Product Dimension: 407*166*92mm (16.02*6.54*3.62Inch) Disposal Guideline 2012/19/EC concerning the handling, collection, recycling and disposal of electrical and electronic equipment and their components (‘waste electrical and... -
Page 29: Troubleshooting
Trouble shooting Serial Abnormal Cause of failure Way of troubleshooting number phenomena The left and right latches are not Press black seal foam/layering, black locked tightly, the bag sealing area is tape, clean the upper and lower sealing Unsealed uneven (black sealing cotton/loose areas with a dry cloth, lock the buttons on layering, the black tape is wrinkled), both sides and seal. -
Page 30: Consignes De Sécurité
Thermosoudeuse sous vide VS3802 Preface Félicitations pour l'achat de ce produit moderne et de haute qualité. Ce mode d'emploi contient des informations importantes sur la sécurité, l'utilisation et le recyclage. Familiarisez-vous avec toutes les directives de manipulation et de sécurité avant d'utiliser le produit. -
Page 31: Sécurité Personnelle
AVERTISSEMENT : Ne pas immerger l'appareil dans l'eau ou d'autres liquides lors du nettoyage. Si le cordon d'alimentation fourni est endommagé, il doit être remplacé par un technicien qualifié pour éviter tout dommage. CONSERVEZ CES INSTRUCTIONS Mode d’emploi Si le cordon d'alimentation est endommagé, il doit être remplacé par le fabricant, son service après-vente ou une personne qualifiée afin d'éviter tout dommage. -
Page 32: Contenu De La Livraison
L'emballage protège l'appareil des dommages pendant le transport. Les matériaux d'emballage ont été sélectionnés pour leur respect de l'environnement et leur élimination facile et sont donc recyclables. e retour de l'emballage dans le cycle des matériaux préserve les matières premières et réduit la quantité... - Page 33 informations sur l'emballage. La qualité de la soudure dépend du type et de l'épaisseur du sachet. ► Coupez la longueur désirée pour votre sac à partir du rouleau. Ouvrez le couvercle de l'appareil en appuyant sur le bouton de déverrouillage du couvercle et repliez le couvercle vers le haut.
- Page 34 13) Support de rouleau 14) Interface externe / d'aspiration Fonctions et Vider Utilisation de la machine 1. Comment fabriquer un sac à partir du rouleau de mise sous vide Bonsenkitchen : (Schéma 2) (Schéma 3) (Schéma 1) Tirez le matériau du sac sur la de scellage Branchez la scelleuse, l’indicateur “Dry”...
- Page 35 2. Comment utiliser le mode « dry » (séchage) : (Schéma 2) (Schéma 1) Poussez les deux côtés du couvercle Après avoir fabriqué un sac (comme décrit jusqu’à ce que vous entendiez un déclic dans la section « Comment fabriquer un de verrouillage.
- Page 36 3. Comment utiliser le mode « Moist » (humidification) : (Schéma 2) (Schéma 1) Poussez les deux côtés du couvercle Appuyez sur le bouton « Moist » (humidification) et l’indicateur s’allumera jusqu’à ce que vous entendiez un déclic (Schéma 2). de verrouillage (Schéma 1) (Schéma 3) (Schéma 4)
- Page 37 4. Comment sceller seulement : (Schéma 1) (Schéma 2) Poussez les deux côtés du couvercle Si vous souhaitez sceller un sac sans jusqu’à ce que vous entendiez un déclic aspirer l’air, appuyez sur le bouton « Seal » de verrouillage (Schéma 1) (scellage) et l’indicateur s’allumera (Schéma 2) (Schéma 3 )
- Page 38 5. Comment mettre un pot sous vide : (Schéma 2) (Schéma 1) Appuyez sur le bouton en caoutchouc gris Insérez une extrémité du tuyau fourni dans de la machine et elle commencera à aspirer le port de la machine. Insérez l'autre l’air.
- Page 39 7. Comment installer le cutter à sac : 1) Démontage (Schéma 1) (Schéma 2) Tournez le cutter dans le sens inverse des Soulevez le capuchon du cutter (Schéma aiguilles d’une montre sur environ 100 ° (Schéma 1) 2) Assemblage (Schéma 2) (Schéma 1) Tournez le cutter dans le sens des Assemblez le cutter et le capuchon...
- Page 40 REMARQUE: Après avoir scellé en continu 5 sacs, laisser refroidir l'appareil pendant environ 1 minute. Vous ne pouvez pas démarrer l'appareil pendant cette phase de refroidissement. Après la phase de refroidissement, vous pouvez utiliser l'appareil comme d'habitude. Nettoyage ► Débrancher la fiche d'alimentation avant de nettoyer l'appareil. ►...
-
Page 41: Caractéristiques Techniques
Veuillez conserver votre reçu comme preuve d'achat. En cas de garantie, veuillez contacter notre service après vente. Caractéristiques techniques Numéro de référence: VS3802 Tension de fonctionnement: 100-240VAC 50/60Hz Consommation électrique: 140W Max. Largeur pour le scellage/vider: 300mm(11.81Inch)... -
Page 42: Dépannage
Dépannage numéros Anomalies Causes des pannes Voies de dépanouissement de série Les verrous gauche et droit ne sont Aplatissez la mousse / les perles pas verrouillés, la zone de scellage du d'étanchéité noires et le ruban noir; utilisez sac n'est pas plate (le coton / les un chiffon sec pour nettoyer les zones Non scellé... -
Page 43: Avisos De Seguridad
Aparato para envasar al vacío VS3802 Prefacio Felicitaciones por la compra de este producto moderno y de alta calidad. Este manual de instrucciones contiene información importante sobre seguridad, uso y eliminación. Familiarícese con todas las normas de manipulación y seguridad antes de utilizar el producto. -
Page 44: Seguridad Personal
La limpieza y el mantenimiento sólo pueden ser llevados a cabo por niños de al menos 8 años de edad y bajo supervisión. No se permite que los niños jueguen con la máquina de envasado al vacío. ADVERTENCIA: No sumerja la unidad en agua u otros líquidos cuando la limpie. Si el cable de alimentación suministrado está... -
Page 45: Alcance Del Suministro
Mantenga la unidad alejada de fuentes de calor. Al envasar al vacío, asegúrese de que la tapa esté correctamente asentada y asegurada antes de llevar a cabo el proceso. PRECAUCIÓN: Para evitar daños a la unidad, no utilice agua o líquidos para su limpieza. Eliminación de los materiales de embalaje ... - Page 46 ► El ancho de la bolsa no debe exceder los 30 cm. De lo contrario, no se puede soldar correctamente. ► Utilizar únicamente láminas de nylon PE con una estructura (puntos o ranuras) en un lado y un grosor de aprox. 0,15 -0,30 mm. De lo contrario, la soldadura no está apretada y la unidad puede resultar dañada.
- Page 47 Partes 1. Botones: 1) Seco 2) Húmedo 3) Parar 4) Sellado 5) Vaciado Sellado 15) Interruptor de interfaz externa/ Interruptor de succión 2. Luces indicadoras: 16) Indicador de Seco 17) Indicador de Húmedo 18) Indicador de Sellado 19) Indicador de Vaciado Sellado 3.
- Page 48 Uso del aparato 1. Cómo hacer una bolsa con el rollo de envasado al vacío Bonsenkitchen: (Imagen 2) (Imagen 3) (Imagen 1) Tira de la película de modo que pase por Enchufar la envasadora, la luz indicadora encima de la banda de sellado (Imagen 2).
- Page 49 “Cómo hacer una su bloqueo. (Imagen 2) Por favor, bolsa con el rollo de envasado al vacío de compruebe que la luz de Seco esté Bonsenkitchen” página 44), encendida. Si no lo está, pulse el botón de introducir en la bolsa lo que desee, Seco.
- Page 50 3. Cómo usar el modo vacío “Húmedo”: (Imagen 2 ) (Imagen 1 ) Pulsar el botón ”Húmedo” y la luz Presionar ambos lados de la tapa hasta indicadora se enciende. (Imagen 2) escuchar un chasquido fuerte que indica que se ha bloqueado. (Imagen 1) (Imagen 3 ) (Imagen 4 ) Pulsar el botón “Vaciado/Sellado”...
- Page 51 4. Cómo realizar solo el sellado: (Imagen 1 ) (Imagen 2 ) Presionar ambos lados de la tapa hasta Si desea realizar el sellado sin vaciado, escuchar un chasquido fuerte que indica debe pulsar el botón de “Sellado” y la luz su bloqueo.
- Page 52 5. Cómo realizar el vaciado de un tarro para envasado: (Imagen 1) (Imagen 2) Introducir un extremo de la manguera Pulsar el botón gris de goma del aparato y accesoria en el puerto correspondiente del este iniciará el vaciado. Cuando el ruido aparato.
- Page 53 7. Cómo instalar la cuchilla para las bolsas: 1) Desmontar (Imagen 1) (Imagen 2) Desenroscar la tapa de la cuchilla en Levantar la tapa de la cuchilla (Imagen 2) sentido antihorario unos 100° aproximadamente (Imagen 1) 2) Montar (Imagen 2) (Imagen 1) Enroscar la tapa de la cuchilla en sentido Instalar la cuchilla y la tapa.(Pic.1)
- Page 54 CONSEJO : Después de haber sellado continuamente 5 bolsas, deje que el dispositivo se enfríe durante aproximadamente 1 minuto. No se puede poner en marcha la unidad durante esta fase de enfriamiento. Después de la fase de enfriamiento, puede utilizar el dispositivo como de costumbre.
-
Page 55: Especificaciones Técnicas
Por favor, conserve su recibo como prueba de compra. En caso de garantía, póngase en contacto con nuestro servicio de atención al cliente. Especificaciones Técnicas Referencia: VS3802 Tensión de funcionamiento: 100-240VAC 50/60Hz Consumo de energía: 140W Max. Anchura para sellado/vacío: 300mm(11.81Inch)... -
Page 56: Solución De Problemas
Solución de problemas Anomalías Causas del fallo Vías de solución de problemas número Las cerraduras izquierda y derecha no están bloqueadas, el área de Aplane la espuma / perlas de sellado sellado de la bolsa no es plana (el negro y la cinta negra; use un paño seco Sin sellar algodón / cuentas de sellado negro para limpiar las áreas de sellado superior e... - Page 57 Sigillatore sottovuoto VS3802 Prefazione Congratulazioni per l'acquisto di questo prodotto moderno e di alta qualità. Le presenti istruzioni per l'uso contengono importanti indicazioni relative alla sicurezza, all'uso e allo smaltimento. Prima di utilizzare il prodotto, familiarizzarsi con tutte le istruzioni per l'uso e la sicurezza.
-
Page 58: Sicurezza Personale
La pulizia e la manutenzione devono essere effettuate solo da bambini di almeno 8 anni e sotto sorveglianza. I bambini non possono giocare con il sigillatore sottovuoto. AVVERTENZA: Non immergere l'unità in acqua o altri liquidi durante la pulizia. Se il cavo di alimentazione in dotazione è... -
Page 59: Volume Di Fornitura
ATTENZIONE: Per evitare danni all'unità, non utilizzare acqua o liquido per la pulizia. Smaltimento dei materiali di imballaggio L'imballaggio protegge l'apparecchio da danni durante il trasporto. I materiali di imballaggio sono stati selezionati per la loro ecocompatibilità e facilità di smaltimento e sono quindi riciclabili. - Page 60 ► Utilizzare solo pellicole in PE di nylon con una struttura (punti o scanalature) su un lato e uno spessore di circa 0,15-0,30 mm. In caso contrario, la saldatura non è a tenuta e l'unità potrebbe danneggiarsi. I sacchi di questo tipo possono essere identificati dalle informazioni che figurano sull'imballaggio.
- Page 61 Componenti 1. Pulsanti: 1) Asciutto 2) Umido 3) Arresta 4) Sigilla 5) Sigilla sottovuoto 15) Interruttore interfaccia esterna/ Interruttore aspirazione 2. Spia: 16) Spia asciutto 17) Spia umido 18) Spia sigillo 19) Spia sigillo sottovuoto 3. Altri componenti: 6) Taglierina a scorrimento 7) Pulsante di apertura 8) Cotone sottovuoto 9) Camera sottovuoto 10) Guarnizione di riscaldamento...
- Page 62 Funzionamento del dispositivo 1. Come ottenere un sacchetto con il rullo del sigillatore per sottovuoto Bonsenkitchen: (Fig. 1) (Fig. 2) (Fig. 3) Collegare il sigillatore sottovuoto Tirare il materiale del sacchetto oltre la all’alimentazione, si accenderà la spia barra di sigillatura (Fig. 2). Si suggerisce di “Dry”.
- Page 63 Premere verso il basso entrambi i lati del sacchetto con il rullo del sigillatore per coperchio fino a udire un forte suono di sottovuoto Bonsenkitchen” a pag. 57), arresto. (Fig. 2) Controllare se la spia inserire gli oggetti nel sacchetto, lasciando “Dry”...
- Page 64 3. Come utilizzare la modalità sottovuoto “Moist”: (Fig. 1) (Fig. 2) Premere verso il basso entrambi i lati del Premere il pulsante “Moist”, la spia coperchio fino a udire un forte suono di si accende. (Fig. 2) arresto. (Fig. 1) (Fig.
- Page 65 4. Come eseguire solo la sigillatura: (Fig. 1) (Fig. 2) Premere verso il basso entrambi i lati del Per sigillare un sacchetto senza effettuare coperchio fino a udire un forte suono di il sottovuoto, premere il pulsante “Seal”, arresto. (Fig. 1) la spia si accende.
- Page 66 5. Come effettuare il sottovuoto di un imballaggio: (Fig. 2) (Fig. 1) Premere il pulsante di gomma grigio sul Inserire un’estremità del tubo flessibile dispositivo, comincia a eseguire il accessorio nella rispettiva porta sul sottovuoto. Quando non si sente più dispositivo.
- Page 67 7. Come installare le taglierine per sacchetti: 1) Smontare (Fig. 1) (Fig. 2) Girare la taglierina in senso antiorario di Sollevare la copertura della taglierina (Fig. circa 100° (Fig. 1) 2) Montare (Fig. 1) (Fig. 2) Montare il coltello e la copertura. (Fig. 1) Girare la copertura della taglierina in senso orario di circa 100°...
- Page 68 Consiglio: Dopo aver sigillato 5 sacchetti, lasciar raffreddare l'apparecchio per circa 1 minuto. Durante questa fase di raffreddamento non è possibile avviare l'unità. Dopo la fase di raffreddamento è possibile utilizzare l'apparecchio come di consueto. Pulitura ► Scollegare la spina di alimentazione prima di pulire l'unità. ►...
-
Page 69: Garanzia
Il dispositivo è stato prodotto con cura e controllato attentamente prima della consegna. Conservare la ricevuta come prova d'acquisto. In caso di garanzia si prega di contattare il nostro servizio clienti. Specifiche tecniche Numero di modello: VS3802 Tensione di funzionamento: 100-240VAC 50/60Hz Consumo: 140W Max. Larghezza per sigillare/vuotare: 300mm(11.81Inch)... -
Page 70: Risoluzione Dei Problemi
Risoluzione dei problemi Numero Anomalie Cause delle disfunzioni Percorso di rottura d’ordine I lucchetti sinistro e destro non sono Appiattire la schiuma / perline di tenuta bloccati, l'area di sigillatura del nera e il nastro nero; utilizzare un panno sacchetto non è piatta (il cotone / asciutto per pulire le aree di sigillatura Non sigillato perline di tenuta nera sono allentati,... - Page 72 Register your product at www.bonsenkitchen.com to get more perks! Follow us @bonsenkitchen BONSEN ELECTRONICS INC. : 4198 Industry Way, Flowery Branch, GA, 30542, USA : customer-service@bonsenoa.com...
Need help?
Do you have a question about the VS3802 and is the answer not in the manual?
Questions and answers