Monitor Audio Radius R225 User Manual
Monitor audio radius r225: user guide
Hide thumbs
Also See for Radius R225:
- Brochure & specs (18 pages) ,
- Install manual (2 pages) ,
- Brochure (18 pages)
Table of Contents
Advertisement
Contents
Contents/ Introduction
Radius 250
Fine Tuning & Trouble Shooting the Radius 360 & 720
Introduction
Congratulations on purchasing Monitor Audio loudspeakers. We are confident they
will provide a reliable, high performance sound for many years as only quality
components have been used throughout.
Mo n i t o r A u d i o a r e a h i g h l y r e s p e c t e d me mb e r o f t h e ' G u i l d o f Ma s t e r C r a f t s me n '
with over 30 years of experience in the art of traditional wood working techniques
and leading edge drive unit technology. This blend of experience and technology
brings you the Radius Series.
Please follow this user manual carefully as it contains important information about
positioning and set up procedures. For further advanced information on system
set-u p , F A Q ' s a n d mu l t i -lingual support please refer to our website at:
www.monitoraudio.co.uk
1
© Monitor Audio 2005 Rev 3
Page
1
2
3
4
5
6
7
8
9
10
11
14
15
16
17
Advertisement
Table of Contents

Subscribe to Our Youtube Channel
Related Manuals for Monitor Audio Radius R225


Summary of Contents for Monitor Audio Radius R225
-
Page 1: Table Of Contents
Ancillary Equipment/ Guarantee & Service Claims Under this Guarantee Introduction Congratulations on purchasing Monitor Audio loudspeakers. We are confident they will provide a reliable, high performance sound for many years as only quality components have been used throughout. Mo n i t o r A u d i o a r e a h i g h l y r e s p e c t e d me mb e r o f t h e ‘ G u i l d o f Ma s t e r C r a f t s me n ’... -
Page 2: Important Safety Instructions
16. This exclamation point within an equilateral triangle is intended to alert the user to presence of important maintenance (servicing) instructions in the literature accompanying the appliance. Install in accordance with the © Monitor Audio 2005 Rev 3... -
Page 3: Radius 45
Monitor Audio dealer for placement in free space (available soon). To fix your speaker to the wall when using the wall bracket, pl e a s e r e f e r t o t h e ‘ Wa l l B r a c k e t F i x i n g I n s t r u c t i o n s ’... -
Page 4: Radius 90
Radius Floor Stand from your local authorised Monitor Audio dealer. To fix your speaker to the wall, please refer to t h e ‘ Wa l l B r a c k e t F i x i n g I n s t r u c t i o n s ’ in the wall bracket carton. When using the wall bracket, we do not recommend connecting the loudspeaker using 4mm plugs into the ends of the terminals. -
Page 5: Radius 180
Radius Floor Stand from you local authorised Monitor Audio dealer. To fix your speaker to the wall, please refer t o t h e ‘ Wa l l B r a c k e t F i x i n g I n s t r u c t i o n s ’ in the wall bracket carton. When using the wall bracket, we do not recommend connecting the loudspeaker using 4mm plugs into the ends of the terminals. -
Page 6: Radius 45/90/180 Wall Bracket Fixing
T o f i x y o u r r a d i u s p r o d u c t t o i t ’ s b e s p o k e w a l l b r a c k e t p l e a s e r e f e r t o t h e f i x i n g instructions found in the Wall Bracket Carton. These instructions give a well detailed approach on fixing the bracket. A template is also provided for assistance. NOTE: The bracket is NOT ceiling mountable © Monitor Audio 2005 Rev 3... - Page 7 Plea s e r e f e r t o t h e ‘ Radius 225/250 Wall B r a c k e t F i x i n g I n s t r u c t i o n s ’ on page 9. The table will stand the speaker 75mm (2 ”...
- Page 8 . P l e a s e r e f e r t o t h e ‘ Radius 225/250 Wa l l B r a c k e t F i x i n g I n s t r u c t i o n s ’ on page 9. The table will stand the speaker 75mm ”...
-
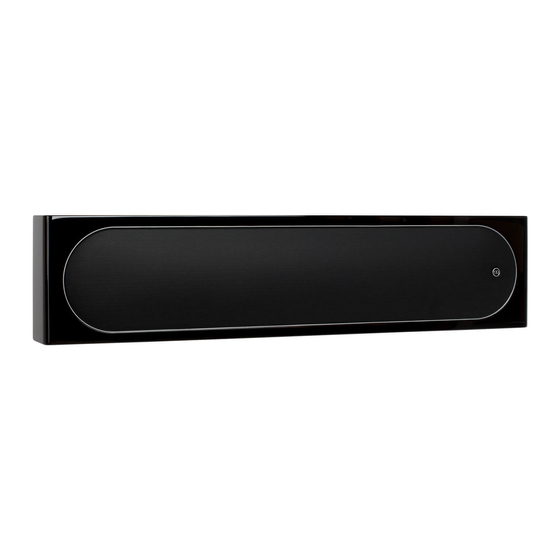
Page 9: Radius 225
For detailed information on fixing your Radius 225/ 250 to the wall, please refer to the fixing instruction found in with the Wall Fixing Plate. For alternate fixing please use the fixing template. Radius 225/ 250 Table Stand Sold in pairs in black or silver © Monitor Audio 2005 Rev 3... -
Page 10: Radius 270
Maximum Handling Full Range (R.M.S) 89dB 107.5dBA 120W Drive Unit Complement Tweeter 1 x 25mm C- CAM gold dome tweeter © Monitor Audio 2005 Rev 3 System Recommended Power Amplifier Handling Requirements (R.M.S) 140W 40-140 W External Weight Kg Dimensions... -
Page 11: Unpacking And Installation
‘ crossover’ . If your subwoofer is being used with an AV amp/receiver with a dedicated subwoofer output, this should be set to ‘ LFE.’ . & WARNING © Monitor Audio 2005 Rev 3... -
Page 12: Subwoofer Connections
RCA phono plugs. Looking at the rear panel of your subwoofer you will see two sets of speaker t e r mi n a l s , o n e l a b e l l e d ‘ a mp l i f i e r i n p u t ’ , t h e o t h e r ‘ s p e a k e r o u t p u t ’ , a n d R C A p h o n o s o c k e t s l a b e l l e d ‘... -
Page 13: Technical Specifications
10. Speaker Output: This provides output to satellite speakers via a built in high pass filter. 11. The Mains Fuse: This should be replaced with one of identical specification. Note: A spare fuse is provided within the fuse holder, located in the plastic holder below the IEC mains input socket. -
Page 14: Troubleshooting
If the amplifier input is in use, check the connections are phased correctly (+ to + and - to -). If the amplifier input is in use, check the speaker wires are connected at the amplifier. Excessive bass from subwoofer ... -
Page 15: Radius 360 & Radius 720
’ s o w n e r s ma n u a l . © Monitor Audio 2005 Rev 3 The illustration to the left shows how the Radius 90, 180, 225, 250 and 270 can be connected direct to your amplifier. -
Page 16: Guarantee And Service
Neither will responsibility be accepted for damage or loss occurring during transit to or from the parties claiming under this guarantee. This guarantee covers both labour and parts. The liability of Monitor Audio is limited to the cost of repair or replacement of the defective parts (at the discretion of Monitor Audio) and under no circumstances extends to consequential losses or damage. -
Page 17: Claims Under This Guarantee
The equipment should be returned in its packaging to the original supplier where possible, or to any other authorised Monitor Audio dealer. If it is not possible to return the equipment by hand, then it should be sent carriage prepaid via a reputable carrier.
Need help?
Do you have a question about the Radius R225 and is the answer not in the manual?
Questions and answers