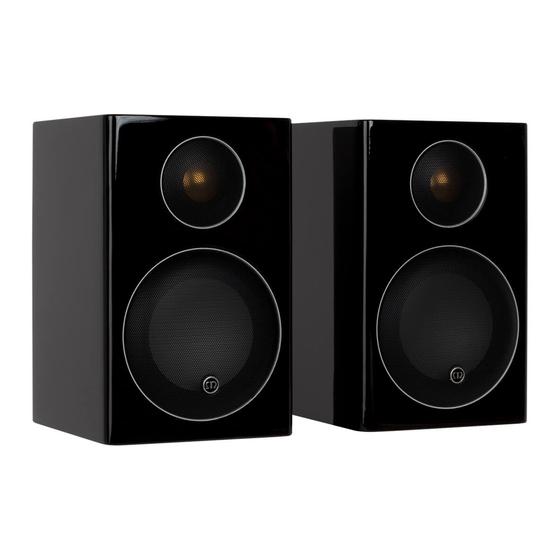
Monitor Audio Radius 45 Manual

Monitor Audio Radius 45 Manual

Hide thumbs Also See for Radius 45:

Advertisement

Contents
Contents/ Introduction/ Safety Instructions
Fine Tuning & Trouble Shooting the Radius 360 & 720
Introduction
Congratulations on purchasing Monitor Audio loudspeakers. We are confident they
will provide a reliable, high performance sound for many years as only quality
components have been used throughout.
Mo n i t o r A u d i o a r e a h i g h l y r e s p e c t e d me mb e r o f t h e ' G u i l d o f Ma s t e r C r a f t s me n '
with over 30 years of experience in the art of traditional wood working techniques
and leading edge drive unit technology. This blend of experience and technology
brings you the Radius Series.
Please follow this user manual carefully as it contains important information about
positioning and set up procedures. For further advanced information on system
set-u p , F A Q ' s a n d mu l t i -lingual support please refer to our website at:
www.monitoraudio.co.uk
Safety Instructions
1. Water & Moisture: The loudspeaker should not be used near water - for
example; bathtub, washbowl, kitchen sink, and washing machine, in a wet
basement or near a swimming pool. Under no circumstance should plants or fish
bowls be placed on the loudspeaker
2. Heat: The loudspeaker should not be placed near any heat source such as
radiators, open fires, stoves, direct sunlight and any other appliance that produces
heat.
3. Cleaning: Great care and attention has gone into the materials chosen to
produce the Radius loudspeakers. A gentle wipe with a dry, clean cloth is all that is
required to remove any dust. Treat them as you would a fine piece of furniture
because that is how they have been designed.
1
© Monitor Audio 2005 Rev 2
Page
1
2
3
4
5
6
7
8
9
10
13
14
15
16

Advertisement

Table of Contents
loading

Summary of Contents for Monitor Audio Radius 45

  • Page 1: Table Of Contents

    Ancillary Equipment/ Guarantee & Service Claims Under this Guarantee Introduction Congratulations on purchasing Monitor Audio loudspeakers. We are confident they will provide a reliable, high performance sound for many years as only quality components have been used throughout. Mo n i t o r A u d i o a r e a h i g h l y r e s p e c t e d me mb e r o f t h e ‘ G u i l d o f Ma s t e r C r a f t s me n ’...
  • Page 2: Radius 45

    Positioning The Radius 45 can be positioned on a shelf by fitting the rubber feet provided to the underside of the speaker to stop vibrations. Alternatively, you can choose to fix the Radius 45 to a wall by using the high-quality metal alloy wall bracket provided.
  • Page 3: Radius 90

    Radius Floor Stand from your local authorised Monitor Audio dealer. To fix your speaker to the wall, please refer to t h e ‘ Wa l l B r a c k e t F i x i n g I n s t r u c t i o n s ’ in the wall bracket carton. When using the wall bracket, we do not recommend connecting the loudspeaker using 4mm plugs into the ends of the terminals.
  • Page 4: Radius 180

    Radius Floor Stand from you local authorised Monitor Audio dealer. To fix your speaker to the wall, please refer t o t h e ‘ Wa l l B r a c k e t F i x i n g I n s t r u c t i o n s ’ in the wall bracket carton. When using the wall bracket, we do not recommend connecting the loudspeaker using 4mm plugs into the ends of the terminals.
  • Page 5: Radius 45/90/180 Wall Bracket Fixing

    T o f i x y o u r r a d i u s p r o d u c t t o i t ’ s b e s p o k e w a l l b r a c k e t p l e a s e r e f e r t o t h e f i x i n g instructions found in the Wall Bracket Carton. These instructions give a well detailed approach on fixing the bracket. A template is also provided for assistance. © Monitor Audio 2005 Rev 2...
  • Page 6: Radius 225

    2 x 4 ” MMP 2 ( S e c o n d Front 1 x 25mm C- 61 H x 12 W ported generation metal matrix CAM gold x 10.5 D bass reflex polymer) dome tweeter © Monitor Audio 2005 Rev 2...
  • Page 7: Radius 250

    2 x 4 ” MMP 2 ( S e c o n d Twin, Front CAM gold 76 H x 12 W ported bass generation metal matrix x 10.5 D dome reflex polymer) tweeter © Monitor Audio 2005 Rev 2...
  • Page 8: Radius 225/250 Wall Bracket Fixing Instructions

    These inserts have been put in place for use with other after market wall brackets. For detailed information on fixing your Radius 225/ 250 to the wall, please refer to the fixing instruction found in with the Wall Fixing Plate. © Monitor Audio 2005 Rev 2...
  • Page 9 2 x 4 ” MMP 2 ( S e c o n d Front 1 x 25mm C- Plinth) x 12 W ported generation metal matrix CAM gold x 14 D bass reflex polymer) dome tweeter Plinth: 18.5 x 18.5 © Monitor Audio 2005 Rev 2...
  • Page 10 R C A p h o n o o u t p u t c o n n e c t o r s o n t h e a mp l i f i e r t o ‘ d a i s y c h a i n ’ the subwoofers together. © Monitor Audio 2005 Rev 2...
  • Page 11 12. Mains Voltage Selector: This is factory set to your countries mains voltage specification. Do not attempt to adjust this as this may lead to permanent damage to the product and even the risk of fire. © Monitor Audio 2005 Rev 2...
  • Page 12: Radius 270

    (switch Digital Class D (each) (cm) level output) able) Amplifier 45.5 H (Inc feet) x 22.5 W 100Hz @ 110-120v 60Hz 250W (RMS) 20.1 x 48 D (Inc 6dB/octave 220-240v 50Hz @ 4Ohms amp) © Monitor Audio 2005 Rev 2...
  • Page 13  Check that this is not caused by items located on top of or close to the Subwoofer, which may vibrate when subject to deep bass sounds If problems persist contact your dealer for assistance. © Monitor Audio 2005 Rev 2...
  • Page 14: Radius 360 & Radius 720

    Speaker Output Speaker Output shows how the Radius 90, 180, 225, 250 and 270 can be connected direct to your amplifier. We do not recommend using the Radius 45 with normal channel stereo system. AMPLIFIER Speaker Output Speaker Output This next illustration to...
  • Page 15: Ancillary Equipment/ Guarantee & Service

    Neither will responsibility be accepted for damage or loss occurring during transit to or from the parties claiming under this guarantee. This guarantee covers both labour and parts. The liability of Monitor Audio is limited to the cost of repair or replacement of the defective parts (at the discretion of Monitor Audio) and under no circumstances extends to consequential losses or damage.
  • Page 16: Claims Under This Guarantee

    The equipment should be returned in its packaging to the original supplier where possible, or to any other authorised Monitor Audio dealer. If it is not possible to return the equipment by hand, then it should be sent carriage prepaid via a reputable carrier.

Table of Contents