
Related Manuals for motortronics Msmart


Summary of Contents for motortronics Msmart
- Page 1 MO T O R T R O N I C S S o l i d S t a t e A C Mo t o r C o n t r o l M s m a r t L V A d d e n d u m - G E N 3 G E N 3 2 1 2 R...
-
Page 2: Table Of Contents
Motortronics Table of contents About the Msmart ..........................3 General ............................3 Dimensions............................4 General Connection Diagram ......................5 Connecting Optional Auxilary Devices .....................6 Connecting Optional RX Motor Protection Relays ................6 Connecting Optional TE-RTD12 Motor RTD Modules ..............7 Msmart Touch Screen ........................8 Startup............................8 Navigation and Settings ....................... 10 3.2.1... -
Page 3: About The Msmart
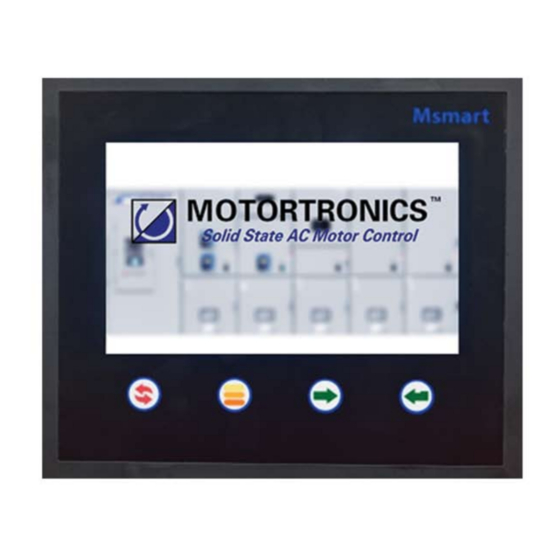
About Msmart General / Features Msmart is a unified screen for all Motortronics products and consists of an active touch screen / information display. In addition, Msmart supports multiple languages and supports dedicated information and graphs for each product. Msmart also has built-in an auto sleep function with wake-up on motion. -
Page 4: Dimensions
Motortronics Dimensions 8.5" (215.9) 7.25" (184.2) 8.5” x 7.25” x 1.75” (H x W x D) 215.9 mm x 184.3 mm x 44.5 mm (H x W x D) (mm) www.motortronics.com Page 4... -
Page 5: General Connection Diagram
Soft Starter Address: 1 Factory Installed Msmart connection diagram to the VMX Soft Starter. MLink Connection Connect the RS485 converter to J3 of the Msmart touchscreen. Plug USB port into PC with MLink. A / + B / - GND/COM Msmart... -
Page 6: Connecting Optional Auxilary Devices
Motortronics 2. Connecting Optional Auxiliary Devices The next steps describe how to connect devices to Msmart Connecting Optional RX Motor Protection Relays Use shielded cable to connect the RX to the Msmart Touch Screen RX #1 RX #2 Msmart RS485... -
Page 7: Connecting Optional Te-Rtd12 Motor Rtd Modules
Motortronics Connecting Optional TE-RTD12 Motor RTD Devices Use shielded cable to connect the TE-RTD12 to the Msmart Touch Screen TE-RTD12 #1 TE-RTD12 #2 Msmart RS485 RS485 Touch Screen Shield Shield Digital Ground J2 Port: RS485/RS422, 6 terminals, non-isolated Protocol: Modbus RTU... -
Page 8: Msmart Touch Screen
After connecting the Msmart touch screen to the VMX and connecting the RX and TE-RTD12 devices the system can be powered up. Upon power-up the Msmart will show a splash startup screen with a status bar indicating the Msmart startup status. - Page 9 Motortronics Msmart consist of a touchscreen and four membrane buttons for navigation that can be used when the system is installed in a harsh environment. Touch screen Panel buttons Msmart Touch Screen Hardware Push Button Description Resets the device on the screen only. Also resets the Msmart display by holding button for 6 –...
-
Page 10: Navigation And Settings
Navigation and Settings 3.2.1 Main Menu After powerup Msmart will display the main menu navigation screen. The main menu allows the users to monitor and program all devices connected to Msmart system. Communication Status GREEN = ONLINE, GRAY = OFFLINE... -
Page 11: Vmx Status / Setup Screen
Motortronics 3.2.2 Main VMX Status / Setup Screen The status screen shows current operation status and includes: Alarm and trip status Phase current and voltages Relay status VMX Parameters and Metering Page Access Communication Status GREEN = ONLINE GRAY = OFFLINE... -
Page 12: Msmart Settings
Motortronics 3.2.3 Msmart Settings Click on the gear tooth icon to view/change the Msmart touch screen settings. The following settings can be adjusted: • Main page background color • Backlight brightness • Beep sound • Save delay time • Return delay to main menu... -
Page 13: Device Selection And Programming
Motortronics Device Selection and Programming 3.3.1 Device Selection Depending on the Msmart system configuration all available devices will be displayed on the main menu page. Communication Status GREEN = ONLINE GRAY = OFFLINE RED = ONLINE + TRIP YELLOW = ONLINE + ALARM... -
Page 14: Vmx Programming
Motortronics 3.3.2 VMX Programming The Msmart touch panel offers an easy way to program the VMX series soft starter. 1. Go to main menu and click on the VMX 2. Next click on the button to access the VMX function pages Note: If the motor data in the VMX has not been set a message is shown indicating the VMX has not been programmed yet. - Page 15 Motortronics Access VMX Setpoint Pages VMX function pages Motor Status Setpoint Pages Go to parameter functions Go back to main menu www.motortronics.com Page 15...
- Page 16 Motortronics #1 Select function page to view parameters direct Parameters Go back to Back to previous page main menu Next page Change parameter settings Time left to change value Parameter title Use + and – buttons to change value Parameter value...
-
Page 17: Rx Programming
Motortronics 3.3.3 RX Programming Select on the RX unit in the Msmart main menu. RX Status Overview Motor Status RX Trip & Relay Status RX Phase Currents RX Phase Voltage Back to previous page Info on other devices connected Next page Function pages www.motortronics.com... - Page 18 Motortronics RX Function Pages Motor Status Setpoint Pages Go back to main menu Next page Select function page to view parameters Parameters Go back to Back to previous page main menu Next page www.motortronics.com Page 18...
- Page 19 Motortronics Changing parameter value Time left to change value Parameter title Use + and – buttons to change value Parameter value Setting range Save value Back to previous page Click done to save value RX Monitoring Pages Motor Status RX Trip & Relay Status...
-
Page 20: Te-Rtd12 Programming
Motortronics 3.3.4 TE-RTD12 Programming Select the TE-RTD12 keypad in the Msmart main menu. TE-RTD12 TE-RTD12 Status Overview Trip & Relay Status Temperature Monitors RTD Monitors Back to previous page Info on other devices connected Next page Function pages www.motortronics.com Page 20... - Page 21 Motortronics TE-RTD12 Function Pages Status Setpoint Pages Go back to main menu Next page Select function page to view parameters Parameters Go back to Enter main menu Next Page www.motortronics.com Page 21...
- Page 22 Motortronics Changing parameter value Time left to change value Parameter title Use + and – buttons to change value Parameter value Setting range Save value Back to previous page Click “done” button to save value www.motortronics.com Page 22...
-
Page 23: Appendix A: Technical Specifications
Motortronics APPENDIX A: Technical Specifications Screen Type: Resistive Touch Screen Keypad: 4 Membrane Keys Input Voltage: 5VDC Average Power Consumption: Real-time Clock: Standard 32ºF – 122ºF / 0ºC to 50ºC Operating Design Temperature: -4ºF – 176ºF / -20ºC to 80ºC... -
Page 24: Warranty Information
Motortronics Warranty information 1 Year Warranty: Phasetronics Inc., dba Motortronics, (hereinafter “Company”) warrants the Msmart product to be free from defects in material and/or workmanship for a period of one (1) year from the date of sale, or a maximum of 18 months from the date of manufacture (if no sales records are available) as indicated by the unit’s date code. - Page 25 MO T O R T R O N I C S S o l i d S t a t e A C Mo t o r C o n t r o l M s m a r t L V A d d e n d u m - G E N 3 P h a s e t r o n i c s , I n c .
Need help?
Do you have a question about the Msmart and is the answer not in the manual?
Questions and answers