Table of Contents
Advertisement
Quick Links
Advertisement
Table of Contents

Related Manuals for ARDESTO SWMG-7121W


Summary of Contents for ARDESTO SWMG-7121W
- Page 6 Before Use...
-
Page 7: Installation
Installation Before Use Qty. Qty. Accessories Name Accessories Name “U” piece Inlet hose transit bolts... -
Page 8: Removing Transit Bolts
of the reach of children. Danger of suffocation! or the vibration and noise may occur. Remove all the packing(including the foam base) Remove all the packing(including the foam base) Dispose all the wrappage safety and keep them out or the vibration and noise may occur. Remove all the packing(including the foam base) It is normal that water drops appear on the packing of the reach of children. -
Page 10: Water Inlet Connection
Installation Use process Installation Use process Installation Use process 2. Connected securely to a standpipe Firstly form a hook in the end of the drain hose using the “U” piece supplied. Place the drain hose into your standpipe, which should have an internal diameter of approximately 30mm thus ensuring there is an air break between the drain hose and standpipe. - Page 11 The functions of the control panel The functions of the control panel The functions of the control panel The functions of the control panel The functions of the control panel Use process Use process Use process Use process Use process The functions of the control panel The functions of the control panel The functions of the control panel...
- Page 12 The functions of the control panel Use process The functions of the control panel Use process Buttons Buttons The following is the instruction of the buttons and their setting options. The following is the instruction of the buttons and their setting options. 1.Power ( 1.Power ( Press this button to turn the machine on or off.
- Page 13 The functions of the control panel The functions of the control panel Use process The functions of the control panel The functions of the control panel Use process Use process Use process The functions of the control panel Use process The functions of the control panel Use process The functions of the control panel...
- Page 14 The functions of the control panel Use process Use process How to use washer Use process How to use washer Use process Buttons Rinse+ The following is the instruction of the buttons and their setting options. Delay Before washing clothes for the first time, you must run a complete cycle without clothes. 1.Power ( Before washing clothes for the first time, you must run a complete cycle without clothes.
-
Page 15: How To Use Washer
w to use washer ow to use washer How to use washer How to use washer Use process Use process Use proce Use pr How to use washer Use process sing the detergent drawer Using the detergent drawer Using the detergent drawer Using the detergent drawer Using the detergent drawer When... -
Page 17: Cleaning The Exterior
Disconnect the machine from the mains electricity supply and withdraw the plug from the socket before cleaning the machine. The washing machine must not be hosed down. Cleaning the exterior Clean the exterior with a mild non-abrasive cleaning agent or soap and water using a well wrung-out cloth. - Page 18 1. Disconnect the machine 1. Disconnect the machine 2. Place a container under 2. Place a container under 3. Clean the filter carefully 3. Clean the filter carefully from the mains electricity from the mains electricity the pump.Unscrew and the pump.Unscrew and supply and open the lower supply and open the lower remove the filter.
- Page 19 Troubleshooting guide Difficult explanation Troubleshooting guide Difficult explanation Troubleshooting guide Difficult explanation Troubleshooting guide Difficult explanation Troubleshooting guide Troubleshooting guide Troubleshooting guide Difficult explanation Problem Error Code Possible Cause Difficult explanation Difficult explanation Problem Error Code Possible Cause Problem Error Code Possible Cause Problem Error Code...
-
Page 25: Parts And Features
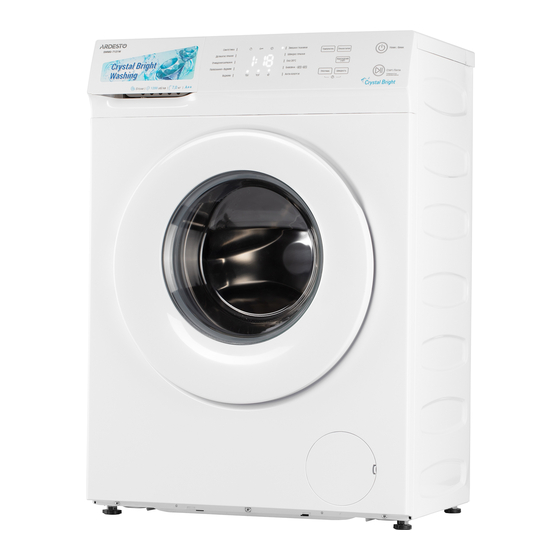
Parts and Features Before Use Drawer(for detergent Top Cover or fabric softener) Control Panel Cabinet Door glass Gasket Door Drain Hose Drain pump cover Adjustable Feet Drain pump filter Unscrew the drain pump filter to let water run out when the machine is not used for a long time. -
Page 26: Transit Bolts
machine is not used for a long time. water inlet valve Transit bolts Back cover Cord The drawing of machine in the manual is only used for instruction. It may be vary from the mode you buy. Installation Before Use Qty. - Page 27 Backout packing or the vibration and noise may occur. plastic bag and the door glass, which are resulted Remove all the packing(including the foam base) Dispose all the wrappage safety and keep them out Remove all the packing(including the foam base) from the water left in the tub for checking out.
-
Page 28: Level Adjustment
The machine must be level and securely positioned. The distance between the machine and wall must be more than 10 cm . To avoid vibrations during spinning. the machine should not be installed on soft floor coverings. Level adjustment The machine must stand perfectly level on all Locknuts four feet to ensure safe and proper operation. - Page 29 Installation Use process 2. Connected securely to a standpipe Installation Firstly form a hook in the end of the drain hose using the “U” piece supplied. Use process Place the drain hose into your standpipe, which should have an internal diameter of approximately 30mm thus ensuring there is an air break between the drain hose and standpipe.
- Page 30 The functions of the control panel The functions of the control panel The functions of the control panel The functions of the control panel The functions of the control panel Use process The functions of the control panel Use process The functions of the control panel Use process Use process...
-
Page 31: The Functions Of The Control Panel
The functions of the control panel Use process The functions of the control panel Use process Buttons Buttons The following is the instruction of the buttons and their setting options. The following is the instruction of the buttons and their setting options. 1.Power ( 1.Power ( Press this button to turn the machine on or off. - Page 32 The functions of the control panel The functions of the control panel Use process Use process The functions of the control panel Use process The functions of the control panel Use process The functions of the control panel Use process The functions of the control panel Use process Programs...
- Page 33 The functions of the control panel Use process Use process How to use washer Use process How to use washer Use process Buttons Rinse+ The following is the instruction of the buttons and their setting options. Delay Before washing clothes for the first time, you must run a complete cycle without clothes. 1.Power ( Before washing clothes for the first time, you must run a complete cycle without clothes.
- Page 34 How to use wash How to use was How to use washer How to use washer Use process Use process Use proc Use pro How to use washer Door lock Door lock Using the detergent drawer Using the detergent drawer Use process When the machine is started , the doo When the machine is started , the do...
- Page 35 How to use washer Use process Door lock When the machine is started , the door lock is locked When the temperature inside the durm is above 60℃, the door lock is locked. When the water is above a certain level, the door lock is locked. When the washing cycle is finished, the door lock is unlocked.
- Page 36 Cleaning the exterior Clean the exterior with a mild non-abrasive cleaning agent or soap and water using a well wrung-out cloth. Wipe dry with a soft cloth. Do not use solvents, abrasive cleaners, glass cleaners or all-purpose cleaning agents. These might damage plastic surfaces and other components because of the chemicals they contain.
- Page 37 1. Disconnect the machine 1. Disconnect the machine 2. Place a container under 3. Clean the filter carefully 2. Place a container under 3. Clean the filter carefully from the mains electricity from the mains electricity the pump.Unscrew and the pump.Unscrew and supply and open the lower supply and open the lower remove the filter.
- Page 38 Troubleshooting guide Troubleshooting guide Troubleshooting guide Troubleshooting guide Difficult explanation Difficult explanation Difficult explanation Troubleshooting guide Difficult explanation Troubleshooting guide Difficult explanation Difficult explanation Troubleshooting guide Difficult explanation Problem Possible Cause Error Code Problem Error Code Possible Cause Problem Error Code Possible Cause Problem Possible Cause...
-
Page 40: Умови Гарантії
Умови гарантії: Warranty conditions: Завод гарантує нормальну роботу виробу The plant guarantees normal operation of the протягом 12 місяців з моменту його продажу product within 12 months from the date of the за умови дотримання споживачем правил sale, provided that the consumer complies with експлуатації...
Need help?
Do you have a question about the SWMG-7121W and is the answer not in the manual?
Questions and answers