Table of Contents
Advertisement
Quick Links
Advertisement
Table of Contents

Related Manuals for Hygiena DUP-1000


Summary of Contents for Hygiena DUP-1000
- Page 1 Model DUP-1000 User Guide...
- Page 2 For warranty and repair issues, contact Torrey Pines Scientific at (760) 930-9400. TECHNICAL SUPPORT If you have any questions or comments on the Automated Thermal Block, please contact your distributor or Hygiena at 800-863-6842 or email diagnostics.support@Hygiena.com for technical assistance.
-
Page 3: Table Of Contents
TABLE OF CONTENTS Instrument Overview ......................1 Supplied Components ......................1 Specifications and Requirements ..................2 Safety Symbols and Precautions..................2 Connecting the Thermal Block ................... 3 Front Panel Display......................4 Program Menu ........................5 Turning the Thermal Block On and Off ................5 Running the Gram Positive Program .................. -
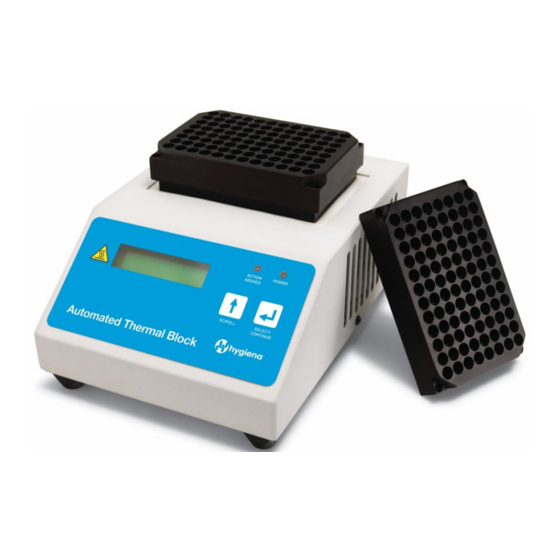
Page 4: Instrument Overview
BAX System. Other tubes and holders are not recommended. Supplied Components The purchase of the thermal block includes the following components: 1. Thermal block unit 2. Metal tube holders (2) 3. Power supply and cord 4. User documentation www.hygiena.com INS2051 Rev A... -
Page 5: Specifications And Requirements
Automated Thermal Block Specifications and Requirements Item Specification Dimensions (with lid) 6.5″ W x 8.75″ D x 8″ H (16.5 x 22.25 x 20.3 cm) Weight Approximately 8 lbs. (3.6 kg) Power usage 12 volts, 8.4 amps Power requirements 90 to 265 volts AC, 50/60Hz Thermal range -10 °C to 110 °C (14 to 230 °F) Thermal uniformity... -
Page 6: Connecting The Thermal Block
3. Insert the power supply jack into the power input port on the back panel of the thermal block. 4. Seat the metal tube holder over the metal plate surface on the top of the thermal block unit. www.hygiena.com INS2051 Rev A... -
Page 7: Front Panel Display
Automated Thermal Block Front Panel Display The front panel of the Automated Thermal Block contains the following items: 1. LCD display – shows the program menu, program selection, settings and instructions. 2. SCROLL button – changes the selected menu item in the LCD display. An audible beep sounds when the button is pressed. -
Page 8: Program Menu
At start-up, the LCD automatically displays the following series of messages: Hygiena Thermal The first screen shows the version of software currently installed on the Block v3.2 thermal block. seq file ver: 02... -
Page 9: Running The Gram Positive Program
Automated Thermal Block Running the Gram-Positive Program Samples are heated to 55 °C for 60 minutes, then 95 °C for 10 minutes, then held at 4 °C for at least 5 minutes or until removed. Gram Positive Turn on the thermal block, then press the SCROLL button until the arrow ... - Page 10 Finished” and the thermal block sounds an audible **Finished** beep to signal that the program has finished. Gram Positive Press the SELECT/CONTINUE button to exit from the program. The LCD changes to display the Gram Negative program menu. www.hygiena.com INS2051 Rev A...
-
Page 11: Running The Gram Negative Program
Automated Thermal Block Running the Gram-Negative Program Samples are heated to 37 °C for 20 minutes, then 95 °C for 10 minutes, then held at 4 °C for at least 5 minutes or until removed. Gram Negative Turn on the thermal block, then press the ... - Page 12 Press the SELECT/CONTINUE button. Gram Negative The LCD display changes to “Gram Negative Finished” and the thermal block sounds an **Finished** audible beep to signal that the program has finished. www.hygiena.com INS2051 Rev A...
-
Page 13: Running The 24E Program
Automated Thermal Block Gram Negative Press the SELECT/CONTINUE button to end the program. The LCD changes to display the program menu. Running the 24E Program Samples are heated at 37 °C for 30 minutes, then removed for the addition of lysis reagents. Samples then are heated to 55 °C for 30 minutes, then 95 °C for 10 minutes, then held at 4 °C for at least 5 minutes or until removed. - Page 14 ACTION NEEDED LED activates. The LCD display changes to “Reload Samples”. After the “Reload Samples” prompt appears, place the rack of samples with additional lysing reagents into the metal tube holder. Press the SELECT/CONTINUE button. www.hygiena.com INS2051 Rev A...
- Page 15 Automated Thermal Block 55C 24E Lysis The LCD display changes to “55C 24E Lysis”. A timer in the bottom right corner 24E 28:03 counts down from 30:00 and shows the number of minutes remaining in this step. Heating to 95C After lysis at 55 °C is complete, the LCD display changes to “Heating to 95C”.
- Page 16 Finished” and the thermal block sounds **Finished** an audible beep to signal that the program has finished. Press the SELECT/CONTINUE button 24E to end the program. The LCD changes RT Listeria to display the program menu. www.hygiena.com INS2051 Rev A...
-
Page 17: Running The Rt Listeria Program
Automated Thermal Block Running the RT Listeria Program Samples are heated to 55 °C for 30 minutes, then 95 °C for 10 minutes, then held at 4 °C for at least 5 minutes or until removed. RT Listeria Turn on the thermal block, then press the ... - Page 18 **Finished** signal that the program has finished. RT Listeria Press the SELECT/CONTINUE button to exit from the program. The LCD changes to display the Gram Positive program menu. www.hygiena.com INS2051 Rev A...
-
Page 19: Cleaning And Decontaminating The Thermal Block
Automated Thermal Block Cleaning and Decontaminating the Thermal Block Cleaning the Thermal Block • Do not attempt to clean the thermal block or metal tube holder when they are hot. Remove dust and debris by wiping the instrument surfaces with a lint-free cloth. •... - Page 20 200 µL of water. Poke a small hole in the cap of one cluster tube near the center of the cluster tube rack. With the power turned off, place the rack of cluster tubes in the metal holder. www.hygiena.com INS2051 Rev A...
- Page 21 Automated Thermal Block Insert the microprobe of the RTD thermometer through the hole in the cap of the cluster tube. Make sure the tip of the probe touches the bottom of the tube to ensure that the probe is completely immersed. Default Settings While pressing and holding the SELECT/CONTINUE button, turn on...
- Page 22 LCD display. Exit Press the SELECT/CONTINUE button until the arrow is next to the Calibrate Calibrate option. Press the SCROLL and SELECT/CONTINUE buttons at the same time to select the Calibrate option. www.hygiena.com INS2051 Rev A...
- Page 23 Automated Thermal Block Lo Temp Cal Pt Press the SELECT/CONTINUE push button until the arrow is next to the Hi Temp Cal Pt Lo Temp Cal Pt option. Press the SCROLL and SELECT/CONTINUE buttons at the same time to select the Lo Temp Cal Pt option.
- Page 24 If necessary, the thermal block automatically adjusts the Plate Temperature to align with the Set Point. Exit Calibration is complete. Turn off power to the thermal block by toggling the Calibrate on/off switch on the back panel. www.hygiena.com INS2051 Rev A...
-
Page 25: Tips And Troubleshooting
Automated Thermal Block Tips and Troubleshooting Aborting a Program The Automated Thermal Block automatically progresses through each sequential step until the program is complete. If necessary, you can cancel the program prior to completion via the Abort option. Continue While the program is running, press the SCROLL button to display the Abort Abort... -
Page 26: Error Messages
POWER FAILURE! Toggle the on/off switch on the back panel to reset the unit. Affected samples should not be used with the BAX System. Remove and dispose of these samples according to your standard operating procedures. www.hygiena.com INS2051 Rev A...
Need help?
Do you have a question about the DUP-1000 and is the answer not in the manual?
Questions and answers