Kraus Ripiano KGTW1-33 Installation Manual
Top mount kitchen sinks
Hide thumbs
Also See for Ripiano KGTW1-33:
- Installation manual (14 pages) ,
- Installation manual (14 pages) ,
- Installation manual (15 pages)
Table of Contents

Subscribe to Our Youtube Channel
Related Manuals for Kraus Ripiano KGTW1-33


Summary of Contents for Kraus Ripiano KGTW1-33
- Page 1 INSTALLATION MANUAL Ripiano Series Top Mount Kitchen Sinks KGTW1-33 / KGTW2-33 / KGTW12-33 KGTW12-18 / KGTW12-25 / KGTW12-28 www.kraususa.com I Toll Free: 1.800.775.0703 I © 2022 Kraus USA Plumbing LLC I REV. April 26, 2022...
- Page 2 Congratulations on the purchase of your new Kraus plumbing fixture! Please keep the box and packaging materials until your product is completely installed. If you have any questions, require technical assistance or have any problems with your product: STOP DO NOT RETURN TO STORE Please contact our Customer Service Team 1-800-775-0703 / customerservice@kraususa.com...
-
Page 3: Cleaning And Maintenance
Toll-Free: 800-775-0703 or customerservice@kraususa.com While these step-by-step instructions are intended to assist in the safe installation of a Kraus sink, this product is likely to perform best when installed by a licensed professional. The failure to follow these instructions or to hire a professional when needed may result in personal injury or property damage and may void the warranty. -
Page 4: Tools You Will Need
Tape Measure Phillips Screwdriver Pencil Masking Tape Hole Saw Closed Toe Shoes NOTE: Specialized tools may be necessary to install Kraus Granite Kitchen sinks with countertop materials other than wood, marble or granite. Parts List KGTW12-18 KGTW1-33 Cut-Out Template ·... -
Page 5: Hardware Included
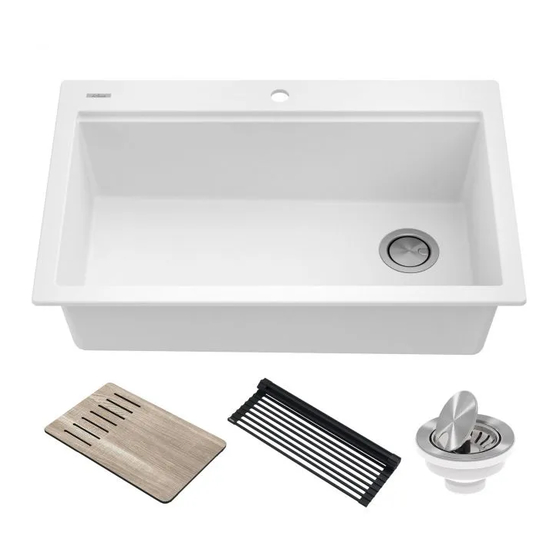
Hardware (Included) Kit for Drop-In Installation Replacement parts list KP31045 - Top Mount Clips (6 hooks) V2 Important · Instructions may vary depending on countertop material. Read all instructions carefully, and ensure that counters are compatible with sink installation before proceeding. - Page 6 Dimensions Ø 1 3/8" Ø 1 3/8" 3" 3" 15 1/8" 15 1/8" (35mm) (35mm) (76.2mm) (76.2mm) (380.9mm) (380.9mm) 5 1/4" 5 1/4" R1/4" R1/4" (6mm) (6mm) (133.4mm) (133.4mm) 30" 30" (761.9mm) (761.9mm) 33" 33" (838.1mm) (838.1mm) 1 1/2" 1 1/2" (38.2mm) (38.2mm) 5/8"...
- Page 7 Dimensions Ø 1 3/8" 2 3/8" Ø 1 3/8" 2 3/8" (35mm) (61mm) (35mm) (61mm) 5 1/4" 7 1/2" (133.4mm) (190.4mm) R1/4" R1/4" R1/2" R3/4" 15" (380.9mm) 22" (558.7mm) (6mm) (6mm) (11.6mm) (20.4mm) 18" (457.2mm) 25" (635mm) 1 1/2" 1 1/2" (38.2mm) (38.2mm) 3 1/2"...
- Page 8 1. Trace Opening · Locate the drop-in template in the box. · Cut carefully along the dotted lines. Keep the inside portion of the template. It contains important information concerning care and maintenance for your new sink. · Place the template on the counter, in the location where you will be installing the sink. When placing the template, note the location of cabinet doors and panels to ensure that they are compatible with sink installation.
- Page 9 2. Cut Opening · Using the drill, make a small starting hole of about 1/2” on the inside of the cutting line. · Drill a second time in the same hole with a larger bit to enlarge the hole so that the jigsaw can be inserted properly.
- Page 10 3. Add Additional Faucet Hole (Optional) · Determine the location of the faucet. · Place the sink upside down on a suitable flat surface. · Using the 35mm (1 3/8”) diamond hole saw at high power (1500tr. per break through in the desired location.
-
Page 11: Install Mounting Hardware
4. Install Mounting Hardware · Insert the anchors (pre-attached to the mounting hardware) into the sink holes with flat side against the sink and tighten the screws. - Page 12 5. Install Sink · Clean and dry the surface around the opening of the sink. Verify that the sink fits correctly in the opening. The edge of the sink must sit on the counter. · · Turn the unit upside down to apply sealant. Apply silicone-based sealant (not included) underneath the edge of the sink.
- Page 13 5. Install Sink SINK SILICONE BASED SEALANT SINK COUNTER...
-
Page 14: Install Drain
6. Install Drain Insert the metal strainer into the rubber seal, and then into the drain hole. · · Insert the rubber gasket and the main drain body underneath the sink. · Using the screw, tighten the main drain body and the metal strainer into place. ·... - Page 15 Kraus warrants the structure and finish of the Kitchen Sink to be free from defects in material and workmanship under normal usage for as long as the original purchaser resides in the residence in which the sink was Kitchen Sink was first installed.
- Page 16 TO THE MAXIMUM EXTENT PERMITTED BY APPLICABLE LAW, THIS WARRANTY DOES NOT COVER, AND KRAUS USA PLUMBING, LLC SHALL NOT BE LIABLE FOR, ANY SPECIAL, INCIDENTAL OR CONSEQUENTIAL DAMAGES (INCLUDING LABOR CHARGES TO REPAIR, REPLACE, INSTALL OR REMOVE THIS PRODUCT), WHETHER ARISING OUT OF BREACH OF ANY EXPRESS OR IMPLIED WARRANTY, BREACH OF CONTRACT, TORT, OR OTHERWISE.
Need help?
Do you have a question about the Ripiano KGTW1-33 and is the answer not in the manual?
Questions and answers