
Related Manuals for Albrecht HYPEX LITE


Summary of Contents for Albrecht HYPEX LITE
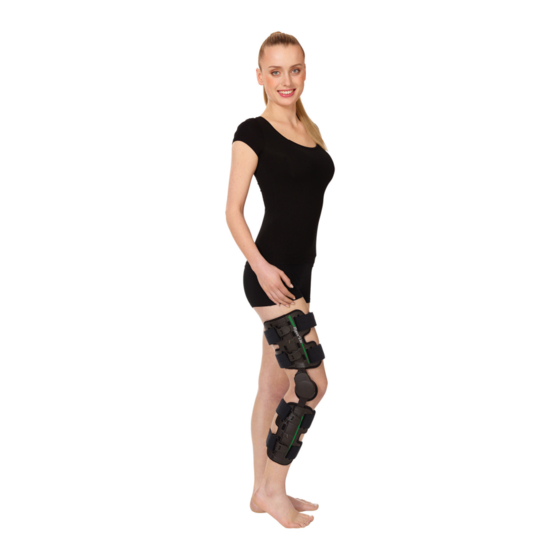
- Page 1 U S E R I N S T R U C T I O N S H Y P E X L I T E ® K N E E O R T H O S I S W I T H 4 - P O I N T- P R I N C I P L E A N D E X T E N S I O N - / F L E X I O N L I M I T AT I O N...
-
Page 2: Table Of Contents
Hypex Lite ® User Instructions Contents 1. Introduction ....................1.1. Foreword ....................1.2. Customer information ................1.3. Mode of operation ................... 1.4. Application ....................1.5. Scope of delivery ..................1.6. Declaration of conformity ................ 1.7. Features ..................... 1.8. Indications ....................1.9. - Page 3 User Instructions Lite XS/XS, XXS, Bambini and Malinki 13 2.3. Setting the hinge for Hypex ® 2.3.1. Remove the hinge cover ............... 2.3.2. Setting the extension limitation ..........2.3.3. Setting the flexion limitation ............2.3.4. Immobilisation ................2.3.5. Reattach the hinge cover ............
-
Page 4: Introduction
1.6. Declaration of conformity or the manufacturer albrecht GmbH directly before using the brace. This holds particularly The albrecht GmbH company, as the true for the safety notes. -
Page 5: Features
User Instructions 1.7. Features 1.8. Indications • Anatomically formed hinge rods and shells The physician will decide on the type of treatment to apply based on his diagnosis. • Individually adjustable straps Generally, the use is indicated in: • Limits can be adjusted without tools •... -
Page 6: Safety Notes
Hypex Lite ® User Instructions • In case of allergic reactions, immediately 1.10. Safety notes contact your physician. • The maximum effectiveness of the brace will 1.11. Warranty only be achieved if it is used correctly. • The brace is only to be used in an intact, In addition to the legal warranty, we provide complete, mechanically faultless condition a 6-month durability guarantee for the... -
Page 7: Adjustment By The Orthopaedic Technician
User Instructions 2. Adjustment by the orthopaedic technician 2.1. Fitting to the patient 2.1.1. Adjusting the brace to the leg shape by using an orthopaedic “bending iron” The brace is anatomically contoured. However, if a different shape is required, the hinge rods can be adjusted to the shape of the patient’s leg with the aid of an orthopaedic bending iron. -
Page 8: Setting The Hinge For Hypex ® Lite L/L, L/M, M/L, S/S And Junior
Hypex Lite ® User Instructions 2.2. Setting the hinge for Hypex Lite L/L, L/M, M/L, S/S and ® Junior Extension and flexion can be limited in 15° steps by appropriate positioning of the stop pins. In order to set the Extension/ Flexion limitation and the immobilisation the follwing steps must be executed. -
Page 9: Setting The Extension Limitation
User Instructions 2.2.2. Setting the extension limitation In order to set the extension limitation, bring the brace into flexion. Monocentrical hinge Polycentrical hinge* Place the stop pin into the desired position. Monocentrical hinge Polycentrical hinge* * not at S/S and Junior www.albrechtgmbh.com... -
Page 10: Setting The Fine Adjustment
Hypex Lite ® User Instructions 2.2.3. Setting the fine adjustment Additionally, the extension limtation can be adjusted infinitely using the fine adjustment from 45° via 0° to -15°. Monocentrical hinge Polycentrical hinge* 2.2.4. Setting the flexion limitation In order to set the flexion limitation, bring the brace into extension. Monocentrical hinge Polycentrical hinge* 00800 03032900 –... -
Page 11: Immobilisation
User Instructions Place the stop pin into the desired position. Monocentrical hinge Polycentrical hinge* 2.2.5. Immobilisation Immobilisation can be set in 15° steps by appropriate positioning of a stop pin in the stop area. Additionally, the set immobilisation can be infinitely adjusted from 45°... -
Page 12: Unlimited Flexion
Hypex Lite ® User Instructions 2.2.6. Unlimited flexion For unlimited flexion put one stop pin into the position ∞. Make sure that both stop pins are placed in the pinholes and that there is always at least one stop pin positioned in the pinholes of the extension stops. Monocentrical hinge Polycentrical hinge* Monocentrical hinge... -
Page 13: Setting The Hinge For Hypex ® Lite Xs/Xs, Xxs, Bambini And Malinki
User Instructions 2.3. Setting the hinge for Hypex Lite XS/XS, XXS, Bambini ® and Malinki Extension and flexion can be limited in 10° steps by appropriate positioning of the stop pins. In order to set the Extension/ Flexion limitation and the immobilisation the follwing steps must be executed. -
Page 14: Setting The Extension Limitation
Hypex Lite ® User Instructions 2.3.2. Setting the extension limitation In order to set the extension limitation, bring the brace into flexion. Place the stop into the desired position. 2.3.3. Setting the flexion limitation In order to set the flexion limitation, bring the brace into extension. Place the stop into the desired position. -
Page 15: Immobilisation
User Instructions 2.3.4. Immobilisation In order to immobilize the brace, first set the the extension limtation. Move the hinge rod against the extension limitation and position the flexion stop adjacent to the hinge rod. 2.3.5. Reattach the hinge cover Make sure that both stops are placed in the holes. Reattach the cover and rotate it 90°... -
Page 16: Attaching Of The Brace By The Orthopaedic Technician
Hypex Lite ® User Instructions 2.4. Attaching of the brace by the orthopaedic technician 2.4.1. Attaching the brace 1 Preparation: Adjust the length of the anterior brace straps. The straps do not have to be pulled out of their lugs. Release the posterior straps by opening the buckles. 2 Attaching: tighten the anterior straps. -
Page 17: Using The Clips
User Instructions 2.4.2. Using the clips Open the clip. Hook in the D-Ring. Close the clip. The length of the straps remains unchanged. The sizes XS/XS, XXS, Bambini Malinki are opened and closed using the straps. www.albrechtgmbh.com... -
Page 18: Cleaning, Maintenance And Disinfection
Hypex Lite ® User Instructions 3. Cleaning, maintenance and disinfection The orthosis is designed to be maintenance-free. To ensure proper operation over the period of treatment the orthosis should be cleaned regularly (at least every 3 months) or as required, according to the following instructions. Hand wash at 30°C 3.1. -
Page 19: Technical Data
User Instructions 4. Technical data Name Material Padding material PU foam with PA hook and loop velour Strap material PA strap with PA hook and loop velour Brace material aluminium Weight 876g www.albrechtgmbh.com... -
Page 20: Size Chart And Article Numbers
Hypex Lite ® User Instructions 5. Size chart and article numbers Circumfe- Length of Length of rence Circumference Art.-No. Art.-No. Name thigh shell lower leg shell of thigh of lower leg left right medial Hypex Lite L/L 24 cm 26,5 cm 36 - 66 cm 27 - 47 cm 804LL-L... -
Page 21: Transfer
User Instructions 6. Transfer The brace is not a single-use product, but has been designed for use by one person only. We advise against passing it on to others. Should you nonetheless wish to do so, please note the cleaning and care instructions and have the brace checked for safe and reliable operation by an authorized dealer. - Page 22 Hypex Lite ® User Instructions 00800 03032900 – INTERNATIONALE SERVICE-HOTLINE...
- Page 23 User Instructions www.albrechtgmbh.com...
- Page 24 P AT E N T S : D E 1 9 9 3 3 1 9 7 / E P 0 9 5 6 8 3 7 / U S 6 , 3 7 5 , 6 3 2 F U R T H E R P A T E N T S P E N D I N G V E R S I O N : E N 0 8 .
Need help?
Do you have a question about the HYPEX LITE and is the answer not in the manual?
Questions and answers