Table of Contents
Advertisement
Quick Links
Advertisement
Table of Contents

Related Manuals for DVDO DVDO-C7-1


Summary of Contents for DVDO DVDO-C7-1
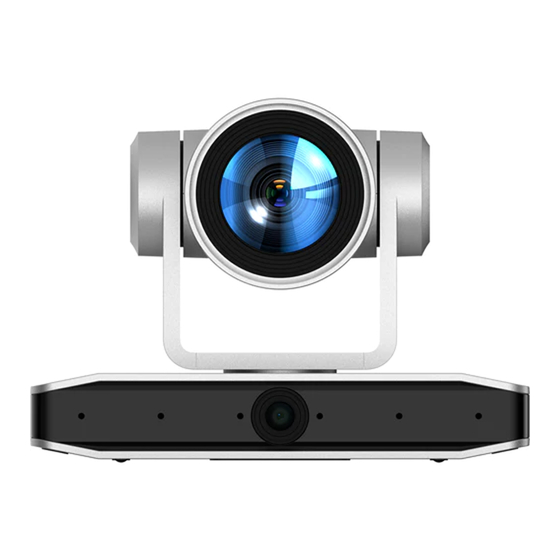
- Page 1 DVDO-C7-1 4K PTZ Camera User Manual Version: V1.0.0...
- Page 2 Preface This manual is to ensure that the user can use the product properly and avoid danger while operating. Before using this product, please read the user manual carefully and keep it for future reference. Overview This manual covers 4K PTZ camera operation Graphic Symbols Description of graphic symbols used in this manual Symbols...
- Page 3 Attention This manual introduces functions, installations and operations for this product in details. Please read this manual carefully before installation and use. Precautions: This product can only be used in the specified conditions in order to avoid any damage to the camera: 1) Do not expose the product to rain or moisture.
-
Page 4: Table Of Contents
Contents Quick Start ......................... 1 1.1 Interface ........................ 1 1.2 Power-on Self-Test ....................1 1.2.1 Power on ....................... 1 1.2.2 Self-Test ......................2 1.3 Video Output ......................2 1.3.1 Network Output ..................... 2 1.3.2 HDMI Output ....................2 1.3.3 USB3.0 Output ....................2 1.4 Bracket ........................ - Page 5 3.3.1 Main Menu ....................22 3.3.2 Tracking Setting .................... 23 3.3.3 System Setting ..................... 23 3.3.4 Camera Parameter Setting ................24 3.3.5 P/T/Z ......................27 3.3.6 Video Format ....................28 3.3.7 Version ......................29 3.3.8 Restore Default .................... 29 NETWORK CONNECTION ....................30 4.1 Connection Method ....................
-
Page 6: Quick Start
Quick Start 1.1 Interface Figure1-1 Interface Product Interface: 1. Close-up Lens 13. Power Switch 7. Audio IN(LINE-IN) 2. Camera Base 8. USB3.0 3. Panoramic Lens 9. HDMI Output 4. Remote Control 10. LAN Port Receiving Light 5. Screw Hole for 11. -
Page 7: Self-Test
1.2.2 Self-Test After power on, the receiver light will start flashing and camera will do a brief pan-tilt tour and return to the home position. When light stop flashing, the self-test is finished. ⚫ Default address of the remote control is 1#. When menu restore default setting, the address of IP remote control will restore 1#. -
Page 8: Bracket
1.4 Bracket ⚫ Bracket can only be wall mounted or upside down mounted on template and concrete wall, but can not be installed on plasterboard. 1.4.1 Steps for Wall Mounting Figure1-2 Steps for Wall Mounting... -
Page 9: Steps Of Ceiling Mount
1.4.2 Steps for Ceiling Mounting Figure1-3 Steps for Ceiling Mounting... -
Page 10: Product Overview
Product Overview 2.1 Product Overview 2.1.1 Product Dimensions Figure1-4 Product Dimension 2.1.2 Accessory When you unpack your package, check that all the supplied accessories are included: Supplied Accessory Power adapter USB3.0 Cable Supplied User manual Plastic pad RS232 Cable... -
Page 11: Product Feature
Wireless remote control IR Remote Control Optional Brackets for wall mounting Brackets for ceiling mount 2.2 Product Feature This is a brand new UHD 4K camera featuring complete functions, excellent performance and rich interfaces. Boasting advanced ISP processing technology and algorithm,this cameras deliver true-to-life image with uniform picture brightness. -
Page 12: Technical Specification
⚫ Multiple Control Protocol: Support VISCA, PELCO-D, PELCO-P protocols; Support automatic identification protocols. ⚫ Low Power Sleep Mode: Support low-power sleep/wake-up, power consumption during sleep is less than 400mW. ⚫ Multiple Presets: Up to 255 presets (10 presets via remote control). ⚫... - Page 13 ×360/640×480/480×270/352×288/320× 240@30/25/20/15/10/5fps; Sub Stream:YUY2/NV12: 1280×720/1024×576/800×600/800×448/640×360/640× 480/480×270/320×180@30/25/20/15/10/5fps; MJPG/H264: 1920×1080/1600×896/1280×720/1024×576/960× 540/800×600/800×448/720×576/720×480/640×360/640 ×480/480×270/352×288/320×240@30/25/20/15/10/5fps; Close-up Lens H:7.6°(N)~80.5°(W) Viewing Angle F1.8 ~ F3.6 Iris Value Digital Zoom Minimum 0.5Lux(F1.8, AGC ON) Illumination 2D﹠3D Auto/Manual/One-Button White Balance/Specified Color White Balance Temperature Focus Mode Auto/Manual/One Button focus Auto, Manual, Shutter Priority, Aperture Priority, Brightness Exposure Mode Priority...
- Page 14 Panoramic Lens Fixed Focus Lens 110.2°\101.8°\69.5°(D\H\V) Viewing Angle Iris F2.0±5% Focus F=1.89mm Interface Interface HDMI, LAN (support POE), USB3.0, LINE-IN, RS232-IN, Back Panel DC12V power supply, power switch Video Output HDMI, LAN, USB3.0 Video LAN:H.264, H.265 Compression USB 3.0:MJPG, H264, YUY2, NV12 Format Audio Input Dual channel 3.5mm line input...
- Page 15 Input: AC110V~AC220V ;Output: DC12V/2.5A Power Adapter DC12V±10% Input Voltage Input Current <1A Power <12W Consumption PTZ Parameter -110°~+110° Pan Angle -30°~+30° Tilt Angle 0.1°/s~100°/s Pan Speed 0.1°/s~70°/s Tilt Speed Pan:78.8°/s,Tilt:31.7°/s Preset Speed Preset Quantity Maximum 255 (10 via remote control) Other Parameter Others Storage...
- Page 16 Accessory Parameter Accessory Standard Power adapter, RS232 control cable, USB3.0 cable, remote Accessory control, user manual, Optional Installation brackets Accessory AI Function AI Function Built in high speed processor and face detection algorithm, it can automatically detect the participants to provide optimal Auto Framing framing Turn on/off voice tracking.
-
Page 17: Interface Introduction
2.4 Interface Introduction 2.4.1 Interface Diagram The interfaces of this product include: HDMI, USB3.0, and audio input interface, network interface, RS232 input, DC12V power supply, interface power switch. The back panel diagram is shown in Figure 2.5: Figure1-5 Interface Diagram... -
Page 18: Rs-232
2.4.2 RS-232 1)RS-232 Diagram Connecting method to PC or controller Device WindowsDB-9 1.DTR 1.DCD 2.DSR 2.RXD 3.TXD 3.TXD 4.GND 4.DTR 5.RXD 5.GND 6.GND 6.DSR 7.IR OUT 7.RTS 8.NC 8.CTS 9.RI... - Page 19 2)RS-232 Mini-DIN 8-pin Terminal Port Definition RS-232 Mini-DIN 8-pinTerminal Port Definition Terminal Definition Port Data Terminal Ready Data Set Ready Transmit Data System Ground Receive Data System Ground IR OUT IR Commander Signal IR No Connection 3)RS232(DB9) Terminal Port Definition RS232(DB9) Terminal Port Definition Terminal Definition...
- Page 20 4)VISCA Networking Method Device Cascading Connection Method Device 1 Device 2 1.DTR 1.DTR 2.DSR 2.DSR 3.TXD 3.TXD 4.GND 4.GND 5.RXD 5.RXD 6.GND 6.GND 7.IR OUT 7.OPEN 8. NC 8.OPEN Figure1-6 VISCA Networking Diagram ⚫ This camera has RS232 Input/Output interface, you can cascade as above method...
-
Page 21: How To Use
How to Use 3.1 Video Output 3.1.1 Power-on Self-test After powering on, camera will have initial configuration and receiver light will be flashing. Camera will do a brief pan-tilt tour and return to the home position, or if preset 0 is set, the camera will return to the preset 0 position). 3.1.2 Video Output 1)Network output: connect this product and your computer through network cable, then open the browser, enter the camera IP address (factory default 192.168.5.163) in... - Page 22 pair the code of the new remote control. If the code pairing has been unsuccessful, the red LED light flashes for 20 seconds and then goes out, stop the code pairing and go to sleep; at this time, press any Button to wake up and re-pair the code. ⚫...
-
Page 23: Ir Remote Control
3.2.1 IR Remote Control 1. Standby Button After 3S long press, the camera will step into standby mode. Long press 3S again, the camera will self-test again and back to HOME position. (Note: If power-on mode is turned on and Preset 0 is set, and there is no operation within 12s, it will automatically point to the specified preset position. - Page 24 “HOME” Button: Return to the middle position or enter into the next level menu 9. BLC Control Button Back Light ON / OFF: Turn on or off the back light 10. Menu Setting Open or close the OSD menu Enter / exit the OSD menu or return to the previous menu. 11.
-
Page 25: Remote Control Usage
3.2.2 Remote Control Usage Finishing initialization, it can receive and execute the IR commands. Press the remote controller button, the indicator light is flashing; release the button, the indicator light stops flashing. Users can control the pan/tilt/zoom, setting and running preset positions via the IR remote controller. - Page 26 Focus (near):Press “【focus+】” Button (Valid only in manual focus mode) Focus (far): Press “【focus-】”Button (Valid only in manual focus mode) Auto Focus: Support Manual Focus: Support Press and hold the Button, the action of focus will keep continue and stops as soon as the Button is released.
-
Page 27: Menu Setting
【*】+【#】+【F1】:Camera Address No.1 【*】+【#】+【F2】:Camera Address No. 2 【*】+【#】+【F3】:Camera Address No. 3 【*】+【#】+【F4】:Camera Address No. 4 3.3 Menu Setting 3.3.1 Main Menu In normal working mode, press 【MENU】Button to display the menu, using scroll arrow to point at or highlight the selected items. MENU ===============... -
Page 28: Tracking Setting
3.3.2 Tracking Setting Track Setting =============== Auto Framing ON/OFF Voice Location ON/OFF Track Mode Movies [↑↓]Select[← →]Change Value [Menu]Back [Home]OK Tracking Mode: On/Off 3.3.3 System Setting Move the pointer to the (Setup) in the Main Menu, click the【HOME】Button and enter into the (System Setting) as shown below SETUP ===============... -
Page 29: Camera Parameter Setting
3.3.4 Camera Parameter Setting Move the pointer to the (CAMERA) in the Main Menu, click the【HOME】Button and enter the (CAMERA) as follow CAMERA ================ (Exposure) (Color) (Image) (Focus) (Noise Reduction) Style Default [↑↓]Select [← →]Change Value [Menu]Back [Home]OK Exposure: Enter into Exposure setting Color: Enter into color setting Image: Enter into image setting Focus: Enter into focus setting... - Page 30 Compensation Level: -7~7 (only available in auto mode when EV is ON) BLC: ON/OFF for options (only available in auto mode) Anti-Flicker: OFF/50Hz/60Hz for options (only available in Auto/Iris priority/Brightness priority modes) Gain Limit: 0~15(only available in Auto/ Iris priority /Brightness priority mode) WDR: Off,1~8 Shutter Priority: 1/25, 1/30, 1/50, 1/60, 1/90, 1/100, 1/120, 1/200, 1/250, 1/350, 1/500, 1/1000, 1/2000, 1/3000, 1/4000, 1/6000, 1/10000, 1/20000 (only available in...
- Page 31 AWB Sensitivity: high/middle/low (only available in Auto mode) Color Temperature: 2400K-7100K (Only available in specified color temperature) 3)IMAGE Move the pointer to the (IMAGE) in the Menu, click the【HOME】and enter the (IMAGE) as follow IMAGE =============== Brightness Contrast Sharpness Auto Flip B&W-Mode Color Gamma...
-
Page 32: P/T/Z
FOCUS =============== Focus Mode Auto AF-Zone AF-Sensitivity [↑↓]Select [← →]Change Value [Menu]Back Focus Mode: Auto, manual AF-Zone: Up/middle/down AF-Sensitivity: High, middle, low 5)Noise Reduction Move the pointer to the (NOISE REDUCTION) in the Menu, click the【HOME】and enter the (NOISE REDUCTION) as follow NOISE REDUCTION ================... -
Page 33: Video Format
P/T/Z ================ Speed by zoom Zoom speed Image Freezing Acc Curve Slow Preset speed [↑↓]Select [← →]Change Value [Menu]Back Depth of Field: Only effective for remote controller, On/ Off; When zoom in, the Pan/Tilt control speed by remoter will become slow Zoom Speed: Set the zoom speed for remote controller,1~8 Image Freezing: On/Off Accelerating Curve: Fast/slow... -
Page 34: Version
⚫ Exit menu after modifying parameter to save it 3.3.7 Version Move the pointer to the (VERSION) in the Main Menu, click the【HOME】and enter the (VERSION) as follow VERSION ================ MCU Version 3.2.0 Camera Version 1.0.0 AF Version 1.0.0 [Menu]Back MCU Version: Display MCU version information Camera Version: Display camera version information AF Version: Display the focus version information... -
Page 35: Network Connection
NETWORK CONNECTION 4.1 Connection Method Direct Connection:Direct connections via “cross-over” network cable Connection to LAN:Connections to LAN via patch cable to LAN wall jack or LAN switch ⚫ Please do not put the power and network cable in places where can be easily touched to prevent video quality lowered by unstable signal transmission due to poor contact of cables. - Page 36 Figure1-7 Network segment successfully added User can also to verify network connection as steps above mentioned after the finish of camera self-check. If IP is default, open DOS command window and input 192.168.5.163, then press Enter Button. It will show message as below: which means network connection is normal.
-
Page 37: Camera Web Interface
4.2 Camera Web Interface 4.2.1 Web Login 1)Web Login After assigning an IP address to the camera, you can reach the Web Interface by typing in the camera’s IP address into a web browser. You can log in this interface as administrator or user. -
Page 38: Configuration
You can control PTZ, zoom, focus, video capture, sound, focus, full screen and set run, and delete the preset position. 2)Login as user User name and default password: “user1” or “user2” You can control PTZ, zoom, focus, video capture, sound, focus, full screen and set run, and delete the preset position. - Page 39 Image Quality: Set the image quality, image quality can be changed only when rate control is variable bit rate,(main stream defaulted is better, secondary stream default is not good, there are best, better, good, bad, worse, worst for options). Rate (Kb / s): Set the video bit rate (main stream default 4096Kb / s,64-12288Kb / s optional;...
- Page 40 4) Video Parameters A)Focus: Focus mode, focus tactic, focus sensitivity can be set. Focus Mode: set the focus mode (Default automatic, manual optional, one-push) Focus Tactic: set the focus tactic (Default before-focus, after-focus, normal meeting, education tracking, moving-target focus, center focus optional.) Focus Sensitivity: Set the focus sensitivity (default is low, high, medium optional) B)Exposure: Exposure mode, exposure compensation, backlight compensation, anti-flicker, gain limit, dynamic range, shutter, aperture, brightness, gain can be set.
- Page 41 Red Fine Tuning: Set red fine tuning, valid in manual white balance mode. Blue Fine Tuning: Set Blue fine tuning, valid in manual white balance mode. Chroma: Set the chrome (default 7, 0-14 optional). Auto White Balance Sensitivity: Sensitivity Auto white balance settings (default is low, high, medium optional).
-
Page 42: Network Configuration
Time, Font and Color: Default white, black, yellow, red and blue optional) Title Font Color: Default white, black, yellow, red, and blue optional) Move Character: Set the location where the time and title to display. Click “ up, down, left, right” button to move the characters’ location. Title: Set title on device property (default CAMERA1) Time: Set time on system time (default 1970/01/01 05:36:00) Click “Save”... - Page 43 Https Port: Set http port, the device will restart automatically after changed (default 443, 0-65535 optional). WebSocket Port:Set WebSocket port, the device will restart automatically after changed (default 8088, 0-65535 optional). Click on the "Save" button, it will be valid when display "Save successful". RTMP access: RTMP: / / equipment IP address: 1935 / live/av0 (av0 main stream;...
-
Page 44: System Configuration
Equipment Ownership: Users can add their own Administrative Regions: Users can add their own Alarm Zone: Users can add their own Equipment Installation Address: Users can add their own Local SIP Port: 5060 Range 0-65535 GB28181 Server Address: IP address of the computer Server SIP Port: 5060 Range 0-65535 Server ID: 34020000002000000001 Click on the "Save"... - Page 45 Time Type: Set the time types (default 24 hours, optional 12 hours). Enable NTP: Enable/disable NTP Update Interval: Set the NTP server automatic updated time interval. Valid after setting NTP server synchronization (default one day, 2-10 days Optional). NTP Server Address or Domain Name: Set NTP server address or domain name (default time.nits.gov).
-
Page 46: Logout
⚫ After the version upgrade is completed, you need to restore the factory default values a, restore the factory default through web configuration; b, restore the factory default value through the menu; c, remote control shortcut Button *#6 restore factory default; Choose one of the above three methods, in which the IP account and password of “method a”... - Page 47 Auto Framing: Built in face detection algorithm, it can automatically detect participants to provide the optimal framing. Voice Tracking: Voice localization and tracking system is used to trace the voice source and the lens will move according to the speaker’s position and capture the corresponding image.
-
Page 48: Serial Port Communication Control
Serial Port Communication Control In normal working state, you can control the camera through RS232/RS485 (VISCA IN) cable. The parameter of RS232 is as below: Baud rate: 2400/4800/9600/115200/second Start Bit:1 bit; Data Bit:8 bit; Stop Bit:1 bit; Verification Bit:None. After power on, the camera will have a brief tour and then back to the center position. The zoom lens is pulled to the farthest position, and then pulled back, after that self- test is completed. -
Page 49: Camera Control Command
Returned when a command which is being executed in a socket specified by the Command z0 6y 04 FF(y: cancel command is canceled. The Canceled Socket No.) completion message for the command is not returned. Returned when no command is executed in z0 6y 05 FF(y: a socket specifild by the cancel command, No Socket... - Page 50 Command Function Command Packet Remark Far(Variable) 8x 01 04 08 2p FF p = 0(low) - 7(high) Near (Variable) 8x 01 04 08 3p FF 8x 01 04 48 0p 0q Direct pqrs: Focus Position 0r 0s FF Auto Focus 8x 01 04 38 02 FF Manual Focus 8x 01 04 38 03 FF...
- Page 51 Command Function Command Packet Remark 6500k 8x 01 04 35 06 FF 3500K 8x 01 04 35 07 FF 4500K 8x 01 04 35 08 FF 5500K 8x 01 04 35 09 FF 6000K 8x 01 04 35 0A FF 7000K 8x 01 04 35 0B FF One Push WB...
- Page 52 Command Function Command Packet Remark Iris Priority Automatic Iris priority 8x 01 04 39 0B FF Exposure mode Bright 8x 01 04 39 0D FF Bright mode Reset 8x 01 04 0A 00 FF 8x 01 04 0A 02 FF Shutter Setting CAM_Shutter Down...
- Page 53 Command Function Command Packet Remark 8x 01 04 4E 00 00 Direct pq: ExpComp Position 0p 0q FF 8x 01 04 33 02 FF Back Light CAM_Back Light Compensation 8x 01 04 33 03 FF Reset 8x 01 04 21 00 FF 8x 01 04 21 02 FF WDR Level Setting CAM_WDRS...
- Page 54 Command Function Command Packet Remark 8x 01 04 42 00 00 Direct pq: Aperture Gain 0p 0q FF B&W-Mode 8x 01 04 63 04 FF CAM_Picture Picture effect Setting effect 8x 01 04 63 00 FF 8x 01 04 3F 00 pq Reset pq: Memory Number(=0 CAM_Memor...
- Page 55 Command Function Command Packet Remark CAM_Setting Reset 8x 01 04 A0 10 FF Reset Factory Setting Reset CAM_Brightn 8x 01 04 A1 00 00 Direct pq: Brightness Position 0p 0q FF CAM_Contra 8x 01 04 A2 00 00 Direct pq: Contrast Position 0p 0q FF 8x 01 04 A4 00 FF Flip-H...
-
Page 56: Inquiry Command
Command Function Command Packet Remark 8x 01 06 01 VV WW DownLeft 01 02 FF 8x 01 06 01 VV WW DownRight 02 02 FF 8x 01 06 01 VV WW Stop 03 03 FF 8x 01 06 02 VV WW AbsolutePosition 0Y 0Y 0Y 0Y 0Z 0Z 0Z 0Z FF... - Page 57 Command Command Return Packet Remark Packet CAM_ZoomPo y0 50 0p 0q 0r 0s 8x 09 04 47 FF pqrs: Zoom Position sInq y0 50 02 FF Auto Focus CAM_FocusA 8x 09 04 38 FF y0 50 03 FF Manual Focus FModeInq y0 50 04 FF One Push mode...
- Page 58 Command Command Return Packet Remark Packet y0 50 08 FF 4500K y0 50 09 FF 5500K y0 50 0A FF 6000K y0 50 0B FF 7000K y0 50 00 FF CAM_AWBSe 8x 09 04 A9 FF y0 50 01 FF Normal nsitivityInq y0 50 02 FF...
- Page 59 Command Command Return Packet Remark Packet mpPosInq y0 50 02 FF CAM_Backligh 8x 09 04 33 FF tModeInq y0 50 03 FF CAM_WDRStr y0 50 00 00 00 0p 8x 09 04 51 FF p: WDR Strength engthInq CAM_NRLeve 8x 09 04 53 FF y0 50 0p FF P: 2DNRLevel l(2D) Inq...
- Page 60 Command Command Return Packet Remark Packet y0 50 03 FF CAM_Brightne y0 50 00 00 0p 0q 8x 09 04 A1 FF pq: Brightness Position ssInq CAM_Contrast y0 50 00 00 0p 0q 8x 09 04 A2 FF pq: Contrast Position y0 50 00 FF y0 50 01 FF Flip-H...
-
Page 61: Pelco-D Protocol Command List
Command Command Return Packet Remark Packet y0 50 0w 0w 0w 0w wwww: Pan Position Pan-tiltPosInq 8x 09 06 12 FF zzzz: Tilt Position 0z 0z 0z 0z FF Note: [x] in the above table represents the address of the device to be operated, [y]=[x + 8]. 5.2 Pelco-D Protocol Command List Function Byte1... - Page 62 Function Byte1 Byte2 Byte3 Byte4 Byte5 Byte6 Byte7 Preset Set Preset 0xFF Address 0x00 0x03 0x00 Preset Clear Preset 0xFF Address 0x00 0x05 0x00 Preset Call Preset 0xFF Address 0x00 0x07 0x00 Query Pan 0xFF Address 0x00 0x51 0x00 0x00 Position Query Pan Value...
-
Page 63: Pelco-P Protcol Command List
5.3 Pelco-P Protcol Command List... - Page 64 Byte Byte Byte Byte Function Byte1 Byte2 Byte5 Byte6 Tilt 0xA0 Address 0x00 0x08 0xAF XOR Speed Speed Tilt Down 0xA0 Address 0x00 0x10 0xAF XOR Speed Speed Tilt Left 0xA0 Address 0x00 0x04 0xAF XOR Speed Speed Tilt Right 0xA0 Address 0x00...
- Page 65 Query Pan Value Value Position 0xA0 Address 0x00 0x59 High 0xAF XOR Response Byte Byte Query Tilt 0xA0 Address 0x00 0x53 0x00 0x00 0xAF XOR Position Query Tilt Value Value Position 0xA0 Address 0x00 0x5B High 0xAF XOR Response Byte Byte Query Zoom...
-
Page 66: Maintenance And Troubleshooting
Maintenance and Troubleshooting 6.1 Camera Maintenance 1)If the camera will not be used for a long time, please turn off the power switch. 2)Use a soft cloth or lotion-free tissue to clean the camera body. 3)Use a soft dry lint-free cloth to clean the lens. If the camera is very dirty, clean it with a diluted neutral detergent. - Page 67 1. Check whether camera is mounted solidly or sitting on a steady horizontal and level surface. 2. Check the building and any supporting furniture for vibration. Ceiling mounts are often affected by building vibration more than wall mounts. 3. Any external vibration that is affecting the camera will be more apparent when in tele zoom (zoomed in) setting.
- Page 68 Copyright Notice The entire contents of this manual may not be cloned, copied or translated in any way without the explicit permission of the company. Product specifications and information referred to in this document are for reference only and as such are subject to updating at any time without prior notice...
Need help?
Do you have a question about the DVDO-C7-1 and is the answer not in the manual?
Questions and answers