Table of Contents
Advertisement
Quick Links
Advertisement
Table of Contents

Related Manuals for DVDO DVDO-C3-1


Summary of Contents for DVDO DVDO-C3-1
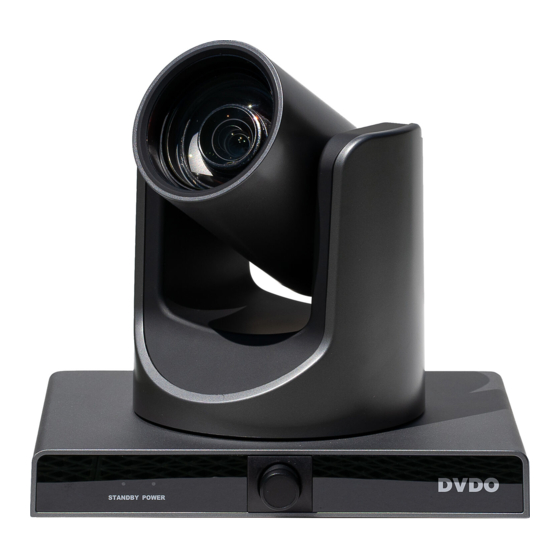
- Page 1 DVDO-C3-1 PTZ Auto Tracking Camera User Manual Version: V1.0.2...
- Page 3 FCC Warning This equipment has been tested and found to comply with the limits for a Class B digital device, pursuant to Part 15 of the FCC Rules. These limits are designed to provide reasonable protection against harmful interference in a residential installation.
-
Page 4: Table Of Contents
Table of Contents Introduction ...................... 6 Features ....................6 Package Contents ..................7 Specifications ................... 8 Panel Description ................... 11 Dimensions ..................... 12 Installation and Wiring ................... 13 Installation ....................13 Wiring ..................... 15 IR Remote Control ..................16 RS232 Control ....................20 RS232 Interface .................. - Page 5 Camera Connection to PC and LAN ............30 Camera Tracking Configuration .............. 30 View Camera / Setup Streaming............. 32 Camera Controlled by WAN..............34 Setup IP Controlled by Dynamic DNS ..........34 Dynamic DNS Visit Camera............. 34 VLC Stream Media Player Monitor ..........35 Camera Parameter Setup ...............
-
Page 6: Introduction
Introduction Features Integrated Design: Provides panoramic and close-up 4 channel Full HD 1080p video. Intelligent Tracking for Education: Built-in image recognition and tracking algorithm smoothly tracks the subject without auxiliary positioning camera or tracking host. Multiple cameras can be installed to track teacher and/or students. -
Page 7: Package Contents
Package Contents 1 x Camera 1 x AC Power Adaptor 1 x Power Cable 1 x RS232 Cable 1 x Remote 1 x Wall Bracket with Screw Pack... -
Page 12: Dimensions
Dimensions... -
Page 13: Installation And Wiring
Installation and Wiring Installation To mount camera on a wall, please follow the following wall mounting installation steps. -
Page 15: Wiring
Device Wiring Please check connections are correct before starting. Connect the power adapter to the power connector on the rear panel of the camera. The power indicator on the front panel of the camera will turn on. After the camera is powered on, it will initialize by moving to its limits, then returning horizontally and vertically to the middle position. -
Page 23: Gui Settings
GUI Settings MENU Press [MENU] button to display the main menu on the normal screen, using arrow button to move the cursor to the item to be set. Press the [HOME] button to enter the corresponding sub-menu. MENU Exposure Color Image P/T/Z Noise Reduction... -
Page 24: Exposure
EXPOSURE EXPOSURE Mode Auto ExpCompMode ExpComp Backlight Gain Limit Anti-Flicker 50Hz Meter Average Select Item Change Value [Menu] Back Mode: Set Exposure to Auto, Manual, SAE, AAE, or Bright. ExpCompMode: Exposure Compensation On / Off. (Only in Auto mode) ... -
Page 25: Color
COLOR COLOR WB Mode Auto RG Tuning BG Tuning Saturation 100% AWB Sens High Select Item Change Value [Menu] Back WB-Mode: Set White Balance to Auto, Indoor, Outdoor, One Push, Manual, VAR. RG Tuning: Red Gain adjust -10~10. (Auto, One Push, VAR modes) ... -
Page 26: P/T/Z
IMAGE Style Clarity Select Item Change Value [Menu] Back Luminance: Select from 0~14. Contrast: Select from 0~14. Sharpness: Select Auto, 0~15. Flip-H: On / Off. Flip-V: On / Off. B&W-Mode: On / Off. Gamma: Select Default, 0.45, 0.5, 0.56, 0.63. -
Page 27: Noise Reduction
SpeedByZoom: Depth of field scale On / Off. AF-Zone: Set automatic focusing area to Top / Center / Bottom. AF-Sense: Set automatic focusing sensitivity to Low / Normal / High. Display Info: On / Off. Image Freeze: On / Off. -
Page 28: Communication Setup
COMMUNICATION SETUP COMMUNICATION SETUP Protocol VISCA V_Address V_AddrFix Net Mode Serial Baudrate 9600 Select Item Change Value [Menu] Back Protocol: Select protocol type: Auto, VISCA, PELCO-D, PELCO-P. V_Address: Select 1 ~ 7. (Effective only in Auto, VISCA protocols) ... -
Page 30: Camera Connection To Pc And Lan
Connect Directly to PC via Ethernet Cable 1) Update Control Panel > Network and Internet > Network and Sharing Center > Change adapter settings > Ethernet > Internet Protocol Version 4 (TCP/IPv4) to set PC IP address as shown below. (Note: Write down existing IP settings or take screenshot to revert to original settings after setup) 2) Turn on C3 camera and connect directly to PC using Ethernet cable. - Page 31 Configure C3 Intelligent Tracking 1) Download C3 Tracking Software, Tracking Instructions, and Step-by-Step Setup Guide from DVDO.com C3 page. Refer to instructions and setup guide for C3 placement and tracking calibration. C3 Camera is now ready for operation via HDMI / 3G SDI outputs to streaming and broadcasting systems or via IP connections to browsers and RTSP / RTMP client apps such as video conferencing and social media.
-
Page 32: View Camera / Setup Streaming
View / Access Camera Enter 192.168.100.82 (if camera connected directly to PC) or into browser. Input login name: admin and password: admin into login window. The camera’s live feed can now be viewed as shown: Note: When using this camera for the first time, VLC player software must be installed. - Page 33 The camera’s RTSP streams can be turned into a virtual webcam using third-party software such as Manycam (www.manycam.com) to use with any app such as Zoom. A separate license fee may be required. C3 camera provides up to four RTMP streams to live feed into social media platforms such as Facebook and Youtube, or into streaming / recording platforms such as OBS Studio.
-
Page 34: Camera Controlled By Wan
Camera Controlled by WAN Setup IP Controlled by Dynamic DNS Dynamic DNS providers: Dyndns.org, 3322.org. Router Port Mapping: Refer to below “Tenda” router example: enter the Router Home Page (interface page), select “Advanced” -> “Virtual Server”, add a new port number in “Ext Port”, add a new port number in “Int port”, input camera IP address to “Internal IP”, then select “Save”, as shown Dynamic DNS View Camera... -
Page 35: Vlc Stream Media Player Monitor
VLC Stream Media Player Monitor Open VLC media player, click “Media > Open Network Stream” or Ctrl+N: Step 3 Input URL address: rtsp://ip: port number/1 (First stream); rtsp://ip: port number/2 (Second stream). Step 4 Click “Play”. Tip: Default RTSP port number is 554. If the camera port default is 80, it is unnecessary to input port number of URL address. -
Page 36: Camera Parameter Setup
Camera Parameter Setup Homepage Introduction Menu All pages include two menu bars for: Real time monitoring: displaying video image Parameter setup: with function buttons. A. Video Viewing Window Video viewing window must accommodate video resolution; higher resolutions will allow larger playback area. Double click viewing window to view full-screen;... - Page 37 PTZ Setup 1) Pan and Tilt Control Up, Down, Left and Right arrows and home button allow you to manually move the camera to the desired position. 2) Zoom Zoom In / Zoom Out control. 3) Focus Focus In / Focus Out control for fine manual focus adjustment in case auto-focus encounters difficult objects or backgrounds.
- Page 38 Click the “Set” button to save the current location to that preset number. Click the “Call” button to cause the camera to return to that position. This enables smooth, quick and convenient control without the need to manually move the camera.
-
Page 39: Video Settings
Video Settings 1) Video Format Support 50Hz (PAL) and 60Hz (NTSC), and Dial Priority three formats. 2) Encode Level Support baseline, mainprofile, highprofile and svc-t four levels. - Page 40 3) Encode Protocol Support H.264, H.265 and MJPEG three formats. 4) Resolution First stream: 1920x1080, 1280x720, 1024x576, 960x540, 640x480, 640x360. Second stream: 1280x720, 1024x576, 720x576 (50Hz), 720x480 (60Hz), 720x408, 640x360, 480x270, 320x240, 320x180 Higher resolutions provide clearer images while consuming more network bandwidth.
-
Page 41: Image Settings
Image Settings Brightness: Image brightness 0~14 slider. Default = 7. Saturation: Saturation 0~14 slider. Default = 4. Contrast: Contrast 0~14 slider. Default = 8. Sharpness: Sharpness 0~15 slider. Default = 3. Hue: Hue 0~14, slider. Default = 7. Flip & Mirror: Flip checkbox turns image upside down. Mirror checkbox reverses image left / right. -
Page 42: Audio Settings
Audio Settings Audio Switch: Enable / disable audio switch. Audio Type: Audio type AAC. Sample Rate Selectable: 44.1K / 48K. Bit Rate: Selectable 96K / 128K / 256K. Input Type: Input type line in. Input Vol L: Left channel volume. Input Vol R: Right channel volume. -
Page 43: Network Settings
Network Settings Lan Settings Default IP address 192.168.100.82 MAC address may not be modified. Port Settings A. HTTP Port IP address identifies the network device, which may run multiple web applications using network ports to transmit data. Port setting determines web server program’s transmission port. -
Page 44: Device Information
B. RTSP Port RTSP protocol supported. (default port: 554) Use VLC tools broadcast. C. PTZ Port PTZ protocol supported. (default port: 5678) Control Protocol Settings Set camera control communication protocol. Enter Visca / Pelco-D / Pelco-P addresses. RTMP Settings Set MRL of RTMP. Turn each stream On / Off and selectively enable / disable video and audio per stream. -
Page 45: Troubleshooting
Troubleshooting ⚫ The monitor shows no image 1. Check camera power supply is connected, voltage is normal, and power indicator light is always on. 2. Turn off power switch to check whether camera is self-testing. 3. Check all connections. ⚫ Intermittent image loss Check check all cable connecdtions of video platform and TV / display. -
Page 46: Warranty Terms And Conditions
The defects are caused by any force majeure including, but not limited to, accidents, fire, earthquake, lightning, tsunami and war. Any service, configuration or offer not covered by contract. DVDO reserves the right to determine these cases, and changes may be made at any time without notice.
Need help?
Do you have a question about the DVDO-C3-1 and is the answer not in the manual?
Questions and answers