
Related Manuals for Luvion PLATINUM X


Summary of Contents for Luvion PLATINUM X
- Page 1 LUVION Premium Baby products P L A T I N U M X INSTRUCTION MANUAL HANDLEIDING MANUEL D’INSTRUCTIONS BENUTZERHANDBUCH...
-
Page 2: Table Of Contents
TECHNICAL SPECIFICATIONS INTRODUCTION Thank you for purchasing the Luvion Platinum X. Now, you will be able to see and hear your baby everywhere in and around the house. Please keep the original dated sales receipt for your administration and proof of warranty. For service and warranty issues, you will always be asked for a copy. -
Page 3: Contents Of Package
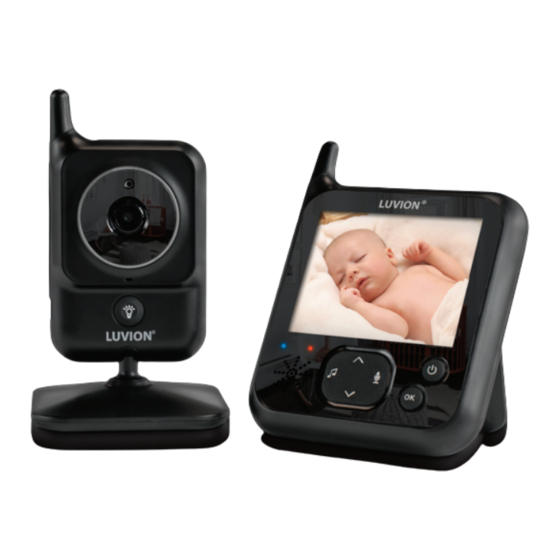
LUVION Premium Baby products CONTENTS OF PACKAGE The Luvion Platinum X includes the following components: 1 x parent unit (monitor) 1 x baby unit (camera) 1 x power adapter for the parent unit 1 x power adapter for the baby unit... -
Page 4: Overview Of Parent Unit Monitor
OVERVIEW OF PARENT UNIT MONITOR Volume + / Up button Microphone Power On/Off button / Return button Ok / Menu button LCD screen Power / Charging indicating LED Signal indicating LED Power Adapter connector Speaker 10. Music Player ON/OFF button 11. -
Page 5: Overview Of Baby Unit Camera
LUVION Premium Baby products OVERVIEW OF BABY UNIT CAMERA Light Sensor Camera Lens Infrared LED Power Indicating LED Microphone Night Light Button Speaker Pair button Temperature Sensor 10. Power Adapter connector... -
Page 6: Getting Started
NOTE HARGE THE PARENT UNIT COMPLETELY BEFORE FIRST USE Press the power button to switch the monitor on. The screen will now show the Luvion introduction screen. INSTALLING THE BABY UNIT CAMERA Before you install the baby unit (camera), carefully plan where and how you want to position it. Make sure that you take in account the length of the power cable and the position of the power socket, because the baby unit (camera) needs to be connected to the power grid. - Page 7 LUVION Premium Baby products : Before permanently installing the baby unit (camera), make sure that the wireless connection NOTE between the baby unit and parent unit is su cient. Verify this when both the parent unit and baby unit are placed in the positions from which you would like to use them.
- Page 8 USING THE SYSTEM The video of the baby unit will be displayed on the screen of the parent unit when both are switched on. The icons on the screen are explained below. 1. Signal indicator The signal indicator shows the strength of the connection between units.
-
Page 9: Menu
LUVION Premium Baby products MENU Open the menu of the Luvion Platinum X to change the device settings. > Press the OK / Menu button on the parent unit to open the menu. > Use the “UP”and “DOWN” buttons to select a sub- menu. - Page 10 > SETTINGS MENU You can use the Settings menu to set the time and date, to change the temperature unit or to set the backlight brightness and backlight time interval. > Select the settings icon in the main menu > Press OK to confi rm your selection. >...
- Page 11 LUVION Premium Baby products is 20 seconds, the maximum backlight time interval is 120 seconds. > Press up or down on the center button to select what you want to change. > Press left or right on the center button to change either the brightness or the time interval of the LCD backlight.
-
Page 12: Pairing
PAIRING Use the Pairing function to connect a baby unit (camera) to the parent unit (monitor). Plug the camera into a power outlet to turn on the camera. Push the power button up to switch the monitor on. Press the OK button to open the main menu. - Page 13 LUVION Premium Baby products Camera Register Press the OK button again to pair the Camera The screen will display “Re-Register the Camera?” Press OK to confi rm pairing the camera The screen will display “Please press the Pair key on your baby unit. ”...
-
Page 14: Lullabies
Press the night light button 3 times to switch the night light off . TROUBLESHOOTING If you have any problems with the Luvion Platinum X, there is often a quick and simple solution. Please try the following:... -
Page 15: Technical Specifications
LUVION Premium Baby products TECHNICAL SPECIFICATIONS General Speci cations Frequency 2.4 GHz Transmitting Power 17 dBm Max Receiving Sensitivity -92 dBm Type of Spread Spectrum FHSS 16 Channels Type of Modulation GSFK Data Rate 2 Mbps Transmitting Distance 260 m (Line of Sight) - Page 16 Outdoor use in France, Italy, Russia and Ukraine is not allowed Luvion declares that the radio equipment type Luvion Platinum X is in compliance with Directive 2014/53/EU. The full text of the EU declaration of conformity is available at: luvion.com/doc/platinum-X...
- Page 17 LUVION Premium Baby products...
-
Page 18: Introductie
TECHNISCHE SPECIFICATIES INTRODUCTIE Hartelijk dank voor uw aanschaf van de Luvion Platinum X. Vanaf nu kunt u uw baby altijd horen én zien. Zorg ervoor dat u altijd uw originele aankoopbewijs bewaart. Voor garantiegevallen zal u altijd gevraagd worden om een kopie van uw aankoopbewijs te tonen. -
Page 19: Inhoud Van Dit Pakket
LUVION Premium Baby products INHOUD VAN DIT PAKKET De Luvion Platinum X bevat de volgende onderdelen: 1 x ouder unit (monitor) 1 x baby unit (camera) 1 x adapter voor de ouder unit 1 x adapter voor de baby unit 1 x handleiding Controleer of in uw pakket alle onderdelen aanwezig zijn. -
Page 20: Overzicht Ouder Unit Monitor
OVERZICHT OUDER UNIT MONITOR Volume + / Omhoog knop Microfoon Aan/Uit knop / Terug knop Ok / Menu knop LCD scherm Power indicator LED / Oplaad LED Signaal indicatie LED Stroomadapterconnector Luidspreker 10. Slaapliedjes Aan/Uit knop 11. Volume - / Omlaag knop 12. -
Page 21: Overzicht Baby Unit Camera
LUVION Premium Baby products OVERZICHT BABY UNIT CAMERA Licht Sensor Camera Lens Infrarood LED Power Indicatie LED Microfoon Nacht lampje Knop Luidspreker Pair knop Temperatuur Sensor 10. Stroomadapterconnector... -
Page 22: Klaarmaken Voor Gebruik
: Laad de monitor volledig op bij eerste gebruik. ET OP Gebruik de aan/uit knop om de monitor aan te zetten. Het scherm zal nu het Luvion logo weergeven. INSTALLEREN VAN DE CAMERA Bepaal eerst goed waar u de camera plaatst voordat u de camera gaat gebruiken. Probeer rekening te houden met de lengte van de adapter kabel en een beschikbaar stopcontact om zo de camera van stroom te voorzien. - Page 23 LUVION Premium Baby products : Wees er zeker van, voordat u de baby unit permanent bevestigt, dat de draadloze verbinding tussen de ET OP baby unit en de ouder unit voldoende is. Controleer dit door beide units te plaatsen op de plaats waar u ze wilt gebruiken.
- Page 24 GEBRUIK Het beeld van de camera wordt weergeven als de monitor en de camera aan staan. De iconen op het scherm worden hier beneden uitgelegd. 1. Signaal indicatie De signaal indicatie geeft aan hoe sterk het signaal is dat wordt ontvangen van de baby unit.
-
Page 25: Menu
LUVION Premium Baby products MENU Open het menu van de Luvion Platinum X om apparaatinstellingen te veranderen. > Druk op de OK knop op de monitor om het menu te openen. > Druk op de Omhoog of Omlaag knop om een sub- menu te openen. - Page 26 > INSTELLINGEN MENU In dit submenu kunt u de datum en tijd, de temperatuureenheid en de helderheid van het scherm instellen. > Selecteer het instellingen icoon in het hoofdmenu > Druk op OK om uw selectie te bevestigen. > Gebruik de navigatie knop om de instelling te selecteren die u wil wijzigen.
- Page 27 LUVION Premium Baby products verlichting tijdsinterval is 20 seconden, het minimale LCD verlichting tijdsinterval is 120 seconden. > Druk omhoog of omlaag op de navigatie knop om de instelling te selecteren die u wil wijzigen. > Druk naar rechts of naar links op de navigatie knop om de helderheid of het tijdsinterval te veranderen.
-
Page 28: Pairing
PAIRING Gebruik Pairing om een baby unit (camera) te verbinden met de ouder unit (monitor). Sluit de camera aan op een stopcontact om de camera in te schakelen. Druk op de Aan/Uit knop om de monitor aan te zetten. Druk op de OK knop om het hoofd menu te openen. - Page 29 LUVION Premium Baby products Camera Register Druk nogmaals op de OK button om de camera bij de monitor te registreren (pairen) De boodschap “Camera opnieuw registreren?” zal verschijnen. Druk op OK om te bevestigen. De boodschap “Druk op de pair knop achter op uw baby unit”...
-
Page 30: Slaapliedjes
Druk 3 keer op de nachtlampje knop om het nachtlampje uit te schakelen. PROBLEEM & OPLOSSING Mocht je tegen problemen aanlopen met de Luvion Platinum X dan is er vaak een snelle, simpele oplossing beschikbaar:... -
Page 31: Technische Specificaties
LUVION Premium Baby products TECHNISCHE SPECIFICATIES Technische Speci caties Frequentiebereik 2.4 GHz Zendvermogen 17 dBm Max Ontvangst gevoeligheid -92 dBm Type Spread Spectrum FHSS 16 Kanalen Type Modulatie GSFK Data Snelheid 2 Mbps Bereik 260 m (Open veld) Baby unit (camera) Beeld Sensor Type 0.3Mpix Color CMOS Image Sensor... - Page 32 94mm x 120mm x 20mm LET OP Buitenshuis gebruik in Frankrijk, Italië, Rusland en de Oekraïne niet toegestaan Luvion verklaart dat het type radioapparatuur Luvion Platinum X conform is met Richtlijn 2014/53/EU. De volledige tekst van de EU-conformiteitsverklaring kan worden geraadpleegd op: luvion.com/doc/platinum-X...
- Page 33 LUVION Premium Baby products...
-
Page 34: Introduction
SPECIFICATIONS TECHNIQUES IINTRODUCTION Nous vous remercions d’avoir choisi le Luvion Platinum X. Il est important et recommandé de toujours conserver votre bon d’achat original. En cas de garantie vous serez amené à envoyer une copie de votre bon d’achat original. -
Page 35: Contenu Du Kit
Premium Baby products ment qualifi é. Batteries: Lors de votre première utilisation veillez à ce que le Luvion Platinum X soit complètement chargé. Ceci garantit une durée de vie optimale des batteries. CONTENU DU KIT Le Luvion Platinum X contient les pièces suivantes : 1 x appareil parents (moniteur) 1 x appareil bé... -
Page 36: Instruction Appareil Parents Moniteur
INSTRUCTION APPAREIL PARENTS MONITEUR Bouton volume + / Haut Microphone Bouton marche / arrêt / Bouton retour Bouton OK / Menu Écran LCD LED d’indication d’alimentation / de charge LED d’indication de signal Connecteur de l’adaptateur secteur Haut-parleur 10. Bouton Marche / Arrêt du lecteur de musique 11. -
Page 37: Instruct Ions Appareil Bebe (Caméra )
LUVION Premium Baby products INSTRUCTIONS APPAREIL BÉBÉ CAMÉRA Capteur de lumière Objctif de la caméra LED infrarouge LED d’indication d’alimentation Microphone Bouton veilleuse Haut-parleur Bouton de couplage Capteur de température 10. Connecteur de l’adaptateur secteur... -
Page 38: Mise En Route
CHARGEZ L APPAREIL PARENTS COMPLÈTEMENT AVANT LA PREMIÈRE UTILISATION Utiliser le bouton On / Off pour allumer l’appareil bé bé . Le logo Luvion s’affi che alors sur l’écran. APPAREIL BÉ BÉ CAMÉ RA Dé terminez d’abord où et comment vous voulez positionner l’appareil bé bé avant de l’installer. Tenez en compte de la longueur du fi l de l’adaptateur et l’emplacement de la prise é... - Page 39 LUVION Premium Baby products : Veillez à ê tre certain, avant de placer l’appareil bé bé de faç on permanente, que la connexion ATTENTION sans l est su sante entre l’appareil bé bé et l’appareil parents. Contrô lez ceci pour chaque appareil avant de les placer aux endroits dé...
- Page 40 UTILISATION DU SYSTÈME L’image de la camé ra s’affi che sur l’é cran du moniteur que lorsque les deux appareils sont allumé s. Les icô nes sur l’é cran vous sont expliqué es ci-dessous. 1. Le signal indicateur Le signal indicateur indique l’intensité...
-
Page 41: Menu
LUVION Premium Baby products MENU Ouvrir le menu du Luvion Platinum X afi n de changer les paramè tres. > Touchez le bouton OK / Menu sur l’appareil parents (moniteur) pour accé der au menu. > Utilisez les boutons + et - pour sélectionner un sous-menu >... - Page 42 > PARAMÈTRES MENU Vous pouvez utiliser le menu Paramètres pour régler l’heure et la date, changer l’unité de température ou bien régler la luminosité du rétroéclairage et l’intervalle de temps du rétroéclairage. > Sélectionnez l’icône Paramètres dans le menu principal >...
- Page 43 LUVION Premium Baby products Lorsque l’image de la vidéo est trop sombre, essayez d’augmenter la luminosité. La luminosité minimale est 1, la luminosité maximale est 5. L’intervalle de temps de rétro-éclairage minimum est de 20 secondes, l’intervalle de temps de rétro- éclairage maximal est de 120 secondes.
-
Page 44: Couplage
COUPLAGE Utilisez le couplage pour connecter l’appareil bé bé (camé ra) avec l’appareil parents (moniteur). Branchez la caméra sur une prise de courant pour allumer la caméra. Faites glisser vers le haut le bouton de mise sous tension pour allumer le moniteur. Appuyez sur le bouton OK pour ouvrir le menu principal. - Page 45 LUVION Premium Baby products Camera Register Appuyez de nouveau sur le bouton OK pour coupler la caméra. L’écran affi chera “ Réenregistrer la caméra ? “ Appuyez sur OK pour confi rmer le couplage de la caméra. L’écran affi chera « Veuillez appuyer sur la touche Couplage de l’appareil bébé.
-
Page 46: Berceuses
Vous avez le choix entre trois niveaux. Appuyez 3 fois sur le bouton veilleuse pour éteindre la veilleuse. PROBLEMES ET SOLUTIONS Si vous rencontrez des problè mes techniques lié s à l’utilisation du Luvion Platinum X, il existe souvent une > canaux solution simple et rapide : Problème... -
Page 47: Specifications Techniques
LUVION Premium Baby products SPECIFICATIONS TECHNIQUES Technische Speci caties Gamme de fréquences 2.4 GHz Puissance d’émission 17 dBm Max Sensibilité de réception -92 dBm Type de spectre étalé FHSS 16 canaux Type Modulation GSFK Débit de données 2 Mbps Distance de transmission... - Page 48 L’utilisation à l’extérieur de la France, Italie, Russie et Ukraine n’est pas autorisée Luvion déclare que l’équipement radio de type Luvion Platinum X est conforme à la directive 2014/53/UE. Le texte intégral de la déclaration de conformité UE est disponible sur : luvion.com/doc/platinum-X...
- Page 49 LUVION Premium Baby products...
-
Page 50: Einführung
TECHNISCHE SPEZIFIKATIONEN EINFÜHRUNG Vielen Dank, dass Sie sich für den Luvion Platinum X entschieden haben. Von nun an können Sie Ihr Baby innerhalb und außerhalb des Hauses sehen und hören (oder sogar mehrere Kinder, da Sie bis zu drei zusätzliche Kameras nutzen können). -
Page 51: Packungsinhalt
Um eine optimale Leistungsfähigkeit der Akkus zu gewährleisten, laden Sie den Monitor vor der Erstbe- nutzung vollständig auf. Der Akku ist vollständig aufgeladen, wenn die Ladeanzeige grün leuchtet. PACKUNGSINHALT Der Luvion Platinum X enthält die folgenden Bestandteile: 1 x Elterneinheit (Monitor) 1 x Babyeinheit (Kamera) 1 x Netzstecker für die Elterneinheit... -
Page 52: Übersicht Über Die Elterneinheit Monitor
ÜBERSICHT ÜBER DIE ELTERNEINHEIT MONITOR Volumen + / Up Mikrofon Power Taste / Return Taste Ok / Menütaste LCD-Bildschirm Power / Charging-Anzeige-LED Signalanzeige-LED Power Adapter Port Lautsprecher 10. Music Player EIN / AUS-Taste 11. Volume - / Down 12. Gegensprech-taste... -
Page 53: Übersicht Über Die Babyeinheit Kamera
LUVION Premium Baby products ÜBERSICHT ÜBER DIE BABYEINHEIT KAMERA Lichtsensor Kameraobjektiv Infrarot-LED Power-Anzeige-LED Mikrofon Nachtlicht-taste Lautsprecher Paar-taste Temperatursensor 10. Power Adapter Port... -
Page 54: Erste Schritte
IE DIE LTERNEINHEIT VOR DER ERSTEN ENUTZUNG VOLLSTÄNDIG AUF Drücken Sie den Netzschalter, um den Monitor einzuschalten. Auf dem Display erscheint nun der Luvion Startbildschirm. INSTALLATION DER BABYEINHEIT KAMERA Bevor Sie die Babyeinheit installieren, überlegen Sie sich gut, wo diese im Raum platziert werden soll. - Page 55 LUVION Premium Baby products : Bevor sie die Babyeinheit dauerhaft befestigen, stellen Sie sicher, dass die drahtlose EACHTEN SIE Verbindung zwischen Baby- und Elterneinheit ausreichend ist. Überprüfen sie dies, wenn sich Elterneinheit und Babyeinheit an den Positionen be nden, von denen aus Sie diese nutzen wollen.
- Page 56 VERWENDUNG Sind sowohl Eltern- als auch Babyeinheit eingeschaltet, wird auf der Elterneinheit das Video der Babyeinheit wiedergegeben. Die Symbole auf dem Display werden im Folgenden beschrieben. 1. Signalanzeige Die Signalanzeige zeigt die Signalstärke zwischen der Eltern- und Babyeinheit an. Keine Balken weisen auf ein schwaches Signal hin, vier Balken auf ein starkes Signal (siehe Tabelle).
-
Page 57: Menü
LUVION Premium Baby products MENÜ Öff nen Sie das Menü des Luvion Platinum X, um die Geräteeinstellungen zu ändern.. > Drücken Sie die Menü/OK- Taste der Elterneinheit, um das Menü zu öff nen. > Wählen Sie die + und – Tasten, um ein Untermenü... - Page 58 erscheint die Mitteilung „Register Successful“ (erfolgreiche Registrierung) auf dem Display. > EINSTELLUNGEN MENÜ Sie können das Einstellungsmenü nutzen, um Datum und Uhrzeit einzustellen, die Temperatureinheit zu verändern, oder zum Einstellen der Helligkeit der Hintergrundbeleuchtung und der Zeitabschaltung der Hintergrundbeleuchtung. > Wählen sie im Hauptmenü...
- Page 59 LUVION Premium Baby products Sie die Bildschirmhelligkeit zu erhöhen, wenn das widergegebene Bild der Babyeinheit zu dunkel erscheint. Die minimale Helligkeit ist 1, die maximale Helligkeit ist 5. Die minimale Zeitabschaltung der Hintergrundbeleuchtung beträgt 20 Sekunden, die maximale Zeitabschaltung beträgt 120 Sekunden.
-
Page 60: Pairing Kopplung
PAIRING KOPPLUNG Nutzen Sie die Pairing Funktion, um die Babyeinheit (Kamera) mit der Elterneinheit (Monitor) zu verbinden. Schließen Sie die Kamera an eine Steckdose an, um die Kamera einzuschalten. Push the power button up to switch the monitor on. Drücken Sie die OK-Taste, um das Hauptmenü... - Page 61 LUVION Premium Baby products Camera Register Drücken Sie erneut auf die OK-Taste, um die Kamera zu koppeln. Auf dem Bildschirm erscheint die Mitteilung „Re-Register - Kamera?“ Drücken Sie OK, um die Kopplung zu bestätigen. Auf dem Bildschirm erscheint die Mitteilung “Bitte drücken Sie die Pair-Taste auf der...
-
Page 62: Schlaflieder
ändern. Es stehen drei Stufen zur Auswahl. Drücken Sie dreimal die Nachtlichttaste, um das Nachtlicht auszuschalten. FEHLERSUCHE/FEHLERBEHEBUNG Treten bei der handhabung Ihres Platinum X probleme auf, fi ndet sich häufi g eine einfache lösung: Problem Lösung Kein Video der Babyeinheit Stellen Sie sicher, dass die Babyeinheit an das Stromnetzwerk angeschlossen ist. -
Page 63: Technische Spezifikationen
LUVION Premium Baby products TECHNISCHE SPEZIFIKATIONEN Technische Spezi kationen Frequenzbereich 2.4 GHz Sendeleistung 17 dBm Max Empfangsempfi ndlichkeit -92 dBm Typ des Wechselspektrums FHSS 16 Kanäle Modulationsart GSFK Datenübertragungsrate 2 Mbps Sendereichweite 260 m (Sichtline) Babyeinheit (Kamera) Bildsensor Typ 0.3Mpix Color CMOS Image Sensor Eff... - Page 64 94mm x 120mm x 20mm HINWEIS Outoor-Einsatz in Frankreich, Italien, Russland und der Ukraine nicht erlaubt. Luvion erklärt dass der Funkanlagentyp Luvion Platinum X der Richtlinie 2014/53/EU entspricht. Der vollständige Text der EU-Konformitätserklärung ist unter der folgenden Internetadresse verfügbar: luvion.com/doc/platinum-X...
- Page 65 LUVION Premium Baby products...
- Page 66 Luvion Premium Babyproducts Visit us at: www. Luvion.com...
Need help?
Do you have a question about the PLATINUM X and is the answer not in the manual?
Questions and answers