Table of Contents
Advertisement
Advertisement
Table of Contents

Related Manuals for HPE D3000


Summary of Contents for HPE D3000
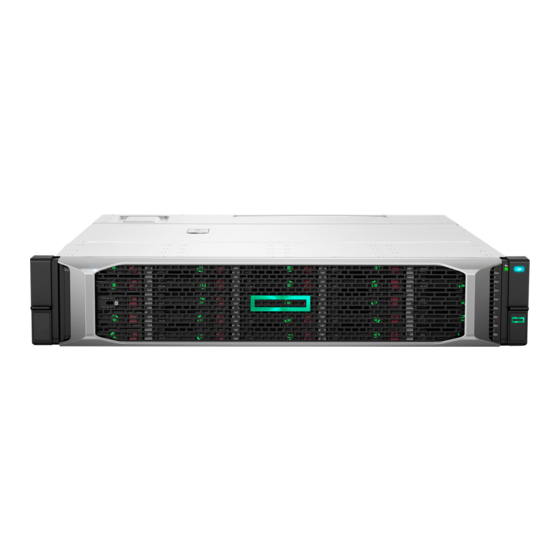
- Page 1 HPE D3000 Disk Enclosure Installation Guide Abstract This guide describes the D3000 family of 12Gb SAS disk enclosures (D3600, D3610, D3700, D3710). Installation, cabling, configuration, and troubleshooting procedures are included. Part Number: 734753-006 Published: September 2020 Edition: 5...
- Page 2 © Copyright 2014, 2016-2017, 2020 Hewlett Packard Enterprise Development LP Notices The information contained herein is subject to change without notice. The only warranties for Hewlett Packard Enterprise products and services are set forth in the express warranty statements accompanying such products and services. Nothing herein should be construed as constituting an additional warranty.
-
Page 3: Table Of Contents
Preparing the site..........................................5 Confirming support for your hardware and software components....................5 Disk enclosure installation and configuration responsibilities......................6 Information gathering........................................6 Registering with the HPE Email Preferences Center..........................6 Required installation tools......................................7 Storage planning considerations.................................... 7 System and performance expectations.............................7 Striping methods...................................... - Page 4 Acoustic noise levels........................................38 Cables..............................................38 Cables to connect HPE D36x0/D37x0 to any HPE 6Gb SAS initiator................ 39 Cables to connect HPE D36x0/D37x0 with any HPE Smart Array 12Gb SAS initiator........39 Websites..........................40 Support and other resources..................41 Accessing Hewlett Packard Enterprise Support............................41 Accessing updates........................................
-
Page 5: Preparing
Procedure 1. Review the HPE D3000 Enclosures QuickSpecs to confirm that the components you plan to use are supported for use with the disk enclosure. Download the quickspecs from the Accessing QuickSpecs website. -
Page 6: Disk Enclosure Installation And Configuration Responsibilities
Registering with the HPE Email Preferences Center The HPE Email Preferences Center website includes options to register for and automatically receive, by e-mail, personalized product tips, update information, driver- and support-related advisories, and other notices for this and other Hewlett Packard Enterprise devices. -
Page 7: Required Installation Tools
Access to the Internet NOTE: A variety of disk drives, SAS controllers, controller enclosures, and SAS cables are supported for use with this disk enclosure. For more information, see the HPE D3000 Enclosures QuickSpecs available on the Accessing QuickSpecs website . -
Page 8: Striping Methods
Striping methods There are two methods for configuring the physical layout of the disk arrays: • Vertical striping—the RAID array uses one physical drive from each disk enclosure. • Horizontal striping—the RAID array uses multiple drives contained within one or more disk enclosures. RAID levels Controllers use RAID technology to group multiple disk drives together in larger logical units (LUNs). -
Page 9: Raid Best Practices
RAID level Data redundancy RAID method RAID 5 Medium Striping and parity RAID 6 High Striping and parity RAID 6 with Advance Data Guarding High Striping and parity (ADG) RAID best practices • RAID 0: Do not use LUNs if fault tolerance is required. Consider RAID 0 only for noncritical storage. RAID 0 LUNs provide the best performance for applications that use random I/O. -
Page 10: Warranty Support And Services
The standard warranty protects against product defects and some causes of downtime. You can extend your warranty with HPE Care Pack Services. This portfolio of predefined packages is flexible, allowing you to extend coverage to the exact level of support required. You choose the support level that meets your business requirement, from basic to mission-critical. -
Page 11: Installing
Disk enclosure racking guidelines The disk enclosure can be installed into most standard server racks. To verify that your rack is supported for use with the disk enclosure, see the see the HPE D3000 Enclosures QuickSpecs on the Accessing QuickSpecs website. •... -
Page 12: Installing The Rack
WARNING: To reduce the risk of personal injury or damage to the equipment, be sure that: • At least two people lift the storage system during removal or installation if the weight exceeds 22.7 kg (50 lb). If the system is being loaded into the rack above chest level, a third person MUST assist with aligning the system with the rails while the other two people support the weight of the system. - Page 13 6. Secure front of rail to the front RETMA column using the provided flat securing screw/guide pin in the bottom screw position of the rail. 7. Slide the enclosure into position on the rails (1). Secure the chassis into the rack by tightening the captive CTO screw behind the latch on the front left and right bezel ears of the chassis (2).
-
Page 14: Installing Disk Drives In The Enclosure
Depending on the enclosure model, 12 or 25 disk drives can be installed in the enclosure. A variety of disk drive models are supported for use, including dual-ported and single-ported models. For more information about supported disk drives, see the QuickSpecs on the Hewlett Packard Enterprise website: https://h20195.www2.hpe.com/v2/getdocument.aspx?docname=c04227611 Installing... -
Page 15: Disk Drive Guidelines
Disk drive guidelines • Follow industry-standard practices when handling disk drives. Internal storage media can be damaged when drives are shaken, dropped, or roughly placed on a work surface. • When installing a disk drive, press firmly to make sure the drive is fully seated in the drive bay and then close the latch handle. -
Page 16: Installing Sas Controllers Or Controller Enclosures
2. Verify that the servers, controllers, operating system version, and service packs are supported for use with the disk enclosure. For more information, see the HPE D3000 Enclosures QuickSpecs on the Accessing QuickSpecs website. 3. Install all operating system-specific service packs, patch kits, or other required tools. -
Page 17: Connecting Sas Cables And Power Cords
• Use supported SAS cables and power cords. A variety of cables and cable lengths are supported for use with this disk enclosure. For more information, see the HPE D3000 Enclosures QuickSpecs on the Accessing QuickSpecs website. • Use the shortest possible cable between devices. Shorter cables reduce the possibility of signal degradation that might occur over longer distances. -
Page 18: Cabling Guidelines-Disk Enclosure To Disk Enclosure
DP1/DP2 I/O-A DP1/DP2 I/O-B Figure 1: Server or controller enclosure to disk enclosure (single-domain) Cabling guidelines–disk enclosure to disk enclosure • To cascade additional disk enclosures from the disk enclosure that is connected to the server or controller enclosure, use standard mini-SAS cables. •... -
Page 19: Power Cord Guidelines
P1/P2 I/O-A P1/P2 I/O-B P1/P2 I/O-A P1/P2 I/O-B Figure 2: Disk enclosure to disk enclosure (single-domain) Power cord guidelines When connecting power cords, use the cords shipped with the disk enclosure. The power cord should be approved for use in your country. The power cord must be rated for the product and for the voltage and current marked on the electrical ratings label of the product. -
Page 20: Powering The Disk Enclosure
Connection method Level of protection One power source Protects you from downtime when one of the disk enclosure power supplies fails. The remaining power supply/fan module can operate the disk enclosure until you install a replacement module. Two separate power sources Protects you from downtime when one of the disk enclosure power supplies fails. -
Page 21: Powering Off Disk Enclosures
There is no power on/standby button. Power flows to the enclosure immediately upon connecting to a live power source. Once power is applied to the power supplies, the enclosure starts running. Verify that the Power On LED turns solid green indicating the enclosure is operating properly. 2. -
Page 22: Cabling
Cabling IMPORTANT: The following illustrations demonstrate connecting disk enclosures to a generic host. Cabling restrictions may exist for server connect and controller enclosure connect environments. For more information, see the user documents for your controller or controller enclosure. Large Form Factor D36x0 disk enclosures — maximum capacity configuration This example illustrates cabling for a single-domain configuration. -
Page 23: Small Form Factor D37X0 Disk Enclosures - Maximum Capacity Configuration
Small Form Factor D37x0 disk enclosures — maximum capacity configuration This example illustrates cabling for a single-domain configuration. In this configuration, note the following: • P1 on the disk enclosure I/O module is treated as the SAS “in” port. • P2 on the disk enclosure I/O module is treated as the SAS “out”... -
Page 24: Dual Domain - Best Performance Cabling
1. Host (server or controller enclosure) 2. Primary disk enclosure 3. Additional cascaded disk enclosure 4. Primary path 5. Additional path Dual domain — best performance cabling This example illustrates cabling for a dual-domain configuration in a pattern that offers best possible performance. In this configuration, note the following: •... -
Page 25: Dual Domain-Alternative Cabling
1. Host (server or controller enclosure) 2. Primary disk enclosure 3. Cascaded disk enclosure 4. Primary path 5. Additional path Dual domain—alternative cabling This example illustrates cabling for a dual-domain configuration in a pattern that offers a balance of fault tolerance and performance. - Page 26 1. Host (server or controller enclosure) 2. Primary disk enclosure 3. Cascaded disk enclosure 4. Primary path 5. Additional path Cabling...
-
Page 27: Configuring The System
NOTE: You can receive proactive support alerts, such as Customer Advisories, as well as updates on drivers, software, firmware, and customer replaceable components, via e-mail. Sign up at the HPE Email Preference Center website, and then select the appropriate product. -
Page 28: Reference
Depending on your disk enclosure model and controller installation environment, one or more disk enclosures can be cascaded from the disk enclosure that is connected to the controller. For more information see the HPE D3000 Enclosures QuickSpecs, on the Accessing QuickSpecs website. -
Page 29: D3600/D3610 Large Form Factor Disk Enclosure Chassis
To order a replacement part, contact an Hewlett Packard Enterprise-authorized service provider or see the Hewlett Packard Enterprise Parts Store website. D3600/D3610 Large form factor disk enclosure chassis Each HPE D3600/D3610 enclosure includes the following standard components: • D3600/D3610 base enclosure with redundant power supplies and fan modules •... -
Page 30: D3600/D3610 Small Form Factor Disk Enclosure Chassis
D3600/D3610 Small form factor disk enclosure chassis Each HPE D3700/D3710 enclosure includes the following standard components: • D3700/D3710 base enclosure with redundant power supplies and fan modules • Two integrated 12Gb SAS I/O Modules • Rack mounting hardware kit •... -
Page 31: Drive Bay Numbering - Small Form Factor Disk Enclosure Chassis
Drive bay numbering - Small form factor disk enclosure chassis Disk drives mount in bays on the front of the enclosure. Bays are numbered sequentially from top to bottom and left to right. Component identification Item Description CSR status Chassis Bezel Ear Not a CSR part (part of drive cage) Chassis Bezel Ear Not a CSR part (part of drive cage) -
Page 32: Rear View Of Disk Enclosure Chassis
Large form factor (LFF): 12 HDDs • Small form factor (SFF): 25 HDDs A variety of disk drive models are supported for use, including dual-ported and single-ported models. For more information, see the HPE D3000 Enclosures QuickSpecs, available on the Accessing QuickSpecs website. Reference... -
Page 33: Disk Drive Leds
Disk drive LEDs Two LEDs indicate drive status. NOTE: Both the D36x0 LFF and D37x0 SFF drive carrier system use I2C communication for drive authentication, failure and configuration info, activity animation and enhanced LEDs. Item Description Status State Drive UID LED Solid blue Locate requested for this drive by a host application... -
Page 34: Disk Drive Blanks
Disk drive blanks To maintain the proper enclosure air flow, a disk drive or a disk drive blank must be installed in each drive bay. The disk drive blank maintains proper airflow within the disk enclosure. Front status and UID module The front status and UID module includes status LEDs and a unit identification (UID) button. -
Page 35: Power Supply Module Led
Power supply module LED Description Status State Health/Status LED Solid green Startup or normal operation Flashing green Powering up No power or fault Fan module Fan modules provide cooling necessary to maintain proper operating temperature within the controller enclosure. If one fan fails, the system still runs, but Hewlett Packard Enterprise recommends replacing the module. If two fans fail (either one complete module, or one fan per module) the system shuts down. -
Page 36: I/O Module
Item Description Status State Fan UID LED Solid blue Startup or fan locate requested Fan locate off Fan health/status LED Solid green System normal operation Solid amber Fan fault No power I/O module The I/O module provides the interface between the disk enclosure and the host. Each I/O module has two ports that can transmit and receive data for bidirectional operation. -
Page 37: Physical Specifications
Green off and amber off No power Physical specifications Height/Width/ HPE D3600/D3610 LFF: 3.44 x Height/Width/Depth 17.64 x 23.54 in (8.7 x 44.8 x 59.8 cm) Depth HPE D3700/D3710 SFF: 3.44 x 17.64 x 21.48 in (8.7 x 44.8 x 54.6 cm) Weight No disk drives: 38 lb (17.2 kg) -
Page 38: Acoustic Noise Levels
These disk enclosures use cables with mini-SAS connectors for connections to the host and to additional cascaded disk enclosures. Use supported SAS cables with mini-SAS connectors. A variety of SAS cables and cable lengths are supported for use with this disk enclosure. For more information, see the HPE D3000 Enclosures QuickSpecs on the Accessing QuickSpecs website. -
Page 39: Cables To Connect Hpe D36X0/D37X0 To Any Hpe 6Gb Sas Initiator
HPE 2.0m External Mini SAS HD to Mini SAS Cable 716191-B21 HPE 4.0m External Mini SAS HD to Mini SAS Cable 716193-B21 Cables to connect HPE D36x0/D37x0 with any HPE Smart Array 12Gb SAS initiator Description Part number External 1.0m Mini-SAS HD 4x to Mini-SAS HD 4x Cable 716195-B21 External 2.0m Mini-SAS HD 4x to Mini-SAS HD 4x Cable... -
Page 40: Websites
Websites General websites Hewlett Packard Enterprise Information Library https://www.hpe.com/info/EIL Single Point of Connectivity Knowledge (SPOCK) Storage compatibility matrix https://www.hpe.com/storage/spock Storage white papers and analyst reports https://www.hpe.com/storage/whitepapers For additional websites, see Support and other resources. Websites... -
Page 41: Support And Other Resources
• To download product updates: Hewlett Packard Enterprise Support Center https://www.hpe.com/support/hpesc Hewlett Packard Enterprise Support Center: Software downloads https://www.hpe.com/support/downloads My HPE Software Center https://www.hpe.com/software/hpesoftwarecenter • To subscribe to eNewsletters and alerts: https://www.hpe.com/support/e-updates • To view and update your entitlements, and to link your contracts and warranties with your profile, go to the Hewlett Packard Enterprise Support Center More Information on Access to Support Materials page: https://www.hpe.com/support/AccessToSupportMaterials... -
Page 42: Remote Support
IMPORTANT: Access to some updates might require product entitlement when accessed through the Hewlett Packard Enterprise Support Center. You must have an HPE Passport set up with relevant entitlements. Remote support Remote support is available with supported devices as part of your warranty or contractual support agreement. It provides intelligent event diagnosis, and automatic, secure submission of hardware event notifications to Hewlett Packard Enterprise, which will initiate a fast and accurate resolution based on your product's service level. -
Page 43: Documentation Feedback
Hewlett Packard Enterprise is committed to providing documentation that meets your needs. To help us improve the documentation, send any errors, suggestions, or comments to Documentation Feedback (docsfeedback@hpe.com). When submitting your feedback, include the document title, part number, edition, and publication date located on the front cover of the document.
Need help?
Do you have a question about the D3000 and is the answer not in the manual?
Questions and answers