(Optional), CBCT and 3D MODEL Scan imaging capabilities into a single system. This manual describes how to operate the Green Smart system. It is recommended that you thoroughly familiarize yourself with this manual to make the most effective use of this equipment.
Getting Started .................. 45 Turning on the Equipment .............. 45 Running the Image Viewer (EzDent-i / EasyDent) ......46 Initiating the Console Software ............51 Acquiring PANO Images ..............53 PANO Imaging Program Overview ........... 53 Green Smart User Manual...
With Auto Pano function, it also reconstructs the 3D CT data and produces 2D panoramic images without an additional scan. Green Smart can also acquire 2D diagnostic image data in conventional panoramic and cephalometric modes. Indications for Use Green Smart (Model: PHT-35LHS) is intended to produce panoramic, cephalometric or 3D digital x-ray images.
Experience Understanding of the normal operation of diagnostic medical radiation equipment Understanding the contents of the User Manual The dental X-ray CT should be used by qualified personnel (dentists, dental hygienists or radiologists) only. Green Smart User Manual...
The equipment has been installed by all of the cautions and conditions required for installation. The genuine VATECH approved equipment and components have been used at all times. All maintenance and repairs have been performed by a VATECH-authorized agent.
Indicates a possible danger from exposure to RADIATION radiation. Indicates a component which must be replaced SINGLE USE for each new patient. Indicates that an item is susceptible to damage from electrostatic discharges. susceptibility Green Smart User Manual...
European Directive for Medical Label Devices 93/42/EEC as amended by 2007/47/EC as a class IIb device. CSA mark Label No.266436 Caution: Federal law restricts this device to sale by or on the Label order of a licensed healthcare practitioner. Green Smart User Manual...
Page 14
60825-1 ED.2 regulations. Indicates that the user needs to Label refer to the Instruction Manual. Indicates the date when the Label equipment was manufactured. Indicates the manufacturer's Label serial number so that specific equipment can be identified. Green Smart User Manual...
Page 15
2. General Information 2.4.1 Label Locations The label is attached to the right side of the equipment, and it consists of 5 parts as below. ① For Canada, (with CEPH) ① For Canada (without CEPH) Green Smart User Manual...
Page 16
2. General Information Item Green Smart (Model: PHT-35LHS) Main Label For Canada, the Model is distinguished by Green Smart SC and Green Smart SP. ① Green Smart SC: CEPH included Green Smart SP: CEPH not included CAUTION Label ②...
Do not push or pull the equipment. Overbalances of the equipment may cause the risk of physical injuries or property damage. The operator must instruct the patient to remain still until the equipment arm has stopped moving and the reset motion is completed. Green Smart User Manual...
Page 18
If this product is exposed to water, moisture, or a foreign substance, immediately turn off the main power of the equipment and contact your VATECH technical support representative. If there are signs of oil leakage, immediately cease all operations of this equipment ...
Page 19
(Emergency Stop Switch is located at the bottom of the Vertical Frame. Turn the switch in the direction of the arrow to reboot the equipment.) Green Smart User Manual...
Page 20
No part of this equipment is serviceable by the operator. All maintenance and repair of this equipment must be performed by a VATECH qualified service technician. This product may only be operated with original VATECH accessories or third-party ...
Therefore, the use of mobile wireless phones in medical offices or hospital environments must be prohibited. For more details, refer to 15.3 Electromagnetic Compatibility (EMC) Information. Please also observe the Electro-Static Discharge (ESD) protective measures described. Green Smart User Manual...
Page 22
humidification, conductive floor coverings, and non-synthetic clothing) Electrostatic discharge of your own body with the frame of the equipment, the protective ground wire or large metallic objects Use of the wristband for grounding Green Smart User Manual...
Children and pregnant women must consult with a doctor before X-ray exposure. As a manufacturer of radiology equipment that conforms to stringent protection standards around the world, we guarantee the maximum degree of protection against radiation hazards for our equipment. Green Smart User Manual...
Defibrillators (ICDs). If the patient has such an implantable device, you should be aware of any interference in its operation and immediately power off the Dental X-ray system. Green Smart system is designed to withstand the effects of defibrillation. However, when possible, disconnect the Dental X-ray system during defibrillation since a malfunction of the safety controls could otherwise result in electrical burns for the patient.
Page 25
The use of accessories and cables other than those specified, except cables sold by VATECH of the medical electrical equipment or medical electrical system as replacement parts for internal components, may result in increased EMISSIONS or decreased IMMUNITY of EQUIPMENT or SYSTEM.
Page 26
Equipment should only be installed by an authorized technician, complying with proper installation procedures. For further details on installation, refer to the Green Smart (Model: PHT-35LHS) Installation Manual. Security Capabilities It is recommended to install and operate EzDent-i / EasyDent SW within a secure ...
4. Imaging System Overview Imaging System Overview System Components Green Smart (Model: PHT-35LHS) X-ray equipment PC system Console Software: PANO, CEPH (Optional), CBCT and 3D MODEL Scan EzDent-i / EasyDent: 2D viewer and patient management software ...
4. Imaging System Overview Standards and Regulations Standards Green Smart is designed and developed to comply with the following international standards and regulations: IEC 60601-1, IEC/EN 60601-1-2, IEC 60601-1-3, IEC 60601-1-6, IEC 60601-2-63 CAN/CSA-C22.2 No. 60601-1:14, CAN/CSA-C22.2 No. 60601-1-3:09, CAN/CSA- ...
4. Imaging System Overview Imaging System Configuration PC Signal Input / Output Item 3D viewer License Key Video output Fiber optic cable (Data in / out) Green Smart User Manual...
Can be controlled by Column UP/DOWN switch. Rotates around the patient's head while the image is being acquired. Rotating Unit (Its movement is different according to the scan mode.) X-ray Generator The vacuum tube where the X-ray is produced. Green Smart User Manual...
Page 31
(For the details, refer to 4.6.1 Control Panel.) * The Membrane type control panel below is the default. Control Panel * Control Panel with LCD screen is Optional. The input signal port for Column UP/DOWN Switch D-Sub Connector Green Smart User Manual...
Page 32
Temple Supports Adjusts the Temple Supports for patient OPEN/CLOSE positioning. button Indicates that imaging is ready after parameter READY / RETURN settings and the patient positioning are complete. button Initializes the positioning of the Rotating Unit. Green Smart User Manual...
Page 33
Initializes the positioning of the Rotating Unit. Horizontal Beam Aligns the Horizontal Beam in PANO mode. UP/DOWN button Moves the Vertical Frame up or down. Column UP/DOWN button (For adjusting the height of the Chinrest) Green Smart User Manual...
Page 34
Always operate the Touch Screen by pressing it gently with your fingertip. Do not use pointed objects such as ballpoint pens or pencils. Doing so may cause damage to the screen. Green Smart User Manual...
Page 35
Adjusts Tube voltage, Tube current, Gender / Age Settings button group, X-ray Intensity, Examination type, Imaging type, Arch selection, and Image option. Displays the current setting information. (Modality, Tube Imaging parameter voltage, Tube current, Arch type, Image option, and settings information Pano option.) Green Smart User Manual...
Page 36
The default is “High Resolution.” “Green” is optional. - When “Green” is enabled, Image Option is selectable between “High Resolution” and “Green.” When “Green” is Image Option disabled, Image Options section is invisible. (Image quality: High Resolution > Green) Green Smart User Manual...
Page 37
4. Imaging System Overview Function Description Closes the Settings Screen and moves back to PANO Main EXIT button Screen. Green Smart User Manual...
Page 38
CBCT / MODEL) selection screen. Adjusts Tube voltage, Tube current, Gender / Age Settings button Group, X-ray Intensity, and Image Option. Imaging parameter Displays the current setting information. (Modality, Tube settings information voltage, Tube current, and Image option) Green Smart User Manual...
Page 39
Normal, or Soft : Soft ≤ Normal ≤ Hard Selects between “High Resolution” and “Green.” Image Option (Image quality: High Resolution > Green) Closes the Settings Screen and moves back to CEPH Main EXIT button Screen. Green Smart User Manual...
Page 40
Adjusts Tube voltage, Tube current, Gender / Age group, Settings button X-ray intensity, Image Option, and Voxel Size. Imaging parameter Displays the current setting information. (Modality, Tube settings information voltage, Tube current, Image option, and Voxel size) Green Smart User Manual...
Page 41
Soft ≤ Normal ≤ Hard Selects between “High Resolution” and “Green.” Image Option (Image quality: High Resolution > Green) Voxel size Selects between Standard and Application. Closes the Settings Screen and moves back to CBCT Main EXIT button Screen. Green Smart User Manual...
Page 42
BACK button CBCT / MODEL) selection screen. Adjusts Tube voltage, Tube current, Gender / Age group, Settings button and X-ray intensity. Imaging parameter Displays the current setting information. (Modality, Tube settings information voltage, and Tube current) Green Smart User Manual...
Page 43
Adjusts Tube voltage (kVp) and Tube current (mA). control button Patient’s gender / age Selects patient's gender / age group. group X-ray intensity Selects X-ray intensity. Closes the Settings Screen and moves back to 3D MODEL EXIT button Scan Main Screen. Green Smart User Manual...
Page 44
The Exposure Switch is detachable. Ensure the Exposure Switch cable is not detached from the unit accidentally during the operation. Keep vocal/visual contact with the patient during exposure. If any problem occurs during exposure, release the Exposure Switch immediately. Green Smart User Manual...
Page 45
Carpus Plate PC (Polycarbonate) Sanitary Vinyl Covers (disposable) for the Bite LDPE (Low-density polyethylene) Protractor (1 set) : For positioning the patient’s PC (Polycarbonate) body in CEPH mode. ABS (Acrylonitrile butadiene Model Scan Jig styrene) copolymer Green Smart User Manual...
1 PCI Express Gen2 x 4 Slot Slots 1 PCI Express Gen2 x 1 Slot 1 PCI 32bit/33MHz CD/DVD drive DVD Writer 5.25" Operating Windows 7 Professional 64-bit (available through System downgrade rights from Windows 10 Pro) Recommended HP Z440 System Green Smart User Manual...
5. Imaging Software Overview EzDent-i / EasyDent EzDent-i / EasyDent is imaging software from VATECH Co., Ltd. that manages patient images to make faster and more accurate diagnoses. EzDent-i / EasyDent, linked with the console software and 3D viewer, makes it convenient for the operator to use and process necessary images.
The Main Screen of the Console Software consists as follows. Each imaging mode will be described later. Item Description Imaging Mode Displays the current imaging mode. Display Scanning Status Shows image acquisition progression and displays preview of and Image the images acquired. Preview window Green Smart User Manual...
Page 49
Patient’s gender/age group Selects X-ray intensity. Depending on the circumference of the patient’s head, X-ray intensity may be classified as Hard, Normal, or Soft : Soft ≤ Normal ≤ Hard X-ray intensity Green Smart User Manual...
Page 50
To start the rotation test, press BEAM ON/OFF button on the Control Panel. To finish the test mode, click Rotation Test button or READYbutton. This function is applied to PANO and CBCT modalities only. Green Smart User Manual...
Page 51
Settings button including language, automatic save, DAP display unit, etc. EXIT button Exits the console software. The radiation mark turns yellow and “X-RAY” changes to “X- RAY ON.” X-ray indicator Version Displays the Console Software version. Information Green Smart User Manual...
Page 52
5. Imaging Software Overview Left blank intentionally Green Smart User Manual...
Press the Main Power Switch that is located at the bottom of the Vertical Frame to turn on the equipment. Main Power Switch isolates its circuits electrically from the supply mains on all poles simultaneously. Make sure that the green LED light at the top of the equipment is on. Green Smart User Manual...
For Green Smart dental computed tomography X-ray system, both 3D viewer (Ez3D-i / Ez3D Plus) and Console Software are being accessed through 2D viewer (EzDent-i / EasyDent) SW. 3D viewer and Console Software do not have image storage capacity of their own, and both programs will not be able to keep patient information.
Page 55
Enter the required patient information. Chart Number, E-Mail address, First Name, and Last Name are required fields which must be filled in. (The Chart Number is filled in automatically.) Click the Add button to save the patient record. Green Smart User Manual...
Page 56
Enter the required patient information. Chart Number, First Name, and Last Name are required fields which must be filled in. All other fields are optional, but it is recommended that they are filled in. Click the Add button to save the patient record. Green Smart User Manual...
Page 57
Search button. The information on the patient that fits the search condition appears. Double-click the Keyboard icon to display the virtual keyboard. You may search patient information using the virtual keyboard. Double-click the patient information to see more details about the patient as shown below. Green Smart User Manual...
Page 58
Enter the Chart No., First name, or Last name of the patient by clicking the mouse on the virtual keyboard and click the Enter key. (The physical keyboard can be used to do the same job) Patient information can be displayed on the Patient Information panel and Patient List. Green Smart User Manual...
The Main Screen for the selected mode appears. From the Main Screen, you can configure the imaging parameter settings prior to acquiring an image. Refer to the following chapters (7 ~ 10) for the more information on the image acquisition. Green Smart User Manual...
Page 60
The Main Screen for the selected mode appears. From the Main Screen, you can configure the imaging parameter settings prior to acquiring an image. Refer to the following chapters (7 ~ 10) for the more information on the image acquisition. Green Smart User Manual...
Multi-image acquisition option that reconstructs the panoramic image into multiple focal images in depth regions. Insight PAN Its main purpose is to diagnose depth regions, which cannot be confirmed with ordinary panoramic images. Green Smart User Manual...
Page 62
It is classified as below based on the ROI (Region of Interest). Examination Arch Selection Sample Image Type Standard Right Narrow Normal Wide Child Orthogonal Front Left PANO Examination Bitewing* Bitewing Incisor* (Optional) Orthogonal Bitewing Right* Bitewing Left* TMJ LAT Open SPECIAL Examination TMJ LAT Close Green Smart User Manual...
Page 63
7. Acquiring PANO Images Examination Arch Selection Sample Image Type TMJ PA Open (Optional) TMJ PA Close (Optional) Sinus LAT (Optional) Sinus PA * Bitewing imaging mode is activated only when Orthogonal is selected in Arch Selection. Green Smart User Manual...
Page 64
A panoramic imaging mode for the patients with a square-shaped arch trajectory. (Typically for some males) Wide Standard A panoramic imaging mode for child trajectory. Child Standard (Less X-ray exposure than the Normal mode by approximately more Green Smart User Manual...
Page 65
Orthogonal (Pros: less X-ray exposure than the Normal mode. / Cons: TMJ and some parts of the maxillary sinus cannot be acquired.) Bitewing** (Bitewing Incisor mode is Optional) Green Smart User Manual...
Page 66
A special imaging mode to acquire a Sinus image, in which X-ray beam is directed on the frontal region of the maxillary sinus. Sinus PA Bitewing imaging mode is activated only when Orthogonal is selected in Arch Selection. Green Smart User Manual...
You can set the imaging parameters on Console Software running on the PC. (Touch Screen is Optional. In case the Touch Screen is included in the equipment, Touch Screen and Console Software are synchronized and display the same environmental settings.) Green Smart User Manual...
Page 68
- Provides multiple panoramic images having different focal planes along with a normal panoramic image Insight PAN together. - Enables detailed verification of images in depth direction. Green Smart User Manual...
Page 69
Panoramic image of child palatal arches, approximately more Child than 40% less X-ray dose than in Normal mode. Panoramic image where the x-ray angle enters vertically in Orthogonal between the teeth, so overlapping images are minimized. Green Smart User Manual...
Page 70
For more information about Examination Program, refer to 7.1 PANO Imaging Program Overview. The Gender / Age group of the patient is selected automatically based on the patient information. If necessary, you can select the option manually. <Console Software> <Touch Screen> Green Smart User Manual...
Page 71
The values of tube voltage and current are configured automatically according to the patient's gender/age group and X-ray intensity. Click the UP/DOWN arrow to adjust kVp and mA. The dose is adjustable by ±1 kVp and ±1 mA respectively. <Console Software> <Touch Screen> Green Smart User Manual...
Page 72
The Vertical Beam will be activated to make patient positioning easier. The DAP (Dose Area Product), Scan Time and Exposure Time will be displayed below the Patient Information window. Guide the patient to the equipment. Green Smart User Manual...
Press the Rotation test button in the Console program and check that the equipment touches a part of the patient while the equipment is running. < Control Panel – Membrane type> <Control Panel – LCD type> Green Smart User Manual...
Page 74
Hold the handles tightly. Press the chest against the equipment. Keep both feet close to the inside of the base. Keep both shoulders parallel. Straighten the Cervical Spine and stand still. Green Smart User Manual...
Page 75
Remove the Normal Chinrest and insert the Special Chinrest into the equipment. Insert the Special Bite B into the Special Chinrest. Clean the Chinrest and the Bite with ethanol and wipe with a dry towel before the next patient. Green Smart User Manual...
Page 76
Keep both shoulders parallel. Straighten the Cervical Spine and stand still. Let the patient maintain the posture as follows: Close the mouth. Place the tongue on the roof of the mouth. Close the eyes. Green Smart User Manual...
Page 77
Horizontal Beam is aligned to the patient's face horizontally. Direct the patient to smile and align the Canine Teeth Beam to the center of the canines. Use the Canine Teeth Beam Lever to adjust the position of the beam. Green Smart User Manual...
Page 78
Make sure that the Temple Supports are in CLOSE position before clicking the READY button. Click the READY button. The X-ray exposure has not started yet. Now go to 7.4 X-ray Exposure to start the exposure. Green Smart User Manual...
Page 79
Hold the handles tightly. Press the chest against the equipment. Keep both feet close to the inside of the base. Keep both shoulders parallel. Straighten the Cervical Spine and stand still. Green Smart User Manual...
Page 80
Close the eyes. As shown in the picture, the support unit of the integrated Chinrest should touch the patient's acanthion point. Ask the patient to maintain his/her position until the operation is completed. Green Smart User Manual...
Page 81
Align the Horizontal Beam in a straight line to the Frankfurt Line on the patient's face. Use the Horizontal Beam button on the control panel to position it. Make sure that the Horizontal Beam is aligned to the patient's face horizontally. Green Smart User Manual...
Page 82
Make sure that the Temple Supports are in CLOSE position before clicking the READY button. Click the READY button. The X-ray exposure has not started yet. Now go to 7.4 X-ray Exposure to start the exposure. Green Smart User Manual...
Page 83
Guide the patient to place the base of his/her nose (acanthion point) against the Chinrest and bend the head forward about 5˚. Let the patient maintain the posture as follows: Close the mouth. Place the tongue on the roof of the mouth. Close the eyes. Green Smart User Manual...
Page 84
Let the patient maintain his/her position until the operation is completed. Laser Beam Aligning This is the same as the one for TMJ Open mode. Finishing Patient Positioning This is the same as the one for TMJ Open mode. Green Smart User Manual...
Page 85
5˚. At this point, make sure the patient's jaw does not touch the equipment. If the jaw touches the equipment, it is difficult to maintain the proper position to get good images. Be careful the patient does not touch the equipment with his/her jaw. Green Smart User Manual...
Page 86
Close the eyes. As shown in the picture, the support unit of the integrated Chinrest should touch the patient's acanthion point. Ask the patient to maintain his/her position until the operation is completed. Green Smart User Manual...
Page 87
Make sure that the Temple Supports are in CLOSE position before clicking the READY button. Click the READY button. The X-ray exposure has not started yet. Now go to 7.4 X-ray Exposure to start the exposure. Green Smart User Manual...
Get out of the X-ray room and close the door. The operator must keep vocal/visual contact with the patient at all times during image acquisition. Press and hold down the Exposure Switch until image acquisition is completed. The image appears on the screen. Green Smart User Manual...
The images are automatically saved if automatic save option is configured as default. If it is not configured as default, click the Save button to save the images. To check the image, double-click the one on the Patient List. Green Smart User Manual...
Page 90
7. Acquiring PANO Images Left blank intentionally Green Smart User Manual...
Measures the angles formed by the <PA> connecting lines between the cranial measurement points to further assess the growth of the facial region. It is widely used in Orthodontics and Oral and Maxillofacial Surgery. Green Smart User Manual...
Page 92
Waters’ view frontozygomatic suture, the nasal cavity, the coronoid process between the upper jaw and the zygomatic arch. <Waters’ view> Used to assess hand bone age to compare Carpus the changes in the skull. <Carpus> Green Smart User Manual...
PC. (Touch Screen is Optional. In case the Touch Screen is included in the equipment, Touch Screen and Console Software are synchronized and display the same environmental settings.) Click the CEPH button on the Main Screen. <Console Software> <Touch Screen> Green Smart User Manual...
Page 94
Select an examination program in the CEPH Examination panel. <Console Software> <Touch Screen> The Gender / Age group of the patient is selected automatically based on the patient information. If necessary, you can select the option manually. <Console Software> <Touch Screen> Green Smart User Manual...
Page 95
The values of tube voltage and current are configured automatically according to the patient's gender/age group and X-ray intensity. Click the UP/DOWN arrow to adjust kVp and mA. The dose is adjustable by ±1 kVp and ±1 mA respectively. <Console Software> <Touch Screen> Green Smart User Manual...
Page 96
Click CONFIRM button when exposure parameter setting is completed. <Console Software> <Touch Screen> When you click CONFIRM button, The DAP (Dose Area Product), Scan Time and Exposure Time will be displayed below the Patient Information window. Guide the patient to the equipment. Green Smart User Manual...
Have the patient wear a lead apron to protect themselves from residual radiation. Use the Column UP/DOWN button or switch option to adjust the equipment to match the height of the patient. < Control Panel – Membrane type> <Control Panel – LCD type> Green Smart User Manual...
Page 98
Use the Column UP/DOWN button or switch option to adjust the height of the CEPH unit to approximately match the height of the patient. After adjusting the height of the column, align the Ear Rods and Nasal Positioner to the patient. Green Smart User Manual...
Page 99
Direct the patient to swallow first before closing the mouth and to remain in his/her current position until image acquisition is completed. Click the READY button. The x-ray exposure has not started yet. Now go to 8.4 X-ray Exposure to start the exposure. Green Smart User Manual...
Page 100
Fold the Nasal Positioner up. The Nasal Positioner is not used in PA mode. Guide the patient to the CEPH unit. Ask the patient to stand upright facing the sensor. Make sure that the patient’s shoulders are level and that his/her neck is relaxed. Green Smart User Manual...
Page 101
Direct the patient to swallow first before closing his/her mouth and to remain in his/her current position until image acquisition is completed. Click the READY button. The x-ray exposure has not started yet. Now go to 8.4 X-ray Exposure to start the exposure. Green Smart User Manual...
Page 102
Turn the Nasal Positioner to the SMV mode Positioning Marker as shown below. Fold the Nasal Positioner up. The Nasal Positioner is not used in SMV mode. Guide the patient to the CEPH unit. Guide the patient to face the X-ray tube and stand upright. Green Smart User Manual...
Page 103
Direct the patient to swallow first before closing his/her mouth and to remain in his/her current position until image acquisition is completed. Click the READY button. The x-ray exposure has not started yet. Now go to 8.4 X-ray Exposure to start the exposure. Green Smart User Manual...
Page 104
Direct the patient to swallow first before closing his/her mouth, and guide the patient to bend the head backward 30˚ - 40˚. Direct the patient to remain in the current position until image acquisition is completed. Green Smart User Manual...
Page 105
8. Acquiring CEPH Images (Optional) Click the READY button. The x-ray exposure has not started yet. Now go to 8.4 X-ray Exposure to start the exposure. Green Smart User Manual...
Page 106
Fold the Nasal Positioner up. The Nasal Positioner is not used in Carpus mode. Fit the two ends of the Carpus Plate into the two holes of the CEPH unit as below. Confirm that the Carpus Plate is safely mounted. Green Smart User Manual...
Page 107
Ask the patient to close his/her eyes and stand still until the image acquisition is completed. Click the READY button. The x-ray exposure has not started yet. Now go to 8.4 X-ray Exposure to start the exposure. Green Smart User Manual...
An alert sound comes out to indicate that X-ray emission is currently underway. On Console Software, the radiation mark turns yellow and “X-RAY” changes to “X-RAY ON.” Release the Exposure Switch when “Image capturing is completed” message appears on the screen. Green Smart User Manual...
The images are automatically saved if automatic save option is configured as default. If it is not configured as default, click the Save button to save the images. To check the image, double-click the one on the Patient List. Green Smart User Manual...
Page 110
8. Acquiring CEPH Images (Optional) Left blank intentionally Green Smart User Manual...
For children aged between 0 and Covers both maxillary and mandibular structures 10x7 including the 3rd molar region. Suitable for most oral surgery <Occlusion / Center> cases as well as multiple implant surgery. Green Smart User Manual...
Page 112
<Maxilla / Right> <Maxilla / Left> Can acquire 3 ~ 4 teeth at once. Endo mode (Voxel Size: 0.08) applied. <Mandible / Right Molar> <Mandible / Left Molar> <Mandible / Incisor> <Mandible / Right> <Mandible / Left> Green Smart User Manual...
Page 113
9. Acquiring CBCT Images Special Option Auto Pano : 2D images of conventional panoramic view are available with the specific FOVs. For more details on Auto Pano, please refer to 9.2 Configuring Exposure Parameters. Green Smart User Manual...
PC. (Touch Screen is Optional. In case the Touch Screen is included in the equipment, Touch Screen and Console Software are synchronized and display the same environmental settings.) Click the CBCT button on the Main Screen. <Console Software> <Touch Screen> Green Smart User Manual...
Page 115
Auto Pano is a feature used to acquire reconstructed 2D images during 3D CT scans without additional X-ray exposure. It has the same region that conventional panoramic images offer. (It provides images for the Standard mode in DICOM or BMP format.) Green Smart User Manual...
Page 116
<Console Software> <Touch Screen> The Gender / Age group of the patient is selected automatically based on the patient information. If necessary, you can select the option manually. <Console Software> <Touch Screen> Select X-ray intensity. Green Smart User Manual...
Page 117
The values of tube voltage and current are configured automatically according to the patient's gender/age group and X-ray intensity. Click the UP/DOWN arrow to adjust kVp and mA. The dose is adjustable by ±1 kVp and ± 0.1 mA respectively. <Console Software> <Touch Screen> Green Smart User Manual...
Page 118
The Vertical Beam will be activated to make patient positioning easier. The DAP (Dose Area Product), Scan Time and Exposure Time will be displayed below the Patient Information window. Guide the patient to the equipment. Green Smart User Manual...
Press the Rotation test button in the Console program and check that the equipment touches a part of the patient while the equipment is running. < Control Panel – Membrane type> <Control Panel – LCD type> Green Smart User Manual...
Page 120
Keep both feet close to the inside of the base. Keep both shoulders parallel. Straighten the Cervical Spine and stand still. Let the patient bite the Bite along its grooves with his/her front teeth. Green Smart User Manual...
Page 121
9. Acquiring CBCT Images Let the patient maintain the posture as follows: Close the mouth. Place the tongue on the roof of the mouth. Close the eyes. Green Smart User Manual...
Page 122
Keep both shoulders parallel. Straighten the Cervical Spine and stand still. Let the patient maintain the posture as follows: Close the eyes. Ask the patient to maintain his/her position until the operation is completed. Green Smart User Manual...
Page 123
Make sure that the Temple Supports are in CLOSE position before clicking the READY button. Click the READY button. The X-ray exposure has not started yet. Now go to 9.4 X-ray Exposure to start the exposure. Green Smart User Manual...
Get out of the X-ray room and close the door. The operator must keep vocal/visual contact with the patient at all times during image acquisition. Press and hold down the Exposure Switch until image acquisition is completed. The image appears on the screen. Green Smart User Manual...
The images are automatically saved if automatic save option is configured as default. If it is not configured as default, click Save button to save the images. To check the image, double-click the one on the Patient List. Then, Ez3D-i / Ez3D Plus will run automatically for 3D viewing. Green Smart User Manual...
Page 126
9. Acquiring CBCT Images Left blank intentionally Green Smart User Manual...
Applied Vertical Description Option (cm) Upper Captures a whole (Maxilla) maxillary Plaster Cast. 10x8.5 Captures a whole Lower mandibular Plaster (Mandible) Cast. The 3D MODEL Scan modality is not available for EasyDent / Ez3D Plus users. Green Smart User Manual...
PC. (Touch Screen is Optional. In case the Touch Screen is included in the equipment, Touch Screen and Console Software are synchronized and display the same environmental settings.) Click MODEL button on the Main Screen. <Console Software> <Touch Screen> Green Smart User Manual...
Page 129
The values of tube voltage and current are configured automatically according to the patient's gender/age group and X-ray intensity. Click the UP/DOWN arrow to adjust kVp and mA. The dose is adjustable by ±1 kVp and ± 0.1 mA respectively. <Console Software> <Touch Screen> Green Smart User Manual...
Page 130
The Vertical Beam will be activated to make patient positioning easier. The DAP (Dose Area Product), Scan Time and Exposure Time will be displayed below the Patient Information window. Bring the Plaster Cast to the equipment. Green Smart User Manual...
Align the Mid-sagittal plane Laser Beam to the center of the Plaster Cast. (To prevent horizontal expansion of the image) Click the READY button. The X-ray exposure has not started yet. Now go to 10.4 X-ray Exposure to start the exposure. Green Smart User Manual...
On Console Software, the radiation mark turns yellow and “X-RAY” changes to “X-RAY ON.” Release the Exposure Switch when “Image capturing is completed” message appears on the screen. Remove the Plaster Cast out of the equipment. Green Smart User Manual...
Save button to save the images. To check the image, double-click the one on the Patient List. You can check the captured image with a 3 party STL viewer. Green Smart User Manual...
Page 134
10. Acquiring 3D MODEL Scan Images Left blank intentionally Green Smart User Manual...
If the Laser Beam has shut off and patient positioning cannot be performed Cause Actions to be taken Expiration of the time Press the Laser Beam button to turn on the Laser allotted for patient Beam. positioning Green Smart User Manual...
≤ set value - 20) The number "3" appears on the inverter board. - Check the input power (DC 300 V) of the inverter board. - Check that the input power (DC 300 V) is changed to less than or Green Smart User Manual...
Page 137
Error occurs during movement from the CT horizontal laser up/down-axis motor's origin position. - Check the connection lines for the motor and origin sensor. If any problem, replace the motor or sensor. H027 Error occurs during movement from the Cephalo sensor motor's Green Smart User Manual...
Page 138
Error occurs when the Exposure Switch has been pressed when the equipment is turned on. - Check the connection to the Exposure Switch and perform Reset the equipment. H102 Error occurs when there is no response to CAN communication. Green Smart User Manual...
Outer covers of equipment Wipe the unit with a dry cloth at the end of each day. Do not use cleaning agents in aerosol or spray form directly on the surface of the equipment. Green Smart User Manual...
12. Cleaning and Maintenance 12.2 Maintenance VATECH requires periodic constancy tests to ensure image quality and the safety of the patient and the operator. Only VATECH-authorized technicians can perform inspection and service for the equipment. For technical assistance, contact VATECH service center or your local VATECH representative.
Page 141
X-ray emission. Ensure that all visible labels are intact and legible. Weekly Check for possible damages to the Exposure Switch cable. Monthly Confirm that the audio message is audible throughout the exposure. Monthly Green Smart User Manual...
Page 142
12. Cleaning and Maintenance Left blank intentionally Green Smart User Manual...
Cardboard ● Paper ● X-ray Tube ● Return the Sensor Head to VATECH Sensor Head Other parts ● This dental equipment shall not be disposed of as domestic garbage materials. Clean / Disinfect / Sterilize the equipment before disassembling it and disposing of its parts.
Page 144
13. Disposing of the Equipment Left blank intentionally Green Smart User Manual...
Inherent Filtration At least 0.8 mm Al equivalent at 50 kV Tube X-ray Coverage 95 mm x380 mm at SID 550 mm Anode Heat 35 kJ Content 1:60 or more Duty Cycle (Exposure time: nterval time) Green Smart User Manual...
Mode of operation: Continuous operation with intermittent loading - Needs waiting time (at least 60 times the exposure time) before the next exposure begins. Column operation time: Max. 2 min. On / 18 min. Off (Ratio 1:9) Green Smart User Manual...
Mode / Age Option Intensity (kVp) (mA) group Hard Normal Soft Hard High Woman Normal Resolution Soft Hard Child Normal Soft PANO Examination Hard Normal Soft Hard Green Woman Normal (Optional) Soft Hard Child Normal Soft Green Smart User Manual...
Page 156
PANO Option > Insight PAN Tube Tube Gender / X-ray Mode Image Option Voltage Current Age group Intensity (kVp) (mA) Hard Normal Soft Hard PANO Examination / Woman Normal SPECIAL Examination Soft Hard Child Normal Soft Green Smart User Manual...
Page 157
Left 14.1 Standard 14.1 13.5 Right 14.1 Normal Front 14.1 11.3 Left 14.1 PANO Examination Standard 14.1 13.5 Right 14.1 Wide Front 14.1 11.3 Left 14.1 Standard 12.0 11.5 Right 12.0 Child Front 12.0 Left 12.0 Green Smart User Manual...
Page 158
Scan Time: The actual time that the equipment shoots the patient except for the initial acceleration and late deceleration stages. Exposure Time: The actual time that the patient is exposed to the X-ray emission. Green Smart User Manual...
Page 159
Soft 16.0 Hard 16.0 Child Normal 16.0 Soft 16.0 Hard 14.0 Normal 14.0 Soft 14.0 Hard 14.0 High Full Lateral Resolution Woman Normal 14.0 (Optional) / Green Soft 14.0 Hard 14.0 Child Normal 14.0 Soft 14.0 Green Smart User Manual...
Page 160
Waters’ view Normal 15.0 Soft 15.0 Hard 15.0 Green Woman Normal 15.0 Soft 15.0 Hard 15.0 Child Normal 15.0 Soft 15.0 Hard Normal Soft Hard High Carpus Resolution Woman Normal / Green Soft Hard Child Normal Soft Green Smart User Manual...
Page 161
Scan Time: The actual time that the equipment shoots the patient except for the initial acceleration and late deceleration stages. Exposure Time: The actual time that the patient is exposed to the X-ray emission. Green Smart User Manual...
Page 162
Voltage Current Intensity Group (kVp) (mA) Hard Normal Soft Hard High Woman Normal Resolution Soft Hard Child Normal 10x8.5 Soft / 10x7 Hard / 5x5 Normal Soft Hard Green Woman Normal Soft Hard Child Normal Soft Green Smart User Manual...
Page 163
Standard mode in DICOM or BMP format.) Auto Pano option is available when FOV 10x8.5 or 10x7 is selected. When selected, Auto Pano image is automatically acquired and can be seen on the EzDent-i / EasyDent Viewer. Green Smart User Manual...
Page 164
File Size (MB) 10x8.5 The above data is obtained from a computer system which is based on Intel i7-6700 and NVIDIA Geforce GTX1060 6GB. Image reconstruction time varies depending on computer specifications and/or working conditions. Green Smart User Manual...
15.2.1 DAP (Dose Area Product) The X-ray dose data is extracted from the X-ray Dose Test Report for the Green Smart. X-ray Dose Test Report for the Green Smart maintains dosimetric evaluation that the VATECH dental diagnostic system meets all requirements specified in the IEC Collateral Standard.
Page 166
15. Appendices DAP (Dose Area Product) Calculation When you need more information on DAP measurement procedures or test results for the equipment, please contact VATECH service center or your local VATECH representative and get assistance from VATECH-authorized technicians Measurement Overview...
Page 167
79 kVp / 5.0 mA / 11.0 s (Green) CBCT FOV 5x5 Mandible Adult Man 94 kVp / 8.7 mA / 11.0 s (High Resolution) CBCT FOV 5x5 Mandible Adult Man 79 kVp / 5.0 mA / 11.0 s (Green) Green Smart User Manual...
Page 168
IEC regulation and has been performed by covering each collimator region in use. Standard National Terminology Permissive Range Deviation International limits leakage at 1M from the source to Standard Leakage 100 mR in 1hr IEC 60601-1-3 Measurement Overview Green Smart User Manual...
PANO (Normal), High Resolution Distance from focal point [m] 1 ~ 2 Applied Tube Voltage Peak [kVp] Applied Tube Current [mA] Results Normal, 13.5 s [mR/hr] Direction [°] 1.5 m (3.3 ft) (4.9 ft) (6.6 ft) Green Smart User Manual...
Page 175
PANO (Insight PAN) Distance from focal point [m] 1 ~ 2 Applied Tube Voltage Peak [kVp] Applied Tube Current [mA] Results Insight PAN, 13.5 s [mR/hr] Direction [°] 1.5 m (3.3 ft) (4.9 ft) (6.6 ft) Green Smart User Manual...
Page 176
CBCT (10x8.5), High Resolution Distance from focal point [m] 1 ~ 2 Applied Tube Voltage Peak [kVp] Applied Tube Current [mA] Results FOV 10x8.5, 16.4 s [mR/hr] Direction [°] 1.5 m (3.3 ft) (4.9 ft) (6.6 ft) Green Smart User Manual...
Page 177
PHT-35LHS or shielding the location. NOTE) It is essential that the actual RF shielding effectiveness and filter attenuation of the shielded location be verified to ensure that they meet or exceed the specified minimum values. Green Smart User Manual...
Page 178
(50/60 Hz) be at levels magnetic field characteristic of a typical IEC 61000-4- location in a typical commercial or hospital environment. NOTE Uт is the a.c. mains voltage prior to application of the test level. Green Smart User Manual...
Page 179
: NOTE 1) At 80MHz and 800MHz, the higher frequency range applies. NOTE 2) These guidelines may not apply in all situations. Electromagnetic propagation is affected by absorption and reflection from structures, objects, and people. Green Smart User Manual...
Page 180
(m) can be estimated using the equation applicable to the frequency of the transmitter, where p is the maximum output power rating of the transmitter in watts (W) according to the transmitter manufacturer. Green Smart User Manual...
Page 181
] V/m. Immunity and Compliance Level IEC 60601-1-2 Actual Immunity Compliance Immunity test Level Level Test level Conducted RF 3Vrms 3Vrms 3Vrms IEC 61000-4-6 150kHz to 80MHz Radiated RF 3Vrms 3V/m 3V/m IEC 61000-4-3 80MHz to 2.5GHz Green Smart User Manual...
Fig.1. Eleven discrete adolescent skeletal maturational indicators (SMI’s), covering the entire period of adolescent development, are found on these six sites (Fig.1 orange circles). [Fig1. Site of skeletal maturity indicators] Green Smart User Manual...
Page 183
2. Third finger – middle phalanx 3. Fifth finger – middle phalanx B. Ossification 1. Adductor sesamoid of thumb C. Capping of epiphysis 1. Third finger –distal phalanx 2. Third finger –middle phalanx 3. Fifth finger – middle phalanx Green Smart User Manual...
Page 184
(orange circle). If not, then the applicable SMI will be one of those associated with early epiphyseal widening rather than capping. If the sesamoid is visible, then either the sesamoid or an SMI based on capping or fusion will be applicable. Green Smart User Manual...
Page 185
15. Appendices Green Smart User Manual...
Direct the patient to swallow and note the flat position of the tongue. Request that the patient sucks in the cheeks, pushing the tongue into the correct flat position against the palate and maintain this position throughout the exposure. Green Smart User Manual...
Page 187
All panoramic x-ray machines have guidelines to assist with positioning the dental arches within the three dimensions of the focal trough, an area where the anatomical structures will be imaged in relative clarity. Most panoramic x-ray Green Smart User Manual...
Page 188
(Figure 2). Incorrectly positioning the patient in any of these three dimensions will produce unique and distinct radiographic image errors (Table 1). Green Smart User Manual...
Page 189
The manufacturer's instructions for directing the laser light beam at a predetermined tooth or interproximal space usually apply to adult patients. These instructions may need to be modified for the pediatric patient with primary or mixed dentition. Green Smart User Manual...
Page 190
Pediatric patients may find looking at themselves in the mirror entertaining and a fun way to participate in the process. Green Smart User Manual...
Page 191
(Figure 6). Depending on the severity of the downward position, the vertebrae may also curve inward and appear superimposed over the condyles, and the hyoid bone may be superimposed over the mandible blocking a clear view of the erupted and unerupted mandibular teeth. Green Smart User Manual...
Page 193
American Academy of Oral and Maxillofacial Radiology. Oral Surg Oral Med Oral Pathol. 2001;91:498-511. 9. McDonald RE, Avery DR, Dean JA. Dentistry for the Child and Adolescent. 8th ed. St. Louis: Green Smart User Manual...
Page 194
A routine survey by radiographs, except for caries, has not been shown to provide sufficient information to be justified considering the balance between cost (radiation and resources) and benefit. Green Smart User Manual...
Page 195
6 years of age undergoing head and neck multi-detector CT (MDCT) examinations. Materials and methods: Radiation doses were measured with small-sized silicon photodiode dosimeters that were implanted at various tissue and organ positions within a standard 6-year-old anthropomorphic phantom. Organ and effective doses of Green Smart User Manual...
Page 196
CT was approximately the same as the diagnostic reference level (DRL) in the 2003 UK survey. 2) Website For additional information on pediatric X-ray imaging, please refer to the websites below. http://www.fda.gov/radiation- emittingproducts/radiationemittingproductsandprocedures/medicalimaging/ucm298899.htm http://www.imagegently.org/ Green Smart User Manual...
Liquid Crystal Display Light-Emitting Diode Metal Artifact Reduction MPSO Multiple Portable Socket-Outlet Object to Detector Distance Posterior / Anterior Radio Frequency Region of Interest Source to Image Receptor Distance Signal Input Part Signal Output Part Submento-Vertical Green Smart User Manual...
Page 198
15. Appendices Stereo Lithography Temporomandibular Joint Ultra High Definition Green Smart User Manual...
Page 199
No part of this manual may be reproduced, transmitted, or transcribed without the expressed written permission of the manufacturer. We reserve the right to make any alterations which may be required due to technical improvement. For the most current information, contact your VATECH representative. Tel: (+82) 1588-9510 Email: gcs@vatech.co.kr Website: www.vatech.co.kr...
Need help?
Do you have a question about the GREEN SMART and is the answer not in the manual?
Questions and answers
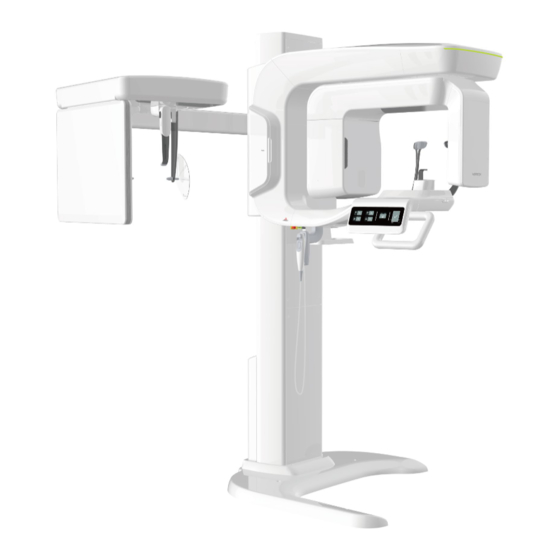
on the vatech Green CT2 machine; where do I line up the horizontal laser line on the patient's face for a 5x5 LFOV CBCT