Table of Contents
Advertisement
Advertisement
Table of Contents

Related Manuals for Vatech EzSensor


Summary of Contents for Vatech EzSensor
- Page 1 EzSensor User Manual...
- Page 2 Attention For improvement of product performance, supplementation, or follow-up of information, the contents of this manual are subject to change without prior notice. Please note that our company will have no responsibility for accidental damage nor be obligated to perform warranty service for any damage to equipment due to user error, which is a result to properly follow the contents of this manual..
- Page 3 Before each usage, check the outer surface of the EzSensor for any signs of physical damage or defect. The surface of the EzSensor should have a smooth finish, with no evidence of chipping or damage.Otherwise, contact your local distributor of VATECH &...
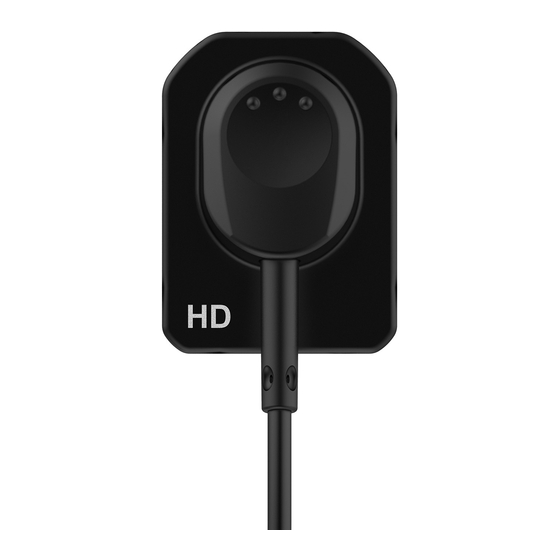
- Page 4 Indicates to the user to check the accompanying documents (this User Guide) for more information about EzSensor. Handle with care Label Location The E-WOO TECHNOLOGY logo and the following label can be found on the EzSensor device. • Medical Image Processing Unit • Model : EzSensor • SN : EZS-00000000...
-
Page 5: Table Of Contents
................................11 2.2. Specifications ...................................11 2.3. Cable Connection & Driver Installation ..........................14 2.4. Installation of the EzSensor Holder ................................3. SOFTWARE SETUP AND USAGE ...................20 3.1. Installation of EasyDent V4 ..............................20 3.2. Image Acquisition with EzSensor ........................ -
Page 6: Introduction
The EzSensor includes a detachable holder that can be mounted to a wall or other stable surface. EzSensor is available in two sizes(1.5 and 1.0). Size 1.0 is suitable for children, while size 1.5 is appropriate for adult patients. - Page 7 1. Introduction < Table 1. Specifications > Parameter Description Detector Structure Low Noise Hybrid CMOS 1.14 x 1.52 x 0.19 inch Dimension(W x L x T) (29.2 x 38.7 x 4.9 mm) 0.035 mm Pixel Pitch 686 x 944 pixels Active Pixel Array (24.01 x 33.04 mm) 4096...
-
Page 8: System Components
1. Introduction 1.2. System Components The EzSensor device installer should check the following items listed in the table below before system installation. If the serial numbers of the individual parts do not match, do not install the system and contact your local distributor or agent for support. - Page 9 1. Introduction 2. Control Box Provides power for the sensor, timing and synchronization of sensor signals, signal pre-amplification, analogue/digital signal conversion, USB port interface and optical insulation of all connections. 3. USB Cable(3M) Used to transmit output signal from the control box to the computer. 4.
- Page 10 1. Introduction 6. EasyDent V4 Installation CD 7.DriverInstallationCD...
-
Page 11: Cone Indicator (Optional)
1. Introduction 1.3. Cone indicator (Optional) The cone indicator is an intraoral positioning device specifically designed to support and align the sensor with the X-ray source when positioning along the upper or lower jaw. Please refer to the appendix for more information. (Pages 46 ~ 48) -
Page 12: Hardware Installation
Installation 2. Hardware Installation 2.1. General Information To operate the intraoral sensor, you need to install EasyDent V4 and the EzSensor driver. 2.2. Specifications We cannot guarantee that EasyDent V4 will work properly with an unregistered copy of Microsoft Windows. Therefore, you should use registered, genuine version of Microsoft Windows. - Page 13 2. Hardware Installation 2.2.2. EzSensor Driver Setup This step is necessary for the installation of EzSensor. Calibration data for the EzSensor will be installed along with the Windows device driver. Step 1 Insert the EzSensor Driver Installation CD in the CD-ROM.
- Page 14 2. Hardware Installation Step 3 Select the EzSensor feature that you want to install. Check ‘EzSensor 1.5’ or ‘EzSensor 1.0’ and then click the ‘Next’ button. Step 4 The Installshield Wizard will start configuring the installation parameters you have chosen.
-
Page 15: Cable Connection & Driver Installation
2. Hardware Installation 2.3. Cable Connection & Driver Installation Do not connect the EzSensor and USB cable to your computer until you have successfully installed the setup program. Be sure to connect the EzSensor module to the control box before connecting the USB cable to your computer. - Page 16 2. Hardware Installation Step 3 Connect the USB cable connector to the USB 2.0 port on the PC. Step 4 After connecting the USB Cable to the USB 2.0 port on the PC, the ‘Found New Hardware Wizard’ will appear. If the ‘Found New Hardware Wizard’...
- Page 17 2. Hardware Installation Step 5 Select ‘include this location in the search’. Click ‘Browse’, and then select ‘EzSensor100’ or ‘EzSensor150’ Folder. And then click ‘Next’ button. Step 6 If the ‘Hardware Installation’ window appears, click ‘Continue Anyway’...
- Page 18 Confirmation of Driver installation at the Device Manager. Method of Confirmation : Settings → Control Panel → System → Hardware → Device manager Select the ‘Vatech HDS Driver’, located under Imaging Devices. You should see the message, “This device is working properly”.
- Page 19 2. Hardware Installation...
-
Page 20: Installation Of The Ezsensor Holder
2.4. Installation of the EzSensor Holder The EzSensor holder is used for mounting the EzSensor to the wall when it is not in use. When choosing where to install the EzSensor, locate an area that offers easy access and visibility during patient examination. -
Page 21: Software Setup And Usage
3. Software Setup and Usage 3. Software Setup and Usage 3.1. Installation of EasyDent V4 Step 1 Insert the EasyDent installation CD in the CD-ROM drive. Setup should start automatically. If it does not, click Start → Run, and type D:\EasyDentV4\setup.exe. - Page 22 3. Software Setup and Usage Step 3 Preparing the installation. Step 4 The ‘EasyDent V4 InstallShield Wizard’ will appear. Click ‘Next’ button.
- Page 23 3. Software Setup and Usage Step 5 Select the setup type that best suits your needs. Click ‘Next’ button. Basic : Installs the basic version of Easydent V4 CD-Publishing : Installs the basic version of EasyDent V4 along with CD-Publishing capabilities.
- Page 24 3. Software Setup and Usage Step 7 Now you are ready to install. If you would like review any of your installation settings, click ‘Back’, To proceed with the installation, click ‘Install’. Click ‘Cancel’ to exit the wizard. Step 8 Installing EasyDent V4.
- Page 25 3. Software Setup and Usage Step 9 MSDE(Microsoft SQL server Desktop Engine) is installed automatically. Step 10 Choose ‘No, I will restart my computer later’, and then click ‘Finish’.
-
Page 26: Image Acquisition With Ezsensor
Usage 3.2. Image Acquisition with EzSensor ① Turn on the computer that has the EzSensor software installed (EasyDent v4 – Refer to 3.2). ② Set the required X-ray parameters (exposure time, etc.) on the X-ray source. Put a new disposable cover on the EzSensor. -
Page 27: Running The Easydent V4
3. Software Setup and Usage 3.3. Running the EasyDent V4 3.3.1. Patient Registration Step 1 Turn on the PC. Run EasyDent V4. Click ‘Patient ( )’ icon to register a new patient. - Page 28 3. Software Setup and Usage 3.3.2. Normal Mode Step 1 Start EasyDent by clicking the EasyDent V4 Viewer on the desktop. )’ button. Search and enter the appropriate patient information and then click the ‘Sensor(...
- Page 29 3. Software Setup and Usage Step 2 Select your capture device. Please click ‘EzSensor 1.5’ then choose the image type. ① HC (Default) : High Contrast ② MC : Middle Contrast ③ LC : Low Contrast ④ HC_N : High Contrast (New Image processing) ⑤...
- Page 30 3. Software Setup and Usage Step 3 Select the tooth position and then click the ‘Capture’( ) button.
- Page 31 3. Software Setup and Usage Step 4 Expose the X-ray after the “Please expose X-ray” message appears. The message, “Optimizing Image… Please wait” appears momentarily while the image is being optimized. The image will appear after optimization is complete. Step 5 Click the ‘DB SAVE( )’...
- Page 32 3. Software Setup and Usage 3.3.3. Multi-Shot Step 1 Click the ‘MULTI-SHOT ( )’ button. The system will get ready to acquire an X-ray image. Step 2 Expose the X-ray after the “Press the X-ray (shot) button” message appears.
- Page 33 3. Software Setup and Usage Step 3 The message, ‘Optimizing Image… Please wait’ will appear momentarily while the image is being optimized. The image will appear after optimization is complete. Step 4 Expose the X-ray again for a subsequent shot.
- Page 34 3. Software Setup and Usage Step 5 If you want to acquire more images, continue to expose the x-ray when the ‘Press the X-ray (shot) button’ message appears. If you want to finish, click the ‘Finish’ button. Step 6 Click and drag the image to its appropriate position.
- Page 35 3. Software Setup and Usage Step 7 Click ‘DB SAVE ( )’ to save the images. Step 8 lick the ‘MULTI-SHOT( )’ button again to exit the Multi-shot Mode.
-
Page 36: Maintenance
USB cable or the sensor cable connectors. After cleaning the surface of the EzSensor, use a clean lint-free cloth to dry the system, as needed, until the surface is clean. -
Page 37: Warranty
Any item returned to the factory, through an authorized dealer VATECH & E-WOO, will be repaired or replaced at our option at no charge provided that our inspection indicates it to have been defective. -
Page 38: Appendix
Appendix Appendix 1. LED Indicators The EzSensor Hardware Controller has two LED indicators that show its functional status. The location of the LED lights is shown in the following illustration and described in Table 3. LED 1 LED 2 < Table 3. Description of LED Indicators >... -
Page 39: X-Ray Exposure Guid
Appendix 2. X-ray Exposure Guide < Table 4. Detailed Exposure Guidance Table> Ref. 60kvp 60kVp 65kVp Exposure condition Dose Signal Level Patient Adult Adult Adult Cone to skin ESX- AnyRay VX 70 Series Section Filter Al filter Approximate Exposure Time Upper Jaw/ 2800... - Page 40 Appendix The X-ray dose required for image acquisition can vary depending on the X- ray source and environmental circumstances. You must maintain the exposure time and change the kVp and mA values according to the signal level. In addition, if the X-ray source and the distance to the sensor were changed during the initial installation, the distance (from cone to detector) must be changed to the 80mm setting.
- Page 41 Appendix How to optimize the exposure conditions? Position the EzSensor and the X-ray source, as shown below. The distance between the cone and the detector should be 80mm (8cm). Please align the X-ray source over the sensor. 1. Distance: 80mm(8cm) (from cone to detector) 2.
- Page 42 Appendix Follow the steps below: [Step 1] Click the ‘Calibration’ tab. [Step 2] Click the ‘Get Bright’ button for the exposure time. ; Refer to ‘Table 4. Detailed Exposure Guidance Table’. [Step 3] Check the command window.
-
Page 43: Error Code
Appendix 3. Error Code 1. Code 0 ● Message : USB device driver is not installed. ● Solution : Please install device driver again. 2. Code 1 ● Message : USB driver can't detect connected sensor device. Check connection. ● Solution : Check and re-connect USB cable. - Page 44 9. Code 8 ● Message : Bad Pixel's map correction error. ● Solution : Restore the EzSensor’s calibration data from the installation CD or re-calibrate the sensor. Contact Customer Service. 10. Code 9 ● Message: Bad Pixel's map correction error.
- Page 45 Appendix 17. Code 16 ● Message: Image process library was damaged. ● Solution: Please re-instal acquisition software. 18. Code 17 ● Message : Can't load 'EzSensor150.dll'. ● Solution : Please re-install acquisition software. 19. Code 18 ● Message : Requre 'EzSensor150.DLL' was damaged. ●...
-
Page 46: Troubleshooting
Appendix 4. Troubleshooting In case you experience any problems regarding the EzSensor system during operation, please refer to the troubleshooting table below for corrective actions. If the problem persists, please contact your local distributor of VATECH & E-WOO products. < Table 5. Troubleshooting Table >... - Page 47 Appendix 4.1. How to use the cone indicator ① Cone indicator for molars ② Cone Indicator for anterior...
- Page 48 Appendix ● Usage ① Insert the sensor into the disposal bag provided. ② Pass the sensor through the cone ring, into the sensor holder. ③ Fix the sensor firmly to the sensor holder. ④ Put the sensor cable in the cable-holder, located at the side of the bottom block.
- Page 49 Appendix ⑤ Fasten the sensor cable on the cone ring with the cable hook. ⑥ Put the cushion cap on the top of the bottom block.
Need help?
Do you have a question about the EzSensor and is the answer not in the manual?
Questions and answers