Table of Contents
Advertisement
Quick Links
Advertisement
Table of Contents

Related Manuals for Brunner cellular


Summary of Contents for Brunner cellular
- Page 1 Assembly instructions Design: Archirivolto...
- Page 2 Thank you for buying a quality Brunner product from the cellu- lar series. The versatile furniture in our cellular range is perfect if you are looking to furnish small quiet areas and workspaces in large halls and waiting areas. Available with or without panels, these versatile chairs and benches can be used in a myriad of ways.
-
Page 3: Table Of Contents
CELLULAR ASSEMBLY INSTRUCTIONS Contents Overview of variants Scope of delivery of upholstered easy chair with panels CE1100 Scope of delivery of upholstered sofa with panels CE2300 Assembly instructions for upholstered easy chair and sofa with panels Scope of delivery of desk with panels CE1070... -
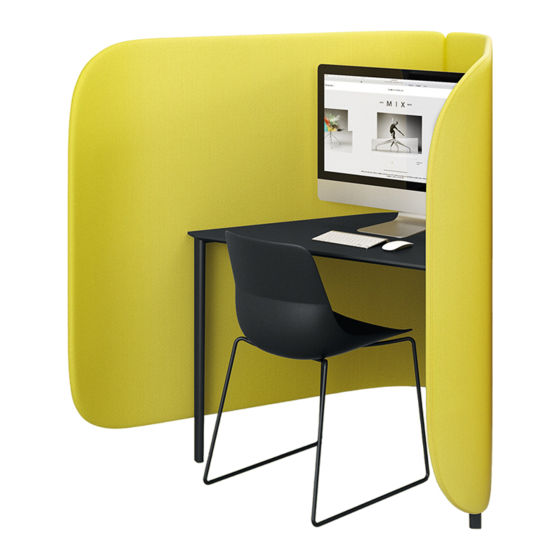
Page 4: Overview Of Variants
OVERVIEW OF VARIANTS CE0100 CE1100 CE0300 CE2300... - Page 5 OVERVIEW OF VARIANTS CE1070 CE1080 CE4010 CE4030 CE3100 CE3200 Overview of variants 4 . 5...
-
Page 6: Scope Of Delivery Of Upholstered Easy Chair With Panels Ce1100
SCOPE OF DELIVERY OF UPHOLSTERED EASY CHAIR WITH PANELS CE1100 Included in scope of delivery: 12 x 5x30 Spax screws 4 x brackets 1 x M5x35 screws 4 x M5x16 screws 1 x left-hand panel 1 x right-hand panel 1 x easy chair... -
Page 7: Scope Of Delivery Of Upholstered Sofa With Panels Ce2300
SCOPE OF DELIVERY OF UPHOLSTERED SOFA WITH PANELS CE2300 Included in scope of delivery: 21 x 5x30 Spax screws 7 x brackets 2 x M5x35 screws 7 x M5x16 screws 1 x left-hand panel 1 x interim panel 1 x right-hand panel 1 x sofa Scope of delivery of upholstered easy chair and sofa with panels 6 . -
Page 8: Assembly Instructions For Upholstered Easy Chair And Sofa With Panels
ASSEMBLY INSTRUCTIONS FOR UPHOLSTERED EASY CHAIR AND SOFA WITH PANELS ASSEMBLY STEP 1 Hook the right-hand panel into the pre-assembled fixture on the back right of the upholstered easy chair, taking care not to press down. ASSEMBLY STEP 2 Then, hook the left-hand panel into the corresponding fixture on the back left of the upholstered easy chair, again taking care not to press down. - Page 9 ASSEMBLY INSTRUCTIONS FOR UPHOLSTERED EASY CHAIR AND SOFA WITH PANELS ASSEMBLY STEP 3 Gently push the top edges of the two panels apart and position the M5x35 screw in the corresponding thread in the left- hand panel. Tighten the screw until it is approx. 10 mm away from the panel. ASSEMBLY STEP 4 Now lift the right-hand panel up slightly and hook the screw from the left-hand panel into the recess in the right-hand panel to attach them to one another.
- Page 10 ASSEMBLY INSTRUCTIONS FOR UPHOLSTERED EASY CHAIR AND SOFA WITH PANELS ASSEMBLY STEP 5 Now push the two panels down so they are anchored in the fixtures on the upholstered easy chair. ASSEMBLY STEP 6 Carefully tip the upholstered easy chair back together with the panels and place the furniture on a soft and clean surface, such as a blanket.
- Page 11 ASSEMBLY INSTRUCTIONS FOR UPHOLSTERED EASY CHAIR AND SOFA WITH PANELS ASSEMBLY STEP 7 Push the panel to the side of the upholstered easy chair and align the bracket with the chair. Fasten the four brackets to the base of the upholstered easy chair using three 5x30 Spax screws for each. Make sure the first panel is fastened before moving on to the second panel.
-
Page 12: Scope Of Delivery Of Desk With Panels Ce1070
SCOPE OF DELIVERY OF DESK WITH PANELS CE1070 Included in scope of delivery: 2 x M6x16 screws 4 x M6x25 screws 4 x 4.5x13 Spax screws 16 x M6x18 screws 2 x M8x20 screws 2 x panel attach- 1 x connecting hook ments 2 x M5x16 screws 4 x M6x45 screws... -
Page 13: Scope Of Delivery Of Desk With Panels Ce1080
SCOPE OF DELIVERY OF DESK WITH PANELS CE1080 Included in scope of delivery: 2 x M6x16 screws 4 x M6x25 screws 4 x 4.5x13 Spax screws 16 x M6x18 screws 2 x M8x20 screws 2 x panel attach- 1 x connecting hook ments 2 x M5x16 screws 4 x M6x45 screws... -
Page 14: Scope Of Delivery Of Desk With Panels Ce4010
SCOPE OF DELIVERY OF DESK WITH PANELS CE4010 Included in scope of delivery: 2 x M6x16 screws 6 x M6x25 screws 4 x 4.5x13 Spax screws 22 x M6x18 screws 2 x M8x20 screws 2 x panel attach- 2 x connecting hooks ments 4 x M5x16 screws 4 x M6x45 screws... -
Page 15: Scope Of Delivery Of Desk With Panels Ce4030
SCOPE OF DELIVERY OF DESK WITH PANELS CE4030 Included in scope of delivery: 6 x M6x16 screws 18 x M6x25 screws 12 x 4.5x13 Spax screws 66 x M6x18 screws 6 x M8x20 screws 4 x panel attach- 6 x connecting hooks ments 12 x M5x16 screws 8 x M6x45 screws... -
Page 16: Scope Of Delivery Of Desk With Panels Ce3100
SCOPE OF DELIVERY OF DESK WITH PANELS CE3100 Included in scope of delivery: 3 x M6x16 screws 12 x M6x25 screws 4 x 4.5x13 Spax screws 44 x M6x18 screws 2 x M8x20 screws 3 x panel attach- 4 x connecting hooks ments 8 x M5x16 screws 6 x M6x45 screws... -
Page 17: Scope Of Delivery Of Desk With Panels Ce3200
SCOPE OF DELIVERY OF DESK WITH PANELS CE3200 Included in scope of delivery: 3 x M6x16 screws 12 x M6x25 screws 4 x 4.5x13 Spax screws 44 x M6x18 screws 2 x M8x20 screws 3 x panel attach- 4 x connecting hooks ments 8 x M5x16 screws 6 x M6x45 screws... -
Page 18: Base And Panel Pre-Assembly
BASE AND PANEL PRE-ASSEMBLY Affix the connecting hook to the pre-drilled place on the base. Secure with screws (M5x16). Affix the panel attachment to the pre-drilled place on the panel. Secure with screws (M6x45). -
Page 19: Assembly Instructions For Desk With Panels
ASSEMBLY INSTRUCTIONS FOR DESK WITH PANELS The following steps also apply to models CE1070, CE1080, CE4010, CE4030, CE3100 and CE3200 ASSEMBLY STEP 1 Insert the legs into the recesses provided on the table and tablet and secure them using the SeKo M6x18 screws provided. Assembly instructions for desk with panel 18 . - Page 20 ASSEMBLY INSTRUCTIONS FOR DESK WITH PANELS ASSEMBLY STEP 2 To connect the table to the tablet, stand the table up and place the tablet on the protruding base. Then tighten all the screws.
- Page 21 ASSEMBLY INSTRUCTIONS FOR DESK WITH PANELS ASSEMBLY STEP 3 To install the panels, place the panel so that the plastic block on the inside of the panel is level with the front leg of the table. Slide the plastic block into the groove on the table leg. You can then put the screws (LiFlaKo M6x25) in the upper section of the table leg and screw them lightly.
- Page 22 ASSEMBLY INSTRUCTIONS FOR DESK WITH PANELS ASSEMBLY STEP 4 All of the other panels are assembled in the same way. Hook the next panel onto the first one fitted then use the screws to secure to the table legs and tighten slightly.
- Page 23 ASSEMBLY INSTRUCTIONS FOR DESK WITH PANELS See assembly step 4 Assembly instructions for desk with panel 22 . 23...
- Page 24 ASSEMBLY INSTRUCTIONS FOR DESK WITH PANELS Bottom view Attach the reinforcement slat to the table legs 2 x SeKo M8x20 2 x SeKo M8x20 5 x RuKo Spax 4.5x13 ASSEMBLY STEP 5 Fitting the reinforcement slat underneath the table top. Use the 2 x SeKo M8x20 screws to screw the reinforcement slat to the table legs and tighten with RuKo Spax 4.5x13 on the table top.
- Page 25 ASSEMBLY INSTRUCTIONS FOR DESK WITH PANELS ASSEMBLY STEP 6 The inserted plastic blocks can now be tightened. Tighten the still loose connection first with a screw clamp then, using a drill, drill a hole (5 mm in diameter) in the plastic block and secure it to the table leg with an M6x16 screw. All of the other still loosely positioned screws can then be securely attached.
-
Page 26: Further Information
GENERAL INFORMATION ABOUT ASSEMBLY The assembly instructions provide general guidelines for assembling your cellular furniture · The steps described are to be followed for all cellular chairs and tables · The assembly tools suggested are simply recommendations from Brunner GmbH ·... -
Page 27: Care Instructions
CARE INSTRUCTIONS Careful and proper cleaning of the surfaces of your cellular table is particularly important to keep it in optimum condition for as long as possible. The following cleaning instructions are only intended as a recommendation. Brunner GmbH will not be held liable for damage to the finish caused by improper cleaning. - Page 28 CARE INSTRUCTIONS General cleaning of table tops As a general rule, we recommend cleaning with a lint-free cloth dampened with pure water without any added cleaning agents or furniture polish. Afterwards, dry off the surface of the table with a clean, soft cloth. Never use silicone- based polishes, strong ammonia, alcohol or plasticiser-based cleaning agents.
- Page 29 Care instructions 28 . 29...
-
Page 31: Notes
We reserve the right to technical changes, errors and colour deviations. Some models are displayed as special versions that are subject to additional costs. Imprint Product design: Archirivolto Illustrations: Andreas Stapel . Brunner GmbH Text: Brunner GmbH Design: Brunner GmbH... - Page 32 © Brunner GmbH 2019 . Im Salmenkopf 10 . 77866 Rheinau, Germany T. +49 78 44 40 20 . F. +49 78 44 40 28 00 . info@brunner-group.com...
Need help?
Do you have a question about the cellular and is the answer not in the manual?
Questions and answers