Table of Contents
Advertisement
Quick Links
Advertisement
Table of Contents

Subscribe to Our Youtube Channel
Related Manuals for Brunner ray


Summary of Contents for Brunner ray
- Page 1 Assembly instructions Design: jehs+laub...
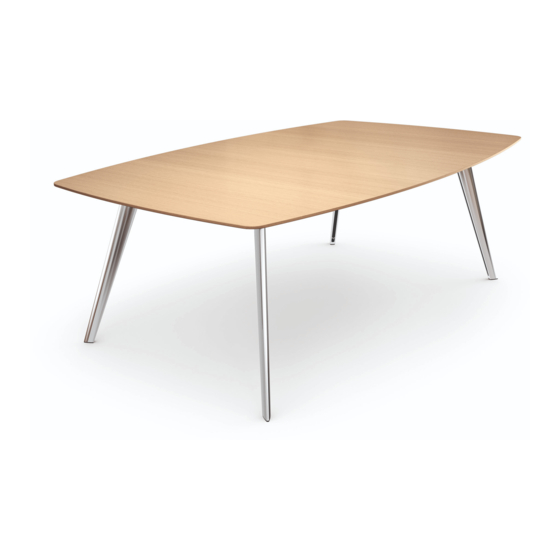
- Page 3 Thank you for buying a quality Brunner product from the ray table series. The tables and conference tables have a versatile range of uses and offer the right model and features for every need. The individual table components can be quickly and easily connected.
-
Page 5: Table Of Contents
Assembly of a table with fixed individual legs Assembly of a table system with system legs Electrification and cabling Electrification and cabling for a ray table conference table system Guiding cables horizontally using a cable channel Guiding cables horizontally using plastic clips... -
Page 6: Basic Structural Principle Of The Table Frame
BASIC STRUCTURAL PRINCIPLE OF THE TABLE FRAME The two exploded-view drawings below illustrate the principle structure of different ray table frames. The first figure shows the arrangement of individual components of an individual leg table for small table top sizes and without electrification options. -
Page 7: Overview Of Variants
OVERVIEW OF VARIANTS Conference table with fixed individual legs Model 9310 Table top shapes: 9310/1 Circle 9310/0 Square Ø 100 cm (with 3 table legs); Ø 130 cm (with 4 table legs) 120 x 120 cm 9310/9 Arch 9330/9 Plectrum 130 x 130 cm 120 cm side length (3 table legs) Conference table system with visible traverse under-frame and system feet:... -
Page 8: Design Of The Leg
DESIGN OF THE LEG Design of a table with individual legs The variants of the 9310 model have an individual leg that is mounted onto the table top on-site. Design of a table with system legs The variants of the 9312 model have a system leg with a visible traverse under-frame that is mounted onto the table top on-site. -
Page 9: Notes For Assembly
NOTES FOR ASSEMBLY General notes for setup The assembly instructions provide general guidelines for assembling your ray table. · The described workflows are to be observed for all table variants and designs. · The assembly tools suggested are simply recommendations from Brunner GmbH. -
Page 10: Assembly Instructions
ASSEMBLY INSTRUCTIONS Select the correct frame type from the overview of variants (page 5) before beginning the table assembly. Assembly of a table with fixed individual legs ASSEMBLY STEP 1 Place the table top on the ground with the table surface facing down, preferably on a soft layer such as a blanket to prevent scratches. -
Page 11: Assembly Of A Table System With System Legs
ASSEMBLY INSTRUCTIONS Assembly of a table system with system legs ASSEMBLY STEP 1 Using the rubber hammer, tap the connector peg on the upper end of the leg into the designated recess in the visible traverse under-frame intended. Screw in and tighten two of the M10 screws included in delivery using the size 6 hexagon spanner with a torque of approx. - Page 12 ASSEMBLY INSTRUCTIONS ASSEMBLY STEP 3 Place the table top(s) on the frame and align it with the edges. For multi-piece table tops, connect the pieces using the fixa- tion brackets included in delivery. Position the fixation brackets in the designated depressions of the table top and tighten them using four M6x20 screws each, a size 4 hexagon spanner and a torque of approx.
- Page 13 ASSEMBLY INSTRUCTIONS ASSEMBLY STEP 5 To attach the plastic bracket, hook the upper end into Slide the plastic bracket within the rail so that the the rail of the frame and fold the other end of the screw-on point is centred over the screw socket. plastic part down toward the table top.
- Page 14 ASSEMBLY INSTRUCTIONS ASSEMBLY STEP 6 Once you have repeated the process for all screw-on points, tighten the screws one after another.
-
Page 15: Electrification And Cabling
Various profile boxes are available to choose from for electrifying your ray table conference table system. All models are delivered with a 3m supply cable as standard. When cabling your ray table conference table, you can select from the following options for guiding the cables horizontally and vertically. You can utilise a cable channel to guide the cabling horizontally. -
Page 16: Guiding Cables Horizontally Using Plastic Clips
ELECTRIFICATION AND CABLING Guiding cables horizontally using plastic clips Even without using a cable channel, the cables can be guided along the visible traverse under-frame and kept neatly stowed using the convenient plastic clips. The cables are clipped in on the inside of the plastic clip one after another. Guiding cables vertically The cables can be guided to the floor completely out of sight using a groove in the table leg. -
Page 17: Care Instructions
CARE INSTRUCTIONS Careful and proper cleaning of the surfaces of your ray table is particularly important to keep it in optimum condition. The following cleaning instructions are only intended as a recommendation. Brunner GmbH will not be held liable for damage to the finish caused by improper cleaning. -
Page 18: General Cleaning Of Table Tops
After lengthy and heavy use, the lacquered surface can be cleaned with a commercially available furniture polish. When doing so, please note any applicable requirements for use. Where appropriate, check the compatibility using a spot on your ray tables that is not visible. -
Page 19: Note
Some models are displayed as special versions that are subject to additional costs. Imprint Product design: jehs+laub Illustrations: Claas Ratjen . Brunner GmbH Text: Claas Ratjen . Hanne Haaf . Brunner GmbH Design: Kerstin Lamprecht. Brunner GmbH... - Page 20 © Brunner GmbH 2017 . Im Salmenkopf 10 . 77866 Rheinau, Germany T. +49 78 44. 40 20. F. +49 78 44. 40 28 00. info@brunner-group.com...
Need help?
Do you have a question about the ray and is the answer not in the manual?
Questions and answers