Table of Contents
Advertisement
Quick Links
LMF219
INSTRUCTION MANUAL
Para Español ver página 10
WE'RE HERE TO HELP
Want to watch a video that
shows how easy this is?
Watch it now at:
SANUS.com/3064
Get it right the first time!
HeightFinder
shows you
™
where to drill.
Use it now at:
SANUS.com/2850
Our live, US-based install
experts are standing by to help.
Call us at:
1-855-734-7805
Advertisement
Table of Contents

Subscribe to Our Youtube Channel
Related Manuals for LEGRAND Sanus LMF219


Summary of Contents for LEGRAND Sanus LMF219
- Page 1 LMF219 INSTRUCTION MANUAL Para Español ver página 10 WE’RE HERE TO HELP Want to watch a video that Get it right the first time! Our live, US-based install shows how easy this is? HeightFinder shows you experts are standing by to help. ™...
-
Page 2: Wall Construction
IMPORTANT SAFETY INSTRUCTIONS PLEASE READ MANUAL PRIOR TO USE – SAVE THESE INSTRUCTIONS Please read through these instructions completely to be sure you’re comfortable with this easy install process. Check your TV owner’s manual to see if there are any special requirements for mounting your TV. If you do not understand these instructions or have doubts about the safety of the installation, assembly or use of this product, contact Customer Service 1-855-734-7805. -
Page 3: Before You Begin
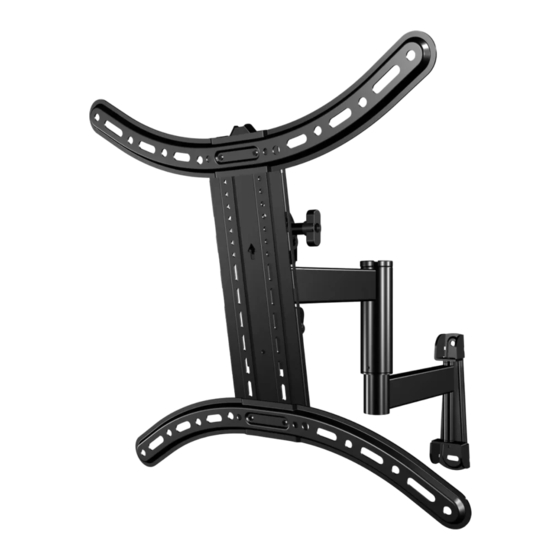
Dimensions TV INTERFACE 15.75 in 400mm 15.75 in 2.95 in MIN 400mm 75mm 2.95 in 75mm MIN TOP VIEW - EXTENDED SIDE VIEW - EXTENDED WALL PLATE WALL IS ON TOP 5° UP 50° 50° 8.21 in 6.89 in 175.1mm 208.5mm 15°... - Page 4 Supplied Parts and Hardware WARNING: This product contains small items that could be a choking hazard if swallowed. Before starting assembly, verify all parts are included and undamaged. If any parts are missing or damaged, do not return the damaged item to your dealer; contact Customer Service. Never use damaged parts! NOTE: Not all hardware included will be used.
- Page 5 STEP 1 Attach TV Bracket to TV 1.1 Select TV Screw Diameter 1.2 Select TV Screw Length and Spacers Only one screw size fits your TV. NO SPACER SPACER NEEDED • Flat Back TV • Flat Back TV • Rounded or Irregular Back TV with extra space needed [for deep inset holes or cable interference] [TV brackets NOT resting flat on your TV]...
- Page 6 Wood Stud Installation STEP 2A Attach Wall Plate CAUTION: Avoid potential personal injury or property damage! ● Drywall covering the wall must not exceed 5/8 in. (16 mm) ● Minimum wood stud size: nominal 2 x 4 in. (51 x 102 mm) actual 1½ x 3½ in. (38 x 89 mm) ●...
- Page 7 Solid Concrete or Concrete Block Installation STEP 2B Attach Wall Plate CAUTION: Avoid potential personal injury or property damage! Concrete Installation Kit CMK1 is not included ● Mount arm assembly directly onto concrete surface (no wall covering) Contact Customer Service at 1-855-734-7805 to inquire about ●...
-
Page 8: Manage Cables
STEP 3 Attach TV to Arm Assembly 3.1 Attach TV to Arm Assembly HEAVY! You may need assistance with this step. Secure the TV to the arm assembly with the locking screw To adjust the leveling of your TV, loosen the locking screw , level your TV, then tighten the locking screw CAUTION: Avoid potential personal injury or property damage! Locking screw... -
Page 9: Tilt Adjustment
TV Adjustments TILT ADJUSTMENT Your TV should adjust easily when moved, then stay in place. If your TV is too loose or too tight, adjust the side tension knob by hand. NOTE: Once your TV is in place, tighten the side tension knob to prevent unwanted movement. -
Page 10: Instrucciones Importantes De Seguridad
INSTRUCCIONES IMPORTANTES DE SEGURIDAD ESPAÑOL – – LEA TODO ESTE MANUAL ANTES DE UTILIZAR ESTE PRODUCTO GUARDE ESTAS INSTRUCCIONES ESTAMOS A SU DISPOSICIÓN PARA AYUDARLE ¿Quiere ver un video donde se muestra lo fácil que es este paso? Véalo ahora en: SANUS.com/3064 SANUS.com/2850 ¡Acierte a la primera! HeightFinder™... -
Page 11: Ajustes Del Televisor
1,3 Arme las placas de sujeción del televisor VER PÁGINA 5 1. Centre los soportes horizontales del televisor sobre el patrón de orificios del aparato y fíjelos combinando los tornillos que eligió para su televisor. NOTA Los orificios redondos en los soportes del televisor se alinean con patrones de orificios de TV estándar (VESA). - Page 12 Nor does it provide for every possible contingency in connection with the installation or use of this product. The information contained in this document is subject to change without notice or obligation of any kind. Legrand makes no representation of warranty, expressed or implied, regarding the information contained herein.
Need help?
Do you have a question about the Sanus LMF219 and is the answer not in the manual?
Questions and answers