Table of Contents
Advertisement
Available languages
Available languages
Quick Links
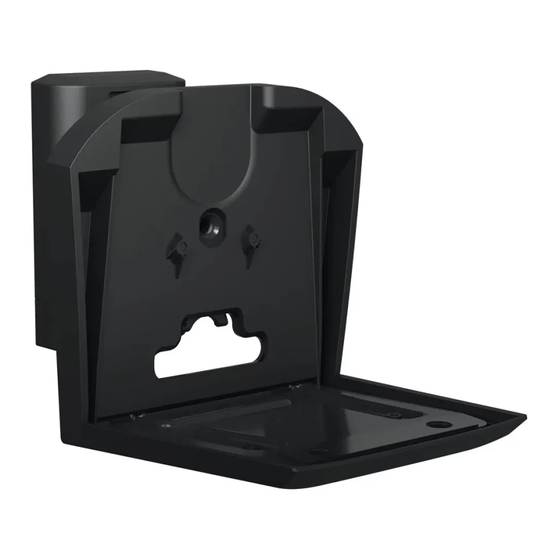
WSWM E31 and WSWM E32
Tilt & Swivel Speaker Wall Mount
For SONOS
Era 300
®
INSTRUCTION MANUAL
US: +1 (800) 359-5520 • EMEA: +31 (0) 495 580 852 • UK: +44 (0) 800 056 2853
Texto en español, página 20
Texte français page 22
™
We'll Make It Stress-Free
If you have any questions along the way, just give us a call.
We're ready to help!
Deutscher Text Seiten 24
Nederlandse tekst op pagina 26
Svensk text sida 28
Русский текст: стр. 30
中文文字说明请参见第 32 页
日本語は 34 ページ
Advertisement
Table of Contents

Related Manuals for LEGRAND Sanus WSWME31


Summary of Contents for LEGRAND Sanus WSWME31
- Page 1 WSWM E31 and WSWM E32 Tilt & Swivel Speaker Wall Mount For SONOS Era 300 ® ™ INSTRUCTION MANUAL We’ll Make It Stress-Free If you have any questions along the way, just give us a call. US: +1 (800) 359-5520 • EMEA: +31 (0) 495 580 852 • UK: +44 (0) 800 056 2853 We’re ready to help! Texto en español, página 20 Deutscher Text Seiten 24...
-
Page 2: Tools Needed
IMPORTANT SAFETY INSTRUCTIONS — PLEASE READ ENTIRE MANUAL PRIOR TO USE — SAVE THESE INSTRUCTIONS Before getting started, let’s make sure this product is perfect for you! This mount is designed to support only Sonos® Era 300™ speakers. CAUTION: Avoid potential personal injuries and property damage! •... - Page 3 Dimensions 0.22in 2.32in 5.6mm 59mm 3.50in 1.17in 0.84in 88.9mm 29.8mm 21.3mm 3.00in 6.89in 76.1mm 175.1mm 1.73in 44mm 1.97in 0.26in 50mm 6.6mm 4 deg UP TILT 4.82in 4.04in 122.4mm 102.6mm 32 deg 4.91in DOWN TILT 124.8mm 32deg 32deg...
- Page 4 Supplied Parts and Hardware WARNING: This product contains small items that could be a choking hazard if swallowed. Before starting assembly, verify all parts are included and undamaged. If any parts are missing or damaged, do not return the damaged item to your dealer; contact Customer Service.
- Page 5 STEP 2 STEP 3 Wall Plate Screw Speaker Screw STEP 4 Wall Plate Drywall / Concrete Anchor Wall Cap...
-
Page 6: Installation
STEP 1 Assemble Brackets BELOW Eye Level Installation... - Page 7 ABOVE Eye Level Installation (Speaker Upside Down)
- Page 8 STEP 2 Attach Speaker to Bracket...
- Page 10 STEP 3-A Attach Wall Plate to Wall Drywall Only Installation CAUTION: Avoid potential personal injury or property damage! ● Drywall covering the wall, must not be less than 1/2 in. (12.7 mm) 1 in. (2.5 cm) Min. 1/2 in. (12.7 mm) 3/8 in.
- Page 11 CAUTION: Avoid potential personal injury or property damage! DO NOT use power tools for this step. MUST BE firmly tightened to prevent unwanted movement of the wall plate . Ensure the wall plate is securely fastened to the wall before continuing Both screws on to the next step, but DO NOT overtighten the screws.
- Page 12 STEP 3-B Attach Wall Plate to Wall Wood Stud Installation CAUTION: Avoid potential personal injury or property damage! ● Drywall covering the wall, must not exceed 5/8 in. (16 mm) ● Minimum wood stud size: nominal 2 x 4 in. (51 x 102 mm) actual 1½ x 3½ in. (38 x 89 mm) ●...
- Page 13 CAUTION: Avoid potential personal injury or property damage! DO NOT use power tools for this step. MUST BE firmly tightened to prevent unwanted movement of the wall plate . Ensure the wall plate is securely fastened to the wall before continuing Both screws on to the next step, but DO NOT overtighten the screws.
- Page 14 Attach Wall Plate to Wall Solid Concrete or Concrete Block Installation STEP 3-C CAUTION: Avoid potential personal injury or property damage! ● Mount the wall plate directly onto the concrete surface (no wall covering) ● Minimum solid concrete thickness: 8 in. (203 mm) ●...
- Page 15 CAUTION: Avoid potential personal injury or property damage! DO NOT use power tools for this step. MUST BE firmly tightened to prevent unwanted movement of the wall plate . Ensure the wall plate is securely fastened to the wall before continuing Both screws on to the next step, but DO NOT overtighten the screws.
- Page 16 STEP 4 Mount Assembly to Wall Plate...
-
Page 18: Side To Side
Adjustments TILT DOWN SIDE TO SIDE TILT UP... - Page 19 To Remove...
-
Page 20: Instrucciones Importantes De Seguridad
INSTRUCCIONES IMPORTANTES DE SEGURIDAD: ESPAÑOL GUARDE ESTAS INSTRUCCIONES Y LEA TODO EL MANUAL ANTES DE UTILIZAR ESTE PRODUCTO. Antes de comenzar, verifiquemos que este producto sea el ideal para sus necesidades. Los soportes para altavoces fueron concebidos para sostener altavoces Sonos® Era 300™, exclusivamente. PRECAUCIÓN: Evite posibles lesiones personales y daños materiales. - Page 21 ESPAÑOL Dimensiones página 3 Piezas y elementos de sujeción suministrados página 4 ADVERTENCIA: Este producto contiene piezas pequeñas que, en caso de ser tragadas, podrían causar asfixia. Antes de comenzar a montar la unidad, verifique que dispone de todas las piezas y que se encuentran en buen estado. Si no dispone de todas las piezas o alguna está dañada, no devuelva el elemento defectuoso al distribuidor. Póngase en contacto con el servicio de atención al cliente.
-
Page 22: Consignes De Sécurité Importantes
CONSIGNES DE SÉCURITÉ IMPORTANTES FRANÇAIS – CONSERVEZ CES INSTRUCTIONS – VEUILLEZ LIRE ATTENTIVEMENT LE MANUEL AVANT D’UTILISER CE PRODUIT Avant de commencer, assurons-nous que ce produit vous convient parfaitement! Les supports sont conçus uniquement pour les haut-parleurs Sonos® Era 300™. ATTENTION : Évitez les risques de blessures corporelles ou de dommages matériels ! ●... - Page 23 FRANÇAIS Dimensions Page 3 Pièces et quincaillerie fournies Page 4 AVERTISSEMENT : Ce produit contient de petites pièces qui peuvent représenter un risque d'étouffement si elles sont avalées. Avant de commencer l'assemblage, assurez-vous qu'il ne manque aucune pièce et qu'elles ne sont pas endommagées. Si une pièce est manquante ou endommagée, contactez le service à la clientèle et non le détaillant. N'utilisez REMARQUE : jamais de pièces endommagées ! Les pièces fournies ne doivent pas nécessairement être toutes utilisées.
-
Page 24: Wichtige Sicherheitshinweise
WICHTIGE SICHERHEITSHINWEISE DEUTSCH – BEWAHREN SIE DIESE HINWEISE SORGFÄLTIG AUF – LESEN SIE VOR DEM GEBRAUCH DES PRODUKTS BITTE DAS GESAMTE HANDBUCH Stellen Sie vor Montagebeginn sicher, dass dieses Produkt für Sie geeignet ist! Die Lautsprecherständer sind nur für Lautsprecher vom Typ Sonos® Era 300™ ausgelegt. PRECAUCIÓN: Evite posibles lesiones personales y daños materiales. - Page 25 DEUTSCH Abmessungen Seite 3 Im Lieferumfang enthaltene Teile und Befestigungsmaterial Seite 4 WARNUNG: Dieses Produkt enthält kleine Teile, die beim Verschlucken zum Erstickungstod führen können. Prüfen Sie vor Montagebeginn, ob alle Teile vorhanden und unbeschädigt sind. Falls Teile fehlen oder beschädigt sind, bringen Sie das Produkt nicht zum Händler zurück, sondern wenden Sie sich an den Kundendienst. Verwenden HINWEIS: Sie niemals beschädigte Teile! Es wird nicht das gesamte mitgelieferte Befestigungsmaterial verwendet.
-
Page 26: Belangrijke Veiligheidsinstructies
BELANGRIJKE VEILIGHEIDSINSTRUCTIES NEDERLANDS – BEWAAR DEZE INSTRUCTIES – LEES DE VOLLEDIGE HANDLEIDING VOORAFGAAND AAN HET GEBRUIK Controleer voor u begint of deze wandbevestiging voor u geschikt is! De luidsprekerstandaarden zijn uitsluitend bedoeld voor de Sonos® Era 300™-luidsprekers. LET OP: Voorkom lichamelijk letsel of materiële schade! ●... - Page 27 NEDERLANDS Afmetingen pagina 3 Bijgeleverde onderdelen en materialen pagina 4 WAARSCHUWING: Dit product bevat kleine onderdelen die verstikkingsgevaar kunnen opleveren als ze worden ingeslikt. Controleer vóór de montage of alle onderdelen onbeschadigd aanwezig zijn. Mochten er onderdelen ontbreken of beschadigd zijn, breng het beschadigde item dan niet terug naar de dealer, maar neem contact op met de klantenservice. OPMERKING: Gebruik nooit beschadigde onderdelen! Niet alle bijgeleverde materialen zullen worden gebruikt.
-
Page 28: Viktiga Säkerhetsanvisningar
VIKTIGA SÄKERHETSANVISNINGAR SVENSKA – SPARA DESSA ANVISNINGAR – LÄS HELA BRUKSANVISNINGEN INNAN DU ANVÄNDER DENNA PRODUKT Innan du börjar bör du se till att den här produkten är perfekt för dig! Högtalarstativen är endast utformade för Sonos® Era 300™-högtalare. FÖRSIKTIGT: Undvik eventuella personskador och materiella skador! ●... - Page 29 SVENSKA Mått sidan 3 Me dföljande delar och monteringstillbehör sidan 4 VARNING: Den här produkten innehåller små delar som kan utgöra kvävningsrisk om de sväljs. Innan du påbörjar hopmonteringen ska du kontrollera att alla delar finns med och är intakta. Om någon del saknas eller är skadad ska du inte returnera den skadade produkten till din återförsäljare, utan vända dig direkt till OBS: kundtjänst.
-
Page 30: Важные Инструкции По Технике Безопасности
ВАЖНЫЕ ИНСТРУКЦИИ ПО ТЕХНИКЕ БЕЗОПАСНОСТИ РУССКИЙ – СОХРАНИТЕ ЭТИ ИНСТРУКЦИИ – ПЕРЕД ЭКСПЛУАТАЦИЕЙ ИЗДЕЛИЯ ПОЛНОСТЬЮ ПРОЧТИТЕ ДАННОЕ РУКОВОДСТВО Перед началом установки необходимо убедиться, что это изделие подходит для вашего телевизора! Стойки для колонок предназначены только для колонок Sonos® Era 300™. ВНИМАНИЕ! Соблюдайте... - Page 31 Размеры РУССКИЙ стр. 3 Поставляемые комплектующие и крепежные элементы стр. 4 ПРЕДУПРЕЖДЕНИЕ! В составе изделия есть мелкие детали, которые могут вызвать удушье при проглатывании. Перед сборкой убедитесь, что все детали имеются в наличии и не повреждены. Если какая-либо деталь отсутствует или повреждена, не возвращайте изделие дилеру; обратитесь в центр обслуживания клиентов. ПРИМЕЧАНИЕ.
- Page 32 重要安全说明 中文 – 保存这些说明 – 使用本产品之前,请阅读完本说明书 在开始安装之前,我们首先来确认此产品是否适合您! 此扬声器支架是为支承 Sonos® Era 300™ 扬声器。 警告: 避免潜在人身伤害或财产损毁! ● 请参阅扬声器的用户手册,检查其中对于扬声器的安装是否规定了任何特殊要求。 ● 请完整浏览这些说明,确保您完全理解此简便安装流程。 ● 请勿将此产品用于制造商明确指定以外的其他目的。 ● 对因不当安装或不当使用而造成的损失或伤害,制造商不承担任何责任。 ● 墙壁的承重力必须至少达到扬声器和墙壁支架总重量的五倍。 ● 如您不理解这些说明,或对本产品的安全安装、拆卸或使用存有疑问,请拨打下列电话联系客户服务部。 重量限制 4.5 kg 磅 必需的工具 3 mm 10 mm (3/8 10 mm (3/8 (1/8 in.) in.) in.) 墙柱...
- Page 33 中文 尺寸 第 3 页 配套零件和配件 第 4 页 警告: 此产品包含若吞咽可能引致窒息危险的小部件。在开始装配以前,先确定所有零件均已提供且完好无损。如果有零件缺失或受损,请勿将受损零件返回至经销商;请联系客户服务 注: 部。切勿使用受损零件! 并非包含的所有配件均要使用。 显示的数量是针对一个扬声器立场。 步骤 1 安装音箱吊架 第 6 页 右边向上 。 上下翻转 。 步骤 2 安装墙壁支架到扬声器 第 8 页 步骤 3-A 安装壁板到墙壁 第 10 页 壁板选项 警告: 注意: 避免潜在人身伤害或财产损毁!...
- Page 34 安全のための重要な説明 日本語 – この説明書を保管しておいてください – 本製品を使用する前に、説明書全体をよくお読みください 作業を始める前に、この製品がお使いのスピーカーに適しているかどうかを確認します。 このスピーカーマウントは、Sonos Era 300™ スピーカー ® 注意: 負傷したり壁面を傷付けたりしないように注意してください。 ● また、お使いのスピーカー特有の要件があるかどうかを、スピーカーの取扱説明書で確認してください。 ● 取り付け作業は難しくありませんが、必ずこの説明書を最後まで読み、手順をすべて理解してください。 ● メーカーが明確に指定している以外の目的で本製品を使用しないでください。 ● メーカーは、不適切な組み立てや使用によって起きた破損または負傷に対して責任を負いません。 ● スピーカーを掛ける壁は、スピーカーとマウントの合計重量の5倍の重量に耐えられなければなりません。 ● この説明書に不明な点がある場合や、この製品の取り付け、組み立て、使用の安全性について疑問がある場合は、 のカスタマーサービスにお問い合わせください。 重量制限 4.5 kg ポンド 必要なツール 10 mm 10 mm 3 mm (3/8 インチ) (3/8 インチ)...
- Page 35 寸法 日本語 3 ぺージ 付属している部品およびハードウェア 4 ぺージ 警告: 本製品には、誤って飲み込むと窒息する危険性のある、小さな部品が含まれています。 組み立て始める前に、部品がすべて揃っており、破損していないことを確認してください。足りない部品や破損している部品がある場合は、販売店に返品せずに、カスタマーサービスま 注記: でご連絡ください。破損した部品は絶対に使用しないでください。 付属の金具をすべて使用するわけではありません。 示された量は、1つのスピーカースタンド用です。 手順 1 スピーカーブラケットの取り付け 6 ページ 右サイドアップ 逆さまに 。 。 手順 2 ウォールマウントをスピーカーに取り付ける 8 ページ 手順 3-A ウォールプレートを壁面に取り付ける 壁板オプション 10 ぺージ 注意: 注意: 負傷したり壁面を傷付けたりしないように注意してください。この手順には、電動 負傷したり壁面を傷付けたりしないように注意してください。 工具を使用しないでください。両方のネジ は、ウォールプレート の不必要な動きを...
- Page 36 EMEA: +31 (0) 495 580 852 Legrand AV Inc. and its affiliated corporations and subsidiaries (collectively, “Legrand”), intend to make this manual accurate and complete. However, Legrand AV makes no claim that the information contained herein covers all details, conditions, or variations. Nor does it provide for every possible contingency in connection with the installation or use of this product. The information contained in this document is subject to change without notice or obligation of any kind.
Need help?
Do you have a question about the Sanus WSWME31 and is the answer not in the manual?
Questions and answers