
Related Manuals for Metos WD-4


Summary of Contents for Metos WD-4
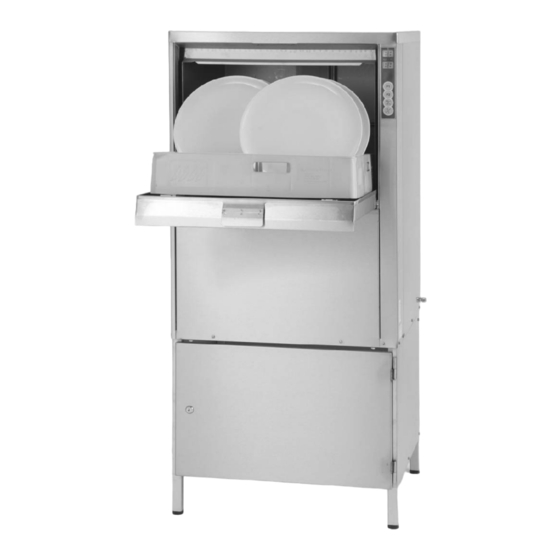
- Page 1 DISHWASHER WD-4 Installation and operationmanual S/N: From date: 01. 01. 2006 Rev.:5.0...
- Page 3 Dear Customer, Congratulations on deciding to choose a Metos appliance for your kitchen activities. You made an excellent choice. We will do our best to make you a satisfied Metos customer like thousands of customers we have around the world.
-
Page 5: Table Of Contents
16.12.2005 Rev. 1. General ......................1 1.1 Symbols used in this manual ..................1 1.2 Symbols on the dishwasher ................... 2 1.2.1 Machine marking ....................2 1.3 Checking agreement between the appliance and the manual ........2 2. Safety instructions ..................3 2.1 General .......................... - Page 6 4.2.3 Changing the water ....................16 4.3 After use - Cleaning ..................... 17 4.3.1 Emptying, internal machine rinsing. WD-4 without emptying pump ....17 4.3.2 Emptying, internal machine rinsing. WD-4 with emptying pump ..... 17 4.3.3 Cleaning each week ..................... 18 4.3.4 External cleaning ....................
-
Page 7: General
16.12.2005 Rev. 5.0 General 1. General Read the instructions in this manual carefully as they contain important information re- garding correct, effective and safe installation, use and service of the dishwasher. Keep this manual in a safe place for eventual use by other operators of the dishwasher. The electronics in the WD-4E machine are RoHS compatible. -
Page 8: Symbols On The Dishwasher
16.12.2005 Rev. 5.0 General 1.2 Symbols on the dishwasher This symbol on a machine part warns of electrical equipment. The part may only be re- moved by a qualified electrician or trained personnel. The machine is sensitive to electro- static discharge (ESD), which is why a static electricity bracelet must be used when handling the electronics. -
Page 9: Safety Instructions
16.12.2005 Rev. 5.0 Safety instructions 2. Safety instructions 2.1 General The machine is CE marked, which means that the machine complies with the require- ments of the EU machinery directive with regards to product safety. Product safety means the machine has a design which prevents personal injury or damage to property. Modification to the equipment without the approval of the manufacturer invalidates the manufacturer’s product liability. -
Page 10: Detergent And Drying Agent
16.12.2005 Rev. 5.0 Safety instructions 2.4 Detergent and drying agent Only detergent and drying agent intended for industrial dishwashing machines are to be used. Ordinary washing-up liquid must not be used in the machine or for soaking. Contact your detergent supplier regarding the selection of a suitable detergent. Be aware of the risk of handling washing and drying agents. -
Page 11: Cleaning The Floor
16.12.2005 Rev. 5.0 Safety instructions 2.7 Cleaning the floor When cleaning floors using high-pressure equipment, water can splash up under the ma- chine and damage the components. These have not been designed to withstand rinsing with water. Never use high pressure washes on the floor less than 1 metre from the dish- washer without using the special protective covers available to prevent splashes. -
Page 12: Installation
16.12.2005 Rev. 5.0 Installation 3. Installation 3.1 General The machine must be installed by authorised personnel only. Read these instructions through carefully as they contain important information regarding correct installation. The instructions should be used together with the machine's wiring diagram and flow di- agram. -
Page 13: Transport And Storage
16.12.2005 Rev. 5.0 Installation 3.3 Transport and storage Always transport the machine in an upright position. Take care during transport, as there is a risk of tipping. NB! The machine must not be transported without a pallet or other support. The machine may be damaged otherwise. -
Page 14: Installation
16.12.2005 Rev. 5.0 Installation 3.4 Installation 3.4.1 Positioning the machine Position the machine and check that it is horizontal using a spirit level. Adjust the height with the machine legs. 3.4.2 Connections WD4_18 Water connection, external thread R½”. Drain connection. Spiral hose ø 20 mm, L=1.5m. Electrical connection. -
Page 15: Electrical Connection
16.12.2005 Rev. 5.0 Installation Electrical connection This symbol on a machine part warns of electrical equipment. The part may only be re- moved by a qualified electrician. The machine is sensitive to electrostatic discharge (ESD), which is why a static electricity bracelet must be used when handling the electron- ics. -
Page 16: Trial Run
16.12.2005 Rev. 5.0 Installation 3.5 Trial run Prepare the machine for a trial run using the DIRECTIONS FOR USE. This describes the measures that must be taken to make the machine ready for operation. 3.5.1 Start-up schedule This should be completed and acknowledged by the customer on start-up. Machine type: Machine number: Installation date:... -
Page 17: Technical Documentation
16.12.2005 Rev. 5.0 Installation 1. Check: • Water and drain connections • That the machine is evenly balanced • Detergent and drying agent • Filters and level pipe are in place 2. Filling the machine: • Turn on main switch •... -
Page 18: Directions For Use
16.12.2005 Rev. 5.0 Directions for use 4. Directions for use 4.1 Preparations 4.1.1 The machine’s design. WD-4 without emptying pump WD4_08 Control knob. On/off and start of washing. Symbol for washing. Symbol for automatic mode. Yellow pilot lamp. The light comes on when the machine is live. -
Page 19: The Machine's Design. Wd-4 With Emptying Pump
16.12.2005 Rev. 5.0 Directions for use 4.1.2 The machine’s design. WD-4 with emptying pump W D 4 _ 0 9 Symbol for emptying the machine. Control knob. On/off and start of washing. Symbol for washing. Symbol for automatic mode. Yellow pilot lamp. The light comes on when the machine is live. -
Page 20: Preparations Before Filling. Wd-4 Without Emptying Pump
16.12.2005 Rev. 5.0 Directions for use 4.1.3 Preparations before filling. WD-4 without emptying pump Check: • that the dishwasher and all removable components are clean and that there is no dirt in the washing and rinsing arms’ nozzles (14, 15). -
Page 21: Filling The Machine. Wd-4 Without Emptying Pump
16.12.2005 Rev. 5.0 Directions for use 4.1.5 Filling the machine. WD-4 without emptying pump • Turn the knob (1) to position 1. The yellow lamp is lit and the machine is filled with water. • Once the machine is full, the water begins heating to washing temperature. Heating time is dependent on incoming water temperature. -
Page 22: Washing. Wd-4 With Emptying Pump
16.12.2005 Rev. 5.0 Directions for use 4.2.2 Washing. WD-4 with emptying pump The items must not be soaked or pre-washed with ordinary washing-up liquid. WD4_13 • Remove larger food particles by rinsing the items using a hand shower. The water in the hand shower must not exceed 40 °C. -
Page 23: After Use - Cleaning
A well-cleaned machine contributes to excellent cleaning results and re- duces the risk of dirt accumulating inside the machine. 4.3.1 Emptying, internal machine rinsing. WD-4 without emptying pump • Turn the knob (1) to position 0. If the machine is equipped with tank filters (8), remove these and the cover plate (13) from the machine. -
Page 24: Cleaning Each Week
16.12.2005 Rev. 5.0 Directions for use 4.3.3 Cleaning each week Weekly cleaning should be carried out more thoroughly than daily cleaning. If the infor- mation message "IF10" is shown on the display, this is to tell you that weekly cleaning needs to be done. -
Page 25: Incorrect Cleaning Methods
16.12.2005 Rev. 5.0 Directions for use 4.3.5 Incorrect cleaning methods NB! An incorrect cleaning method may damage the machine. The following therefore ap- plies: • Do NOT use steel wool as it will corrode the machine. • High-pressure cleaning can damage the machine and must NOT be used for clean- ing purposes. - Page 26 16.12.2005 Rev. 5.0 Directions for use PROBLEM CAUSE ACTION Noise from wash pump. Low water level. Foam in tank. Check level. Change water. The machine stops in the middle of The level pipe's rubber seal is not Adjust the level pipe. Check that the the washing cycle and starts taking sealing against the bottom plate.
Need help?
Do you have a question about the WD-4 and is the answer not in the manual?
Questions and answers