Sign In
Upload
Download
Table of Contents
Contents
Add to my manuals
Delete from my manuals
Share
URL of this page:
HTML Link:
Bookmark this page
Add
Manual will be automatically added to "My Manuals"
Print this page
×
Bookmark added
×
Added to my manuals
Manuals
Brands
Kodak Manuals
Scanner
E1030 Series
User manual
Kodak E1030 Series User Manual
Hide thumbs
1
2
3
4
Table Of Contents
5
6
7
8
9
10
11
12
13
14
15
16
17
18
19
20
21
22
23
24
25
26
27
28
29
30
31
32
33
34
35
36
37
38
39
40
41
42
43
44
45
46
47
48
49
50
51
52
53
54
55
56
57
58
page
of
58
Go
/
58
Contents
Table of Contents
Troubleshooting
Bookmarks
Table of Contents
Table of Contents
Safety
User Precautions
Acoustic Emission
Overview
Scanner Models
Scanner Specifications
Illustrations in this Guide
Supporting Documentation
Accessories
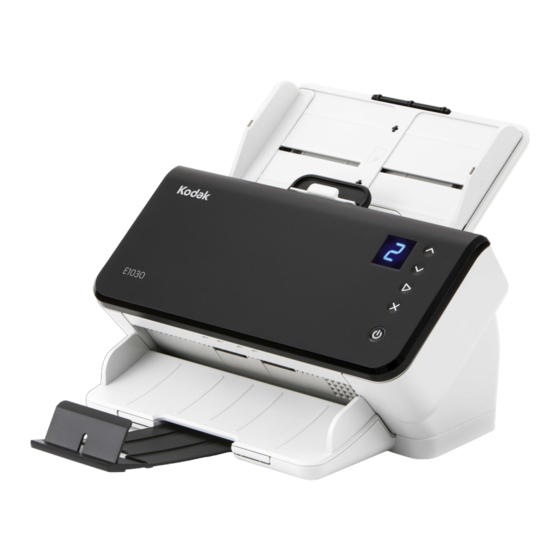
Scanner Components
Front View
Back View
Inside View
Installation
Unboxing the Scanner
Setting up Your Scanner
Install Driver Software
Verify Scanner Driver Version
Available Kodak Scanning Software
Smart Touch
Capture Pro LE
Scanning
Basic Scanning
Scanner Controls
Getting Your Scanner Ready to Scan
Getting Your Pages Ready to Scan
Scanning Applications
Initial Scan with a Kodak Scanning Application
Other Scanning Applications
Function Window
Scanning Functions
Error Codes
Energy Star
Paper Handling Challenges and Solutions
Input Tray Capacity
Preparing Documents for Scanning
Mixed Paper
Lightweight Paper
NCR Paper
Scanning Small Items
Long Paper
Fragile or Oversize Paper
Handle with Care
Handle with Extra Care
Multifeeds
Paper Jams
If You Still Have Trouble
Improving Image Quality
Recommended Settings
Other Perfect Page Settings
Turning the Scanner off
Maintenance
Opening the Scanner Cover
Cleaning Procedures
Running a Transport Cleaning Sheet
Clean in this Order
Cleaning the Separation Roller
Cleaning the Feed Rollers
Cleaning the Transport Rollers
Cleaning the Imaging Area
Replacement Procedures
Replacing the Separation Roller
Replacing the Pre-Separation Pad
Replacing the Urging Roller Tire
Replacing the Feed Roller Tires
Supplies and Consumables
Customer Replaceable Parts and Accessories
Updates
Troubleshooting
Self-Help for Problems
Upgrading Software
Contacting Service
Appendix A Regulatory Information
Environmental Information
European Union
EMC Statements for E1030/E1040 Scanners
Appendix B Warranty - US and Canada Only
Advertisement
Quick Links
1
Table of Contents
2
Setting up Your Scanner
3
Install Driver Software
4
Scanning
5
Basic Scanning
6
Scanner Controls
7
Scanning Functions
Download this manual
E1030/E1040 Series Scanners
User's Guide
A-61997
Table of
Contents
Previous
Page
Next
Page
1
2
3
4
5
Advertisement
Table of Contents
Need help?
Do you have a question about the E1030 Series and is the answer not in the manual?
Ask a question
Questions and answers
Related Manuals for Kodak E1030 Series
Scanner Kodak E1040 Series User Manual
(58 pages)
Scanner Kodak Kodak Ngenuity 9150 User Manual
Ngenuity 9000 series (98 pages)
Scanner Kodak Kodak i1840 User Manual
I1800 series scanners (110 pages)
Scanner Kodak Kodak i1220 Installation And Configuration Manual
Configuration guide (14 pages)
Scanner Kodak Kodak i1405 Setup Manual
I1400 series (26 pages)
Scanner Kodak Kodak i1420 User Manual
I1400 scanners (162 pages)
Scanner Kodak Kodak i1440 User Manual
I1400 series (59 pages)
Scanner Kodak Kodak i780 Manual
I600/i700 series scanner (86 pages)
Scanner Kodak Kodak Ngenuity 9090DB User Manual
Ngenuity 9000 series (78 pages)
Scanner Kodak S1220 - Photo Scanning System User Manual
Photo scanning system (81 pages)
Scanner Kodak Scan Station 710 Administrator's Manual
Scan station 700 series (146 pages)
Scanner Kodak alaris 2000w Series User Manual
(78 pages)
Scanner Kodak S3120 Max User Manual
(82 pages)
Scanner Kodak 2400DSV Service Manual
(131 pages)
Scanner Kodak Scan Station 700 series User Setup Manual
(33 pages)
Scanner Kodak S2000 Series User Manual
(78 pages)
This manual is also suitable for:
E1040 series
E1030
E1035sf
E1040
Table of Contents
Save PDF
Print
Rename the bookmark
Delete bookmark?
Delete from my manuals?
Login
Sign In
OR
Sign in with Facebook
Sign in with Google
Upload manual
Upload from disk
Upload from URL


Need help?
Do you have a question about the E1030 Series and is the answer not in the manual?
Questions and answers