Victron energy BMV-700 Manual
Battery monitor
Hide thumbs
Also See for BMV-700:
- Manual (316 pages) ,
- Quick installation manual (4 pages) ,
- Quick installation manual (4 pages)

Related Manuals for Victron energy BMV-700


Summary of Contents for Victron energy BMV-700
- Page 1 ENGLISH Manual - BMV-700 Battery monitor Rev 10 - 12/2022 This manual is also available in HTML5.
-
Page 2: Table Of Contents
Manual - BMV-700 Table of Contents 1. Safety precautions ........................1 1.1. General safety precautions ....................1 1.2. Battery safety warnings ..................... 1 1.3. Transport and storage ...................... 1 2. Introduction ........................... 2 2.1. The battery monitor ......................2 2.2. Why should I monitor my battery? ..................2 2.3. - Page 3 Manual - BMV-700 7.2.1. Battery capacity ....................23 7.2.2. Charged voltage ....................24 7.2.3. Discharge floor ....................24 7.2.4. Tail current ....................... 24 7.2.5. Charged detection time ..................24 7.2.6. Peukert exponent ....................24 7.2.7. Charge efficiency factor ..................25 7.2.8.
- Page 4 Manual - BMV-700 9.3.6. State of charge does not reach 100% ................ 38 9.3.7. State of charge always shows 100% ................39 9.3.8. State of charge does not increase fast enough or too fast when charging ....... 39 9.3.9. Incorrect battery voltage reading ................39 9.3.10.
-
Page 5: Safety Precautions
Manual - BMV-700 1. Safety precautions 1.1. General safety precautions Read this manual carefully. It contains important instructions that must be followed during installation, operation and maintenance. Save these instructions for future reference on operation and maintenance. 1.2. Battery safety warnings Working in the vicinity of a lead acid battery is dangerous. -
Page 6: Introduction
2.1. The battery monitor The BMV-700 is a battery monitor. It measures battery voltage and current. Based on these measurements, it calculates the battery's state of charge and the time to go. It also keeps track of historical data, such as deepest discharge, average discharge and the number of charge and discharge cycles. -
Page 7: Accessories
Manual - BMV-700 2.5. Accessories These optional parts might be needed depending on your setup: • GX Device, such as a Cerbo GX - for system and/or remote monitoring. • VE.Direct cable - to connect the battery monitor to a GX device. -
Page 8: Installation
Manual - BMV-700 3. Installation 3.1. What's in the box? BMV-700 head unit together with attachment sleeve. 500A shunt. 1.5m (59") red cable with a 1A fuse. 10m (33ft) RJ12 UTP cable. Square face plate together with an attachment flange. -
Page 9: Mounting The Head Unit
Manual - BMV-700 Top view shunt indicating mounting holes and side view shunt indicating the mounting method. 3.3. Mounting the head unit The head unit can be mounted in a variety of ways: A. Panel mounting, the head unit is secured at the back of a panel. - Page 10 Manual - BMV-700 Mounting method B. Mounting method C. For the full wall mounting instructions, see the wall mounting installation manuals on the Wall mount enclosure for BMV or MPPT Control Wall mount enclosure for BMV and Color Control GX product pages.
-
Page 11: Connections Overview
Manual - BMV-700 3.4. Connections overview Name Terminal type Display Setup button Down button Up button Select button RJ12 connector RJ2 terminal Buzzer Programmable relay connector Push connector VE.Direct connector VE.Direct terminal Negative battery connection M10 bolt Positive battery connection... -
Page 12: Programmable Relay
Manual - BMV-700 Loads & Chargers Battery bank Basic battery monitor installation. 3.6. Programmable relay The battery monitor is equipped with a programable relay. This relay can be used as an alarm relay, to start a generator or for other applications. For more information on the various relay modes and how to configure the relay, see chapter... -
Page 13: Gx Device Connection
Manual - BMV-700 3. Connect the new shunt to the electrical system and battery monitor head unit as shown in chapter Basic electrical connections [7]. Pay special attention to the orientation of the shunt circuit board in relation to the battery and load connections. -
Page 14: Configuration
Manual - BMV-700 4. Configuration Once the electrical connections have been made, and the battery monitor has been powered up, it needs to be configured to be suitable for the system it is used in. This can be done with the buttons on the battery monitor head unit or even easier via the VictronConnect app. Note that a VE.Direct Bluetooth Smart dongle... -
Page 15: The Victronconnect App
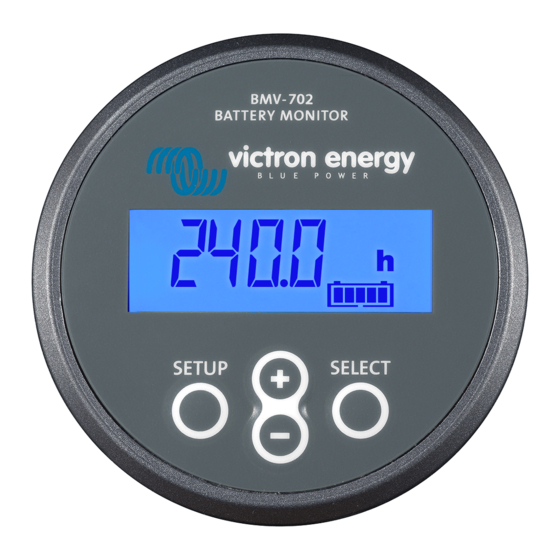
Manual - BMV-700 It is also possible (and easier) to make the battery monitor settings via the VictronConnect app. See the VictronConnect app [11] chapter on how to do this. Display Setup Select button button + (up) and - (down) buttons BMV head unit display and buttons. -
Page 16: Update Firmware
Manual - BMV-700 Ways to connect to the battery monitor: • Locally via USB using the VE.Direct to USB interface connected to the VE.Direct port. • Locally via Bluetooth using the VE.Direct Bluetooth Smart dongle connected to the VE.Direct port. -
Page 17: Make Essential Settings
Manual - BMV-700 • To update the firmware, press the "UPDATE" button. 4.5. Make essential settings The default settings of the battery monitor are tailored for lead acid batteries, like AGM, GEL, OPzV or OPzS batteries. Most settings can stay at their factory default. But there are a few settings that need to be changed. These are: •... - Page 18 Manual - BMV-700 • Tail current. • Peukert exponent. • Charge efficiency. • Discharge floor. Tail current In VictronConnect see: Settings > Battery > Tail current. Via the head unit, see: Setup menu > Setting 03 - Tail current. Some lithium battery chargers stop charging when the current drops below a set threshold. The tail current must be set higher in this case.
-
Page 19: Operation
Manual - BMV-700 5. Operation 5.1. How does the battery monitor work? The main function of the battery monitor is to follow and indicate the state of charge of a battery, to be able to know how much charge the battery contains and to prevent an unexpected total discharge. -
Page 20: Using The Head Unit Menus
Manual - BMV-700 If the “Time remaining” indicates three dashes: “---” this means that the battery monitor is in an unsynchronised state. This occurs when the battery monitor has just been installed or after it has been left unpowered and is powered up again. For more... -
Page 21: History
Manual - BMV-700 VictronConnect app battery monitor trends. 5.5. History The battery monitor stores historic events. These can be used at a later date to evaluate usage patterns and battery health. The history data is stored in a non-volatile memory and will not be lost when the power supply to the battery monitor has been interrupted or when the battery monitor has been reset to its defaults. -
Page 22: History Data
Manual - BMV-700 • Press SELECT again to stop scrolling and show the value. • Press SELECT again to leave the historical menu and to go back to the normal operation mode. The below table gives an overview of the history parameters and how they are displayed in the menu. For the meaning of each parameter see the next chapter. -
Page 23: Alarms
Manual - BMV-700 • Number of full discharges: The number of full discharges. A full discharge is counted when the state of charge reaches 0%. Battery voltage • Min battery voltage: The lowest battery voltage. • Max battery voltage: The highest battery voltage. -
Page 24: Manual Synchronisation
Manual - BMV-700 • The voltage exceeds 13.2V, • the charge current is less than 4.0% of the total battery capacity (e.g. 8A for a 200Ah battery) and, • 3 minutes have passed while both the voltage and current conditions are met. -
Page 25: Interfacing
Cerbo GX, is a Victron Energy device that provides control and monitoring for all Victron equipment that is connected to it. Control and monitoring of the GX device and it's connected equipment can be done locally or remotely via our free Victron Remote Monitoring portal, the portal. -
Page 26: Connecting To Ve.smart Networking
VE.Direct Bluetooth Smart dongle. Note that the BMV-700 can only transmit battery voltage and battery current to VE.Smart networking. It can not transmit battery temperature. If the battery temperature is needed use a BMV 700, BMV-712, SmartShunt or SmartShunt IP65 instead. For more information see our battery monitor product page. -
Page 27: All Features And Settings
Manual - BMV-700 7. All features and settings This chapter explains all battery monitor settings. In addition to this we also have a video available explaining these settings and how the interact with each other to achieve accurate battery monitoring for both lead acid and lithium batteries. -
Page 28: Charged Voltage
Manual - BMV-700 7.2.2. Charged voltage The battery voltage must be above this voltage level to consider the battery as fully charged. As soon as the battery monitor detects that the voltage of the battery has reached this “charged voltage” parameter and the current has dropped below the “tail... -
Page 29: Charge Efficiency Factor
Manual - BMV-700 Setting Default Range Step size Peukert exponent (setting 05) 1.25 1.00 - 1.50 0.01 7.2.7. Charge efficiency factor The “Charge Efficiency Factor” compensates for the capacity (Ah) losses during charging. A setting of 100% means that there are no losses. -
Page 30: State Of Charge
Manual - BMV-700 Setting Default Modes Start synchronized (setting 70) ON/OFF 7.2.11. State of charge With this setting, you can manually set the state of charge value. This setting is only active after the battery monitor has, at least once, been synchronised. Either automatically or manually. -
Page 31: Invert Relay
Manual - BMV-700 Setting Default mode Modes Description DFLT The relay settings 16 up to 31 can be used to control the relay. Default mode. The relay will close when the state of charge falls below setting 16 (discharge floor) or when the battery voltage falls below setting 18 (low voltage relay). -
Page 32: Low Voltage Relay
Manual - BMV-700 When the state of charge percentage has risen above the "clear relay" value, the relay will open (after a delay, depending on the Relay minimum closed time [27] and/or the Relay off delay [27] settings). The "clear relay" value needs to be greater than the "set relay" value. -
Page 33: Low Soc Alarm Settings
Manual - BMV-700 7.4.2. Low SoC alarm settings When enabled, the alarm will activate when the state of charge (SoC) falls below the set value for more than 10 seconds. The alarm will deactivate when the state of charge rises above the clear value... -
Page 34: Scroll Speed
Manual - BMV-700 7.5.3. Scroll speed The scroll speed of the display. This setting ranges from 1 (very slow) to 5 (very fast). Setting Default Range Step size Scroll speed (setting 51) 1 - 5 7.5.4. Main voltage display Must be set to ON to display the voltage of the main battery in the monitoring menu. -
Page 35: Miscellaneous Settings
Manual - BMV-700 7.6. Miscellaneous settings 7.6.1. Software version Setting 61 This is a read-only setting. it displays the firmware version of the battery monitor. The software version as displayed on the head unit is the same as the firmware version as displayed in the VictronConnect app product settings. -
Page 36: Shunt Current
Manual - BMV-700 7.6.5. Shunt current When a shunt other than the one supplied with the battery monitor is used, use this setting to set the rated current of the shunt. Setting Default Range Step size Shunt current (setting 65) -
Page 37: Reset To Defaults
Manual - BMV-700 Occasionally a newer firmware version is available. New firmware is released to either add features or to fix a bug. The product overview in the VictronConnect app displays the battery monitor firmware version. It also indicates whether the firmware is the latest version, and there is a button you can press to update the firmware. -
Page 38: Battery Capacity And Peukert Exponent
Manual - BMV-700 8. Battery capacity and Peukert exponent Battery capacity is expressed in Amp hour (Ah) and indicates how much current a battery can supply over time. For example, if a 100Ah battery is being discharged with a constant current of 5A, the battery will be totally discharged in 20 hours. - Page 39 Manual - BMV-700 Calculation example using the 5h and the 20h rating The C5 rating is 75Ah. The t1 rating is 5h and I1 is calculated: The C20 rating is 100Ah. The t2 rating is 20h and I2 is calculated:...
-
Page 40: Troubleshooting
Manual - BMV-700 9. Troubleshooting 9.1. Functionality issues 9.1.1. Unit is dead On first connection the display of the head unit should be active. If this is not the case check the fuse in the +B1 cable and also check the cable itself and its terminals. -
Page 41: Incomplete Current Reading
Manual - BMV-700 9.3.2. Incomplete current reading The negatives of all the loads and the charge sources in the system must be connected to the system minus side of the shunt. If the negative of a load or a charge source is connected directly to the negative battery terminal or the “battery minus” side on the shunt, their current will not flow through the battery monitor and will be excluded from the overall current reading and the state of charge reading. -
Page 42: Incorrect State Of Charge Reading
Manual - BMV-700 9.3.4. Incorrect state of charge reading An incorrect state of charge can be caused by a variety of reasons. Incorrect battery settings The following parameter(s) will have an effect on the state of charge calculations if they have been set up incorrectly: •... -
Page 43: State Of Charge Always Shows 100
Manual - BMV-700 9.3.7. State of charge always shows 100% One reason could be that the negative cables going in and out of the battery monitor have been wired the wrong way around, see Charge and discharge current are inverted [36]. -
Page 44: Technical Data
Manual - BMV-700 10. Technical data 10.1. Technical data Battery monitor BMV-700 Supply voltage range 6.5 - 95 Vdc Current draw (backlight off) < 4mA Battery capacity (Ah) 1 - 9999Ah Operating temperature range -40 +50°C (-40 - 120°F) VE.Direct communication port... -
Page 45: Appendix
Manual - BMV-700 11. Appendix 11.1. Dimensions BMV head unit Dimension Drawing - BMV BAM010700000 Battery Monitor BMV-700 BAM010700000R Battery Monitor BMV-700 Retail BAM010702000 Battery Monitor BMV-702 BAM010702000R Battery Monitor BMV-702 Retail BAM010702200 Battery Monitor BMV-702 BLACK BAM010702200R Battery Monitor BMV-702 BLACK Retail... -
Page 46: Dimensions Shunt
Manual - BMV-700 11.2. Dimensions shunt Page 42 Appendix...
Need help?
Do you have a question about the BMV-700 and is the answer not in the manual?
Questions and answers