Table of Contents
Advertisement
Quick Links
Elektroniikka
Kilpailuosio X, piirikortin kokoaminen ja testaus
Johdanto
Aiemmassa osiossa suunniteltu piirikortti kootaan ja testataan. Kortti tullaan lopullisesti kiinnittämään
Nokian robottiin paineilmasormen paikalle lasermodulin kanssa.
Tehtävän kuvaus
1. Alkutoimet
Varmista, että sinulla on tätätehtävää varten annettu osapussi ja piirikortin suunnittelutehtävässä
käytetty osaluettelo ja kytkentäkaavio. Osapussissa pitäisi olla osaluettelon mukaiset komponentit, ja
niiden sijoittelutietojen pitäisi olla näkyvillä piirilevyn merkinnöissä. Ilmoita tuomarille puutteesta jo
ennen tehtävän aloitusta. Tarkasta, että saamasi komponentit ovat tallella ja niiden laatu ja lukumäärä
vastaavat piirikaaviota.
Ilmoita avustavalle tuomarille poikkeamista tai puutteista. Jos tarvitset apua nosta käsi ylös merkiksi
avun tarpeesta, odota paikallasi kunnes avustava tuomari tulee luoksesi.
Lue tehtäväkuvaus huolella ja tutustu muuhun oheismateriaaliin ennen kuin aloitat. Huomioi myös
tehtävässä arvosteltavat kohteet!
2. Piirikortin kokoaminen
Kokoa tehtävän piirikortti. Tekemäsi työn jälki ja käyttämäsi työskentelytavat arvioidaan kaikkineen. Ole
huolellinen juotoksissa, ylimääräiset tinaroiskeet, korjatut tinasillat ja muu työn jälki arvostellaan.
Komponenttien asennustyön voi tehdä vain yhdellä tavalla – hyvin, kiinnitä huomiota pieniinkin
yksityiskohtiin. Kun saat piirikortin valmiiksi, niin ilmoita siitä tuomarille. Hän tuo sinulle tehtävän
jatkamiseen liittyvät dokumentit.
Kuva koottavasta piirikortista.
Advertisement
Table of Contents

Related Manuals for OUMAN EH-203


Summary of Contents for OUMAN EH-203
- Page 1 Elektroniikka Kilpailuosio X, piirikortin kokoaminen ja testaus Johdanto Aiemmassa osiossa suunniteltu piirikortti kootaan ja testataan. Kortti tullaan lopullisesti kiinnittämään Nokian robottiin paineilmasormen paikalle lasermodulin kanssa. Tehtävän kuvaus 1. Alkutoimet Varmista, että sinulla on tätätehtävää varten annettu osapussi ja piirikortin suunnittelutehtävässä käytetty osaluettelo ja kytkentäkaavio.
- Page 2 Arviointikohteet Arviointi- Vain objektiiviselle arvioinnille kohteen Arviointikohde - Nimi tai tyyppi Pisteet lyhyt kuvaus O = Obj Lisätietoa - (Lisää uuden rivin Tavoitearvo S = Sub arviointikohteen alle) Laitteen toiminta Toimii 100% 7,00 IPC-A-610 D Toimii 50% (vain 5 p) Komponenttien kiinnittäminen IPC-A-610 D Juotosten laatu 5,00...
- Page 3 3. Piirikortin korjaaminen, asentaminen ja testaus (annetaan piirikortin kokoamisen jälkeen) Piirikortin valmistuttua huomattiin, että kaiutinlähdön rajoitusvastukset tulivat liian suuriksi. Tästä johtuen vastukset R4 ja R5 pitää vaihtaa. Poista kyseiset komponentit ja juota tilalle tuomarilta saamasi uudet vastukset. Uusien vastusten tulisi olla 27 :n suuruisia. Vastukset vaihdettuasi varmista vielä, että...
- Page 4 Mittauspöytäkirja Nimi: ______________________________ Kilpailijanumero ______________________________ Mittauksissa käytetyt mittalaitteet: __________________________________________ __________________________________________ __________________________________________ __________________________________________ Kohta 1 Mittaustulos __________________________________________ Menetelmä __________________________________________ Kohta 2 Mittaustulos __________________________________________ Menetelmä __________________________________________ Kohta 3 Mittaustulos __________________________________________ Menetelmä __________________________________________...
- Page 5 Robot_2010.c /******************************************************************** Base firmware for Task robot (year 2010 version) (SAMPLE CODE) MCU: ATmega324p Clock: 16MHz XTAL Compiler: WinAVR (avr-gcc) version 20071221 - Toni Harju 2010 ********************************************************************/ #define F_CPU 16000000 // clock frequency for delay.h #include <avr/io.h> #include <avr/interrupt.h> #include <util/delay.h> #define XTAL 16000000 // Clock frequency for calculating USART...
- Page 6 Robot_2010.c _USART1_Init(); // global enable interrupts sei(); Move(MV_DOWN,0); Move(MV_RIGHT,0); _pwm_set(_pwm_test_data[4]); while(1) _sound_ena=1; _delay_ms(500); _sound_ena=0; _delay_ms(500); // The Timer0 interrupt is defined in "LaserCard.c" TIMER0_INTERRUPT // USART interrupt routine // - TKH 2010 ISR(USART1_RX_vect) unsigned char c; c=UDR1; // This function moves the robot finger // dir, direction [1,2,3,4] // steps, number of steps, drives to the edge if 0 or 255 void Move(unsigned char dir, unsigned char steps)
- Page 7 Robot_2010.c PORTA=active; _delay_us(100); if(PINB & dir_mask) return; PORTA&=rest; _delay_us(300); PORTA|=0b01000100; _delay_us(1800); // 1800 = max isolle moottorille, 950 menee vielä pienelle moottorille... if(steps < 255) steps--; while(steps && !(PINB & dir_mask) ); // this function checks wether the given string ref can be found // at given position on string data // - TKH 2008 char StrCompare(const char *ref, unsigned char *data)
- Page 8 Elektroniikka Kilpailuosio 1, piirilevyn suunnittelu (laserkortti) Johdanto Kilpailijan tehtävänä on suunnitella piirilevy annetun piirikaavion, ulkoisten mittojen sekä osaluettelossa lueteltujen komponenttien mukaan. Kilpailija saa käyttää suunnittelussa vapaasti valittua piirisuunnitteluohjelmaa. Suunnittelun tulos arvioidaan kilpailijan tuottaman paperitulosteen ja piirilevytiedostojen (gerberit) perusteella. Tehtävän kuvaus Suunnittele yksipuolinen piirilevy annetun piirikaavion (liite 1) mukaan.
- Page 9 Sijoita liitin X1 tälle alueelle Kuva 1. Kiinnitysreikien sijoittelu ja liittimen jalkajärjestys (yksiköt millimetreissä). Kuva 3. Käytetyn trimmeripotentiometrin mitat ja piirilevykuvio (yksiköt millimetreissä).
- Page 10 Ohjeita kilpailijalle Tee valmiista piirilevystä osasijoittelukuva tuloste. Osasijoittelukuva tulostetaan 1:1 kokoisena A4 -paperiarkille. Käytät tätä tulostetta piirikortin komponenttien kalustuksessa ja asennuksessa kokoamisohjeena. Tulosteessa pitää näkyä piirilevyn ääriviiva, komponenttien piirroskuvat, komponenttien kytkentäkaavionimet sekä oma kilpailijanumerosi ja nimikirjaimet. Tulosta arviointia varten 1:1 kokoinen tuloste, jossa samassa kuvassa näkyy sekä osasijoittelu- että...
- Page 11 Liite 1. Suunniteltavan levyn piirikaavio.
- Page 12 Liite 2. Suunniteltavan levyn osaluettelo. Kuvassa vasemmalla liitin X1, oikealla liitin X2 / X3.
- Page 13 16.4.2010 Sulautetun järjestelmän ohjelmointi, Labyrinttipeli Kilpailulaitteena toimii Jari Koskisen ja Ville Viitalan suunnittelema ”sokko” labyrinttipeli. Kilpailulaitteen käyttöliittymä koostuu kahdesta 5x7 pistematriisinäytöstä, neljästä painonapista ja piezo-summerista. Pelin ideana on löytää reitti alkupisteestä loppupisteeseen ”sokkona”, eli pelaaja ei näe missä seinät ovat. Pelaaja joutuu ”tunnustelemaan” reittiään edetessään. Pelaajan törmätessä...
- Page 14 Vaihe 1b. Laitteen toimintakunnon toteaminen (0-2p) Sinun tulee tehdä kortille testiohjelma, joka soittaa piezo-summeria siten, että summeri soi 5 ms ja on sammuksissa 200 ms. Tehtyäsi ohjelman pyydä tuomari paikalle ja osoita hänelle ohjelman toimivuus. Vasta tuomarin annettua luvan voit jatkaa eteenpäin. Vaihe 2.
- Page 15 Vaihe 4. Labyrintin seinien luominen (0-3p) Ota käyttöön ohjelmassasi taulukko johon on määritetty labyrintin seinät. Taulukko on kaksiulotteinen. Jokaisella ledillä on oma solu taulukossa. Solussa neljä alinta bittiä kertovat mihin suuntaan solusta voidaan edetä. Mahdollinen etenemissuunta on merkitty taulukkoon 1 tilassa olevalla bitillä.
- Page 16 Nimi:_____________________________ Kilpailija numero:_______ Ohjelmointitehtävän kirjallinen osio Palauta tämä tehtävä tuomarille, kun olet vastannut kysymyksiin. Mitkä ovat mikro-ohjaimen porttien alustukset (hex-lukuna), kun kytkimillä pitää olla ylösvetovastukset, piezo-summeri ei saa soida ja yksikään ledi ei pala näytössä? PORTA = ______________________________ DDRA = ______________________________ PORTB = ______________________________ DDRB = ______________________________ PORTC = ______________________________...
- Page 17 Labyrintin alustukset PORTA = 0x1F; // xxx1 1111 DDRA = 0x1F; // xxxo oooo PORTB = 0x1F; // xxx1 1111 DDRB = 0x1F; // xxxo oooo PORTC = 0x00; // x000 0000 DDRC = 0x7F; // xooo oooo PORTD = 0x78; // 0ppp pxxx DDRD = 0x80;...
- Page 18 Goal Start...
- Page 19 100n 100n Ohjelmointiliitäntä 100n (MISO) (SCK) (MOSI) RESET 100R RESET RESET AVCC Käytettävä piirin sisäistä referenssiä XTAL2 AREF Uref = 2,56V 16MHz 100n 100n XTAL1 AGND ATMEGA16_TQFP Ohj.liit. (SCK) (SCK) (ADC7) Laajennusliitin (MISO) (MISO) (ADC6) Laajennusliitäntä (MOSI) (MOSI) (ADC5) Näyttö (Col9) (Col4) Näyttö...
- Page 20 +VCC +VCC +VCC +VCC +VCC +VCC +VCC +VCC +VCC +VCC +VCC +VCC +VCC +VCC 100n 100n 2,2k 2,2k 2,2k 2,2k Right 2,2k 2,2k Left 2,2k 2,2k Down 2,2k 2,2k 14 R2 14 R2 8 R3 8 R3 1 R5 1 R5 7 R6 7 R6 +VCC...
- Page 21 J4 sillataan vain, jos näyttöjä ohjataan vuorotteluperiaatteella +VCC ES2C ES2C 7805 ES2C 2,2k 100n 100n 470u 470u Tietomyrsky Oy http://www.tietomyrsky.fi DRAWN: DATED: TITLE: 240310 Laby1 CHECKED: DATED: 230410...
- Page 22 Laby2.c /************************************************************************* Project: Labyrintti Author: Ville Viitala Company: MacGyver Technologies Date: 29.03.2010 Version: *************************************************************************/ #include <util/delay.h> #include <avr/io.h> /************************************************************************/ /* Kytkentöjen määritykset /************************************************************************/ #define ROWS PORTC // Rivit on kytketty C-porttiin #define COLLOW PORTB // 5 alinta saraketta A-porttiin #define COLHIGH PORTA // ja 5 ylintä...
- Page 23 Laby2.c /* Funktioiden prototyypit /************************************************************************/ /* Asettaa ledin kerrallaan palamaan halutulta riviltä ja sarakkeelta */ void setLed(unsigned char row, unsigned char col); /* Äänimerkki */ void beep(void); /* Näyttää virhepisteet näytöllä */ void dspScore(void); /* Aloittaa uuden pelin */ void startNewGame(void); /************************************************************************/ /* Pääohjelma /************************************************************************/...
- Page 24 Laby2.c /* Painettu alaspäin */ if(DOWN) _delay_ms(10); // Kytkin värähtelyn poistoa if((row < 6) && (labyrintti[row][col] & MOVE_DOWN)) // Jos emme ole alimmalla rivillä ja - // on mahdollista mennä alaspäin row++; // Lisätään riviä (laskeudutaan) setLed(row,col); // Uusi ledi palamaan else // Jos ei ole mahdollista edetä...
- Page 25 Laby2.c Jos emme ole oikeassa reunassa ja - // on mahdollista mennä oikealle col++; // Lisätään saraketta setLed(row,col); // Uusi ledi palamaan else // Jos ei ole mahdollista mennä oikealle beep(); // PIIP! ja points++; // virhepiste while(RIGHT) // Odotellaan että nappi asm("nop");...
- Page 26 Laby2.c // Jos sarake on alle 5, niin - COLLOW = ~(mask << col); käytetään PORTA:ta sarakkeiden ohjaamiseen else // Jos sarake on yli 5, niin - COLHIGH = ~(mask << (col - 5)); // käytetään PORTB:tä ohjaamiseen /************************************************************************/ /* Funktio, joka näyttää virhepisteet näytöllä /************************************************************************/ void dspScore(void) unsigned char i;...
- Page 27 Laby2.c unsigned char i; points = 0; // Virhepisteet nollille. row = 6; // Aloituspaikat: rivi 6 (0...6) col = 0; // Sarake 0 (0...9) for(i=0;i<10;i++) // Luodaan efekti, joka // vilkuttaa aloitus- ROWS &= 0x00; // lediä 10 kertaa (tämä ei ollut kilpailussa) COLHIGH |= 0xFF;...
- Page 28 Myllytullin yksikkö 19.1.2010 Jouni Lievonen Lajikuvaus TAITAJA 2010-01-19 Elektroniikka Teollisen laitteen rakentaminen Kilpailutehtävän pohjana on OUMAN EH-203 lämmönsäädin 1. Kilpailussa kootaan EH-203 elektroninen säätölaite näyttö/näppäinyksikön kokoonpano piirikorttien testaus testausjärjestelmällä asiakasohjelmien asennus laitteen kokoonpano 2. EH-203 säätölaitteen asennus ja kytkentä simulaatiovastusten asentaminen (ulkoanturi, menovesianturi) relelähdön kaapelointi...
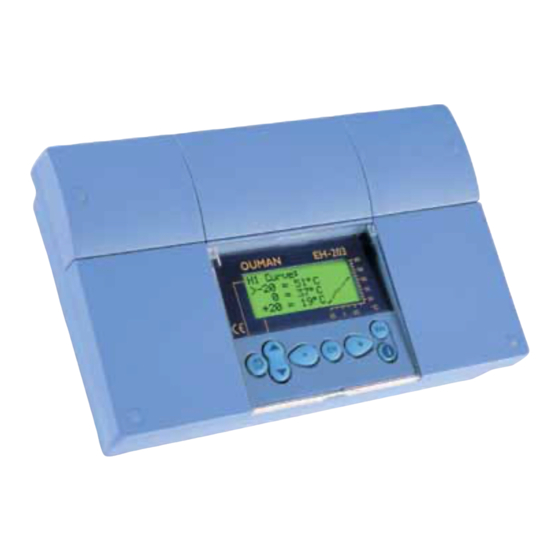
- Page 29 EH-203 Heating regulator MODBUS...
- Page 30 FOR STARTERS Ouman EH-203 is a multifunctional heating controller which is adaptable to many different types of heating systems. Ouman EH-203 has the ability to control two heating circuits and one hot water control circuit simultaneously. Your controller's display changes depending on the connections and selected functions that are in use.
-
Page 31: Table Of Contents
Entering the maintenance mode Tuning values These pages contain Settings directions for maintenance persons authorized by Trends Ouman. Access to the Actuator selectionl regulator´s maintenance Relay 1 control selection mode is prevented by a maintenance mode. Relay 2 control selection... - Page 32 DH Energy meas. 3-point curve (factory setting): You can adjust the characteristic heating curve using outdoor temperature settings - 20°C, 0°C and +20°C. EH-203 prevents you from setting characteristic heating curves that are the wrong shape. It automatically proposes a correction.
- Page 33 OUMAN EH-203 OUMAN EH-203 Instructions for setting the curve CURVE INTERPRETATION: When the outdoor temp. is: -20 C, the supply water is +58 C 0 C, the supply water is +41 C H1 Curve: -20 = 58°C +20 C, the supply water is +18 C 0 = 41°C...
- Page 34 OUMAN EH-203 SETTINGS Ajan asetus Browsing, making changes In Ouman EH-203 the regulator is controlled by many different settings. Settings are selected according to sensor connections and relay control modes (e.g., is a relay controlling the oil burner or pump or is the relay temperature controlled see p. 26-27).
-
Page 35: Ouman
OUMAN EH-203 OUMAN EH-203 OUMAN EH-203 OUMAN EH-203 Additional information about settings Factory Settings: settings: Range: Explanation: Attention! The room temperature of a house having large Sun compens. 0 °C 0...-7 °C The sun measurement windows with a south exposure rises on a sunny day can only be read from the even in subzero weather. - Page 36 OUMAN EH-203 OUMAN EH-203 OUMAN EH-203 OUMAN EH-203 MITTAUKSET MEASUREMENTS Labeling The regulator can be connected to 14 different measurement data at the same time (11 NTC measurements + 3 digital inputs).Measurement data can also be read through the bus. Also the position of the voltage controlled (0...10V or 2...10V) actuator can be seen.
- Page 37 OUMAN EH-203 OUMAN EH-203 MEASUREMENTS Additional information OUMAN EH-203 OUMAN EH-203 MITTAUKSET Strip con- Measure- Measurement information: Setting Attention! nector ment: range: Out temp Outdoor temperature -50...+50 Can be read through the net 2 H1 Supply Supply water temperature in regulating circuit H1 0...+130...
-
Page 38: Settings
OUMAN EH-203 OUMAN EH-203 OUMAN EH-203 OUMAN EH-203 SUPPLY WATER INFORMATION In this mode we can see which factors determined by the regulator make up the supply water temperature at the time of inspection. The basis for this is the supply water temperature at the present outdoor temperature according to the characteristic heating curve. - Page 39 MITTAUKSET Measurement information from the district heating energy meter can be read to the Ouman EH-203 by using EMR-200 read head (optional equipment). Ouman EH-203 has a connector for the read head. The function is activated in the controller's special maintenance menu (see Energy meter p.
-
Page 40: Operating Modes
OUMAN EH-203 OUMAN EH-203 OUMAN EH-203 OUMAN EH-203 OUMAN EH-203 OUMAN EH-203 OUMAN EH-203 OUMAN EH-203 OPERATING MODES Each regulating circuit can be controlled with the operating modes mentioned below. The factory set automatic regulation is a normal regulating situation in which the clock controlled temperature drops are also possible. -
Page 41: Clock Functions
The weekday blinks. Use the or button to set the weekday. Press 2006 Thursday Exit with ESC. Attention! The Ouman EH-203 regulator's clock registers summer time and standard time changes and leap years. The battery lasts approx. 10 years. - Page 42 OUMAN EH-203 OUMAN EH-203 OUMAN EH-203 OUMAN EH-203 Clock programs - browsing, adding, deleting With the freely programmable 24 hour/7 day clock you can: 1. Drop the temp. for certain lengths of time (heat. circuits H1 and H2) 2. Increase the domestic hot water temp. (anti-bacteria function) 3.
- Page 43 OUMAN EH-203 OUMAN EH-203 OUMAN EH-203 OUMAN EH-203 Clock functions; relay control Relays can control many different functions, e.g., sauna stoves, locking doors etc. Relay clock functions are taken into use and labeled according to use in the relay control mode. (see p. 26 and 27).
- Page 44 OUMAN EH-203 OUMAN EH-203 LANGUAGE The Ouman EH-203 regulator is in two languages. The regulator has the most commonly used languages, Finnish - Swedish, English-Estonian, English-Russian and English-Lett. The language of the regulator can be changed in the following manner.
-
Page 45: Type Information
OUMAN EH-203 TYPE INFORMATION Type information indicates which regulator is in question and which program version is in use. There are two heating circuits and one domestic hot water regulating circuit in the Ouman EH-203 regulator. OPERATING INSTRUCTION: Automatic Automaattiohj... - Page 46 OUMAN EH-203 OUMAN EH-203 START FUNCTION Regulat. mode sel. In the start function the regulator detects the sensors that are attached to it. The regulator takes the regulating circuits (H1, H2 and HW) into use according to the supply water sensors. The assumption is that there is a basic regulator in each regulating circuit.
-
Page 47: Alarms
ALARMS! EH-203 gives as alarm when a situation deviates from the norm. In the event of an alarm, the regulator gives an alarm and a message appears on the display. In addition, the alarm relay contact closes. Note! Although the reason of the alarm is no more valid, the last alarm will remain into display intil it is acknowledged. -
Page 48: Gsm-Functions
GSM- FUNCTIONS When a GSM modem is connected to EH-203, a GSM telephone can be used to communicate with the regulator via text messages.(installation p. 35). Almost all of the user level functions that are mentioned in this manual can be carried out using a GSM phone. -
Page 49: Entering The Maintenance Mode
OUMAN EH-203 OUMAN EH-203 ENTERING THE MAINTEN. MODE Access to the Ouman EH-203 maintenance mode is prevented by user rights. Only those persons who have a maintenance code have access to the maintenance mode. There are typical tuning values and settings in the maintenance mode which the maintenance person needs in conjunction with installation. -
Page 50: Tuning Values
OUMAN EH-203 OUMAN EH-203 TUNING VALUES EH 203 has three PID regulators. The tuning values may have to be adjusted, for example, when the district heating exchanger is installed if the setting wavers with the original factory setting. Anticipate and quick run can be set in the HW regulating circuit in addition to PID. -
Page 51: Settings
OUMAN EH-203 OUMAN EH-203 SETTINGS Ouman EH-203 has three types of settings: user level settings which the user can adjust (p. 6-7) maintenance mode settings which the maintenance person may have to adjust special maintenance mode settings which seldom have to be adjusted (p. -
Page 52: Trends
OUMAN EH-203 OUMAN EH-203 TRENDS It is possible to follow supply water temperature changes on the trend Directions for entering the display with the graphic depictor. You can decide yourself how often the maintenance mode are on page 21 temperature is measured. The factory set sampling interval is 1 second. -
Page 53: Actuator Selectionl
OUMAN EH-203 OUMAN EH-203 ACTUATOR SELECTION The control mode for each regulating circuit actuator is selected in actuator selection. Options are either 24 VAC 3-point control or DC voltage control (0...10V or 2...10V). If relays 1 and 2 are free, they can be utilized to implement one 230VAC 3-point control. -
Page 54: Relay 1 Control Selection
OUMAN EH-203 RELAY 1 CONTROL SELECTION Select EH-203 has two 230VAC/6A relays. Relay 1 is a break before make H1 Maint mode contact relay and relay 2 is an on/off relay. The relays can be used for many Relay1 control different purposes. -
Page 55: Relay 2 Control Selection
(71-72 open) and the heating resistor switches off at the end of the set hysteresis. (setting + hysteresis). If EH-203 is used for burner control (see p. 26), the regulator can also control the heating resistor according to the same measurement data (meas. 10). There is a separate setting for switching on the heating resistor. -
Page 56: Special Maintenance
OUMAN EH-203 OUMAN EH-203 RESTORING SETTING Restoring settings: 1. The regulator restores factory settings to the charasteristic heating curve settings. 2. Eliminates clock functions 3. Restores user and maintenance level settings 4. Selects automatic control for the operating mode 5. Selects the basic regulator for the regulator type. -
Page 57: Settings
OUMAN EH-203 ERIKOISHUOLTO Asetusarvot In the Ouman EH-203 heating regulator the user can adjust most of the settings (see settings p. 6-7). Some of the settings that control the regulator's functions can be set in the maintenance mode (see page 23) and some in special maintenance. -
Page 58: Measurement 6 Setting
OUMAN EH-203 OUMAN EH-203 MEASUREMENT 6 SETTING Measurement 6 can be used as a free temperature measurement, Room temperature measurement, wind measurement or measurement of the pressure in the heating or ventilation network. It is factory set as a free temperature measurement labelled “Cold water”. - Page 59 OUMAN EH-203 OUMAN EH-203 Measurement 6: Pressure measurement Network pressure: Connection 1. Connect the pressure sensor using a resistor Verk.paine (bar) NetworkPress(bar) The controller's measurement channel 6 can have a 10V emitter voltage but Mittausalue Meas.area 16.0 16.0 can only measure 0…5V. If you want to use the entire measurement area of Ylärajahäl.
-
Page 60: Digital Inputs 1, 2 And
OUMAN EH-203 DIGITAL INPUTS 1, 2, 3 EH-203 has three digital inputs. A digital input can be connected to contact information or pulse information. Contact information can be used to receive an alarm, e.g., blower overcurrent protection alarm. Alarms can be labelled using the text editor according to their cause. -
Page 61: Characteristic Heating Curve Type Selection (3-Point/5-Point)
Supply water 3-point curve: You can adjust the heating curve with outdoor temperature values 20°C, 0°C and +20°C. EH-203 prevents you from making a heating curve of the wrong shape. It automatically proposes a correction. If -20 °C Outdoor temperature a 3-point curve has been selected it is possible to take self-learning into use (see p. -
Page 62: Energy Meter
OUMAN EH-203 OUMAN EH-203 ENERGY METER Take into use: 1. District heating energy consumption reading from an energy meter (see p. 11). 2. Automatic reporting from an energy meter by text message. If using automatic reporting, set the day when the report is to be sent and the GSM numbers that the report is sent to. -
Page 63: Lon Initialization
BUS CONNECTIONS/ LON initialization The Ouman EH-203 controller can be connected to the MODBUS, RS-485 or LON bus. When the EH-203 controller is connected to the bus, a (Modbus-200, EH-485, or LON-200 card) bus adapter card (optional equipment) is installed. Detailed instructions for installing and initializing the bus adapter card are provided. -
Page 64: Net Measurements
OUMAN EH-203 OUMAN EH-203 NET MEASUREMENT Ouman EH-203 has an LON-200, RS-485 and MODBUS-200 bus adapter cards as an optional equipment. In this special maintenance mode you can select which measurement informati is to be read from the net. Directions for entering the If you selected to read wind or sun measurements from the net, maintenance mode are on page 21. - Page 65 The power is on but the modem is not ready to use. Inspect the following: 1. EH-203 has the same PIN code as the GSM modem's SIM card PIN code. 2. Perform the start-up function. To start-up, move to Start function. Press OK. Exit with ESC without changing settings.
- Page 66 RS-485 field bus through the master device, EH-686. An EH-485 bus adapter card must be installed in the controller so that the EH-203 controller can be connected to the RS-485 field bus. (see installation and initialization guide in the instructions that come with the EH- 485 card).
-
Page 67: Using The Browser
If the EH-net is connected directly to a public IP address, we recommend using a firewall device between the EH-net and the network. By using the browser it is possible to communicate with the EH-203 controller from any pc. Information from the controller can be read and changed from the pc. If desired, entry to certain functions can be limited or certain things can be hidden that can be security risks or which are not relevant. - Page 68 OUMAN EH-203 OUMAN EH-203 INSTALLATION AND MAINTENANCE GUIDE EH-203 is fastened to its mounting base with three screws (two Changing the fuse: mounting points under the cover in the connection space and one in the installation bracket. Cables can be brought for the regulator from above (standard factory delivery) or from below.
- Page 69 Relay 2 R2 (230VAC, 6(1)A) 3 x 1.5 N Relay control Relay 1 R1 (230VAC, 6(1)A) Note! Connect a protective cable if an LON card is installed in the EH-203 3 x 1.5 S Distribution center power supply 230 VAC...
- Page 70 GSM phone. EMR-200 EH-203 has a plug connection for the energy meter read head. When a district heating energy meter is connected to the EH-203 controller using an EMR-200 energy meter read head, the district heating meter measurement information can be read from the EH-203 controller.
- Page 71 OUMAN EH-203 OUMAN EH-203 INDEX Actuator control mode Input/Output unit 37, 42 Sauna stove 15, 27 Actuator selection Installation instructions 40 Self-learning Alarms 18, 32 Sensor fault alarm 18 Alarm labeling 8, 32 Labelling regulating circuits 33 Stand by-function 12, 10, 29...
-
Page 72: Ouman Finland Oy
OUMAN EH-203 OUMAN EH-203 Technical information: Operat. voltage: 230 VAC, 50 Hz, 0.20 A Digital inputs: 3 pieces The potential free contact is Casing: PC/ ABS connected to the digital input (load 6...9 VDC/20 mA) Protection class: Without cover seal IP 41... - Page 73 KILPAILIJAN TEHTÄVÄT ARVIOINTIOSA 5 VIANHAKU Tehtävässä korjataan tietokoneella ohjattava askelmoottorin ohjainkortti. Tehtävässä etsitään seuraavia vikoja: piirikaaviossa yksi merkittävä virhe, piirikortissa kaksi ladontavirhettä, ohjelmistossa kaksi virhettä, mitoittaa oikea komponentti. Vikojen etsintä ja korjaus aloitetaan vikaosioista 1 ja 2. Kun ne ovat löytyneet, voi laitteen kytkeä käyttövalmiiksi (Liite 1).
- Page 74 1. PIIRILEVYN SUUNNITTELUVIKA Kytkentäkaavioon on jäänyt suunnitteluvaiheessa virhe, joka vaikuttaa toimintaan vakavasti. Piirikortin johdotus vastaa kytkentäkaaviota. Etsi virhe, ja ilmoita se tuomarille. Tuomarin hyväksynnän jälkeen korjaa kytkentä. (0 - 4p) 2. LADONTAVIAT Piirilevylle on asennettu kaksi (2) virheellistä komponenttia, joista toinen on asennettu väärin ja toinen ei ole piirikaavion mukainen.
- Page 75 OHJEITA OHJELMOINTIIN Ohjelmakoodeja voit muokata ja kääntää AVR Studio 4. Lataat käännetyn hex tiedoston kortille näin: Avaa toiminto Tools / Program AVR / Connect Valitse ohjelmointilaitteeksi AVRISP mkII ja portiksi USB. Klikkaa sen jälkeen Connect. Avaa kääntämäsi hex-tiedosto kohtaan Flash / Input HEX File ja klikkaa Program. ARVIOINTI Piirilevyn suunnitteluvika Ladontaviat 2kpl...
- Page 76 LIITE 1. KYTKENTÄ JA TOIMINTAKUVAUS Jännitteet saa kytkeä vasta kun kilpailija on korjannut foliovian ja ladontaviat. Tämän jälkeen säädä jännitelähteestä 12VDC ja kytke 12V J2.1, 0V J2.2 liittimeen. Kytke askelmoottori liittimeen J3. Lataa ohjelma mikro-ohjaimelle. Virtuaali COM-portin asennus Kopioi ajurikansio, CDM 2.06.00 WHQL, koneelle jonnekkin mistä löydät sen. Kytke USB kaapeli laitteen ja PC:n välille.
- Page 77 Kun laitetta aletaan käyttää, täytyy ensin avata yhteys valitsemalla oikea portti Motor_Terminal.exe ohjelmasta ja painamalla Avaa portti painiketta (portti joka valittii yllä). Tällöin ohjelma lähettää kortille laitekyselyn ja mikäli laite on kunnossa, se vastaa. Tällöin laite on yhdistetty ja toimintakunnossa. Askeleet- ja Nopeus-kenttiin voi kirjoittaa positiivisen 16-bit luvun.
- Page 78 LIITE 2. OHJAUSKORTIN OSALUETTELO IC, ATMEGA48PV-10PU IC, IMT-901 IC, NE555 IC, FT232RL REGULATOR, LM1117-SO DIODE, 1N4007 D2-D5 DIODE, SR504 DIODE, 1N4148 LED, 3mm GREEN LED, 3mm RED LED, 3mm YELLOW CRYSTAL, 8 MHz R1, R2 RESISTOR, 1Ω 3W RESISTOR, 1kΩ 1/4W RESISTOR, 10kΩ...
- Page 79 LIITE 3. OHJELMAKOODI LISTAUS – T2010_5.C /***********************************************************/ Project; T2010 vianhaku osio 5 Versio; 2.0 Tekijä; Jussi Holsti Kilpailijan nimi; (laita nimesi tähän) /***********************************************************/ #include <avr/io.h> #include <avr/interrupt.h> #define XTAL 8000000 // kellotaajuus #define BAUD 9600 // sarjaportin nopeus // dataväylän määritykset #define REF_IN 0x01 #define M2...
- Page 80 /************************************* Keskeytysrutiini CK signaalille *************************************/ ISR(TIMER1_OVF_vect) static uint16_t i; TCNT1H = 0xFF; TCNT1L = 0xEA; //noin 47kHz // lasketaan riittävä määrä keskeytyksiä CK muutokseen ja kunnes askelia on riittävästi // tai askeleet 0 eli ajetaan aina if((i++ >= Count_CK) && ((Step_Count < Steps) || !Steps)) i = 1;...
- Page 81 /***************************** Käsitellään tullut data *****************************/ void Process_Data(void) uint8_t Sets=0, MASK=DISABLE; // 0.tavu asetukset, // 1.tavu nopeuden L bitit, // 2.tavu nopeuden H bitit // 3.tavu askeleiden L bitit // 4.tavu askeleiden H bitit Sets = Rx_Buf[0]; // käsitellään ensimmäinen tavu if(Sets &...
- Page 82 /***************************** Pääohjelman alustukset *****************************/ void Main_Init(void) Timer1_Init(); // Timer 1 USART_Init(); // Sarjaliikenne sei(); // Globaali keskeytysbitti DATA_DDR = 0x3F; // dataväylän alustus DATA_PORT = 0x20; /********************* Timer1 alustus *********************/ void Timer1_Init(void) TCCR1B |= 1<<CS11; // clk/8 = 1MHz TIMSK1 |= 1<<TOIE1; // T/C1 overflow interrupt enable TCNT1H = 0xFF;...
- Page 83 Tarkistusohjeet tuomareille 1 - Piirikaavion suunnitteluvirhe Johdin puuttuu väliltä ATMEGA48 8jalka ja GND. Hyväksyttävä suoritus on siisti ja läheltä jompattu. 2 – Ladontaviat 1,2 Elko C1 47µF on asennettu väärinpäin, kerko C8 10nF tulee korvata 3,3nF kerkolla. 3 – Ohjelmavika 1 - USART vastaanottaa vain yhden merkin USART vastaanottokeskeytys funktiossa oleva vika else Rx_Buf[Index] = data;...
- Page 84 LIITE 4. Piirikaavio...
- Page 85 LIITE 5. OSASIJOITTELUKUVA...
Need help?
Do you have a question about the EH-203 and is the answer not in the manual?
Questions and answers