Table of Contents
Advertisement
Quick Links
Advertisement
Table of Contents

Related Manuals for Pioneer VR6C-Z710DH


Summary of Contents for Pioneer VR6C-Z710DH
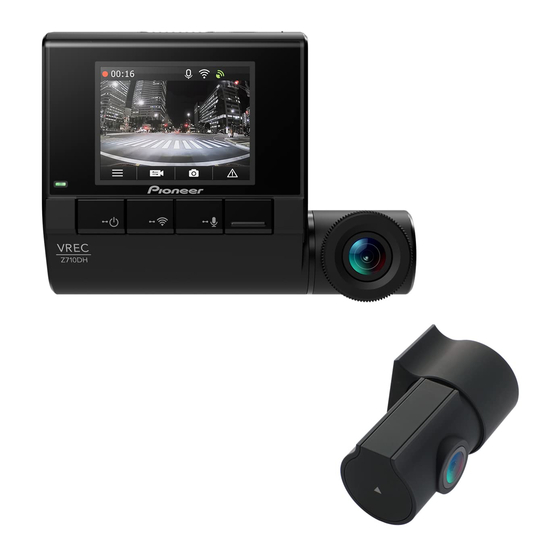
- Page 1 VREC-Z710DH DASH CAMERA Owner’s Manual...
-
Page 2: Table Of Contents
Pioneer Corporation accepts no responsibility whatsoever in these cases. Precaution ......................4 Information to User ..........................5... - Page 3 SD Card Life Detection Function .......................33 SD Card Format Warning Function ....................34 Photography Feature ...........................34 Playing Recorded Files ........................34 Product Settings ....................36 Configurable Features .........................38 Correcting the Errors in the Shooting Range for Detection of an Approaching Vehicle Behind ..............................40 Guide to Recording Time and No.
-
Page 4: Precaution
Precaution Certain country, state and provincial laws may prohibit or restrict the placement and use of this product in your vehicle. Please comply with all applicable laws and regulations regarding the use, installation and operation of this product. WARNING • Do not allow the battery to be exposed to fire or excessive heat or to become crushed or cut, or dispose of the battery in a fire or hot oven, which could result in an explosion. -
Page 5: Information To User
— FEDERAL COMMUNICATIONS COMMISSION SUPPLIER'S DECLARATION OF CONFORMITY Product Name: DASH CAMERA Model Number: VREC-Z710DH Responsible Party Name: PIONEER ELECTRONICS (USA) INC. SERVICE SUPPORT DIVISION Address: 2050 W. 190TH STREET, SUITE 100, TORRANCE, CA 90504, U.S.A. Phone: 1-800-421-1404 URL: https://www.pioneerelectronics.com... - Page 6 This transmitter must not be co-located or operated in conjunction with any other antenna or transmitter. This equipment complies with FCC/ISED radiation exposure limits set forth for an uncontrolled environment and meets the FCC radio frequency (RF) Exposure Guidelines and RSS-102 of the ISED radio frequency (RF) Expo- sure rules.
-
Page 7: After-Sales Service For Pioneer Products
Pioneer service company for aftersales service or questions you may have about the product. You may contact Pioneer directly as follows: Do not ship your unit in for repair without contacting Pioneer first. Units sent without a return authorization number will be refused. -
Page 8: Safety Precautions
• Do not disassemble or modify this product, as there are high-voltage components inside which may cause an electric shock. Be sure to consult your dealer or the nearest authorized Pioneer Service Company for internal inspection, adjustments or repairs. - Page 9 • Firmly install this product so it does not fall off the windshield. If this product is not firmly installed, it may fall off the windshield while driving and cause an accident. Periodically inspect this product. • Pioneer recommends that only authorized service company personnel, who have special training and experience in mobile electronics, set up and install this product.
-
Page 10: Disclaimer
(acceleration) with the G-sensor (accelerometer). However, this product is not guaranteed to save video in all situations. • Pioneer accepts no responsibility whatsoever for product failures or damage that occur due to the microSD card wearing out. • Pioneer does not make any assurances that microSD card problems will be repaired by formatting the card. -
Page 11: How To Read This Manual
How to read this Manual Notation Meaning These symbols are used to draw your attention to items you should be aware of when using this product and items you should be aware of to maintain its performance. Notes provide useful tips and extra information about product features. Note /Notes Square brackets are used to indicate selectable items displayed on the [ ○○... -
Page 12: Usage Precautions
• Do not touch the lens with your hands. Wipe the lens off with a soft cloth if you touch it. • Do not replace the backup lithium rechargeable battery. If required, please contact the dealer or the nearest authorized Pioneer Service for replacement in the event of a malfunction, as data loss may occur. - Page 13 • Pioneer does not make any assurances that microSD card problems will be repaired by formatting the card. Pioneer bears no responsibility for files that are erased from the microSD card or damage that occurs from formatting the card. Format the microSD card according to your own judgment and at your own responsibility.
-
Page 14: Check The Accessories
Check the Accessories Main Unit×1 2nd Camera×1 Mounting Bracket×1 Power Cable (5 m/16 ft. 5 in.)×1 2nd Camera 2nd Camera microSDHC Card Quick Start Guide×1 Connection Cable Connection Cable (16 GB)×1 (3 m/9 ft. 10 in.)×1* (6 m/19 ft. 8 in.)×1* Warranty×1 Cleaning Cloth×1 * The 2nd camera connection cable is included already connected. -
Page 15: Before Installing The Product
Before Installing the Product WARNING • Never install on the cover of an airbag or at locations that might obstruct the deployment of the airbag. Doing so might prevent the airbag from being deployed normally, cause the product to fly out due to airbag deployment, and cause accident and injury. -
Page 16: Installation Tips
Installation Tips Before Installing and Securing the Product First, temporarily connect this product and confirm that it operates correctly, and then install it. If the product does not operate correctly, check again if there is a mistake in the connection. Before Applying Double-sided Tape Clean the location where the double-sided tape will be applied. -
Page 17: Installation
Installation Specified Installation Position on Front Windshield When installing this product, install in a position that satisfies all of the following conditions if allowed by applicable law in your location: • Install in a 7-inch/17.8 cm square in the lower corner of the windshield farthest from the driver, a 5-inch/12.7 cm square in the lower corner of the windshield nearest to the driver and outside of any airbag deployment zone, or in a 5-inch/12.7 cm square mounted to the center uppermost portion of the interior of the windshield. -
Page 18: Recommended Installation Position On Rear Windshield
Pioneer is not liable for any damages due to faulty or improper installation or use of the product. • For vehicles equipped with driver-assistance systems, there may be areas where the installation of accessory items is prohibited. - Page 19 CAUTION • Make sure that the surface of the front windshield is clean and dry before applying the tape. • Firmly push the area around the LCD. Next, remove this product from the mounting bracket, and directly press the mounting bracket against the tape. In this way, the product can be firmly installed on the windshield.
- Page 20 4 Connect the Dash Camera main unit, power cable, and 2nd camera connection cable. 2nd camera connection cable 2nd camera Power cable Main Unit 5 Route the power cable and 2nd camera connection cable along the passenger side. Connection cable Main Unit 2nd camera 6 Connect the power cable.
- Page 21 8 Adjust the angle of the lens so that video outside and inside the vehicle is properly displayed. Turn this part to adjust the lens angle. Turn the angle adjustment jog dial to adjust the lens angle. Before driving, turn the lens of this product towards the outside of the vehicle. This product restarts when the lens angle is moved from the outside of the vehicle to the inside, and vice versa.
-
Page 22: Connecting The Power Cable
Connecting the Power Cable • Be sure to disconnect the ⊖ terminal of the vehicle’s battery before connecting the power cable. • The product should be installed by authorized service company personnel who have special training and experience with mobile electronics products. By using the power cable to draw power directly from the vehicle, this product can detect and record vehicle movement caused by vibration even when the vehicle’s engine is turned off. - Page 23 Ground (Black) Securely connect to the metal part of the vehicle body. To prevent noise, connect as close to the navigation unit as possible. + Battery power supply (Yellow) Always connect to the power circuit supplied with power from the battery, regardless of whether the vehicle engine switch is ON or OFF.
-
Page 24: Part Names
Part Names Left side Right side Front Back 2nd camera 1 Power Port 9 Reset Button Connect the power cable. Press this button with the tip of a ballpoint pen to reset this product. 2 2nd Camera Connection Terminal Connect to the 2nd camera connection a Angle Adjustment Jog Dial terminal (d) using the 2nd camera The angle of the lens can be adjusted by... -
Page 25: Inserting And Ejecting The Microsd Card
Inserting and Ejecting the microSD Card Turn off the power to this product when inserting and removing the microSD card. → “Manually Turning the Power On and Off ” Inserting the microSD Card Hold the top edge of the microSD card, position the microSD card so that the label is facing the backside of this product, and slowly insert it into the microSD card slot until it clicks. -
Page 26: Backing Up Recorded Files
Backing Up Recorded Files When the free space of the file storage areas is low, files are deleted from the oldest file. We recommend that you back up any important files you want to keep with the following procedure. Note • Prepare a spare microSD card in advance. -
Page 27: Using This Product
Using this product Before using this product, first stop the vehicle in a safe location and apply the parking brake. Power Operation This product starts when the vehicle’s engine is turned on (ACC ON), and it automatically starts recording. (Video recording) → “Using this product”... -
Page 28: Function Buttons
Function Buttons The functions of the function buttons are indicated by the icons displayed at the bottom of the screen. The functions of the buttons will depend on the displayed screen. (Icons are not displayed on some screens.) In the playback screen or MENU screen, pressing the function button returns you to the previous screen. -
Page 29: Status Display
Status Display The status display shows the operating status of this product. 00:00 1 Recording in progress 2 Elapsed recording time 3 Event recording status*1 4 Parking mode 5 Sound recording*2 6 Wi-Fi connection status*3 7 GPS reception status*4 *1 When manual event recording is performed, or vibration, sudden braking or an approaching vehicle behind is detected in the event recording mode, and event recording has been activated, “×2”... -
Page 30: Event Recording
Event Recording Automatic Recording by Detecting Impacts When an impact is detected by this product, such as an impact with another vehicle, a file from the continuous video recording is automatically saved for the 20 seconds before and 20 seconds after the moment of detection as an event video file.→... - Page 31 Event Video Timing and Save Location 20 seconds before, 20 seconds after Event video file Start of recording Video recording file 1 Video recording file 2 Video recording file 3 Detection of Detection of approaching vehicle emergency braking behind Impact detected * The video recording file is saved to the “Video”...
-
Page 32: Parking Mode
Parking Mode When the power supply to this product is turned off (vehicle engine is turned off), Parking Mode is activated for a fixed period of time. The maximum operation time is approximately 40 minutes. When this device detects vehicle movement caused by vibration while Parking Mode is activated, that event is saved for 20 seconds before and 20 seconds after the moment of detection as a parking mode file, and a notification message is displayed at the next startup. -
Page 33: Sd Card Life Detection Function
When the setting is other than OFF, and the setting is ON “Video Clip Length” “Security Mode” When the voltage drops to the voltage value set in +0.1 V or lower, this stops “Voltage Monitoring” Parking Mode, and instead activates Security Mode. When the voltage drops below the voltage value set in during Security Mode, “Voltage Monitoring”... -
Page 34: Sd Card Format Warning Function
SD Card Format Warning Function When a microSD card error is detected, the buzzer of this product will beep and a message recommending formatting the microSD card will be displayed on the screen. Please Format the SD Card Press the function buttons, then select [Yes] or [No], and press Yes: A screen to reconfirm whether you want to format will be displayed. - Page 35 3 Press the function buttons, select the folder, and then press File Video Event Parking Photo The thumbnails of files in the selected folder will be displayed. 4 Press the function buttons, select the file, and then press Video Recording The selected file will play.
-
Page 36: Product Settings
Product Settings Before using this product, first stop the vehicle in a safe location and apply the parking brake. These settings configure this product. You can reset the settings to the default settings. You can also format the microSD card and check this product version information. Note that video recording will stop while the MENU screen is displayed. - Page 37 4 Press the function buttons, select the setting item, and then press Video Recording Video Clip Length Video Resolution Exposure Value 5 Press the function buttons, select the setting value, and then press Video Resolution ▼ This completes setting, and you are returned to the previous screen. Note • In the screens in Steps 2 to 4, pressing the function button returns you to the previous screen.
-
Page 38: Configurable Features
Configurable Features Values Bold: The factory default setting. Setting Setting Details Set value Category [1 min]/[3 min]/ Sets the recording time for one video recording Video Clip Length [5 min] video file in video recording. [1280 x 720p]/ Video Resolution Sets the image quality of video recording.*1 [1920×1080p] Sets use of the feature that automatically (Wide Dynamic... - Page 39 Setting Setting Details Set value Category Sets the operation time of Parking Mode. This [10 min]/[ 30 min]/ Video Clip Length can also be set to OFF.→ [40 min]/[OFF] “Parking Mode” G-Sensor Sets the sensitivity for detecting vibration or [1] to [6] Sensitivity impact.
-
Page 40: Correcting The Errors In The Shooting Range For Detection Of An Approaching Vehicle Behind
Wi-Fi Setting Setting Details Default Settings Category Sets whether or not to connect a Wi-Fi tethering ― ― supported terminal to this product. (connectible) In the recording screen, Wi-Fi on/off can be switched by holding down the function button. Correcting the Errors in the Shooting Range for Detection of an Approaching Vehicle Behind Sets adjustment of the shooting range evenly up/down/left/right. - Page 41 4 Press the function buttons, then select [Calibration], and press Video Recording G-Sensor Sensitivity Sudden Braking Detection Calibration Unit of measurement 5 Press the function buttons, then align with the horizontal line, and press Calibration Please align the horizontal line with the horizon.
-
Page 42: Guide To Recording Time And No. Of Photos
Guide to Recording Time and No. of Photos The following table provides estimates of the video recording times and number of photos possible with different “SD Card Partition” settings. The actual values will depend on various factors, such as the microSD card being used, subject being recorded, and recording conditions. -
Page 43: Dedicated App
Dedicated App The dedicated app “Dash Camera Interface” can be used to check the video recorded on this product or make settings on the screen of an iPhone or Android device. • To use this app, a Wi-Fi connection must be made between this product and iPhone or Android device beforehand. -
Page 44: Trademarks & Copyrights
Trademarks & Copyrights • microSDHC Logo is a trademark of SD-3C, LLC. • microSDXC Logo is a trademark of SD-3C, LLC. • Android is a trademark of Google LLC. ® • The Wi-Fi CERTIFIED™ Logo is a certification mark of the Wi-Fi Alliance • iPhone is a trademark of Apple Inc., registered in the U.S. and other countries. −... -
Page 45: Gps
• GPS (Global Positioning System) is a system that measures your current position by receiving position measurement radio signals from GPS satellites. • The GPS satellite signals cannot pass through solid matter (except glass). The signals from GPS satellites may be blocked when this product is in the following locations. —... -
Page 46: Troubleshooting
Troubleshooting Check the following information before sending the product in for repairs. Symptom Cause Action The microcomputer in this Press the reset button. → product is malfunctioning. “Part Names” An error occurred during the Format the microSD card. → display and operation of this “... -
Page 47: Specifications
Specifications SD Memory Card Types/ Speed microSDHC/microSDXC card, Class 10 (8 GB to 128 GB) Class Rating Imaging Element Approx. 2 million pixels (on-board high-sensitivity CMOS sensor) Main Unit: 130° horizontal, 68° vertical, 160° diagonal Recording Angles 2nd camera: 112° horizontal, 58° vertical, 137° diagonal Main Unit: F2.0 Focal Ratio Number 2nd camera: F1.9... - Page 48 Register your product at https://www.pioneerelectronics.com in Canada https://www.pioneerelectronics.ca PIONEER CORPORATION 28-8, Honkomagome 2-Chome, Bunkyo-ku, Tokyo 113-0021 Japan PIONEER ELECTRONICS (USA) INC. P .O. Box 1540, Long Beach, CA 90801-1540, U.S.A. TEL: (800) 421-1404 © 2022 PIONEER CORPORATION. < KYTZ22I >< OWM_VRECZ710DHUC_EN_C >...
Need help?
Do you have a question about the VR6C-Z710DH and is the answer not in the manual?
Questions and answers
If all power is removed from my VREC-2710DH FOR A OF 24 to 48 hours will the unit need to programmed again