Table of Contents
Advertisement
Advertisement
Table of Contents

Related Manuals for Mindray BeneView T5


Summary of Contents for Mindray BeneView T5
- Page 1 BeneView T5/T6/T8/T9 Patient Monitor Quick Guide...
- Page 2 If you have any question, please contact us. Comply with the requirements of the Council Directive 93/42/EEC. 0123 © 2006-2013 Shenzhen Mindray Bio-Medical Electronics Co., Ltd. All rights reserved. Content in this guide is subject to change without prior notice.
-
Page 3: Front View
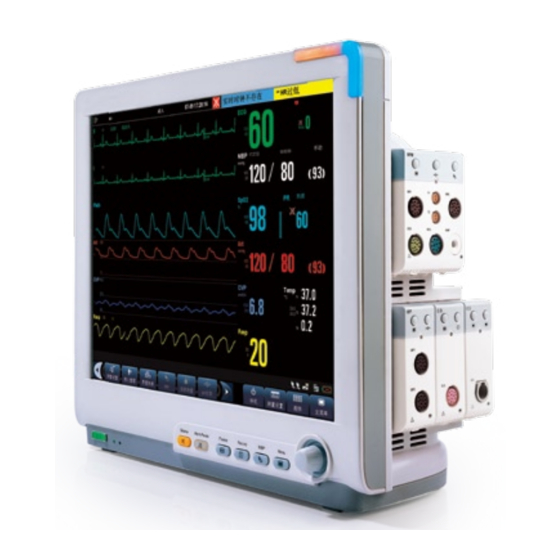
Product Overview 1. Handle(T5 only) Front View 2. Alarm lamp When a physiological alarm or technical alarm occurs, this lamp will flash as defined below. High level alarms: the lamp quickly flashes red. Meidum level alarms: the lamp slowly flashes yellow. ... - Page 4 Product Overview Side View (T6, T8, T9) Side View (T5) Bottom View (T6, T8, T9) 1. Compartment for CF storage card slot 2. Recorder 3. Battery compartment 4. Integral Module Racks 5. Integral Module Racks...
- Page 5 Product Overview Rear View (T5) Rear View (T6, T8, T9) Radiator...
-
Page 6: Satellite Module Rack
Product Overview 1. AC Power Input Satellite Module Rack 2. USB Connectors Indicator Contact They connect such devices as the USB mouse, USB keyboard, etc. 3. Nurse Call Connector It connects the patient monitor to the hospital’s nurse call system through the nurse call cable (PN: 8000-21-10361). - Page 7 Modules The patient monitor supports the following modules: BeneView T1: Used as a multi-measurement module for monitoring ECG, respiration, SpO , temperature, NIBP and IBP. MPM: Multi-parameter module. It can simultaneously monitor ECG, respiration, SpO , temperature, NIBP and IBP. IBP module: Invasive blood pressure module.
-
Page 8: Basic Operations
Basic Operations Display Screen Patient Information Area Alarm Symbols Technical Alarm Area Physiological Alarm Area Waveform Area Parameter Area A Parameter Area B 8. Prompt Message Area 9. QuickKeys area Using the Touchscreen Select screen items by pressing them direct- ly on the patient monitor’s screen. -
Page 9: Setting The Screen
Basic Operations Setting the Screen You can enter the [Screen Setup] window as shown below by selecting the [Screen Setup] button in the prompt message area. In this window, you can allocate the positions of the parameters and waveforms. The parameters or waveforms whose positions are not allocated will not be displayed. -
Page 10: Using The Main Menu
Basic Operations Using the Main Menu To enter the main menu, select the QuickKey on the monitor’s screen or the hardkey on the monitor’s front. Most of monitor operations and settings can be performed through the main menu. Other menus are similar to the main menu and contain the following parts: Heading: gives a sum-up for the current menu. -
Page 11: Turning Power On
Basic Operations Turning Power On Disconnecting from Power Before you start to make measurements, check the To disconnect the patient monitor form the AC power patient monitor, SMR and plug-in modules for any source, follow this procedure: mechanical damage and make sure that all external Confirm that the patient monitoring is finished. - Page 12 Basic Operations Setting up a Monitor Showing/Hiding the Help In situations where you install a patient monitor or change The patient monitor provides online help information. The the patient monitor’s application site, you need to setup user can display or hide the help as required. the patient monitor as follows: Select [Main Menu]→[Screen Setup >>].
-
Page 13: Adjusting Volume
Basic Operations Managing Configurations Adjusting Volume Entering the [Manage Configuration] Menu Alarm Volume Select the [Volume Setup] QuickKey, or [Main Select [Main Menu]→[Maintenance >>]→[Manage Menu]→[Alarm Setup >>]→[Others]. Configuration >>]. Select [Alm Volume] and then select the appropriate Enter the required password and then select [Ok]. volume: X-10, in which X is the minimum volume, depending on the set minimum alarm volume, and Setting Default Configuration... -
Page 14: Deleting A Configuration
Basic Operations To import the configuration on the USB drive to the 3. Select [Alarm Setup >>], [Screen Setup >>] or [Parameter >>] to enter the corresponding menu in monitor: which settings can be changed. The changed items 1. Connect the USB drive to the monitor’s USB port. of alarm setup will be marked in red. -
Page 15: Using A Mouse
Using The Mouse and Keyboards Using a Mouse When you are using a mouse: By default, the left mouse-button is the primary button and the right one the secondary button. Clicking the primary button equals to pressing the knob or selecting the touchscreen. ... -
Page 16: Using A Cf Storage Card
To avoid electrostatic charges, do not come into contact with the CF storage card when the patient monitor is on. Unload the CF storage card before removing it from the patient monitor. Otherwise it may cause damage to the data in the card. Use only the CF storage card specified by Mindray. ... -
Page 17: Starting And Stopping Recordings
Record The thermal recorder records patient information, measurement numerics, up to three waveforms, etc. Starting and Stopping Recordings To manually start a recording: Select the hardkey on the front of either the patient monitor or the recorder module. Select the [Record] button from the current menu or window. -
Page 18: Installing The Batteries
Batteries The battery is charged whenever the patient monitor is For T5, battery compartment is located at the lower connected to an AC power source regardless of whether right side. You can install the batteries by following this or not the patient monitor is currently on. Whenever the procedure: AC power is interrupted during patient monitoring, the Turn off the patient monitor and disconnect the... - Page 19 Batteries On-screen battery symbols indicate the battery status as follows: indicates that batteries are working normally. The solid portion represents the current charge level of the batteries as a percentage of its maximum charge level. indicates that the batteries have low charge level and need to be charged. indicates that the batteries are almost depleted and need to be charged immediately.
- Page 20 Shenzhen Mindray Bio-Medical Electronics Co., Ltd. Mindray Building, Keji 12th Road South, Hi-tech Industrial Park, Nanshan, Shenzhen 518057 P.R. China Tel: +86 755 81888998 Fax: +86 755 26582680 www.mindray.com...
Need help?
Do you have a question about the BeneView T5 and is the answer not in the manual?
Questions and answers