
Related Manuals for MPMan MP-FUB 31


Summary of Contents for MPMan MP-FUB 31
-
Page 1: Table Of Contents
Table of Contents Getting Started Introduction Key Features Package Contents Installing the Battery Parts Description Control Keys LCD Screen Downloading and Transferring Files Install the digital audio player CD software Safely remove your player from the computer Transferring files Operation Listening to Music Using the MAIN MENU MUSIC... -
Page 2: Getting Started
Getting Started INTRODUCTION Your DAP is a device that stores and plays multi-format digital audio files including MP3, WMA and WAV files. Download hours of music onto your PC and transfer them to your DAP digital audio player. Use your DAP to record those quick reminder memos or even lengthy business meetings or lectures. -
Page 3: Package Contents
PACKAGE CONTENTS Check that you have the following accessories: Stereo Earphones USB Cable Installation CD-ROM with Windows 98SE Driver and User Manual Quick Start Guide One AAA Alkaline Battery INSTALLING THE BATTERY Press the button and then push the battery compartment door in the direction the button is pointing. -
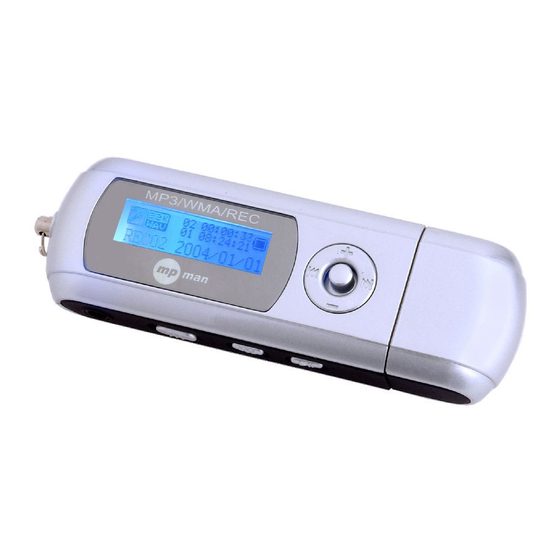
Page 4: Parts Description
PARTS DESCRIPTION 1. Press to decrease the volume. Press and hold the button down to decrease the volume rapidly. 2. Press and hold to access the SETTINGS menu. Press to access the MAIN MENU. 3. Press to increase the volume. Press and hold the button to increase the volume rapidly. -
Page 5: Install The Digital Audio Player Cd Software
INSTALL THE DIGITAL AUDIO PLAYER CD SOFTWARE For Windows 98SE: Windows 98SE will not recognize the player until you have installed the driver using the included installation CD-ROM. Follow the instructions detailed in this section to activate the USB mass storage function so you will be able to transfer files from your computer to your player. - Page 6 2. Follow the on screen instructions to install the software. 3. After succesfully installing the software, the “Digital Flash Player” program will appear in the “Start” menu.
-
Page 7: Safely Remove Your Player From The Computer
SAFELY REMOVE YOUR PLAYER FROM THE COMPUTER NOTE : To avoid damage to your player or data loss, always follow the procedure listed below before disconnecting the USB cable from your computer or disconnecting the player from the USB cable. Using your mouse, double click the "Safely Remove Hardware"... -
Page 8: Transferring Files
TRANSFERRING FILES Push the USB button and then slide it to the left in order to expose the USB Plug. Then connect the unit to your computer either directly or by using the supplied USB cable. Press the button to turn the player on. The following will be displayed in the LCD: A "Removable Disk"... -
Page 9: Operation
Operation LISTENING TO MUSIC After you have transferred MP3, WMA or WAV files from your computer to your player, you can start listening to music while you learn how to use all of the features. With the battery installed, insert the earphones into the earphone jack of player. Press the button to turn the player on. -
Page 10: Fm Radio
FM RADIO The unit has a built in FM tuner with auto scan and ten station memory. In addition to listening to your favorite station, you can also record a song or program. Press the mode button to access the MAIN MENU. The following menu will be displayed on the LCD screen, highlight the icon as shown and press the Using the preset channels - In order to use the preset function, you must first complete an Autoscan. -
Page 11: Using The Setting Menu
Customizing Your Player USING THE SETTING MENU You have the option to change the way your player displays, records and plays the files you have stored. Press and hold the mode button to display the SETTING Menu on the LCD screen. Use the to select one of the following setting options: Recording Resolution, Contrast, Equalizer, Play Timer, Repeat, Back Light Timer, Language or Auto Scan. -
Page 12: Repeat
Repeat Setting Use to select between Normal, Repeat Track, Repeat All, Shuffle or Shuffle Repeat. Back Light Timer Setting Use to set the duration of LCD backlight timer. Select: OFF, 5 sec, 10 sec, 15 sec or always. Languages Select one of the available languages. Auto Scan While in FM Mode select Autoscan in order to save the 10 strongest stations as preset channels. -
Page 13: Additional Information
ADDITIONAL INFORMATION PRECAUTIONS Copyright Making copies of MP3 tracks or files without permission is a violation of the international copyright laws. Safety Vibration experienced during walking or exercising will not affect the player. However, dropping the player or dropping a heavy object on the player may result in damage or sound distortion. -
Page 14: Trouble Shooting
TROUBLE SHOOTING Should any problem persist after you have checked these symptoms, consult your dealer or contact the support site at www.mpmaneurope.com Symptom Possible Reason No Power - Check whether the. battery is exhausted - Check whether the battery has not been installed properly No Sound - Check whether the jack is from the earphones... -
Page 15: Technical Specifications
TECHNICAL SPECIFICATIONS Category Item Audio Frequency Range Headphone Output S/N Ratio File Support File Type Bit Rate Tag Info FM Tuner FM Frequency range Antenna Dimension Weight Battery Built-in Memory Max. Playtime Supported OS Firmware Upgradeable Operating Temperature Specification 20Hz - 20KHz 20mW, 16ohm (Max.Vol) 85dB (MP3) MPEG 1/2/2.5 Layer 3, WMA, WAV (ADPCM) -
Page 16: Care And Maintenance
CARE AND MAINTENANCE Your Digital Audio Player is a precision electronic device, and should not be subjected to rough handling or exposed to extreme temperatures or moisture. Do not use chemical agents or liquids to clean the unit, as they may damage the plastic. Be sure to remove the batteries before cleaning the unit.
Need help?
Do you have a question about the MP-FUB 31 and is the answer not in the manual?
Questions and answers