Table of Contents
Advertisement
Advertisement
Table of Contents

Related Manuals for Hytera HM782


Summary of Contents for Hytera HM782
- Page 1 HM78X Digital Mobile Radio User Manual Hytera Communications Corporation Limited...
- Page 2 Preface Welcome to the world of Hytera and thank you for purchasing this product. This manual includes a description of the functions and step-by-step procedures for use. To avoid bodily injury or property loss caused by incorrect operation, please carefully read the Safety Information Booklet before use.
- Page 3 Copyright Information Hytera is the trademark or registered trademark of Hytera Communications Corporation Limited (the Company) in the People's Republic of China (PRC) and/or other countries or areas. The Company retains the ownership of its trademarks and product names. All other trademarks and/or product names that may be used in this manual are properties of their respective owners.
- Page 4 United States Federal Communications Commission, Code of Federal Regulations; 47 CFR § 1.1307, 1.1310 and 2.1091 American National Standards Institute (ANSI)/Institute of Electrical and Electronic Engineers (IEEE) C95. 1:2005; Canada RSS102 Issue 5 March 2015 Institute of Electrical and Electronic Engineers (IEEE) C95.1:2005 Edition FCC Statement This equipment has been tested and found to comply with the limits for a Class B digital device, pursuant to part 15 of FCC Rules.
- Page 5 Antenna Installation: install the antenna at least 100 cm away from your body, in accordance with the requirements of the antenna manufacturer/supplier. EU Regulatory Conformance As certified by the qualified laboratory, the product is in compliance with the essential requirements and other relevant provisions of 2014/53/EU.
-
Page 6: Table Of Contents
Contents Documentation Conventions ......................... 3 1. Packing List ..............................4 2. Product Overview ............................5 2.1 Product Layout ............................5 2.1.1 Front Panel ........................... 5 2.1.2 Rear Panel ............................ 6 2.1.3 Palm Microphone .......................... 7 2.2 Programmable Keys ..........................7 3. - Page 7 6.4 Broadcast Call (Trunking Only) ......................24 6.4.1 Initiating a Broadcast Call ......................25 6.4.2 Receiving a Broadcast Call ......................25 6.4.3 Ending a Broadcast Call ......................26 6.5 Include Call (Trunking Only) ......................... 26 6.6 Phone Call ............................26 6.6.1 Initiating a Phone Call .........................
- Page 8 8.6.3 Setting the BT ..........................45 8.7 One Touch Call/Menu ........................... 46 8.8 Quick Dial ............................. 46 8.9 Roam ..............................47 8.9.1 Conventional Mode ........................47 8.9.2 Trunking Mode ..........................48 8.10 Clarity Transmission ........................... 48 8.10.1 Conventional Mode ........................48 8.10.2 Trunking Mode ..........................
-
Page 9: Documentation Conventions
Documentation Conventions Icon Conventions Icon Description Indicates references that can further describe the related topics. Indicates situations that could cause data loss or equipment damage. Indicates situations that could cause major personal injury or even death. Notation Conventions Item Description Example To save the configuration, click Apply. -
Page 10: Packing List
1. Packing List Please unpack carefully and check that you have received the following items. If any item is missing or damaged, contact your dealer. Item Quantity (PCS) Item Quantity (PCS) Radio Locking Knob Mounting Bracket Microphone Hanger Palm Microphone Without Keypad (conventional) or Screw (4 mm x 16 mm) with Keypad (trunking) -
Page 11: Product Overview
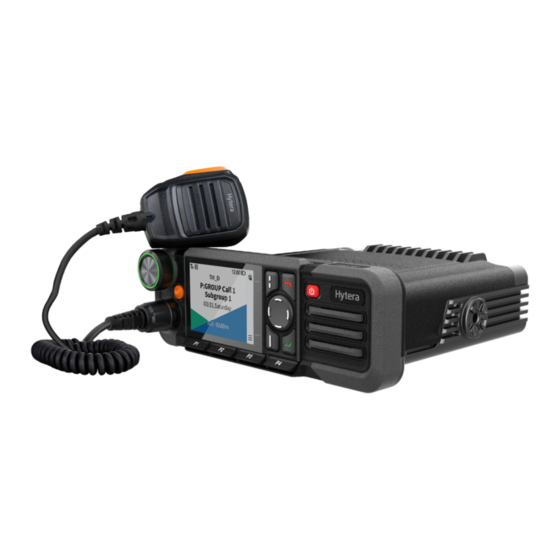
2. Product Overview 2.1 Product Layout 2.1.1 Front Panel Part Name Part Name Smart Knob (Volume Control & On-Off Key Channel/Group Selector Knob) LED Indicator Navigation Key LCD Display Speaker OK/Menu Key P5/Answer Key Back/Subgroup Key Programmable Keys P6/End Key Aviation Port... -
Page 12: Rear Panel
2.1.2 Rear Panel Part Name Part Name RF Antenna Connector GPS Antenna Connector Power Inlet Network Port Accessory Connector The GPS antenna connector is used only by radios with the GPS feature. -
Page 13: Palm Microphone
2.1.3 Palm Microphone The palm microphone without keypad is available for the conventional radio and the one with keypad is for the trunking radio. 2.2 Programmable Keys You can request your dealer to program the following keys as shortcuts to assignable radio features: ... -
Page 14: Installation
3. Installation 3.1 Instructions Before installing the radio in a vehicle, read the following instructions carefully: Before installation, check the ground polarity and voltage of the vehicle power. The radio must work with a 13.6 V±15% negative ground electrical system. ... -
Page 15: Parts
3.3 Parts Part Name Part Name Radio Screw (4 mm x 16 mm) Locking Knobs Microphone Hanger Mounting Bracket GPS Antenna Screw (4.8 mm x 20 mm) Power Cord (with fuse) Palm Microphone RF Antenna... -
Page 16: Procedure
The RF antenna must be purchased separately. The GPS antenna is available only for radios with the GPS feature. The palm microphone without keypad (with ⑥ and ⑦) is available for the conventional radio, and the one with keypad (with ⑥... -
Page 17: Installing The Radio
Align the concave side of the plastic upper cover with the aluminum chassis, and then press the cover until the latches are properly locked. 3.4.2 Installing the Radio Select a location, drill holes based on the shape of the mounting bracket, and then use the screws (4.8 mm x 20 mm) to secure the bracket. -
Page 18: Basic Operations
4. Basic Operations 4.1 Turning On or Off the Radio To turn on the radio, long press the On-Off key. To turn off the radio, press the On-Off key. 4.2 Adjusting the Volume To increase or decrease the volume, rotate the Smart knob clockwise or counter-clockwise. 4.3 Switching the Operation Mode The radio can operate in conventional mode or digital trunking mode (enabled by your dealer). -
Page 19: Trunking Mode
current zone contains the channel. 4.3.1.2 Selecting a Zone Through Menu Go to Menu > Zone. Press the Navigation key up or down to select the zone. Press the OK/Menu key. Through Programmable Key Press the preprogrammed Zone Up or Zone Down key. 4.3.1.3 Selecting a Channel Through Smart Knob On the home screen, press the Smart knob, and then rotate the knob within 5s. - Page 20 Through Menu On the home screen, press the Back/Subgroup key, or go to Menu > Subgroup. Press the Navigation key up or down to select the subgroup. Press the Navigation key up or down to select the group or private contact. Press the OK/Menu key.
-
Page 21: Status Indications
5. Status Indications 5.1 LCD Icons Icon Radio Status The radio detects no signal. The number of bars indicates the signal strength. The radio operates in low power mode. The radio operates in high power mode. An accessory is connected. The GPS feature is enabled, and valid positioning data has been received. -
Page 22: Led Indicators
The TF card is nearly full. The TF card is full. The radio is recording the call. The radio fails to record the call. The Monitor feature is enabled. The speaker is unmuted. The radio operates in silent mode. The radio operates in profile 1. The radio operates in profile 2. - Page 23 Trunking Mode: The radio is establishing a Full Off Air Call Set-up (FOACSU) private call. This indication is applicable only to the called radio. Call hang time: No voice is being transmitted or received during a call. Within Glows orange such a period, you can press and hold the PTT key and speak.
-
Page 24: Call Services
6. Call Services When you are speaking during a call, keep the microphone 2.5 to 5 cm away from your mouth. This ensures optimal voice quality on the receiving radio. In trunking mode, if the radio is not registered or attached, or an empty group is selected, you cannot initiate a call. 6.1 Group Call A group call is a call from an individual user in a group to all the other members in the group. - Page 25 The group ID must be complied with the dialing rules. For details, consult your dealer. Through One Touch Call/Menu With the One Touch Call/Menu feature enabled, press the preprogrammed One Touch Call/Menu key, and then press and hold the PTT key. 6.1.1.2 Trunking Mode Through Preset Contact Press and then rotate the Smart knob to select the group contact.
-
Page 26: Receiving A Group Call
Through One Touch Call/Menu With the One Touch Call/Menu feature enabled, press the preprogrammed One Touch Call/Menu key. 6.1.2 Receiving a Group Call You can answer a group call without any operation. 6.1.3 Ending a Group Call Conventional mode A group call ends when the call hang time expires. - Page 27 Through Manual Dialing If the radio is connected to the palm microphone with keypad, do either of the following: With the private call dial permission enabled by your dealer, on the home screen, enter the private ID, select Private ID, and then press and hold the PTT key.
-
Page 28: Receiving A Private Call
The private ID must be complied with the dialing rules. For details, consult your dealer. Through Call Logs Do one of the following: Go to Menu > Call Logs. Press the preprogrammed BackDial Call or ReDial Call key. Select the private call record. -
Page 29: All Call
The calling or called party changes the contact with the Clear Down feature enabled. 6.3 All Call Conventional mode An all call is a call from an individual user to all the other users on the current digital channel. ... -
Page 30: Receiving An All Call
6.3.1.2 Trunking Mode Through Manual Dialing On the home screen, enter the all call ID through the keypad on the palm microphone. Do either of the following: Press the P5/Answer key on the radio. Press the Answer key, , or the PTT key on the palm microphone. -
Page 31: Initiating A Broadcast Call
The Broadcast Call feature is enabled by your dealer. 6.4.1 Initiating a Broadcast Call Through Contact List Do either of the following: Press the Back/Subgroup key or the preprogrammed Current Subgroup Contact key, and then select the subgroup and group contact. Press the preprogrammed Favorite Contact List key, or go to Menu >... -
Page 32: Ending A Broadcast Call
6.4.3 Ending a Broadcast Call A broadcast call ends in any of the following cases: The calling party presses the P6/End key or places the palm microphone back to the hanger. The call duration preset by your dealer expires. ... -
Page 33: Receiving A Phone Call
6.6.1.2 Trunking Mode Through Contact List Press the preprogrammed Favorite Contact List key, or go to Menu > Favorite/Private. Select the PSTN/PABX contact. Press the P5/Answer key on the radio, or press the Answer key or the PTT key on the palm microphone. Through Manual Dialing On the home screen, enter the phone ID through the keypad on the palm microphone. -
Page 34: Ending A Phone Call
6.6.3 Ending a Phone Call Conventional mode A phone call ends in either of the following cases: The calling party hangs up. The called party presses the P6/End key (with the One-Key Connect feature enabled) or enters the disconnect ... -
Page 35: Message Services
7. Message Services In trunking mode or on a digital channel in conventional mode, the Message feature allows you to send and receive the following types of messages: Quick text message: a frequently used text message that can be created, edited, or deleted through the menu. ... -
Page 36: Replying To A Message
7.2 Replying to a Message Go to Menu > Message > Msg. Select a conversation, and then press the OK/Menu key twice. Determine the message type. To send a text message, enter the message content in the message text box. ... -
Page 37: General Features
8. General Features 8.1 Settings Go to Menu > Settings, and then set radio parameters including Basic Settings, Call Settings, and Security. 8.1.1 Basic Settings 8.1.1.2 Language Go to Basic Settings > Language, and then select the display language. 8.1.1.3 Display Go to Basic Settings >... - Page 38 8.1.1.5 Keypad Mode With the Keypad Mode feature enabled by your dealer, go to Basic Settings > Keypad Mode, and then do either of the following: Select On or Off to enable or disable the manual dialing on the home screen. ...
-
Page 39: Call Settings
8.1.2 Call Settings 8.1.2.1 Power Level You can set the TX power level to high or low. Go to Call Settings > Power Level, select High Power or Low Power, and then press the OK/Menu key. 8.1.2.2 Talker Alias With the Talker Alias feature enabled by your dealer, go to Call Settings > TalkingAlias, and then do either of the following: ... - Page 40 8.1.2.6 ESN Check in Idle (Trunking Only) The ESN Check in Idle feature allows the radio to respond to the ESN check from the trunking system when the radio is registering or after the radio has registered. Go to Call Settings > ESN Check In Idle, and then press the OK/Menu key to do either of the following: ...
-
Page 41: Security
With Phone enabled, you can call any PABX/PSTN contacts. With Phone disabled, you can call only the PABX/PSTN contacts in the contact list or emergency contact. 8.1.2.9 Call Divert (Trunking Only) When the radio malfunctions or powers off, the Call Divert feature allows the radio to divert calls to a private or PABX/PSTN contact to ensure communications. - Page 42 Adding an Encrypt Key Go to Security > Encrypt > New Key, specify the key-related parameters, and then press the OK/Menu key. The following table describes the key-related parameters. Parameter Description Key ID The ID for each key must be unique. The value ranges from 1 to 255. Key Alias The key alias is composed of letters, digits, and special characters.
- Page 43 Live recording The Live Record feature is to record the sound in the current environment. The maximum recording time is 495 minutes. Enabling the Live Record feature Go to Menu > TF Application > Recorder > Live Record, and then press the OK/Menu key to enable the feature.
-
Page 44: Product Information
"mmddhhmmss" represents the recording time (month/day/hour/minute/second). In trunking mode, the time is the real time provided by the clock. In conventional mode, the time is "0000000000". "zz" represents the serial number of the files separated from a file. The folder is named as "Record_xxxx xxxx". -
Page 45: Contacts
8.2 Contacts 8.2.1 Creating a Contact Through Contact Menu Go to Contact > New Contact, enter the alias, private ID or phone number, and then press the OK/Menu key. The ID and alias of each contact must be unique. Through Call Logs You can save a private ID to the contact list from the call logs. -
Page 46: Setting The Alert Tone
8.3.1 Setting the Alert Tone To enable or disable the alert tone, go to Menu > Profiles > Settings > Tone > On/Off. To adjust the alert tone volume, go to Menu > Profiles > Settings > Tone > Tone Volume, and then select the volume level. -
Page 47: Trunking Mode
If you do not want to hear activities on the channel, press the preprogrammed Nuisance Temporary Delete key to remove the channel from the scan list temporarily. 8.4.1.2 Setting the Scan List The scan list is a list of up to 32 analog and digital channels that the radio scans. Go to Menu >... -
Page 48: Positioning
8.4.2.2 Post-registration Hunt After successful registration, you can hunt again by pressing the preprogrammed Manual Current Hunt key. To ensure seamless communications, you can enable the hunt modes as listed in the following table. Hunt Mode Description Operation This feature allows an idle radio to keep detecting the signal strength of the BS with which it registers. -
Page 49: Selecting The Positioning System
In trunking mode, this feature is enabled by your dealer. 8.5.2 Selecting the Positioning System The radio supports positioning systems including GPS, BDS/GLONASS, and BDS/GLONASS+GPS. To select the positioning system, go to Menu > GPS > Position Sys. This feature applies only to radios with BDS or GLONASS. 8.5.3 Viewing the Position 8.5.3.1 Viewing the Local Position Go to the Menu >... - Page 50 8.5.5.1 Voice w/Location The Voice w/Location feature allows the radio to report its location information when initiating a private call, a group call, or an emergency call. Go to Menu > GPS > Call Location > Voice w/Location, and then press the OK/Menu key to enable the feature. 8.5.5.2 Display Call Location If the transmitting radio is enabled with the Voice w/Location feature and the receiving radio is enabled with the Display Call Location feature, the receiving radio displays the location information of the transmitting radio during...
-
Page 51: Connecting A Bt Device
To derive optimal communication quality, it is recommended to use the BT devices approved by the Company. If BT earpieces of other companies are used, you must use them with the wireless ring PTT of the Company. Otherwise, the earpieces cannot transmit To enable or disable the BT feature, do either of the following: ... -
Page 52: One Touch Call/Menu
8.7 One Touch Call/Menu The One Touch Call/Menu feature allows you to initiate a preset service or switch to the function menu by pressing the preprogrammed One Touch Call/Menu key. The following table shows the services that can be implemented by this feature and the corresponding operations. Mode Description Operation... -
Page 53: Roam
screen Switch the operation mode. Check the radio information. Enable/disable the alert tone. Trunking mode Adjust the power level. Set the backlight. Switch the operation mode. Check the radio information. Enable/disable the alert tone. ... -
Page 54: Trunking Mode
To enable the Roam Feature, do either of the following: Press the preprogrammed Roam key. Go to Menu Roam > On/Off, and then press the OK/Menu key. > To set the roam list, go to Menu > Roam > Roam List, select a roam list, and then add or delete channels in the list. -
Page 55: Ignition Sense
For operations of initiating, receiving, or ending a DGNA call, see 6.1 Group Call. 8.12 Ignition Sense The Ignition Sense feature controls the radio on or off and the PTT key enabled or disabled by starting or stopping your vehicle. Four types of ignition sense are listed in the following table. -
Page 56: Manual Priority Interrupt
8.14.1 Manual Priority Interrupt Press the preprogrammed Priority Interrupt key to interrupt the ongoing activities. 8.14.2 Auto Priority Interrupt Auto Priority Interrupt includes Emergency Priority Interrupt, Call Back Priority Interrupt, Message Priority Interrupt, Radio Disable Priority Interrupt, and All Call Priority Interrupt. With this feature enabled by your dealer, you can interrupt an ongoing call by initiating an emergency call, all call, or sending a short message or the Radio Disable command. -
Page 57: Initiating An Emergency Call
8.15.1 Initiating an Emergency Call Press the preprogrammed Emergency On key to initiate an emergency call to the preset contact. If the Alarm w/Call To Follow feature is enabled by your dealer, you can speak into the microphone without pressing or holding the PTT key. -
Page 58: Stun, Revive, And Kill
unauthorized access. When erasing the data, the radio stops voice and data services and returns to the home screen. If this feature is enabled by your dealer, the encrypted data can be erased in the following cases: Press the P1 key and then the PTT key (within 1.5s) for two times, and then press the P1 key again. ... -
Page 59: Troubleshooting
9. Troubleshooting Phenomena Analysis Solution The radio cannot be turned The power cord may be unconnected. Connect the power cord properly . Make sure the radio is within the The radio cannot detect signal from the BS. coverage of the BS. The radio cannot be Contact the BS manager to check registered. - Page 60 Phenomena Analysis Solution Set your TX/RX frequency and The frequency or signaling type may be signaling to the same as that of other inconsistent with that of other members. members. Communications with The channel type (digital or analog) may be set Make sure that all members are on group members are inconsistently.
-
Page 61: Care And Cleaning
10. Care and Cleaning To guarantee optimum performance as well as a long service life of the product, please follow the tips below. 10.1 Product Care Do not pierce or scrape the product. Keep the product away from substances that can corrode the circuitry. ... -
Page 62: Optional Accessories
11. Optional Accessories Use the accessories approved by the Company only. Otherwise, we will not be liable for any loss or damage arising out of the use of unauthorized accessories. Contact your local dealer for the optional accessories used with the product. -
Page 63: Abbreviations
TransFlash Top Key Existing devices should be upgraded to Hytera's iM or iS firmware before being used as part of a system. Speak to your Hytera dealer about how to upgrade your existing devices and for more information on Hytera's... - Page 64 Hytera Communications Corporation Limited. © 2021 Hytera Communications Corporation Limited. All Rights Reserved. Address: Hytera Tower, Hi-Tech Industrial Park North, 9108# Beihuan Road, Nanshan District, Shenzhen, People's Republic of China Postcode: 518057 https://www.hytera.com...
Need help?
Do you have a question about the HM782 and is the answer not in the manual?
Questions and answers
How do you dim the LCD Display???
To dim the LCD display on the Hytera HM782, go to Basic Settings > Display, then adjust the Brightness setting. Select Level 1, Level 2, Level 3, or Level 4, where a smaller number represents lower screen brightness. Press the OK/Menu key to confirm.
This answer is automatically generated